BOSCH SHE3AEE5N 100 Series Full Console Dishwasher


Dishwasher
SHE3AEE5N
[en-us] Use and Care Manual

| General | Details |
|---|---|
| Name | BOSCH SHE3AEE5N 100 Series Full Console Dishwasher |
| Make | Bosch |
| Language | English |
| Filetype | PDF (Download) |
| File size | 2.56 MB |


BOSCH SMV6ZCX49E-39 Dishwasher

BOSCH SMI4HVS33E Dishwasher

BOSCH SRV2HKX39G Dishwasher

BOSCH SGS4HAW40G Dishwasher

BOSCH SGH4HVX32G Dishwasher

BOSCH SMS4ECI26E Dishwasher

BOSCH SMS6EDI02G Free-Standing Dishwasher

BOSCH SMS6EDW02G Free-Standing Dishwasher

BOSCH SMV4HTX27G Dishwasher

BOSCH SMV4HCX48E Dishwasher
BOSCH SHE3AEE5N 100 Series Full Console Dishwasher Overview
Summary of Contents
- Page 1: Dishwasher SHE3AEE5N Use and Care Manual
- Page 2: IMPORTANT SAFETY INSTRUCTIONS Safety definitions General information Intended use Restrictive use Grounding instructions Safe use Risk to children State of California Proposition 65 Warning Basic operation Preventing material damage Environmental protection and energy-saving Familiarizing yourself with your appliance Dishwasher cycles Features Cleaning and maintenance Troubleshooting Transportation, storage and disposal Customer service Technical specifications
- Page 3: Statement of limited product warranty. What this warranty covers and who it applies to. How long the warranty lasts. Extended warranty. Repair/replace as your exclusive remedy. Out of warranty product. Warranty exclusions. Obtaining warranty service. Product information.
- Page 4: IMPORTANT SAFETY INSTRUCTIONS Always use caution when opening the door during or following a wash cycle as hot water or steam may escape. Under certain conditions, hydrogen gas may be produced in a hot water system that has not been used for two weeks or more. To avoid floor damage and possible mold growth, do not allow wet areas to remain around or under the dishwasher. Before using a dishwasher that is connected to a hot water system that has been unused for two weeks or longer, turn on all hot water faucets and let the water flow from each for several minutes. It is highly recommended for the end user to become familiar with the procedure to shut off the incoming water supply and the procedure to shut off the incoming power supply. To avoid risk of electric shock, only use the appliance in enclosed residential space according to the installation manual. Do not allow children to play in or on the dishwasher. When loading items to be washed, locate sharp items so they are not likely to damage the door seal. Do not wash plastic items unless they are marked dishwasher safe or the equivalent. This product may contain a chemical known to the State of California, which can cause cancer or reproductive harm.
- Page 5: Preventing material damage Harsh chemicals such as bleach-based products can damage your dishwasher. Do not use harsh chemicals such as bleach-based products to clean your dishwasher. Certain cleaning products may damage the appliance. Do not use a steam cleaner. So as not to scratch the finish on the appliance, do not use sponges with a rough surface or abrasive cleaning agents. Do not use stainless steel polish on an anti-fingerprint finish or a black stainless finish. When the program ends, let the appliance cool down a bit before opening the door. Protect against freezing to avoid possible damage to the fill valve. Damage caused by freezing is not covered by the warranty. Saving energy If you follow these instructions, your appliance will use less power and water. The Normal program is energy-efficient and environmentally friendly. The AquaSensor is an optical measuring device which measures the turbidity of the washing water. You can save water with the AquaSensor. The operation of the AquaSensor depends on the selected cycle. If the soiling level is high, the washing water is drained off and replaced with fresh water. If the soiling level is lower, the washing water is used in the next rinse, reducing water consumption. In the Auto cycles, the temperature and run time are additionally adjusted to the level of soiling.
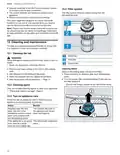
- Page 6: Familiarizing yourself with your appliance Appliance Detergent dispenser: Add detergent to the detergent dispenser. Lower rack Lower spray arm: The lower spray arm washes the dishware in the lower rack. If the dishware has not been washed properly, clean the spray arms.
- Page 7: Familiarizing yourself with your appliance Detergent tabs automatically drop out of the detergent dispenser into the tab collecting tray during the wash cycle. The upper spray arm washes the dishware in the upper rack. If the dishware has not been washed properly, clean the spray arms. Rinse aid is added to the dispenser for rinse aid. You can use the control panel to configure all functions of your appliance and to obtain information about the operating status. If you press the button for approx. 3 seconds, you can open the basic settings. Switching on the appliance. Switching off the appliance. Terminating the wash cycle. Remote Start.
- Page 8: Familiarizing yourself with your appliance The displays show the remaining time of the wash cycle. Starting the wash cycle Rinse aid refill indicator Rinse aid system The indicator lights up at the end of the program Sanitize. Once the wash cycle has ended, the display lights up.
- Page 9: Dishwasher cycles overview includes different cycles available on your dishwasher. The running time may vary depending on the cycle selected, water temperature, quantity of dishware, level of dirt, and options selected. Consumption values relate to normal conditions and a water hardness of 16 - 20 °E. Heavy cycle is for washing pots, pans, non-fragile dishware, and silverware, removing stubborn burned or dried-on food remnants. Auto cycle is sensor-controlled and optimized depending on the soiling of the rinse water. Normal cycle is for cleaning mixed dishware and silverware, removing common household food remnants lightly dried-on. Speed 60® cycle is the most economical for cleaning mixed dishware and silverware. Energy Guide label was based on the Normal soil sensing cycle. The unit was tested without any rinse aid in the rinse aid dispenser. A single dose of detergent was inserted into the detergent dispenser, with no detergent used in the prewash.
- Page 10: Highest position is recommended for daily use to wash a full load of normally soiled dishes. Only sanitizing cycles have been designed to meet the requirements for soil removal and sanitation efficacy. There is no intention to imply that all cycles on a certified machine have passed the sanitization performance test. You can find an overview of the possible features of your appliance and how to use them here. Arrange cups, glasses, and small tableware items in the top rack. With the favorite function, you can save a combination of a cycle and an option. You can use the Home Connect app to download additional cycles and options. Here is an overview of the different options available on your dishwasher. For a better drying result, the final rinse temperature is increased and the drying phase extended. To ensure a higher hygiene status for the appliance and dishware, the temperature is increased and maintained for an extra-long period.
- Page 11: Before using for the first time, arrange the silverware in the silverware basket, ensuring that the items are not nestled together and with the sharp points down. Before the first use, or after a factory reset, you will need to configure the settings. The sharp points and edges of knives and other sharp utensils can cause serious injury. Load knives and other sharp utensils with edges down. Connect your appliance to a mobile device to conveniently change all settings using the Home Connect® app. Add rinse aid before starting the appliance. Switch on the appliance and set the amount of rinse aid. Start the program with the highest cleaning temperature without dishware to remove any marks from water or other residues. For optimum drying results, use rinse aid intended for household dishwashers. If the rinse aid refill indicator lights up, fill the dispenser with rinse aid.
- Page 12: Add rinse aid up to the max mark. To store the setting, press the button for 3 seconds. If rinse aid spills out, remove it from the tub. Spilled rinse aid can cause excessive frothing during the wash cycle. The rinse aid system is switched off and the rinse aid refill indicator is deactivated. If there are streaks or water spots on dishware, change the amount of rinse aid. Find out which detergents are suitable for your appliance. Only use detergents that are made for dishwashers, either basic or combination detergents. For the best washing and drying results, use a separate detergent, then add rinse aid separately. Powder detergent is recommended for shorter cycles.
- Page 13: Detergent should be added to the dry detergent dispenser. Liquid detergent works faster and is recommended for shorter cycles without a pre-rinse. Only choose a cycle without PreRinse and do not use the Delay Start option. If using tablets, one is enough and should be inserted in a horizontal position. Do not use a detergent that is not designated for dishwasher use or contains chlorine. Liquid hand soap can cause increased frothing and damage the appliance. Detergents marked as ecological may contain lower levels of active agents, reducing cleaning effectiveness. Adjust the rinse aid and water softening system settings according to the detergent in use. The detergent dispenser will open automatically at the optimum time during the cycle. Use tablets with enhanced drying results for better performance.
- Page 14: Dishware Arrange dishware correctly to optimize the dishwashing result and prevent damage to both dishware and the appliance. Only wash dishware that is suitable for dishwashers. Decorated glassware and parts made of aluminum or silver may fade or discolor with dishwashing. Avoid dishwasher damage by not loading it with paper products, plastic bags, or anything other than normal, dishwasher-safe dishware. Only put glasses and china in the dishwasher if they are labeled dishwasher-safe. Using the appliance allows you to save energy and water compared to doing dishes by hand. Load the machine with the number of place settings specified for better efficiency. Position items with curves or recesses at an angle so water can run off for better washing and drying results. Remove large remnants of food from dishware before loading. Arrange silverware with the points and sharp edges facing down to avoid injury.
- Page 15: Dishware Upper rack Removing dishware Dishes can be very hot immediately after the cycle ends. Open the door slightly and allow dishes to cool for a few minutes before unloading. To prevent water dripping onto dishware, unload it starting at the bottom and working up. Check the washing tank and accessories for soiling and clean if necessary. Recommended loading patterns. Additional loading patterns for 10 place settings.
- Page 16: Basic operation Switching on the appliance involves a short touch. The last selected cycle and option will be set by default. The buttons are touch sensitive and require a quick, gentle touch. The appliance will automatically switch off after 10 minutes of inactivity. Setting a cycle allows you to adjust the wash cycle to the soiling level of the dishware. You can set options to complete the chosen wash program, depending on the selected program. The time delay function can be accessed via the Home Connect® app to delay the start of the wash cycle. Starting the wash cycle is done by pressing the designated button. Protection against unintentional operation is built into the dishwasher to prevent accidental use. The door must be closed within 4 seconds after starting the appliance to avoid pausing the operation. The appliance will switch off automatically 10 minutes after the end of the wash cycle to save energy.
- Page 17: Basic operation Activating the button lock prevents the appliance from being operated accidentally or incorrectly while running. Press for approx. 3 seconds to activate the button lock, which will be automatically deactivated at the end of the cycle. The button lock remains activated with a power failure. Deactivating the button lock can be done by pressing for approx. 3 seconds. To interrupt the wash cycle, press On/Off. The program is saved and the appliance switches off. To resume the wash cycle, press On/Off and then press to continue. To terminate the wash cycle early, press for approx. 4 seconds to cancel it. All displays light up when the cycle is cancelled, and the residual water is pumped out. Caution is advised when opening the door during or after a wash cycle due to the risk of hot water or steam escaping. Do not fully open the door until water noises have stopped and steam has subsided.
- Page 18: Basic settings allow you to configure your appliance to meet your needs. The basic settings depend on the features of your appliance. You can set or switch off the amount of rinse aid to be dispensed. Intensive drying can be switched on or off for each operation, which may slightly increase run time. Adjust the signal volume with a scale of 4 levels. You can switch the wireless network connection on or off. The basic setting is not available until the appliance is connected with the Home Connect® app. You can restore changed settings to the factory settings. Connect your appliance to a mobile device to conveniently change all settings using the Home Connect® app. To open the appliance settings, press the button for 3 seconds.
- Page 19: To open the appliance settings, press the button for 3 seconds. The refill indicator for rinse aid flashes. Press the button repeatedly until the Rinse Aid and Sanitize LEDs flash. The factory setting is level 2. To store the setting, press the button for 3 seconds. If the LED is not lit up, Wi-Fi is switched off. This appliance is network-capable. Connecting your appliance to a mobile device lets you control its functions via the Home Connect® app. The Home Connect® services are not available in every country. The availability of the Home Connect® function depends on the availability of Home Connect® services in your country.
- Page 20: Home Connect® To be able to use Home Connect®, you must first set up the connection to the WLAN home network and to the Home Connect® app. Remote Start You can use the Home Connect® app to start the appliance with your mobile device. Tips Consult the Home Connect® documents supplied. Requirements The appliance is connected to your WLAN home network. Setting up the Home Connect® app Install the Home Connect® app on your mobile device. Remote Diagnostics The Customer Service can access your appliance via Remote Diagnostics if you ask them to do so. Software update You can use this function to update the software of your appliance. Data Protection Your appliance will transmit unique appliance identification to the Home Connect® server during initial registration. Home Connect® settings Adapt Home Connect® to your needs. The Home Connect® app guides you through the entire registration process.
- Page 21: Cleaning and maintenance The filter system removes coarse soiling from the dishwashing cycle. This initial registration prepares the Home Connect® functions for use and is only required when you want to use the Home Connect® functions for the first time. To keep your appliance working efficiently for a long time, it is important to clean and maintain it carefully. Never use detergents containing chlorine. Check the filters for residues after each dishwashing cycle. Only use suitable cleaning agents to clean your appliance. Follow the tips on appliance care to make sure your appliance functions properly at all times. Regularly wipe the door seals, the front of the dishwasher, and the control panel using a damp cloth and dishwashing liquid. If the appliance is not going to be used for a while, leave the door slightly ajar.
- Page 22: Cleaning and maintenance Pull the micro filter downward and off. Cleaning the spray arms Limescale and soiling in the dishwashing water may block the nozzles and bearings on the spray arms. Clean the spray arms regularly. Unscrew the upper spray arm and pull down to remove. Press the locking catches together and take the coarse filter upward and out. Pull up the lower spray arm to remove. Clean the filter elements under running water. Carefully remove the rim of debris between the coarse filter and the fine filter. Put the filter system back together. Ensure that the locking catches on the coarse filter click into position. Check the outlet nozzles on the spray arms for blockages under running water and remove any foreign objects. Insert the lower spray arm. Ensure that the arrow markings match up. Insert the upper spray arm and screw firmly in place.
- Page 23: Troubleshooting You can eliminate minor issues on your appliance yourself. Please read the information on eliminating issues before contacting Customer Service. This may avoid unnecessary repair costs. Four vertical LEDs (i.e. the cycle duration indicators and the clean indicator) all light up at the same time. Not an appliance error. Garbage disposal is still plugged or the drain hose is kinked. Check that the garbage disposal plug is removed and that the drain hose is not kinked. Not an appliance error. The drain pump cover is loose or a foreign object is blocking the pump. Secure the cover of the drain pump so it clicks into place or clean the drain pump. Filters in the water connection of the supply or AquaStop hose are blocked. Switch off the appliance and pull out the power cord plug. Turn off the water faucet and unscrew the water connection. Remove the filter from the supply hose and clean the filter.
- Page 24: Troubleshooting Four vertical LEDs are all flashing. There is a technical issue. Dishware is not dry. No rinse aid used or dosage set too low. Cycle or cycle option has no drying phase, or drying phase is too short. Water collects in recesses of dishware or silverware. The combined detergent used has a poor drying performance. Extra Dry/intensive drying not activated to improve drying performance. Dishware removed too early or drying process not yet ended. Rinse aid used has a limited drying performance. Silverware is not dry. Silverware not arranged properly in the silverware basket or silverware drawer. Appliance interior still wet after wash cycle. Not an error. Condensation drying creates water droplets in the tub.
- Page 25: Troubleshooting Food remnants on dishware may occur if dishware is placed too close together or the rack is overfilled. Arrange dishware with sufficient space in between to ensure spray jets reach the surfaces. Avoid points of contact to prevent blockage of spray arm rotation. Spray arm nozzles may be blocked; clean the spray arms. Dirty filters can also cause issues; clean the filters. Filters must be inserted correctly and engaged properly. If the selected wash cycle is too light, choose a more intensive wash program. Do not pre-rinse dishware too intensively, as this can lead to stubborn remnants. Tall narrow containers should not be positioned at too great an angle or in corner areas. Ensure the upper rack is set to the same height on both sides for optimal performance.
- Page 26: Troubleshooting Issue Cause and troubleshooting Wipeable or water-soluble coatings may have detergent residue that cannot generally be removed with chemicals. Change your detergent and scrub the appliance by hand. Stubborn white coatings on dishware may also be due to detergent residue. Increase the amount of detergent used or select a more intensive wash program. Tea residue or lipstick marks on dishware may result from low dishwashing temperature. Use a suitable detergent and follow the manufacturer's instructions for the amount to be used. Colored coatings inside the appliance may be due to substances in vegetables or tap water. Clean the appliance; coatings are harmless to health. Plastic parts inside the appliance may become discolored over time but will not impair functioning. Removable streaks on glasses and silverware may be due to the rinse aid setting being too high or no rinse aid added.
- Page 27: Troubleshooting There are removable streaks on glasses, glassware with a metallic appearance, and silverware. Items of dishware are blocking the dispenser lid. Do not place dishware or fragrance dispensers in the tab collecting tray. Dishware has been precleaned too intensively. Only remove large remnants of food and do not pre-rinse dishware. Irreversible clouding of glassware may occur if glasses are not dishwasher-proof. Use dishwasher-proof glasses. Check that the spray arms are not blocked and can rotate freely. Hand soap got in the rinse aid dispenser. Add rinse aid to the dispenser and set the amount to be dispensed.
- Page 28: Troubleshooting All LEDs light up or flash. Electronics have detected a fault. Press the main switch button for approx. 4 seconds to reset the appliance. Water is left in the appliance at the end of the program. The filter system or area under the filters is blocked. Clean the filters and drain pump. Appliance cannot be switched on or operated. A software update may be taking place; wait until it finishes. Appliance does not start. The breaker may have tripped or the power cord may not be inserted properly. Appliance door is not closed properly. Ensure the door is securely closed to prevent issues during operation. Appliance stops during the cycle. Check if the door is closed properly and if the power or water supply has been interrupted. Upper rack is pressing against the inner door. Arrange dishware to ensure the door can close securely. Door lock has been activated. Close the appliance door with greater force if necessary.
- Page 29: Troubleshooting Appliance door cannot be closed due to installation method. Check whether the appliance has been installed properly. Lid on the detergent dispenser cannot be closed due to sticky detergent residue. Remove detergent residue. Filling valves making knocking noises are caused by domestic installation. Noise level can vary depending on the type of dishes loaded. Make sure the dishware is loaded securely. Large food remnants or foreign objects can block the drain pump. Disconnect the appliance from the power supply before cleaning. Use caution when removing parts for cleaning.
- Page 30: Transportation, storage and disposal To avoid damage to the appliance, empty it before transporting. Always transport the dishwasher upright to prevent residual water getting into the machine's controls. Disconnect the appliance from the power supply before removing it. Environmentally sound disposal allows valuable raw materials to be recycled. Avoid a risk of entrapment upon disposal by unplugging the appliance and cutting the power cord. Preparing your unit for vacation includes turning off the main valve and water supply. If your dishwasher will be unused for an extended period in freezing temperatures, have it winterized by an authorized service provider. With any warranty repair, the appliance will be repaired by an authorized service provider using genuine replacement parts. Detailed information on the warranty period and terms can be found in the Statement of Limited Product Warranty. For assistance with connecting to Home Connect, view the provided instructions.
- Page 31: Customer service Model number (E-Nr.), production number (FD) and consecutive numbering (Z-Nr.) You can find the model number (E-Nr.), the production number (FD) and the consecutive numbering (Z-Nr.) on the appliance's rating plate. The rating plate is located inside the appliance door. Making a note of your appliance's details and the customer service telephone number will enable you to find them again quickly.
- Page 32: Statement of limited product warranty 5 year limited warranty on dish racks: BSH will replace the upper or lower dish rack if the rack proves defective in materials or workmanship. Lifetime warranty against stainless steel rust through: BSH will repair or replace your dishwasher if the inner liner should rust through. BSH will repair or replace the stainless steel door if the door should rust through. Bosch is under no obligation to provide concessions once this warranty has expired. During this warranty period, Bosch will repair your product without charge if it proves to have been manufactured with a defect. Bosch will replace your product if reasonable attempts to repair it have been made without success. Bosch's sole liability is to repair manufacturer-defective products using an authorized service provider. The warranty coverage excludes defects or damage that are not the direct fault of Bosch. The warranty does not cover use of the product in anything other than its normal, customary and intended manner. Bosch will not incur any liability for damage to surrounding property or for products with altered serial numbers.
- Page 33: Register your appliance to enjoy customized benefits. Simply create a MyBosch account, then register your appliance. You'll find a variety of customized information in MyBosch such as discounts for filters, cleaners, accessories & parts. Easy access to manuals & appliance specifications. Easy access to parts lists. Customized offer for the Bosch Appliance Service Plan (sent by mail after appliance registration). No matter what, no matter when: Bosch is here to support you. We’re here to assist with usage instructions, cleaning tips, accessories & parts, troubleshooting, and repairs. Find online resources such as FAQs, how-to-videos, manuals, warranties and authorized Bosch service. Please have your Model Number (E-Nr) ready when contacting us.

BOSCH SPS4EMI61E Dishwasher

GE APPLIANCES GDF511PSR-PGR Dishwasher with Front Controls with Power Cord

BOSCH SPS2IKW04G Slimline Dishwasher

SIEMENS SN63EX02CE Dishwasher

BOSCH SMS8YCI01E Dishwasher

Westinghouse WDU903SA Household Dishwasher

Miele PFD 100 Smart Biz Free Standing Dishwasher

BOSCH SMS2IVI61E Dishwasher

FISHER PAYKEL DD60D2HNX9 Built Under Dishwasher

BOSCH SMV4HDX52Y-39 Dishwasher