BOSCH SHE41CM6N Dishwasher


Dishwasher
SHE41CM6N
[en-us] Use and Care Manual

| General | Details |
|---|---|
| Name | BOSCH SHE41CM6N Dishwasher |
| Make | Bosch |
| Language | English |
| Filetype | PDF (Download) |
| File size | 2.73 MB |


BOSCH SMV6ZCX49E-39 Dishwasher

BOSCH SMI4HVS33E Dishwasher

BOSCH SRV2HKX39G Dishwasher

BOSCH SGS4HAW40G Dishwasher

BOSCH SGH4HVX32G Dishwasher

BOSCH SMS4ECI26E Dishwasher

BOSCH SMS6EDI02G Free-Standing Dishwasher

BOSCH SMS6EDW02G Free-Standing Dishwasher

BOSCH SMV4HTX27G Dishwasher

BOSCH SMV4HCX48E Dishwasher

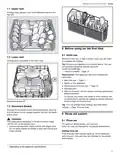
BOSCH SHE41CM6N Dishwasher Overview
Summary of Contents
- Page 1: Dishwasher SHE41CM6N Use and care manual
- Page 2: IMPORTANT SAFETY INSTRUCTIONS Safety definitions General information Intended use Restrictive use Grounding instructions Safe use Risk to children State of California Proposition 65 Warning Preventing material damage Environmental protection and energy-saving
- Page 3: IMPORTANT SAFETY INSTRUCTIONS Read all instructions carefully before use. These precautions will reduce the risk of electrical shock, fire, and injury to persons. This appliance is not intended for use by persons with reduced physical, sensory, or mental capabilities unless supervised. This appliance must be grounded to a metal, permanent wiring system. WARNING indicates that death or serious injuries may occur as a result of non-observance of this warning. CAUTION indicates that minor or moderate injuries may occur as a result of non-observance of this warning. Improper connection of the equipment grounding conductor can result in risk of electric shock. To reduce the risk of fire, electrical shock, or serious injury, observe the following. Read and understand all instructions before using the appliance. Use this dishwasher only for its intended function, which is the washing of household dishware and kitchenware rated as dishwasher safe. NSF/ANSI 184 Certified residential dishwashers are not intended for licensed food establishments.
- Page 4: IMPORTANT SAFETY INSTRUCTIONS Always use caution when opening the door during or following a wash cycle as hot water or steam may escape. Under certain conditions, hydrogen gas may be produced in a hot water system that has not been used for two weeks or more. Before using a dishwasher that is connected to a hot water system that has been unused for two weeks or longer, turn on all hot water faucets and let the water flow from each for several minutes. To avoid floor damage and possible mold growth, do not allow wet areas to remain around or under the dishwasher. It is highly recommended for the end user to become familiar with the procedure to shut off the incoming water supply and the procedure to shut off the incoming power supply. Only use the appliance in enclosed residential space according to the installation manual. Do not allow children to play in or on the dishwasher. When children become old enough to operate the appliance, it is the responsibility of the parents/legal guardians to ensure the children are instructed in safe practices. Do not operate your dishwasher unless all enclosure panels are in place. Follow the safety instructions and directions for use on the detergent and rinse aid product labels.
- Page 5: Preventing material damage Harsh chemicals such as bleach-based products can damage your dishwasher. Do not use harsh chemicals such as bleach-based products to clean your dishwasher. Certain cleaning products may damage the appliance. Do not use a steam cleaner. Do not use sponges with a rough surface or abrasive cleaning agents. Do not use stainless steel polish on an anti-fingerprint finish or a black stainless finish. When the program ends, let the appliance cool down a bit before opening the door. Protect against freezing to avoid possible damage to the fill valve. Damage caused by freezing is not covered by the warranty. Saving energy If you follow these instructions, your appliance will use less power and water.
- Page 6: Familiarizing yourself with your appliance Detergent dispenser: Add detergent to the detergent dispenser. Lower rack: The lower spray arm washes the dishware in the lower rack. If the dishware has not been washed properly, clean the spray arms.
- Page 7: Familiarizing yourself with your appliance Detergent tabs automatically drop out of the detergent dispenser into the tab collecting tray, where they can dissolve fully. The upper spray arm washes the dishware in the upper rack. If the dishware has not been washed properly, clean the spray arms. Rinse aid is added to the dispenser for rinse aid. You will need the rating plate data to contact customer service. You can use the control panel to configure all functions of your appliance and to obtain information about the operating status. If you press the button for approx. 3 seconds, you can open the basic settings. Switching on the appliance is detailed on page 16. Switching off the appliance is detailed on page 17. Terminating the cycle is detailed on page 17. Remote Start cycles are detailed on page 20.
- Page 8: Familiarizing yourself with your appliance Cycle buttons and options The displays show the remaining time of the wash cycle. Home Connect Starting the wash cycle Rinse aid refill indicator Rinse aid system The indicator lights up at the end of the program Sanitize. Once the wash cycle has ended, the display lights up.
- Page 9: Dishwasher cycles overview includes different cycles available on the dishwasher. Running time varies depending on the selected cycle, water temperature, quantity of dishware, level of dirt, and options selected. Consumption values relate to normal conditions and a water hardness of 16 - 20 °E. Heavy cycle is for washing pots, pans, non-fragile dishware, and silverware, removing stubborn burned or dried-on food remnants. Auto cycle is sensor-controlled and optimized based on the soiling of the rinse water for mixed dishware and silverware. Normal cycle is for cleaning mixed dishware and silverware, removing common household food remnants lightly dried-on. Speed 60® cycle is the most economical for cleaning mixed dishware and silverware. Favorite cycle is time-optimized for cleaning common household food remnants lightly dried-on. Energy Guide label is based on the Normal soil sensing cycle. Testing was conducted without rinse aid and with a single dose of detergent in the dispenser.
- Page 10: Options for washing dishes include a recommended setting for daily use and the ability to access additional cycles through the Home Connect app. To save a favorite cycle and option, open the appliance door, press the appropriate buttons, and hold the Favorite button for three seconds. Resetting the cycle can be done using the Home Connect app or by restoring factory settings. An overview of different options available on the dishwasher is provided. The Extra Dry option improves drying results by increasing rinse temperature and extending the drying phase. The Sanitize option raises temperature and cycle length for effective sanitation, ideal for cleaning items like chopping boards and baby bottles. Only sanitizing cycles are designed to meet soil removal and sanitation efficacy requirements. A summary of possible features of the appliance and their usage is included. The Favorite function allows saving a combination of a cycle and an option, depending on the appliance model. The selected cycle and option combination can also be saved via the Home Connect app.
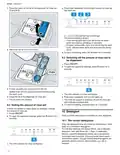
- Page 11: Before using for the first time, you will need to configure the settings. Arrange cups, glasses, and small tableware items in the top rack. Arrange pans and plates in the lower rack. Connect your appliance to a mobile device for convenient settings changes using the Home Connect® app. Add rinse aid before the first use. Switch on the appliance. Set the amount of rinse aid. Add detergent. Start the program with the highest cleaning temperature without dishware. For optimum drying results, use rinse aid.
- Page 12: Detergent Press the catch on the lid of the dispenser for rinse aid. The factory setting is level 2. A low setting adds less rinse aid during the wash cycle and reduces streaking on dishware. A higher setting adds more rinse aid during the wash cycle, reduces water spots, and improves the drying result. If rinse aid spills out, remove it from the tub. Spilled rinse aid can cause excessive frothing during the wash cycle. The rinse aid system is switched off and the rinse aid refill indicator is deactivated. If there are streaks or water spots on dishware, change the amount of rinse aid. Only use detergents that are made for dishwashers, either basic or combination detergents. For the best washing and drying results, use a separate detergent, then add rinse aid separately.
- Page 13: Detergent Follow the manufacturer's instructions for each detergent. Use tablets with enhanced drying results. To open the detergent dispenser, press the locking latch. Add the detergent to the dry detergent dispenser. Powder detergent is recommended for shorter cycles. Liquid detergent works faster and is recommended for shorter cycles without a pre-rinse. Do not use a detergent which is not designated for dishwasher use or contains chlorine. Liquid hand soap can cause increased frothing and damage the appliance. Detergents marked as ecological generally contain lower levels of active agents or none at all. Adjust the rinse aid and the water softening system settings in accordance with the detergent in use.
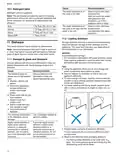
- Page 14: Dishware Recommendation: Select a cycle with lower temperatures if the water temperature of the cycle is too high. This dishwasher provides optimum cleaning performance without the use of a prewash detergent. After the cycle has ended, take glassware and silverware out of the appliance without delay. Only wash dishware that is suitable for dishwashers. Avoid dishwasher damage by not loading it with paper products, plastic bags, or anything other than dishwasher-safe dishware. Only put glasses and china in the dishwasher if they are labeled dishwasher-safe. Using the appliance allows you to save energy and water compared to doing dishes by hand. For better washing and drying results, position items with curves or recesses at an angle so water can run off. Use a detergent labeled as gentle to dishes to avoid damage. Remove large remnants of food from dishware and do not pre-rinse under running water.
- Page 15: Dishware To avoid damage to dishware, arrange it so it is stable and cannot tip over. Loading patterns To avoid injury, arrange silverware with the points and sharp edges facing down. Position containers with the openings facing down so no water can collect in them. Do not block the spray arms - make sure that they can turn freely. Do not place small parts in the collecting tray and do not block it with dishware so as not to obstruct the lid of the detergent dispenser. Removing dishware Dishes can be very hot immediately after the cycle ends. Open the door slightly and allow dishes to cool for a few minutes before unloading. To prevent water dripping onto dishware, unload it starting at the bottom and working up. Check the washing tank and accessories for soiling and clean if necessary.
- Page 16: Basic operation Your dishwasher has a built-in feature to help prevent unintentional operation, e.g. by children. After starting the appliance, the door has to be closed within 4 seconds, otherwise the operation will be paused. For top button controls: Press and close the door. For front button controls: Close the door and press the start button. The wash cycle will resume. This feature cannot be deactivated. Touch the control with a short 1 second touch to switch on the appliance. The cycle last selected and the option last selected will be set by default. To adjust the wash cycle to the soiling level of the dishware, select a suitable program. You can delay the start of the wash cycle via the Home Connect® app.
- Page 17: Basic operation Starting the wash cycle Switching off the appliance The wash cycle has ended when no controls are lit. To avoid risk of injury, always use caution when opening the door during or following a wash cycle as hot water or steam may escape. Do not fully open the door until water noises have stopped and steam has subsided. If you want to add more dishware while the appliance is running, do not use the collecting tray as a handle for the upper rack. You can only change a cycle in progress if you can cancel it first. To save energy, the appliance switches off automatically 10 minutes after the end of the wash cycle. The button lock prevents the appliance from being operated accidentally or incorrectly while running. To end a cycle early or to switch from one that has already started, you will need to cancel it first.
- Page 18: Basic settings You can configure the basic settings for your appliance to meet your needs. The basic settings depend on the features of your appliance. Set or switch off the amount of rinse aid to be dispensed. Switch intensive drying on or off for each operation. The temperature in the final rinse is increased for a better drying result. Adjusting the signal volume. Switch the wireless network connection on or off. The basic setting is not available until you have connected the appliance with the Home Connect® app. Restore changed settings to the factory settings. Connect your appliance to a mobile device to conveniently change all settings using the Home Connect® app.
- Page 19: To open the appliance settings, press the button for 3 seconds. The refill indicator for rinse aid flashes. Press the button repeatedly until the Rinse Aid and Sanitize LEDs flash. The factory setting is level 2. To store the setting, press the button for 3 seconds. If the LED is not lit up, Wi-Fi is switched off. This appliance is network-capable. Connecting your appliance to a mobile device lets you control its functions via the Home Connect® app. The Home Connect® services are not available in every country. The availability of the Home Connect® function depends on the availability of Home Connect® services in your country.
- Page 20: Home Connect® To be able to use Home Connect®, you must first set up the connection to the WLAN home network and to the Home Connect® app. Remote Start You can use the Home Connect® app to start the appliance with your mobile device. Activating Remote Start The appliance is connected to your WLAN home network. The appliance is connected to the Home Connect® app. A program is selected. Setting up the Home Connect® app Install the Home Connect® app on your mobile device. Start the Home Connect® app and set up access for Home Connect®. Remote Diagnostics Customer Service can access your appliance via Remote Diagnostics if your appliance is connected to the Home Connect® server. Software update You can use this function to update the software of your appliance for optimization, troubleshooting, or safety-relevant updates. Data Protection The first time your appliance is registered on a home network connected to the Internet, your appliance transmits unique appliance identification to the Home Connect® server.
- Page 21: Cleaning and maintenance The filter system removes coarse soiling from the dishwashing cycle. This initial registration prepares the Home Connect® functions for use and is only required when you want to use the Home Connect® functions for the first time. To keep your appliance working efficiently for a long time, it is important to clean and maintain it carefully. Never use detergents containing chlorine. Check the filters for residues after each dishwashing cycle. Only use suitable cleaning agents to clean your appliance. Follow the tips on appliance care to make sure your appliance functions properly at all times. Regularly wipe the door seals, the front of the dishwasher, and the control panel using a damp cloth and dishwashing liquid. If the appliance is not going to be used for a while, leave the door slightly ajar.
- Page 22: Cleaning and maintenance Pull the micro filter downward and off. Insert the filter system into the appliance and turn the coarse filter clockwise. Ensure that the arrow markings match up. Press the locking catches together and take the coarse filter upward and out. Limescale and soiling in the dishwashing water may block the nozzles and bearings on the spray arms. Clean the spray arms regularly. Unscrew the upper spray arm and pull down to remove. Clean the filter elements under running water. Carefully remove the rim of debris between the coarse filter and the fine filter. Put the filter system back together. Ensure that the locking catches on the coarse filter click into position. Pull up the lower spray arm to remove.
- Page 23: Cleaning and maintenance Check the outlet nozzles on the spray arms for blockages under running water and remove any foreign objects. Insert the lower spray arm. The spray arm clicks into position. Insert the upper spray arm and screw firmly in place.
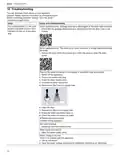
- Page 24: Troubleshooting Four vertical LEDs are all flashing. There is a technical issue. Dishware is not dry. No rinse aid used or dosage set too low. Cycle or cycle option has no drying phase, or drying phase is too short. Select a wash cycle with drying. Water collects in recesses of dishware or silverware. Position dishware at an angle where possible. The combined detergent used has a poor drying performance. Use rinse aid to improve drying performance. Extra Dry/intensive drying not activated to improve drying performance. Activate Extra Dry/intensive drying. Dishware removed too early or drying process not yet ended. Wait until the program ends. Rinse aid used has a limited drying performance. Use a name-brand rinse aid. Silverware is not dry. Silverware not arranged properly in the silverware basket or silverware drawer. Appliance interior still wet after wash cycle. Not an error. Condensation drying creates water droplets in the tub.
- Page 25: Troubleshooting Food remnants on dishware may occur if dishware is placed too close together or the rack is overfilled. Arrange dishware with sufficient space in between to ensure spray jets reach all surfaces. The spray arm rotation may be blocked by improperly arranged dishware. Clean the spray arms if the nozzles are blocked. Dirty filters can also cause issues; they should be cleaned regularly. Filters must be inserted correctly and engaged properly. If the selected wash cycle is too light, choose a more intensive wash program. Avoid pre-rinsing dishware too intensively to ensure proper cycle selection. Tall narrow containers should not be positioned at extreme angles or in corner areas. To prevent detergent residue, ensure the dispenser lid is not blocked by dishware.
- Page 26: Troubleshooting Issue Wipeable or water-soluble coatings: There is detergent residue that cannot generally be removed with chemicals. Change your detergent and scrub the appliance by hand. Stubborn white coatings on dishware: There is detergent residue that cannot generally be removed with chemicals. Increase the amount of detergent used or change detergent. Selected wash cycle is too light: Select a more intensive wash program. Tea residue or lipstick marks on dishware: Dishwashing temperature is too low. Select a program with a higher dishwashing temperature. Colored coatings inside the appliance: The formation of films is due to substances contained in vegetables or tap water. Clean the appliance; coatings are harmless to health. Plastic parts inside the appliance may become discolored over the life of the dishwasher. Discoloration will not impair the functioning of the appliance. Removable streaks on glasses and silverware: Amount of rinse aid to be dispensed is set too high. Set the rinse aid system to a lower setting. There is detergent residue in the final rinse: Lid of detergent dispenser is blocked by dishware. Arrange dishware in the upper rack so the tab collecting tray is not obstructed.
- Page 27: Troubleshooting There are removable streaks on glasses, glassware with a metallic appearance, and silverware. Items of dishware are blocking the dispenser lid. Do not place dishware or fragrance dispensers in the tab collecting tray. Only remove large remnants of food and do not pre-rinse dishware. Irreversible clouding of glassware may occur if glasses are not dishwasher-proof. Use dishwasher-proof glasses. Avoid a lengthy steam phase after the wash cycle ends. Check that the spray arms are not blocked and can rotate freely. Hand soap in the rinse aid dispenser can cause excessive foam. Add rinse aid to the dispenser if it has been spilled.
- Page 28: Troubleshooting All LEDs light up or flash. The appliance is reset and restarted. If the problem occurs again, switch off the appliance and unplug it. Wait at least 2 minutes before switching it back on. If the issue persists, contact customer service. Water is left in the appliance at the end of the program. Clean the filters and the drain pump. If the program has not yet ended, wait until it does or terminate the program with reset. Appliance cannot be switched on or operated. A software update may be taking place; wait until it finishes. If appliance functions have failed, pull out the power cord, wait, and reconnect. Appliance does not start. Check if the breaker has tripped and ensure the power cord is properly inserted. Appliance door is not closed properly. Close the appliance door securely. Appliance stops during the cycle. Check if the power and/or water supply has been interrupted. Upper rack may be pressing against the inner door. Ensure dishware is arranged properly to allow the door to close. Appliance door cannot be closed. The door lock may be activated or the installation method may be incorrect. Check the installation and close the door with greater force if necessary.
- Page 29: Transportation, storage and disposal Appliance door cannot be closed. When closed, the appliance door, its decor or attached parts should not knock against adjacent cabinets or the worktop. Lid on the detergent dispenser cannot be closed. Detergent dispenser or lid are blocked by sticky detergent residue. Filling valves making knocking noises. Caused by the domestic installation. No fault present in the appliance. Noise level varies. The noise level can vary, depending on what kind of dishes are loaded and where they are placed. Spray arm is striking dishes. Arrange dishware so the spray arms do not strike dishware. Clean drain pump. Large food remnants or foreign objects can block the drain pump.
- Page 30: Close the water supply valve. Detach the drain connection. Detach the water connection. Loosen any screws fastening the appliance to cabinet parts. Check your local area for large appliance recycling programs. With any warranty repair, we will make sure your appliance is repaired by an authorized service provider using genuine replacement parts. Detailed information on the warranty period and terms of warranty can be found in the Statement of Limited Product Warranty. Before leaving for vacation during warmer weather, turn off the water supply at the nearest point to the dishwasher. If your dishwasher will be unused for an extended period in freezing temperatures, have it winterized by an authorized service provider. Always transport the appliance upright to prevent residual water from damaging the appliance.
- Page 31: Technical specifications include weight, voltage, power rating, fuse, water pressure, inlet rate, water temperature, and load capacity. The product has a maximum weight of 60 kg/132 lbs and operates at 120 V, 60 Hz with a power rating of 1440 W. Water pressure ranges from a minimum of 7.25 psi (50 kPa) to a maximum of 145 psi (1000 kPa). The minimum inlet rate is 2.6 gal/min, and the maximum hot water temperature is 140 °F (60 °C). The load capacity is 12 place settings. The product includes software components licensed as free or open source software. The warranty lasts for 365 days from the date of original delivery, covering defects in materials and workmanship. A cosmetic warranty is provided for 30 days, excluding slight color variations. The source code is available upon request, with costs charged to the requester. The limited warranty applies only to appliances purchased for normal household use.
- Page 32: Statement of limited product warranty 5 year limited warranty on dish racks: BSH will replace the upper or lower dish rack if the rack proves defective in materials or workmanship. Lifetime warranty against stainless steel rust through: BSH will repair or replace your dishwasher if the inner liner should rust through. BSH will repair or replace the stainless steel door if the door should rust through. Bosch is under no obligation to provide concessions once this warranty has expired. During this warranty period, Bosch will repair your product without charge if it proves to have been manufactured with a defect. Bosch will replace your product if reasonable attempts to repair it have been made without success. Bosch highly recommends that you do not attempt to repair the product yourself or use a non-authorized service provider. The warranty coverage excludes all defects or damage that are not the direct fault of Bosch. The warranty does not cover use of the product in anything other than its normal, customary and intended manner. Bosch will not incur any liability for damage to surrounding property.
- Page 33: Register your appliance to enjoy customized benefits. Simply create a MyBosch account, then register your appliance. You'll find a variety of customized information in MyBosch such as discounts for filters, cleaners, accessories & parts. Easy access to manuals & appliance specifications. Customized offer for the Bosch Appliance Service Plan (sent by mail after appliance registration). No matter what, no matter when: Bosch is here to support you. We’re here to assist with usage instructions, cleaning tips, accessories & parts, troubleshooting, and repairs. Find online resources such as FAQs, how-to-videos, manuals, warranties and authorized Bosch services. Please have your Model Number (E-Nr) ready when contacting us. Contact us for support.

FISHER PAYKEL DD24SDFTX9 N Dishwasher

BOSCH SMH4HVX31E Dishwasher

Gorenje Voll-I GV 64x B Dishwasher

FISHER and PAYKEL DD60DDFHB9 Contemporary Dishwasher

IKEA AA-2360858-2-1 RENGÖRA Dishwasher

Whirlpool WFE2B19X Dishwasher

BOSCH SMS2ITI04E 60 cm Free-standing Dishwasher

Kleenmaid DW6020XB Black Built Under Dishwasher

BOSCH SRV2HKX39G Fully-Integrated Dishwasher

NEFF S355HAX27G Dishwasher