×
- 1. Instructions For Use And Warranty Details (Semi Integrated Dishwasher)
- 2. Dear Customer, Thank You And Congratulations For Choosing Kleenmaid. Your New Appliance Has Been Designed And Meticulously Tested To Ensure …
- 3. Part 1 General Care And Installation (Safety Information → Product Overview → Using Your Dishwasher → Troubleshooting Tips)
- 4. Part 2 (Using Your Dishwasher → Programming The Dishwasher → Error Codes → Technical Information)
- 5. Quick User Guide (Install The Dishwasher → Loading The Baskets → Filling The Dispenser → Selecting A Program And Running The Dishwasher)
- 6. Safety Information (When Using Your Dishwasher, Observe The Precautions Listed Below: This Appliance Is Intended To Be Used In Household And Similar Applications Such As:)
- 7. Packaging Material Safety (Indoor Household Use → Electrical Shock Prevention → Cleaning And Maintenance → Earthing Instructions)
- 8. Do Not Modify The Plug Provided With The Appliance. (Do Not Operate Your Dishwasher Unless All Enclosure Panels Are Properly In Place. → When Loading Items To Be Washed: → Some Dishwasher Detergents Are Strongly Alkaline. → Avoid Contact With The Skin And Eyes And Keep Children Away From The Dishwasher When The Door Is Open.)
- 9. Do Not Wash Plastic Items Unless They Are Marked 'dishwasher Safe' Or The Equivalent. For Unmarked Plastic Items Not So Marked, Check The Ma…
- 10. Disposal
- 11. Product Overview (Important → Top Spray Arm → Lower Spray Arm → Filter Assembly)
- 12. Using Your Dishwasher (Before Using Your Dishwasher : → Loading The Basket → Basket Use Tips → Adjusting The Upper Basket)
- 13. Folding Down The Glass Holder (Folding Back The Rack Shelves)
- 14. Maintenance And Cleaning (External Care → The Control Panel → Internal Care → Filtering System)
- 15. Coarse Filter (Main Filter → Fine Filter → Reassembly Of Filters → Cleaning The Filters)
- 16. Spray Arms
- 17. Caring For The Dishwasher (Frost Precaution → After Every Wash → Remove The Plug → When Not In Use For An Extended Period)
- 18. Installation Instruction (About Power Connection → Electrical Requirements → Electrical Connection)
- 19. Water Supply And Drain (Cold Water Connection → About The Safety Supply Hose → How To Connect The Safety Supply Hose → How To Disconnect The Safety Supply Hose)
- 20. Connection Of Drain Hoses (How To Drain Excess Water From Hoses → Water Outlet → Extension Hose → Syphon Connection)
- 21. Position The Appliance (Built-in Installation)
- 22. Step 2. Aesthetic Panel's Dimensions And Installation (Step 3. Tension Adjustment Of The Door Spring)
- 23. Step 4. Dishwasher Installation Steps (Connect The Inlet Hose To The Cold Water Supply. → Connect The Drain Hose. → Level The Dishwasher. → Install The Furniture Door To The Outer Door Of The Dishwasher.)
- 24. Step 5. Levelling The Dishwasher (Check Level Front To Back → Check Level Side To Side)
- 25. Troubleshooting Tips (Before Calling For Service → Problem → Possible Causes → What To Do)
- 26. Problem (Possible Causes → What To Do → Knocking Noise In The Dishwasher → The Dishes Are Not Clean)
- 27. Problem (Possible Causes → What To Do → The Dishes Are Not Clean. → The Dishes Are Not Drying)
- 28. Problem (Possible Causes → What To Do → Loading The Baskets)
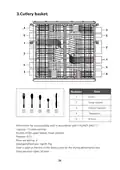
- 29. Cutlery Basket (Information For Comparability Tests In Accordance With (*as/nzs 2007.1) → Capacity: 15 Place Settings → Position Of The Upper Basket: Lower Position → Program: Eco)
- 30. Part 2 Detailed Operating Instructions (Using Your Dishwasher → Control Panel → Programming The Dishwasher → Error Codes)
- 31. Using Your Dishwasher (Control Panel → Operation (button) → Program → Option → Delay +/)
- 32. Auto Sensing Wash (Intensive → Heavy → Eco Program → Rapid)
- 33. Display (Extra Wash → Extra Drying → Rinse Aid → Water Tap)
- 34. Preparing And Loading Dishes (Recommendations For Loading The Dishwasher → Are Not Suitable → Are Of Limited Suitability)
- 35. Place Objects In The Dishwasher (Load Hollow Items → The Upper Basket → Removing The Dishes → Warning Items Will Be Hot!)
- 36. Loading The Upper Basket (Loading The Lower Basket → Loading The Cutlery Basket)
- 37. Function Of The Rinse Aid And Detergent (When To Refill The Rinse Aid Dispenser → Function Of Detergent → Proper Use Of Detergent)
- 38. Filling The Rinse Aid Reservoir (Rinse-aid Indicator → Adjusting The Rinse Aid Reservoir)
- 39. Filling The Detergent Dispenser (Open The Detergent Dispenser Flap → Add Detergent Into The Larger Cavity → Close The Flap By Sliding It To The Left)
- 40. Programming The Dishwasher (Wash Cycle Table → Description Of Cycle)
- 41. Starting A Wash Cycle (Changing The Program Mid-cycle)
- 42. Open The Door A Little To Stop The Dishwasher (Forget To Add A Dish? → It Is Dangerous To Open The Door Mid-cycle, As Hot Steam May Scald You.)
- 43. Error Codes (Meanings → Codes → Possible Causes → Washing Control System Fail)
- 44. Technical Information (Height (h) → Width (w) → Depth (d1) → Depth (d2))
- 45. Product Data (Manufacturer → Type / Description → Energy Efficiency Class → Noise Level)
- 46. Kleenmaid Warranty (Terms And Conditions → What Is Covered By This Kleenmaid Warranty → What Is Not Covered By This Kleenmaid Warranty (excluded) → This Kleenmaid Warranty Ceases If)
×
kleenmaid DW6032 Dishwasher
Spray arms
It is necessary to clean the spray arms regularly for hard water chemicals will clog the
spray arm jets and bearings.
To clean the spray arms, follow the instructions below:
1
2
To remove the upper spray arm,
hold the nut in the centre still and
rotate the spray arm counterclockwise
to remove it.
To remove the lower spray arm, pull
out the spray arm upward.
3 Wash the arms in soapy and warm
water and use a soft brush to clean
the jets. Replace them after rinsing
them thoroughly.
13
| General | Details |
|---|---|
| Name | kleenmaid DW6032 Dishwasher |
| Make | kleenmaid |
| Language | English |
| Filetype | PDF (Download) |
| File size | 4.3 MB |

kleenmaid DW6020XB Black /Built Under Dishwasher
Kleenmaid DW6020XB Black Built Under Dishwasher

KLEENmaid DW6031 Dishwasher

KLEENmaid DW4531 45cm Dishwasher

kleenmaid DW6020X Dishwasher

kleenmaid DW6032 Semi Integrated Dishwasher


FRIGIDAIRE FDSP4501SS Tub Dishwasher

beko DDS25842X Dishwasher

IKEA 905.681.49 OSTVEDA Dishwasher

KUCHT K6502D Dishwasher

FISHER and PAYKEL DD24DCTB9_N Dishwasher

Whirlpool WDF130PAHB Dishwasher

BOSCH SMI8ZCS00X Dishwasher

FISHER PAYKEL DD24DDFT9 Series Dishwasher

comfee CDC22P4AWW Dishwasher

AEG FSE94848P Sliding Door Dishwasher
Table of Contents
- 1. Instructions For Use And Warranty Details - Semi Integrated ... →
- 2. Dear Customer, Thank You And Congratulations For Choosing Kl... →
- 3. Part 1 General Care And Installation - Safety Information →
- 4. Part 2 - Using Your Dishwasher →
- 5. Quick User Guide - Install The Dishwasher →
- 6. Safety Information - When Using Your Dishwasher, Observe The... →
- 7. Packaging Material Safety - Indoor Household Use →
- 8. Do Not Modify The Plug Provided With The Appliance. - Do Not... →
- 9. Do Not Wash Plastic Items Unless They Are Marked 'dishwasher... →
- 10. Disposal →
- 11. Product Overview - Important →
- 12. Using Your Dishwasher - Before Using Your Dishwasher : →
- 13. Folding Down The Glass Holder - Folding Back The Rack Shelve... →
- 14. Maintenance And Cleaning - External Care →
- 15. Coarse Filter - Main Filter →
- 16. Spray Arms →
- 17. Caring For The Dishwasher - Frost Precaution →
- 18. Installation Instruction - About Power Connection →
- 19. Water Supply And Drain - Cold Water Connection →
- 20. Connection Of Drain Hoses - How To Drain Excess Water From H... →
- 21. Position The Appliance - Built-in Installation →
- 22. Step 2. Aesthetic Panel's Dimensions And Installation - Step... →
- 23. Step 4. Dishwasher Installation Steps - Connect The Inlet Ho... →
- 24. Step 5. Levelling The Dishwasher - Check Level Front To Back →
- 25. Troubleshooting Tips - Before Calling For Service →
- 26. Problem - Possible Causes →
- 27. Problem - Possible Causes →
- 28. Problem - Possible Causes →
- 29. Cutlery Basket - Information For Comparability Tests In Acco... →
- 30. Part 2 Detailed Operating Instructions - Using Your Dishwash... →
- 31. Using Your Dishwasher - Control Panel →
- 32. Auto Sensing Wash - Intensive →
- 33. Display - Extra Wash →
- 34. Preparing And Loading Dishes - Recommendations For Loading T... →
- 35. Place Objects In The Dishwasher - Load Hollow Items →
- 36. Loading The Upper Basket - Loading The Lower Basket →
- 37. Function Of The Rinse Aid And Detergent - When To Refill The... →
- 38. Filling The Rinse Aid Reservoir - Rinse-aid Indicator →
- 39. Filling The Detergent Dispenser - Open The Detergent Dispens... →
- 40. Programming The Dishwasher - Wash Cycle Table →
- 41. Starting A Wash Cycle - Changing The Program Mid-cycle →
- 42. Open The Door A Little To Stop The Dishwasher - Forget To Ad... →
- 43. Error Codes - Meanings →
- 44. Technical Information - Height (h) →
- 45. Product Data - Manufacturer →
- 46. Kleenmaid Warranty - Terms And Conditions →



