
ATAG DW7214MC Dishwasher


USER MANUAL
Dishwasher
EN
DW7214MC


| General | Details |
|---|---|
| Name | ATAG DW7214MC Dishwasher |
| Make | ATAG |
| Language | English |
| Filetype | PDF (Download) |
| File size | 1.96 MB |
 (1 votes, average: 5.00 out of 5)
 Loading...

ATAG VA7214LR 60 cm Dishwasher

ATAG VA8214LU Dishwasher

ATAG VA7213SMN Dishwasher

ATAG DW7214MC Dishwasher Overview
Summary of Contents
- Page 1: Page 1
- Page 2: Your dishwasher Safety instructions Child lock Installation Declaration of conformity Overflow guard Before washing for the first time Water hardness Basic settings Care and cleaning
- Page 3: Your dishwasher On/Off Display Start/Stop Select program Select program mode Auto door open Delayed start Symbols on the display First time setup is shown on the display the first time the dishwasher is switched on. It is important that you choose the right settings to ensure good dishwashing results.
- Page 4: Safety instructions Read the user manual and keep it in a safe place. Number of standard place settings: 14. Never use the dishwasher for any purpose other than that specified in these operating instructions. Do not load the dishwasher door or dishwasher baskets with anything other than dishes. Never leave the dishwasher door open as someone may trip on it. Use only dishwasher detergent. This machine can be used by children aged 8 and upwards, and by people with reduced physical capacity, mental ability, memory loss or lacking experience and knowledge. Damaged supply cord must only be replaced by the manufacturer's service centre or someone similarly professionally qualified. Only use the dishwasher in household-type environments for dishwashing household dishes. Knives and other pointed items must be placed with the points down in the cutlery basket or horizontally in other baskets.
- Page 5: Safety instructions Children must be supervised – dishwasher detergent is corrosive. You can activate the automatic child lock setting to prevent children from starting the dishwasher. The overflow guard starts pumping out the water and turns off the water supply if the water level exceeds the normal level. If the overflow guard is triggered, F54 (Overfilling water) appears on the display. The outer packaging protects the product during transport and is recyclable. Separate the different packaging materials to help reduce raw material use and waste. The dishwasher is manufactured and labelled for recycling. When disposing of the dishwasher, it should immediately be made unusable. Pull out the power cable and cut it as short as possible. Contact your local authority for information about recycling the dishwasher.
- Page 6: Safety instructions Read the user manual. Recycle as electrical waste. Approved in accordance with the relevant EU directives. Approved in accordance with the relevant UK legal requirements.
- Page 7: Before washing for the first time Water hardness is essential for achieving good dishwashing results. Hard water leaves a white coating on dishes and the dishwasher. Water hardness is specified using various degrees of measurement. A water supply with hardness over 5°dH must be softened. The built-in water softener automatically softens the water. Adjust the water softener settings to match the water supply hardness. Add detergent and rinse aid suitable for soft water after adjusting settings. Contact local waterworks to check the water hardness in your area. If water hardness exceeds 50°dH, consider connecting an external water softener. Regeneration of the water softener increases energy and water consumption.
- Page 8: Before washing for the first time Hard water leaves a white coating on dishes and inside the dishwasher. It is therefore important that you select the right setting for the water softener. Never run the dishwasher with an empty salt compartment if the water supply has a water hardness in excess of 5°dH. It is important that you choose the right settings to ensure good dishwashing results. Select the language to be shown on the display. Drying is faster and a better result is achieved if you use rinse aid. The rinse aid dispenser can be adjusted between 0 (Off) and 5 (High dosage). Adjusting the water softener. Select a setting depending on the hardness of the water supply. For a water supply with a hardness above 5 °dH, fill with salt. Activate this setting when using an all-in-one detergent that contains rinse aid.
- Page 9: Before washing for the first time, top up rinse aid and salt. Top up the rinse aid compartment with rinse aid if you have selected Rinse aid 1 - 5. Open the rinse aid compartment lid and carefully top up with rinse aid to the level marked MAX. Wipe up any splashes of rinse aid around the compartment and close the lid firmly. When the rinse aid needs topping up, the symbol lights on the display. For a water supply with a hardness above 5 °dH, fill with salt. Add salt to the salt compartment if you have selected Water hardness 1 - 9. Pour in about 1 l of water before washing for the first time, then add enough salt to fill the salt compartment. When the salt needs topping up, the symbol lights on the display. A dishwashing program must be started immediately after adding salt to avoid rust stains.
- Page 10: Greener dishwashing Save energy and water when using a dishwasher in a residential setting. Do not rinse the dishes under running water as this will lead to increased energy and water consumption. Choose a green detergent and read the environmental declaration on the packaging. Run a fully loaded dishwasher to save energy and water. Use the Rinse and hold program to rinse the dishes if there are any unpleasant odours. Run programs at a lower temperature if the dishes are only slightly dirty. Select the Eco dishwashing program for normally soiled dishes, which is effective in terms of energy and water consumption. Better drying results are achieved with the Auto door open option. Connect the dishwasher to the cold water supply if the building is heated using oil, electricity, or gas. Connect the dishwasher to the hot water supply if the building is heated using energy-efficient means.
- Page 11: Loading the dishwasher Some cookware is not dishwasher safe due to high heat or damage from detergent. Exercise caution with handmade items, fragile decoration, crystal/glassware, silver, copper, tin, aluminium, wood, and plastic. Porcelain with decoration on top of the glazing should not be washed in a dishwasher. Drying is faster and better with rinse aid for crystal/glass. Hand-painted glassware and antique items should not be washed in a dishwasher. Silver and stainless steel items should not come into contact to avoid discoloration. Aluminium can lose its shine in a dishwasher, but good quality pans can be washed. Some types of glue on cutlery handles are not dishwasher safe. Load dishes carefully to ensure the best washing and drying results. All dirty surfaces should face inwards and downwards.
- Page 12: Loading the dishwasher The dishwasher is equipped with a top cutlery tray, an upper basket and a lower basket with a cutlery basket. The appearance of the baskets may differ depending on the dishwasher setup. The top cutlery tray has space for cutlery, ladles, whisks, serving cutlery and similar items. Avoid placing tall objects in the top cutlery tray. They can block the top spray arm. Pull out the top cutlery tray. Pull forward the two locking handles on either side to raise the top cutlery tray. Make sure the upper basket is in the lowest position. Slide the two locking handles on either side downwards and backwards to lower the top cutlery tray.
- Page 13: Loading the dishwasher involves placing glasses, cups, bowls, side plates, and saucers in the upper basket with dirty surfaces facing inwards and downwards. Wine glasses should be placed on the wine glass shelf, and knives in the knife stand on the right. To raise the upper basket, pull it out and lift it up by grabbing the sides with both hands. To lower the upper basket, pull it out and push in the two locking handles after grabbing the sides with both hands.
- Page 14: Loading the dishwasher involves placing plates, side plates, serving dishes, pots, and cutlery in the lower basket. The adjustable plate supports can be modified to accommodate different dish sizes. To adjust the plate supports, push them inwards before repositioning. The supports can also be folded down for easier loading of pots and bowls.
- Page 15: Loading the dishwasher The dishwasher's two adaptable power zones can be opened in two different positions or turned off. Leave the power zones open for increased water flow with pots and pans or vases and slim items. Turn the power zones off for greater spray pressure in the lower spray arm. You can adjust the lower basket for plates with a diameter of 25-31 cm by moving the adjustable plate supports. Place cutlery with the handles facing down, except for knives, and spread them out as much as possible. Ensure that spoons do not stack inside each other. The cutlery basket is best placed in the middle at the front of the lower basket. Knives and other pointed items must be placed horizontally in the dishwasher's special cutlery baskets. The cutlery basket has a fold-down section for small items or small shafts.
- Page 16: Using the dishwasher Add detergent Follow the instructions on the detergent packaging. This dishwasher is fitted with a water softener, so use detergent and rinse aid doses suitable for soft water. Too much detergent can result in less effective dishwashing and also entails greater environmental impact. The detergent compartment must be dry when adding detergent. Use only dishwasher detergent! Washing up liquid must not be used as the foam that forms prevents the dishwasher from operating effectively. There are many types of all-in-one detergents on the market. Read through the directions for these products carefully. Activate the TAB setting when using an all-in-one detergent that contains rinse aid. Dishwasher tablets are not recommended for short programs (less than 75 minutes). Use powder or liquid dishwasher detergent instead. Optimal washing and drying results are achieved by using normal detergent together with separately dispensed rinse aid and salt.
- Page 17: Using the dishwasher Open the door and press the On/Off button. Also turn on the water tap if it is turned off. Eco is always pre-selected. To select another program, press the button shown on the display until the desired program is selected. Select a program to suit the type of dishes and how dirty they are. Eco program is suitable for washing normally soiled dishes and is the most effective program in terms of combined energy and water consumption. For heavily soiled dishes with a lot of grease, a program with higher temperatures should be used. Universal program is effective for daily use for slightly dried leftovers. Intensive program has a high temperature for dissolving grease on very dirty dishes. Quick program is fast and effective for slightly dried leftovers. The Auto door open option is important for ensuring the best drying results. When combined with Speed, the program is shortened to 60 minutes.
- Page 18: Using the dishwasher Time program: The program adapts to the specified running time or finish time. Choose a time suited to how dirty the dishes are. Hygiene: This program is ideal for high hygiene demands, e.g., for baby bottles and cutting boards. Rinse and hold: Used to rinse dishes while waiting for the dishwasher to become fully loaded. Self-cleaning: A program for hygienic cleaning of the dishwasher tub, spray arms, and spray pipes. Anti-odour: This program prevents bad odours from dirty dishes left in the dishwasher. Select program mode: Scroll through the available program modes. Speed: The program time is shortened, but the dishwasher uses more energy. Night: Lower noise level during the dishwashing program; the program time is extended.
- Page 19: Using the dishwasher Select option Available options are dimly lit. The options glow brighter when activated. Auto door open The dishwasher door opens automatically, which shortens the program time and improves the drying results. Wait until the dishwasher indicates that the program has ended and the dishes have cooled before unloading. The drying time of the Auto door open option varies depending on the model, program, and temperature of the final rinse. For the best drying results, do not close the door before the drying phase has finished. The dishwasher door must not be blocked or closed when opened automatically. Wait at least 5 minutes before closing the door. Delayed start When you select Delayed start, the dishwasher will start 1-24 hours after you have pressed Start/Stop. If you want to cancel the Delayed start option, open the door then press and hold for three seconds. Stopping or changing a program If you want to change the program after starting the dishwasher, open the door then press and hold for three seconds. Remaining time Once you have selected a program, the time the program took when last used is displayed.
- Page 20: Using the dishwasher The status light at the bottom of the dishwasher provides information by means of 3 different colours. Blue - Load more: The program has started, but you can still load more dishes. Red - Do not load: You should not load more dishes (risk of poorer dishwashing result). A flashing light indicates that the door has been opened while a program is in progress. Green - Unload: The dishwashing program is finished. If the dishwasher is turned off due to a power failure when a dishwashing program is running, the program continues when power is restored. The end of the program is indicated by one short signal from the buzzer. The end of the program is indicated by the status light turning green. Once the dishwasher door is opened and the program has finished, Program done appears on the display. The dishwasher switches off automatically after the program ends.
- Page 21: Using the dishwasher The best drying results Fully load the dishwasher. Angle dishes with hollows, such as cups, so that the rinse water will run off. Top up with rinse aid or increase the rinse aid dosage setting. Activate the Auto door open option. Allow the dishes to cool before unloading the dishwasher. Unloading the dishwasher Hot porcelain is more fragile. Leave the dishes to cool in the dishwasher before unloading them. Unload the lower basket first to avoid any water drops from the upper basket falling onto the dishes in the lower basket.
- Page 22: Program mode Consumption values This program is suitable for washing normally soiled dishes and is the most effective program in terms of combined energy and water consumption. Connection to cold water, approx. 15 °C. Connection to hot water, approx. 60 °C. The values for the Eco program are accurate, others are indicative only. Rinse and hold Self-cleaning Anti-odour Time program
- Page 23: Settings menu allows access to various configurations. You can choose the language used for the display. Automatic child lock can be activated to prevent children from starting the dishwasher. To temporarily deactivate or activate the child lock, press and hold specific buttons for three seconds. Contrast of the display can be adjusted. You can select which information is shown on the display. A beep confirms that the control panel has been pressed. The buzzer indicates when a dishwashing program has ended. Setting for rinse aid dosage can be adjusted between 0 (Off) and 5 (High dosage). Adjust rinse aid dosage based on the condition of the dishes.
- Page 24: Settings Build-up of foam. If you have very soft water, the rinse aid can be diluted 50:50 with water. Adjusting the water softener. Select a setting depending on the hardness of the water supply. It is important that this setting is correct. For a water supply with a hardness above 5 °dH, fill with salt. For a water supply with a hardness below 6°dH, select 0. The water softener is deactivated and no salt needs to be added. Activate this setting when using an all-in-one detergent that contains rinse aid. The Super rinse function rinses the dishes an extra two times. Select whether the interior light is to be switched on when the dishwasher is turned off and the door is opened. When Odour control is activated, Anti-odour can be selected from the program table. Any error messages. When contacting your service centre, you may be asked to provide the most recent error messages. Restores all settings to the factory defaults.
- Page 25: To exit the dishwasher's Settings menu, select Exit and press.
- Page 26: Care and cleaning Top up rinse aid Top up salt Clean the filters Coarse filter traps larger food particles. Empty the coarse filter when necessary. Fine filter collects debris that is rinsed away during each wash. Clean the fine filter when necessary. Refit the coarse filter and ensure it clicks into place. Check that the edges of the fine filter seal properly.
- Page 27: Care and cleaning Dishwashing results may be affected if the coarse and fine filters are incorrectly fitted. The dishwasher must not be used without the filters in place. Check that the yellow drainage pump stop is in place. Cleaning the spray arms Holes and bearings can sometimes become blocked. Remove any debris using a pin or the like. To facilitate cleaning you can remove the spray arms. Remember to fit them firmly back into place afterwards. Pull out the top cutlery tray. Push up on the top spray arm while turning it anticlockwise to release it. Pull out the upper basket.
- Page 28: Care and cleaning Unscrew the spray arm bearings anticlockwise to remove the spray arm from the upper basket. Pull the lower spray arm straight up to release it. Clean the sides of the door and the door seal regularly with a slightly damp cloth. Clean the door seal at the lower front edge of the dishwasher with a washing-up brush. Keep the control panel clean. If necessary, wipe it with a dry or slightly damp cloth. The dishwasher tub is made of stainless steel and is kept clean through normal use. If you have hard water, limescale deposits may build up in the dishwasher. Run the Self-cleaning program with two tablespoons of citric acid in the detergent compartment. If the dishwasher still contains water after the program has finished, something may be blocking the drainage pump.
- Page 29: Care and cleaning Turn off the machine and remove the plug from the wall socket. Remove the coarse filter and the fine filter. Scoop out the water from the dishwasher tub. Inspect the drainage pump by removing the yellow drainage pump stop. Turn the pump wheel located behind the drainage pump stop by hand. Refit the drainage pump stop along with the fine and coarse filters. Unblocking the inlet hose filter is necessary if the water supply contains small particles. Unscrew the inlet hose and carefully remove the outer filter from the inlet hose to clean it. Check that the gasket is correctly positioned when refitting the filter. Screw the inlet hose firmly into place and check that the connection is watertight.
- Page 30: Care and cleaning Winter storage/Transport Store the dishwasher above freezing temperature and avoid long transport distances in very cold weather. Transport the dishwasher upright or laying on its back. Before transporting a used dishwasher, or before prolonged storage, water must first be removed from the machine. Run the Self-cleaning program.
- Page 31: Troubleshooting Error messages F10 - Overfilling water 1: Unblocking the drainage pump. If the problem persists, contact your nearest service centre. F11 - Water outlet fault: See Water remains in the dishwasher under Problem in the table below. If the problem persists, contact your nearest service centre. F12 - Water inlet fault 1: Check that the water tap is on and that the outer filter on the inlet hose is not blocked. If the problem persists, contact your nearest service centre. F40 - Inlet valve leakage: Turn off the water tap and contact your nearest service centre. F41 - Heater fault 1: Turn off the water tap, remove the plug from the wall socket, and contact your nearest service centre. F45 - Diverter fault: Contact your nearest service centre. F52 - Water level fault: Clean the coarse and fine filters and check that the outer filter on the inlet hose is not blocked. If the problem persists, contact your nearest service centre. F54 - Overfilling water 2: Turn off the water tap and contact your nearest service centre. Do not remove the plug from the wall socket until the water tap has been turned off. F56 - Circulation pump fault: Contact your nearest service centre. F67 - Water inlet fault 2: Check that the water tap is on and that the outer filter on the inlet hose is not blocked. If the problem persists, contact your nearest service centre.
- Page 32: Troubleshooting The control panel does not react. Possible causes include pressing the control panel too soon after opening the door, activation of the child lock, or dirt on the control panel. The door is closed; it only reacts when the door is open. If the door cannot close, check that the baskets are correctly positioned and that dishes are not blocking them. The door lock may not click into place; check the door lock and follow the procedure to reset it if necessary.
- Page 33: Troubleshooting The dishwasher does not start. Possible causes include the start button not being pressed, the door not properly closed, the door lock not clicking into place, the Delayed start option being selected, or the plug not being plugged into the wall socket. Actions include pressing the start button until the display shows Program started, checking the door and door lock, and canceling the Delayed start option if necessary.
- Page 34: Troubleshooting The dishes are not clean. Possible causes include the spray arms not rotating, blocked spray arm holes or bearings, unsuitable dishwashing program, incorrect detergent dosage, old detergent, and dishes loaded incorrectly. Check that the dishes are not blocking the spray arms. Clean the spray arms. Select a program with a high temperature to dissolve grease on very dirty dishes. Dose detergent according to water hardness. Avoid large packages of detergent as it is a perishable product. Place dishes to sit steady to prevent glasses and cups from toppling over during the program. Clean the coarse and fine filters if they are clogged. Check that the filters are fitted correctly. Rinse off foodstuffs that can cause spots on stainless steel if left for too long.
- Page 35: Troubleshooting Spots or films on the dishes may be caused by incorrect rinse aid dosage setting or insufficient drying effect. Top up with salt if the salt compartment is empty. Check the water softener setting if there are issues with the water softener. A leaking salt compartment lid should be tightened or checked by a service center. Too high temperature and/or too much detergent can cause etching on crystal. The dishes may have a sticky white/blue film due to high rinse aid dosage. Spots left after washing can be difficult to remove, especially lipstick and tea/coffee stains. Detergent residue in the detergent compartment may occur if it was damp when adding detergent. Ensure the detergent compartment is not blocked and can open properly. A rattling sound during dishwashing may indicate that dishes are not placed correctly or spray arms are obstructed.
- Page 36: Troubleshooting Water remains in the dishwasher. The filters are clogged. Clean the coarse and fine filters. Debris in the drainage pump. Clean the drainage pump. Kink in drainage hose. Check that the hose is free from kinks and sharp bends. Bad odour in dishwasher. Clean with washing-up brush and low foaming cleaner. Run a program with a high temperature once or twice a month.
- Page 37: Troubleshooting The dishes are not dry enough. Possible causes include the Auto door open option not being activated, the dishwasher not being fully loaded, and the rinse aid needing topping up or the dosage being set too low. Actions include activating the Auto door open option, fully loading the dishwasher, topping up with rinse aid or increasing the rinse aid dosage setting, switching all-in-one detergents, and deactivating the setting TAB while topping up with salt and separate rinse aid.
- Page 38: Installation instructions should be followed carefully. Connections to electricity, water, and drainage must be performed by a qualified professional. Always adhere to applicable regulations for water, drainage, and electricity. Wear protective gloves during installation. Two people should be involved in the installation process. A drip tray should be placed beneath the dishwasher to prevent water damage. Test the dishwasher by running the Rinse and hold program before securing it in place. Ensure that the ventilation opening in the lower part of the door is not blocked. Turn off the water supply when installing the dishwasher. Disconnect the plug or turn off power to the socket during installation.
- Page 39: Installation The recess and connection dimensions are included in the separate installation instructions. Check that all dimensions are correct before starting the installation. Make sure the area on which the dishwasher is to be installed is firm. Adjust the adjustable feet so that the dishwasher is level. If the dishwasher is built-in, the surrounding furnishings must be resistant to any condensation. Mount the protective film beneath the worktop and up around the edge. Check that the machine is installed such that the door opens freely. This dishwasher is suitable for installing in a raised recess. Use only the inlet hose supplied with the dishwasher. Connect the dishwasher to the cold water supply if the building is heated using oil, electricity or gas.
- Page 40: Installation Electrical connection Information about the electrical connection can be found on the serial number plate. This specification must match the electricity supply. The dishwasher must be connected to an earthed socket. The electric wall socket must be placed outside of the installation area to be easily accessible after installing the dishwasher. Do not use an extension cord!
- Page 41: Read the chapter troubleshooting before contacting the service centre. If you have encountered a problem that you cannot resolve, please contact your nearest service centre for professional help. Our website also has information about spare part availability and what you can repair yourself. When making contact, provide the details on the serial number plate. Include the article number and the serial number. Please note that non-professional repairs may risk user safety and affect the warranty. Press and hold the designated buttons for 3 seconds to show the number of cycles on the display.
- Page 42: Technical data and energy labelling Height: 819-872 mm Width: 596 mm Depth: 554 mm Weight: 50 kg Number of standard place settings: 14 Water pressure: 0.03-1.0 MPa Electrical connection: See the serial number plate Rated power: See the serial number plate Information for consumers Information about your appliance can be found at www.atag.nl / www.atag.be. This appliance contains a light source/light sources of energy efficiency class D. Information for test institute Information about this product can be found in the European Product Database for Energy Labelling, EPREL. Declaration of conformity We hereby declare that this appliance is in conformity with the relevant European directives and the requirements of the relevant standards.
- Page 43: Page 43

FISHER PAYKEL DD24SCTW9N Dishwasher

SHARP QW-NA24S42DI-EE Dishwasher

AEG FSE76738P Dishwasher

esatto EBTDWW Benchtop Dishwasher

FISHER and PAYKEL DW60U2I2 Dishwasher

SAMSUNG DW80N3030UW Front Control Dishwasher

CAFE CDD220P2WS1 Energy Star Smart Drawer Dishwasher

AEG FFB53617ZW Dishwasher

Rasonic RDW-ZW39 Table Top Dishwasher
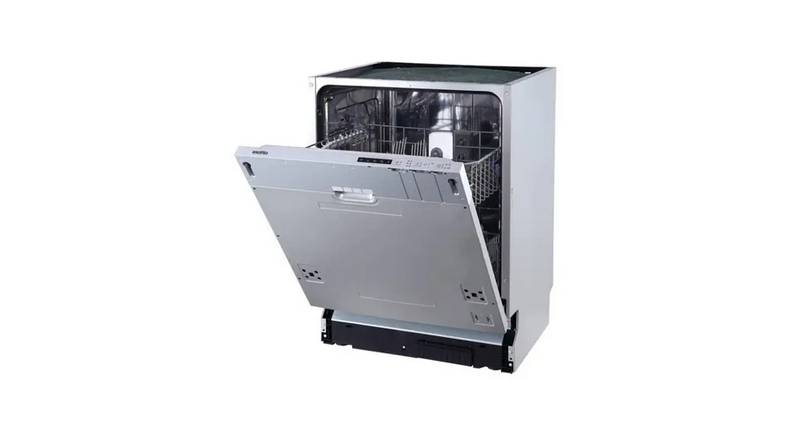
TEKNIX TBD606 Dishwasher