
Hisense HS643D60WUK Dishwasher

















EN
User manual
Dishwasher
HS643D60WUK
HS643D60XUK

| General | Details |
|---|---|
| Name | Hisense HS643D60WUK Dishwasher |
| Make | Hisense |
| Language | English |
| Filetype | PDF (Download) |
| File size | 2.07 MB |
 (1 votes, average: 5.00 out of 5)
 Loading...

Hisense HFI663BXXL Dishwasher

Hisense HS673A60X Dishwasher

Hisense HV642C65UK Dishwasher

Hisense HSCE14FS Dishwasher

Hisense HV642E90UK Fully Dishwasher

Hisense HV643D90UK Dishwasher

Hisense HV642C60 Dishwasher

Hisense HV693C60UK Dishwasher

Hisense HS693C60XAD Dishwasher

Hisense HS622E90BUK Dishwasher

Hisense HS643D60WUK Dishwasher Overview
Summary of Contents
- Page 1: User manual Dishwasher HS643D60WUK HS643D60XUK
- Page 2: Your dishwasher Safety instructions Automatic child lock Child lock Installation Overflow guard Packaging Disposal Symbols on the appliance Before washing for the first time
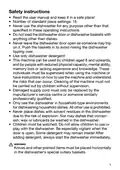
- Page 3: Safety instructions Read the user manual and keep it in a safe place. Number of standard place settings: 16. Never use the dishwasher for any purpose other than that specified in these operating instructions. Do not load the dishwasher door or dishwasher baskets with anything other than dishes. Never leave the dishwasher door open as someone may trip on it. Use only dishwasher detergent. This machine can be used by children aged 8 and upwards, and by people with reduced physical capacity, mental ability, memory loss or lacking experience and knowledge. Damaged supply cord must only be replaced by the manufacturer's service centre or someone similarly professionally qualified. Only use the dishwasher in household-type environments for dishwashing household dishes. Knives and other pointed items must be placed horizontally in the dishwasher's special cutlery baskets.
- Page 4: WARNING! Children must be supervised – dishwasher detergent is corrosive. You can activate the automatic child lock setting to prevent children from starting the dishwasher. To prevent children from stopping the current dishwashing program, you can activate the child lock function. The overflow guard starts pumping out the water and turns off the water supply if the water level in the dishwasher exceeds the normal level. If the overflow guard is triggered, F54 (Overfilling water) appears on the display. The outer packaging protects the product during transport and is recyclable. Separate the different packaging materials to help reduce raw material use and waste. The dishwasher is manufactured and labelled for recycling. When the dishwasher has reached the end of its service life, it should immediately be made unusable. Contact your local authority for information about where and how your dishwasher should be correctly recycled.
- Page 5: Symbols on the appliance Read the user manual. Recycle as electrical waste. Approved in accordance with the relevant EU directives. Approved in accordance with the relevant UK legal requirements.
- Page 6: Before washing for the first time Water hardness The dishwasher needs soft water for good dishwashing results. Hard water leaves a white coating on dishes and the dishwasher. Water hardness is specified using various degrees of measurement. A water supply with hardness over 5°dH must be softened. Adjust the water softener settings to match the water supply hardness. Add detergent and rinse aid suitable for soft water. Contact local waterworks to check water hardness in your area. If water hardness exceeds 50°dH, consider connecting an external water softener. Regeneration of the water softener increases energy and water consumption. Select the right setting for the water softener to avoid hard water issues.
- Page 7: Basic settings It is important to choose the right settings for good dishwashing results. Set up includes rinse aid, water hardness, and TAB (all-in-one detergent). Using rinse aid results in faster drying and better dishwashing outcomes. Top up the rinse aid compartment if you have selected Rinse aid 3:01 - 3:05. When the rinse aid needs topping up, the symbol lights on the display. For water hardness above 5 °dH, fill with salt. Add salt to the salt compartment if you have selected Water hardness 4:01 - 4:09. When the salt needs topping up, the symbol lights on the display. A dishwashing program must be started immediately after adding salt to avoid rust stains.
- Page 8: Greener dishwashing Save energy and water When using a dishwasher in a residential setting, less energy and water are generally used compared to washing the dishes by hand. Do not rinse under running water Do not rinse the dishes under running water as this will lead to increased energy and water consumption. Choose a green detergent Read the environmental declaration on the packaging. Run a fully loaded dishwasher Save energy and water by waiting until the dishwasher is full before running a program. Run programs at a lower temperature If the dishes are only slightly dirty, you can select a program with a low temperature. Select dishwashing program – Eco 55° This program is suitable for washing normally soiled dishes and is the most effective program in terms of combined energy and water consumption. Activate the setting – Auto Dry A shorter dishwashing program and better drying results are achieved if you activate the Auto Dry setting. Connect to cold water Connect the dishwasher to the cold water supply if the building is heated using oil, electricity or gas. Connect to hot water Choosing a hot water connection reduces the dishwasher's energy consumption.
- Page 9: Loading the dishwasher Some cookware is not dishwasher safe due to high heat or damage from detergent. Exercise caution with handmade items, fragile decoration, crystal/glassware, silver, copper, tin, aluminium, wood, and plastic. Load the dishes carefully for the best washing and drying results. All dirty surfaces should face inwards and downwards. Dishes should not be placed in or on each other. Angle dishes with hollows to allow rinse water to run off. Ensure small items cannot fall through the dishwasher basket; place them in the top cutlery tray. The dishwasher is equipped with a top cutlery tray, an upper basket, and a lower basket. Be careful with fully loaded dishwasher baskets to avoid tipping. The top cutlery tray has space for cutlery and similar items and can be adjusted for better accommodation of dishes.
- Page 10: Upper basket Place glasses, cups, bowls, side plates, and saucers in the upper basket. All dirty surfaces should face inwards and downwards. Wine glasses are placed on the wine glass shelf and knives are placed in the knife stand on the right. Raising and lowering the upper basket Pull out the upper basket. Grab the sides of the upper basket with both hands and lift it up. If the upper basket is raised while in the top position, it will drop to the bottom position. Note that both sides of the basket must always be set to the same height.
- Page 11: Lower basket Place plates, side plates, serving dishes and pots in the lower basket. Cutlery can be placed in the cutlery holder. Fit the cutlery holder to achieve maximum loading capacity. Adjustable plate supports The adjustable plate supports can be folded down to make it easier to load pots and bowls. Check that the spray arms can rotate freely.
- Page 12: Using the dishwasher Add detergent Follow the instructions on the detergent packaging. This dishwasher is fitted with a water softener, so use detergent and rinse aid doses suitable for soft water. Too much detergent can result in less effective dishwashing and also entails greater environmental impact. The detergent compartment must be dry when adding detergent. Use only dishwasher detergent! Washing up liquid must not be used as the foam that forms prevents the dishwasher from operating effectively. There are many types of all-in-one detergents on the market. Read through the directions for these products carefully. Activate the TAB setting when using an all-in-one detergent that contains rinse aid. Dishwasher tablets are not recommended for short programs (less than 75 minutes). Use powder or liquid dishwasher detergent instead. Optimal washing and drying results are achieved by using normal detergent together with separately dispensed rinse aid and salt.
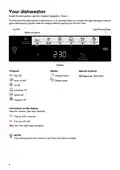
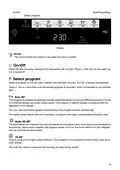
- Page 13: On/Off The control panel only reacts to use when the door is closed. Close the door properly, otherwise the dishwasher will not start. Select a program to suit the type of dishes and how dirty they are. Eco 55° is always pre-selected. Eco 55° is suitable for washing normally soiled dishes and is the most effective program in terms of combined energy and water consumption. For heavily soiled dishes with a lot of grease, a program with higher temperatures should be used. The dishwasher can measure how dirty the dishes are and adjust water consumption and temperature accordingly. When newly installed, the program needs to be run five times before it is fully adapted. A quick program for slightly dried leftovers is available. The Auto Dry option is important for ensuring the best drying results.
- Page 14: Intensive 70° A program with a high temperature for dissolving grease on very dirty dishes, such as pans, casserole dishes, and oven dishes. Glass 40° A gentle dishwashing program with a low temperature for washing fragile items made of crystal/glass. Hygiene 70° This program is ideal to use where demands on hygiene are extra high, e.g. for baby bottles and cutting boards. Self-clean Self-cleaning program for hygienic cleaning of the dishwasher tub, spray arms, and spray pipes. NOTE! The dishwasher will indicate at regular intervals that Self-clean needs to be run. Delayed start When you select Delayed start, the dishwasher will start 1-24 hours after you press the button. Speed wash This option shortens the program time, but uses more energy and water. Start/Pause/Stop Press the button to start the countdown. Press and hold to select the program. Press the options to activate them.
- Page 15: Stopping or changing a program Press and hold for three seconds to pause the program. If you want to interrupt or change the program after starting the dishwasher, press and hold for another five seconds. Open the door and top up with new detergent if the lid of the detergent dispenser has opened. Remaining time Once you have chosen a program and options, the time the program took when last used is displayed. The remaining time is updated during the drying phase. Power failure If the dishwasher is turned off due to a power failure when a dishwashing program is running, the program continues when power is restored. If you open the door for more than 2 minutes during drying, the program will be interrupted. Once the program has finished End appears on the display. The dishwasher switches off automatically after the program ends. The best drying results Fully load the dishwasher. Angle dishes with hollows, such as cups, so that the rinse water will run off. Top up with rinse aid or increase the rinse aid dosage setting. Unloading the dishwasher Leave the dishes to cool in the dishwasher before unloading them. Unload the lower basket first to avoid any water drops from the upper basket falling onto the dishes in the lower basket.
- Page 16: Page 16
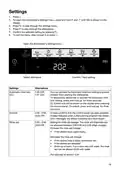
- Page 17: Press and hold to open the dishwasher's settings menu until SEt is shown on the display. Press to step through the settings menu and alternatives. Confirm the selected setting by pressing the appropriate button. To exit the menu, step through it or press the exit button. You can activate the automatic child lock setting to prevent children from starting the dishwasher. To temporarily deactivate or activate the automatic child lock, press and hold for three seconds. A beep confirms that the control panel has been pressed and indicates when a dishwashing program has ended. Error messages are indicated by a loud buzzer. The rinse aid dispenser can be adjusted between 3:00 (Off) and 3:05 (High dosage). Increase the rinse aid dosage if dishes have water marks or decrease it if there is a sticky film or streaks.
- Page 18: Adjusting the water softener is important for the correct setting based on water hardness. For water hardness above 5 °dH, fill with salt. For hardness below 6 °dH, select 4:00 to deactivate the water softener. The factory pre-selected setting for water hardness is 4:04. Activate the setting for all-in-one detergent to reduce rinse aid dosage. The factory pre-selected setting for all-in-one detergent is 5:00. Auto Dry feature opens the dishwasher door automatically to improve drying results. Auto Dry is pre-selected and cannot be deactivated for the Eco 55° program. Error messages may be required when contacting service. Restoring factory defaults will reset all settings.
- Page 19: Care and cleaning Top up with rinse aid When the rinse aid needs topping up, the symbol lights on the display. Open the rinse aid compartment lid. Carefully top up with rinse aid to the level marked MAX. Wipe up any splashes of rinse aid around the compartment. Close the lid firmly. Top up with salt When the salt needs topping up, the symbol lights on the display. Add enough salt to fill the salt compartment (max. 750 gram). In order to avoid rust stains, a dishwashing program must be started immediately after adding salt. Never pour dishwasher detergent into the salt compartment.
- Page 20: Clean the filter. The filter traps larger food particles, which cannot get past the drainage pump. Empty the filter when necessary. It should be cleaned at regular intervals depending on how often the dishwasher is used. Turn the locking ring anticlockwise and lift the filter straight up. Dishwashing results may be affected if the filter is fitted incorrectly. The dishwasher must not be used without the filter in place. Check that the yellow drainage pump stop is in place. Cleaning the spray arms is important as holes and bearings can sometimes become blocked. To facilitate cleaning, you can remove the spray arms.
- Page 21: Lower spray arm Pull the lower spray arm straight up to release it. Clean the outside of the dishwasher Open the door. Clean the sides of the door and the door seal regularly with a slightly damp cloth. Control panel Keep the control panel clean. If necessary, wipe it with a dry or slightly damp cloth. Dishwasher tub The dishwasher tub is made of stainless steel and is kept clean through normal use. Remove blockages If the dishwasher still contains water after the program has finished, something may be blocking the drainage pump. Unblocking the drainage pump Turn off the machine and remove the plug from the wall socket. Inspect the drainage pump Remove the yellow drainage pump stop on the right in the bottom drain. Turn the pump wheel Carefully remove any sharp items, such as glass. Refit the drainage pump stop Refit the filter after clearing blockages.
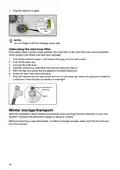
- Page 22: Plug the machine in again. Do not forget to refit the drainage pump stop. If the water supply contains small particles, the outer filter on the inlet hose may become blocked, resulting in the water inlet fault error message. Turn off the machine and remove the plug from the wall socket. Turn off the water tap. Unscrew the inlet hose. Carefully remove the outer filter from the inlet hose and clean it. Store the dishwasher above freezing temperature and avoid long transport distances in very cold weather. Transport the dishwasher upright or laying on its back. Before transporting a used dishwasher, water must first be removed from the machine.
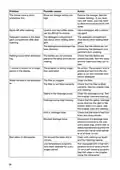
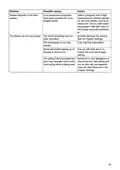
- Page 23: Troubleshooting Error messages F10: Overfilling water - Unblocking the drainage pump. If the problem persists, contact your nearest service centre. F11: Water outlet fault - See Water remains in the dishwasher under Problem. If the problem persists, contact your nearest service centre. F12: Water inlet fault - Check that the water tap is on and that the outer filter on the inlet hose is not blocked. If the problem persists, contact your nearest service centre. F40: Inlet valve leakage - Turn off the water tap and contact your nearest service centre. F41: Heater fault 1 - Turn off the water tap, remove the plug from the wall socket, and contact your nearest service centre. F54: Overfilling water - Turn off the water tap and contact your nearest service centre. Do not remove the plug from the wall socket until the water tap has been turned off. F67: Water inlet fault - Check that the water tap is on and that the outer filter on the inlet hose is not blocked. If the problem persists, contact your nearest service centre. Press any button to clear the error message. Problem Possible causes The control panel does not react - Wait a moment then try again. The door is open - The control panel only reacts to use when the door is closed. Child lock or Automatic child lock is activated - See the chapter on safety instructions. Dirt on the control panel - Clean with a dry or slightly damp cloth. The control panel requires calibration - Turn off the water tap, remove the plug from the wall socket, and wait for 60 seconds before plugging it back in. Cannot close door - Check that the baskets are correctly positioned and that dishes are not blocking them.
- Page 24: Problem: The door lock does not click into place and lock. Possible causes: The door is not properly closed. Action: Press and hold until the display starts counting down. Problem: The dishwasher does not start. Possible causes: The door lock has not clicked into place and locked. Action: Check the door lock and press to start. Problem: The dishes are not clean. Possible causes: The spray arms do not rotate. Action: Check that the dishes are not blocking the spray arms. Problem: Unsuitable dishwashing program. Action: Select a program with a high temperature to dissolve grease on very dirty dishes. Problem: Incorrect detergent dosage. Action: Dose according to water hardness for optimal results. Problem: Old detergent. Action: Avoid large packages as detergent is a perishable product.
- Page 25: Problem: Dishes loaded incorrectly. Action: Do not cover porcelain with large bowls or the like. Avoid placing very tall glasses in the corners of the baskets. Problem: Glasses and cups have toppled over during the program. Action: Place dishes to sit steady. Problem: The filter is clogged. Action: Clean the filter. Problem: The filter is not fitted correctly. Action: Check that the filter is fitted correctly. Problem: Drainage pump stop missing. Action: Check that the yellow drainage pump stop is in place. Problem: Spots on stainless steel or silver. Action: Rinse off certain foodstuffs if not starting the dishwasher immediately. Problem: Spots or films on the dishes. Action: See the chapter on settings for incorrect rinse aid dosage. Problem: Salt compartment empty. Action: Top up with salt. Problem: Incorrect water softener setting. Action: See water hardness in the chapter on settings. Problem: The water softener is leaking salt. Action: Check that the salt compartment lid is properly tightened.
- Page 26: Problem: The dishes have a sticky white/blue film. Possible cause: Rinse aid dosage setting too high. Action: Reduce the dosage. Problem: Spots left after washing. Possible cause: Lipstick and tea/coffee stains can be difficult to remove. Action: Use a detergent with a bleaching agent. Problem: Detergent residue in the detergent compartment after dishwashing. Possible cause: The detergent compartment was damp when adding detergent. Action: The detergent compartment must be dry when adding detergent. Problem: Rattling sound when dishwashing. Possible cause: The dishes are not correctly placed or the spray arms are not rotating. Action: Check that the dishes are placed securely and spin the spray arms. Problem: The program is taking longer than estimated. Action: No action needed; the program time is stored for future runs. Problem: Water remains in the dishwasher. Possible cause: The filter is clogged. Action: Clean the filter. Problem: The filter is not fitted correctly. Action: Check that the filter is fitted correctly. Problem: Debris in the drainage pump. Action: Clean the drainage pump. Problem: Kink in drainage hose. Action: Check that the hose is free from kinks and sharp bends. Problem: Bad odour in dishwasher. Possible cause: Dirt around the seals and in corners. Action: Clean with washing-up brush and low foaming cleaner.
- Page 27: Problem: Grease deposits in the dishwasher. Possible causes: Low temperature programs have been selected for a prolonged period. Action: Select a program with a high temperature to dissolve grease on very dirty dishes, such as Intensive 70°. The dishes are not dry enough. Possible causes: The Auto Dry setting has not been activated. Action: Activate the Auto Dry setting. Possible causes: The dishwasher is not fully loaded. Action: Fully load the dishwasher. Possible causes: Rinse aid needs topping up or dosage is set too low. Action: Top up with rinse aid or increase the rinse aid dosage setting. Possible causes: The setting TAB is activated and all-in-one detergent with insufficient drying effect is being used. Action: Deactivate the TAB setting and top up with salt and separate rinse aid.
- Page 28: Installation Nominal dimensions. Actual measurements may vary. Safety instructions Connections to electricity, water and drainage must be performed by a qualified professional. Always follow applicable regulations for water, drainage and electricity. Take care during installation! Wear protective gloves! There must always be two people! Place a drip tray on the floor beneath the dishwasher to prevent damage from any water leaks. Before screwing the dishwasher into place, test the dishwasher by running the 1h 65° program with the Speed wash option. WARNING! Turn off the water supply when installing the dishwasher! The plug must be disconnected or power to the socket turned off while the work is carried out. Do not forget to remove the transport protection for the door when unpacking the dishwasher. The dishwasher can be installed under a worktop or freestanding. Make sure the area on which the dishwasher is to be installed is firm.
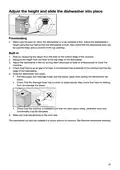
- Page 29: Adjust the height and slide the dishwasher into place. Make sure the area on which the dishwasher is to be installed is firm. Adjust the dishwasher's height using the four feet so that the dishwasher is level. Check that the dishwasher door can be opened freely and is centred in the tub opening. Start by measuring the height from the floor to the bottom edge of the worktop. Check that there is an air gap of at least 3 mm between the underside of the worktop and the top edge of the dishwasher. Pull the supply and drainage hoses and the power cable when sliding the dishwasher into place. Check that the drainage hose has no kinks or sharp bends. Make any final adjustments to the front feet. The dishwasher can also be installed in a recess without its worktop.
- Page 30: Drainage connection The drainage hose may be extended by a maximum of 3 m (the total length of the drainage hose must not exceed 4.5 m). No part of the drainage hose may be more than 950 mm above the bottom of the dishwasher. The hose must always discharge at least 350 mm above the bottom of the machine. Attach the drainage hose with a hose clamp. Ensure that the drainage hose has no kinks. When the drainage hose is routed to a connection nipple on the sink unit's water trap, the hose must be attached at the same height as the underside of the worktop. The water trap must be ventilated. Use only the inlet hose supplied with the dishwasher. The supply pipe must be fitted with a water tap (stopcock). Check that all connections are watertight.
- Page 31: Connection to hot water supply Connect the dishwasher to the hot water supply (max. 70 °C) if the building is heated using an energy-efficient means. Choosing a hot water connection reduces the dishwasher's energy consumption. Do not exceed the permitted water supply temperature. Certain materials used in some cookware cannot withstand high heat. Electrical connection Information about the electrical connection can be found on the serial number plate. This specification must match the electricity supply. The dishwasher must be connected to an earthed socket. The electric wall socket must be placed outside of the installation area to be easily accessible after installing the dishwasher. Do not use an extension cord! Fit the sound insulation (only certain models) Remove dishwasher worktop The dishwasher can be installed in a recess without its worktop. If the dishwasher's worktop is removed, it must be installed under a separate worktop.
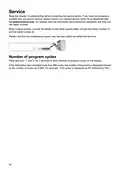
- Page 32: Read the chapter Troubleshooting before contacting the service centre. If you have encountered a problem that you cannot resolve, please contact your nearest service centre for professional help. Our website also has information about spare part availability and what you can repair yourself. When making contact, provide the details on the serial number plate. Please note that non-professional repairs may risk user safety and affect the warranty. Press and hold buttons for 3 seconds to show the number of program cycles on the display. If the dishwasher has completed more than 999 cycles, the number of thousands is displayed followed by the number of cycles up to 999. For example: 1234 cycles is displayed as 001 followed by 234.
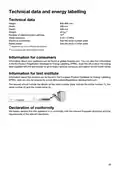
- Page 33: Technical data and energy labelling Height: 846-896 mm Width: 599 mm Depth: 598 mm Weight: 40 kg Number of standard place settings: 16 Water pressure: 0.03-1.0 MPa Electrical connection: See the serial number plate Rated power: See the serial number plate Information for consumers Information about your appliance can be found at global.hisense.com. Declaration of conformity We hereby declare that this appliance is in conformity with the relevant European directives and the requirements of the relevant standards.
- Page 34: We reserve the right to make changes.

Haier HDW13F0W1 Hygiene Dishwasher

BOSCH SMV6ZCX10E-39 Slim Fully Integrated Dishwasher

BOSCH SMS4EMI01E Dishwasher

HOMCOM 800-190V70 Tabletop Dishwasher

BOSCH SGV4HAX40G Dishwasher

BOSCH SMS4EVI04E Dishwasher

eta 239490001B Dishwasher

inDeSIT DSIO3M24CS Dishwasher

BOSCH SMH8ZCX01E 60 cm Dishwasher

comfee CDC22P Dishwasher