
Home > LG Electronics > LG Electronics LDPS6762S 23.75 in. PrintProof Smart Dishwasher
LG Electronics LDPS6762S 23.75 in. PrintProof Smart Dishwasher


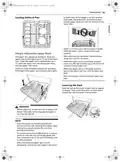


us_main.book.book Page 22 Tuesday, July 5, 2022 1:32 PM
22 OPERATION
OPERATION
Before Using
WARNING
• To reduce the risk of fire, electric shock, or injury to persons, read the SAFETY INSTRUCTIONS before
operating this appliance.
NOTE
• Connect to the hot water supply only. The water supply temperature should be a minimum of 120 °F (49
°C) for better washing performance and shorter cycle time.
• Follow the instructions for loading the dishwasher to ensure effective cleaning.
• Remove insoluble items such as bones, toothpicks, and pieces of paper while loading the dishwasher.
5
6
Select the cycle and options.
Quick Start
• Select the cycle and options that best fit the
load by referring to the Cycle Guide. The
display will show the estimated time for the
cycle and options selected.
1
Load the dishes.
• Pull each rack out and load the dishes as
described in this manual.
• Only load items that are dishwasher-safe.
Operate the dishwasher.
• Scrape the dishes free of excess food,
bones, and any other hard, non-soluble
residue. Remove solid, burned-on scraps
from dishes prior to loading in the
dishwasher.
• Method 1
- Press the Start button and then close the
door in less than four seconds to operate
the dishwasher. If the door is not closed
within four seconds, the white LED with
time flashes, an audible tone is heard, and
the cycle does not start.
• Place items with deep dish bottoms at an
angle to help water run off and speed the
drying process.
• Do not load items that are not heat-
resistant or have decorative metal trim.
• Method 2
- Close the door first and then press the
Start button to operate the dishwasher.
2
Add the detergent.
NOTE
• Using the guidelines in this manual, fill the
detergent cup with the recommended
amount of detergent and close the lid. If a
prewash is desired, the recess on top of the
lid should also be filled with detergent.
• If the door is opened during the cycle, the
dishwasher will stop. To resume the cycle, see
methods 1 and 2 above.
• If the door is opened during the cycle and is not
closed within four seconds after selecting the
Start button, or if the door is closed without
pressing the Start button, the white LED with
time flashes, an audible tone is heard, and the
cycle does not start.
3
4
Turn on the dishwasher.
• To turn on the display panel, press the
Power button.
Check the rinse aid.
7
End of cycle.
• The Rinse Aid Refill LED will flash if the
level of rinse aid in the dishwasher is low.
Add rinse aid if the level is low to maintain
the effectiveness of the dry cycle.
• When the cycle is complete, a chime will
sound and the display will show ENd until
the door is opened or Power is pressed. To


| General | Details |
|---|---|
| Name | LG Electronics LDPS6762S 23.75 in. PrintProof Smart Dishwasher |
| Make | LG Electronics |
| Language | English |
| Filetype | PDF (Download) |
| File size | 2.29 MB |
 (1 votes, average: 5.00 out of 5)
 Loading...

LG Electronics LDPH7972D Dishwasher

LG Electronics LDTH7972S 23.75 in. in PrintProof Smart Dishwasher
LG Electronics MFL30149780 Dishwasher

LG Electronics LDPS6762S Smart Dishwasher

LG Electronics LDPS6762S 23.75 in. PrintProof Smart Dishwasher Overview
Summary of Contents
- Page 1: Operation Before using, read the safety instructions to reduce the risk of fire, electric shock, or injury. Connect to the hot water supply only, with a minimum temperature of 120 °F for better performance. Follow loading instructions to ensure effective cleaning and remove insoluble items before loading. Select the cycle and options that best fit the load by referring to the cycle guide. Load the dishes by pulling each rack out and only loading dishwasher-safe items. Scrape dishes free of excess food and remove solid, burned-on scraps before loading. Press the Start button and close the door within four seconds to operate the dishwasher. Fill the detergent cup with the recommended amount of detergent and close the lid. To turn on the display panel, press the Power button. The Rinse Aid Refill LED will flash if the level of rinse aid is low; add rinse aid to maintain effectiveness.
- Page 2: Operation It is normal for the dishwasher to chime continuously if you open it during operation or just after the cycle ends. The dishwasher is letting you know that the interior temperatures of the unit are hot and to use caution when reaching inside. Once the unit has cooled down, the chiming will stop. Do not open the door during operation or immediately after it has completed the wash cycle as the escaping steam may cause scalding as the door is opened. Empty the lower rack first and then the upper rack. This will avoid water dripping from the upper rack onto dishes in the lower rack. The dishwasher automatically turns off after four minutes of inactivity if paused or if no cycle is started.
- Page 3: Operation Control panel features Power on/off button Press this button to turn the washer on or off. After the cycle is complete, the power automatically turns off for purposes of safety and economy. If there is a power surge, power outage, or disruption of any kind, power is automatically turned off for safety. When power is connected again, the dishwasher will turn on automatically and resume the cycle. Option setting mode You can set various options by using the option setting mode. Refer to the using option setting mode topic for each function of the option setting mode. Display Rinse aid refill LED illuminates when the rinse aid level is low. The digital display on the control panel shows the estimated cycle time.
- Page 4: Operation Delay Start is selected, the display shows the delay time in hours. Cycle time may vary depending on the soil level of your load. Control Lock feature helps prevent settings from being changed during a cycle. The Sanitized indicator stays lit at the end of the cycle if the dishes were properly sanitized. When the appliance is connected to the internet through a home Wi-Fi network, the LED illuminates. The drain pump activates and the cycle cancels. To operate the machine, either press Start and close the door within four seconds or close the door and press Start. The front time indicator feature shows the remaining cycle time while the cycle is running. Heavy Wash Cycles is for heavily soiled dishes and dishes with hardened on soil. The Auto cycle senses the soil amount and soil toughness and is optimized to achieve the best cleaning.
- Page 5: Operation Options and extra functions refresh and warm dishes that have been unused for a long time. Do not use detergent when using the refresh cycle. The steam option cannot be turned off and improves wash performance. The sanitized indicator stays lit if dishes were properly sanitized. Use a dedicated cycle downloadable via Wi-Fi or NFC with the LG ThinQ smartphone app. The machine clean cycle eliminates residual soils and odors. The express cycle quickly cleans lightly soiled dishes without drying. The rinse cycle is a quick rinse for dishes that will not be washed immediately. The pots & pans cycle cleans heavily soiled cookware without hand scrubbing. The night care cycle quietly washes dishes overnight.
- Page 6: Operation Night Dry Mode This option runs the ventilation fan periodically to help vent the steam from the tub. The Night Dry option is selected by default for all cycles for which it is available, except the Normal cycle. High Temp. Raises the main wash temperature to improve cleaning. Delay Start This feature delays the start of a selected cycle. The delay time can be set from 1 to 12 hours, in one-hour increments. Extra Dry Select the Extra Dry option for better drying performance. Remote Start Use a smartphone to control your appliance remotely. Cycle/Option Guide The cycle guide below shows the available options for each cycle.
- Page 7: Operation Actual water consumption will vary depending on soil level and hardness of water. The actual running time and cycle time displayed may change depending on options chosen, soil level, water temperature, and hardness of water. Options are not available for Download Cycle. The Machine Clean cycle is the default Download Cycle. You can set various options by using the Option Setting Mode. The default ON setting keeps the green light on until the door is opened. You can turn on/off the volume of the button sound or notification sound. The error alert sound cannot be turned off. The default ON setting selects options automatically for better washing and drying performance. For effective washing performance, always follow these instructions. Make sure that all items do not touch each other.
- Page 8: Operation Loading 12 place settings Non-dishwasher safe items may be damaged by high water temperature and dishwasher detergents. Do not wash copper or anodized aluminum, hand-painted silver or gold leaf china, wood or bone handled utensils, iron or non-rustproof utensils, plastic items not dishwasher safe, sterling silver or gold-plated flatware, or fragile items like crystal glasses. Do not place pots or pans with plastic handles in the appliance. For best cleaning results, use the top separators in the basket when loading silverware to prevent nesting. Load sharp items, such as knives, pointing down. When unloading the dishwasher, start with the silverware basket to prevent water droplets from falling on your silverware. The silverware basket has separators to avoid scratching and tarnishing of delicate silverware. Be careful when loading and unloading sharp items. Load sharp knives with the handles up to reduce the risk of personal injury.
- Page 9: Operation Loading 12 place settings Lower rack loading tips: - Plates should be positioned upright and facing the center of the rack, and pots, pans, and large dishes must be turned upside down. - Load dinner plates, dishes, soup bowls, etc. between the tines. - Load cookie sheets, cake pans, and other large items at the sides or back of the rack. - Make sure that pot handles and other large items do not stop the rotation of the spray arms. - The lower rack should not be used for small items such as cups, wine glasses, or small plates. - Make sure that large items do not interfere with the rotation of the spray arms and do not prevent the detergent dispenser from opening. Loading pots and bowls Folding down the lower tines
- Page 10: Operation Loading the upper rack Loading dishes into the upper rack Silverware basket ships installed at the back of the bottom rack. For best performance, install it along the right side. Upper rack loading tips: Place cups and glasses in the rows between the rack tines to avoid breakage and water spots. To avoid chipping, do not let stemware touch other items. Place items so that the open end faces down for cleaning and drying. Do not stack items on top of each other. Use the upper rack for small or delicate items such as small plates, cups, saucers, glasses, and dishwasher-safe plastic items. Cups, glasses, and bowls must be positioned upside down. Make sure items do not interfere with the rotation of the spray arms above and below the upper rack.
- Page 11: Operation It is necessary to remove the cutlery rack if one is present. Locate the assembly slot on the cup rack, align the slot with the bar, and firmly pop the rack off the support bar on that side. The rack on the left pops free at the back. The rack on the right pops free at the front. This feature is only available on some models. Extra cups or cooking utensils can be laid on the fold down cup racks, which also provide support for long-stemmed glasses. The cup racks can be folded up out of the way for tall glasses. Follow the instructions in reverse to replace the cup rack. The left and right cup racks are interchangeable and can be removed. Slide the cup rack down into its closed position. Fold tines down to fit larger dishes; pull tines back up to fit smaller dishes.
- Page 12: Operation Loading dishes & pots Height adjustable upper rack The upper rack adjusts up and down. Raise the upper rack to allow items up to 14 tall in the lower rack. Lower the upper rack to allow dishes up to 12 tall in the upper rack. There are three available positions for adjusting the height of the upper rack. Before adjusting, ensure the rack is empty of all dishes. Raise the upper rack without pushing the buttons on each side. To set the rack to the middle position, it may be easier to lower the rack all the way down.
- Page 13: Operation Raising the rack involves lifting the rack at the center of each side until it locks into place in the upper position. To replace the rack, place the back rack supports behind the rear hooks and pull the rack forward to snap the supports into the hooks. Removing the snap-in gliding upper rack is only available on some models. Loading the cutlery rack is best suited for flatware, with separators helping to keep flatware separated to avoid damage. The snap-in upper rack should only be removed for servicing, and gloves should be worn to avoid personal injury. For best cleaning performance, place flatware in the silverware baskets. Heavily soiled utensils or items with baked-on foods should be placed in the middle rack or spoon basket for best performance. To remove the front rack supports from the rails, push the front hooks open with a flat-blade screwdriver while pulling the front of the rack up. To remove the back rack supports from the rails, hold a side rail with one hand, lift the front of the rack, and firmly push the rack.
- Page 14: Operation Loading 10 place settings Removing the cutlery rack can create more space on the upper rack for larger items. Always remove the cutlery from the rack before removing the rack. Be careful when loading and unloading items with sharp edges. Do not place bowls in the center of the cutlery rack to avoid leakage. Folding down the cutlery tines allows for fitting flatware. The height adjustable tray can accommodate utensils or cutlery of different sizes. Remove dishes before adjusting the tray. The amount of detergent needed depends on the cycle, load size, and soil level of dishes.
- Page 15: Operation Put detergent into the detergent compartment before starting any cycle, except the Rinse cycle. Using liquid rinse aid improves drying performance by allowing water to drain off of dishes after the final rinse. Do not use detergent tablets for shorter wash cycles as they may not dissolve completely. Dishwasher detergent and rinse aid contain chemical components and must be kept out of the reach of children. Using a wash booster helps remove spots, residue, and the white film caused by hard water. Use only detergent intended for dishwashers to avoid excessive suds and potential leaks. Add dishwashing detergent to the main wash compartment until the level is between the lines marked 15 and 25. After completion of the wash program, check whether the detergent was completely washed out. Some dishwasher detergent tablets may become stuck in the dispenser due to their excessive size. If dishwasher detergent tablets are used without liquid rinse aid, select the Extra Dry option for better drying performance.
- Page 16: Operation Adding rinse aid to the dispenser is necessary when the rinse aid refill LED appears in the display. The use of rinse aid is recommended to prevent water spots on dishes and to enhance drying performance. Close the lid to lock the dispenser; rinse aid is dispensed automatically during the final rinse cycle. Only use liquid rinse aid in the dishwasher and do not overfill the rinse aid dispenser. Wipe off any spilled rinse aid around the dispenser. The rinse aid dispenser has five adjustment levels, factory set at level 2. Adjust the setting higher if you have hard water to avoid calcium buildup on dishes. Setting the rinse aid control too low can lead to spotting and streaking on dishes. Setting the control too high can cause foaming, resulting in poor wash performance. Ensure the appliance is off before entering the option setting mode.
- Page 17: Operation Press Extra Dry to change the rinse aid dispenser setting. Each press of the button changes the setting one step from L0 to L4. Once the desired rinse aid dispenser setting is selected, press Start to save. How often the dispenser needs to be refilled depends on how often dishes are washed and the rinse aid setting used. The Rinse Aid Refill LED flashes when more rinse aid is needed, unless the rinse aid dispenser setting is set to L0.
- Page 18: SMART FUNCTIONS LG ThinQ application allows you to communicate with the appliance using a smartphone. If you change your wireless router, Internet service provider, or password, delete the connected appliance from the LG ThinQ application and connect it again. You can download new and specialized cycles that are not included in the standard cycles on the appliance. Check the distance between the appliance and the wireless router (Wi-Fi network). Only one downloaded cycle can be stored on the appliance at a time. Smart Diagnosis provides useful information for diagnosing and solving issues with the appliance. Set the Rinse Aid Dispenser Level, Machine Clean Reminder, Signal Level, and Clean Indicator Light. To verify the Wi-Fi connection, check that the Wi-Fi LED on the control panel is lit. The appliance supports 2.4 GHz Wi-Fi networks only. You can use the energy monitoring function to check the estimated power usage.
- Page 19: Smart functions Press the Remote Start button and close the dishwasher door to enable the Remote Start function. If the appliance is having trouble connecting to the Wi-Fi network, it may be too far from the router. Start a cycle from the LG ThinQ application on your smartphone. Once the Remote Start mode is enabled, you can start a cycle from the LG ThinQ application, but the cycle and option keys on the appliance are deactivated. The door must be closed in order to activate the Remote Start mode. If the firewall on your wireless router is enabled, disable the firewall or add an exception to it. Search for the LG ThinQ application from the Google Play Store or Apple App Store on a smartphone. This equipment has been tested and found to comply with the limits for a Class B digital device. Use a smartphone to control the appliance remotely or check to see how much time is left in the cycle. Make sure that the Wi-Fi is connected.
- Page 20: SMART FUNCTIONS Increase the separation between the equipment and the receiver. This equipment should be installed and operated with a minimum distance of 20 cm (7.8 inches) between the antenna and your body. The manufacturer is not responsible for any radio or TV interference caused by unauthorized modifications to this equipment. This device complies with part 15 of the FCC Rules. Operation is subject to conditions that the device may not cause harmful interference and must accept any interference received. This equipment complies with FCC radiation exposure limits set forth for an uncontrolled environment. Smart Diagnosis function helps diagnose and solve problems with your appliance. This device contains licence-exempt transmitter(s)/receiver(s) that comply with Innovation, Science and Economic Development Canada’s licence-exempt RSS(s). For reasons not attributable to LGE’s negligence, the service may not operate due to external factors. Using LG ThinQ, the appliance can transmit troubleshooting data to a smartphone.
- Page 21: SMART FUNCTIONS Launch the LG ThinQ application and select the Smart Diagnosis feature in the menu. Using audible diagnosis to diagnose issues. Follow the instructions below to use the audible diagnosis method. Press the POWER button to turn on the appliance. Do not press any other buttons. Place the mouthpiece of your smartphone close to the logo. Press and hold the Download Cycle button for 3 seconds or longer while holding the smartphone mouthpiece to the logo until the data transfer is complete. Keep the smartphone in place until the data transfer has finished. After the data transfer is complete, the diagnosis will be displayed in the application. For best results, do not move the smartphone while the tones are being transmitted.
- Page 22: MAINTENANCE To maintain performance and prevent trouble, it is important to check the outside and inside of the dishwasher, including filters and spray arms, at regular intervals. WARNING When cleaning the outside and inside of the dishwasher, do not use benzene or thinner. Otherwise, it may cause fire or explosion. To prevent injury during care and maintenance or cleaning, wear gloves and/or protective clothing. Cleaning the Exterior Do not use scrub pads or abrasive cleaners on the exterior of the dishwasher. Remove all dishes from the appliance. Add 3 tbsp. (40 g) of citric acid to the detergent dispenser or follow the manufacturer’s instructions if using a dishwasher cleaning agent. Run the Machine Clean cycle once a month, or more often if needed, to remove detergent buildup and other residue. If you have not used the dishwasher for a long time, refresh the inside by running the Machine Clean cycle without detergent. Cleaning the Interior Clean the interior of the dishwasher periodically with a soft, damp cloth or sponge to remove food and dirt particles. Check the drain air gap or in-sink disposal if the dishwasher is not draining well. To remove white spots and odor from inside the dishwasher, run an empty cycle, without detergent, with one cup of white vinegar in a dishwasher safe glass or bowl placed on the upper rack.
- Page 23: Maintenance The warranty provided with the dishwasher does not cover service costs directly associated with the cleaning or repair of the external drain air gap and disposal. For best wash performance, clean the filter after each load. If food debris remains in the filter, it may cause an odor. In areas with hard water, clean the filter at least once a month with a soft brush. Clean the filters using non-abrasive materials and warm running water. Cleaning the air gap involves turning off the dishwasher, removing the lower rack, and checking the sump opening for foreign materials. Clean out any debris with a toothpick or brush. Reassemble the filters before reinstalling them and replace the plastic cap and air gap cover. Be cautious of sharp edges when handling the stainless steel filter. Remove food residue caught in filters to prevent the buildup of odor-causing bacteria and possible drainage problems.
- Page 24: Maintenance Cleaning the spray arm is essential for proper water spray and effective dish cleaning. It is recommended that the spray arms be cleaned once every two weeks. Ensure that the water jet holes are not blocked by food particles. Make sure the filter is assembled correctly before starting a cycle. Remove any food residue blocking the spray arm holes with a pin or sharp tool. To avoid breaking the rolling spray arm sections, do not pull or manually rotate them. Recommended filter cleaning schedule varies based on the number of loads per week. Cleaning the upper spray arm should be done once a year. Remove the upper spray arm by turning the nut on the bottom counter-clockwise. Food particles can be removed by rinsing or shaking the spray arm.
- Page 25: Maintenance If any food residue blocks the spray arm holes, remove it with a pin or any sharp tool. After removing the food residue, clean the spray arms under running water. After cleaning the upper spray arm, press it up into place. Turn the nut 1/8 turn clockwise to make sure that the nut locks back into place. After assembly, make sure that the spray arms rotate freely. Seasonal maintenance and storage If you will be absent for an extended period of time during warmer months, close the water valve and disconnect the power supply line, or turn off the circuit breaker. Clean the filter, tub and dispenser to prevent odor. If you will be absent for an extended period of time during colder months and there is a possibility of freezing temperatures, winterize the water supply lines and the dishwasher itself. Winterization must be performed by qualified service personnel.

BOSCH SMH6TCX01E-38 Dishwasher

Whirlpool DU810SWP Dishwasher

Fisher and Paykel DW60FC2X2 Dishwasher

Bauknecht BFP 5O41 PLT X Dishwasher

FISHER AND PAYKEL DW60CHPX1 Dishwasher

Miele PFD 104 SCVi XXL XXL Dishwasher

HOBART S.48820 Commercial Dishwasher

Whirlpool WDFS3R4NBSAU 14 Place Setting Dishwasher

BOSCH SGV4HAX40G Dishwasher

SIEMENS 9001902343 Dishwasher