
smeg Dishwasher









EN
CONTENTS
Contents
1
INTRODUCTION .................................................................................
SAFETY INFORMATION ...................................................................
INSTALLATION MATERIAL..................................................................
KIT SUPPLIED DISHWASHER............................................................
DIMENSIONS OF DISHWASHER........................................................
INSTALLATION AND HOOK-UP ..........................................................
LEVELING...........................................................................................
CONNECTIONS..................................................................................
3
4
2
7
3
8
3.1
4
8
9
5
10
11
12
12
14
19
20
20
22
24
28
5.1
5.2
5.2.1 CONNECTION TO THE WATER SUPPLY...........................................
5.2.1.1 CONNECTION TO THE WATER TAP.................................................
5.2.1.2 CONNECTION TO THE DRAIN HOSE...............................................
5.2.2 ELECTRICAL CONNECTIONS AND WARNINGS................................
5.3
COMMISSIONING...............................................................................
5.3.1 INSTALLATION PROCEDURE.............................................................
5.3.2 COMPLETION OF INSTALLATION.....................................................
5.4
5.6
APPLY THE GASKETS..........................................................................
TESTING..............................................................................................
1

| General | Details |
|---|---|
| Name | smeg Dishwasher |
| Make | Smeg |
| Language | English |
| Filetype | PDF (Download) |
| File size | 0.61 MB |
 (1 votes, average: 5.00 out of 5)
 Loading...

smeg DWAU6224N4 Matte Black Underbench Dishwasher

smeg DWAFI6224-4 Dishwasher

smeg DWA6224X4 Dishwasher

smeg STU8633 Dishwasher

smeg DWAFI6214 Dishwasher

smeg LVS344PM 60 cm Free Standing Dishwasher

smeg LSPU8653X 24″ Fingerprint Resistant Dishwasher

Smeg DI362DQ Dishwasher

smeg DI323BL Dishwasher

smeg DWA6315X1 Dishwasher

smeg Dishwasher Overview
Summary of Contents
- Page 1: Introduction Safety information Installation material Kit supplied dishwasher Dimensions of dishwasher Installation and hook-up Leveling Connections Commissioning Testing
- Page 2: Thank you for choosing one of our products. To install this dishwasher correctly and safely, please read this manual carefully. The manual is divided into sections giving you a step-by-step guide to installation of the appliance. This user-friendly manual will provide answers to all your questions about installation of the dishwasher. This manual comprises the following sections: Warnings: a list of warnings concerning safety during installation. Installation instructions: for the qualified technician who must carry out the installation, hook-up and testing of the appliance. This symbol highlights information and warnings which, if not observed, may compromise personal safety or damage the appliance. This symbol highlights information and warnings of an electrical nature which, if not observed, may compromise personal safety or damage the appliance. This symbol highlights general information and warnings.
- Page 3: Warnings Safety information This manual forms an integral part of the appliance and must always be kept intact together with the dishwasher. Before using the appliance, carefully read all the instructions contained in this manual. Installation must be performed by a qualified technician, in compliance with the regulations in force. This appliance is intended for domestic use and similar applications such as staff kitchens of shops, offices, and other workplaces. The appliance is designed for washing and drying of dishes; any other use shall be considered improper. The manufacturer declines all responsibility for uses other than those described. Installation, repairs, and servicing must be performed by qualified and authorized technicians. The name plate featuring the technical data, serial number, and markings is visibly positioned on the inner edge of the door. The nameplate on the inner edge of the door must never be removed. This appliance is not suitable for use on boats, caravans, or the like.
- Page 4: Warnings Check that the voltage, frequency, and protection of the domestic mains power supply match the ratings on the name plate of the appliance. Two people wearing safety gloves are required to lift the dishwasher. Do not leave discarded packaging materials unsupervised within the home. Separate the various packaging materials and take them to the nearest sorted waste collection centre. Keep children, physically and/or mentally impaired adults, and animals away from packaging waste; danger of suffocation. Before proceeding with installation, disconnect the mains power supply from the work area. During installation, take care not to injure yourself on the sharp edges of the appliance; wear safety gloves. The appliance must be provided with a ground connection in accordance with the electrical safety regulations in force. The manufacturer declines all responsibility for damage to persons or property resulting from the failure to ground the appliance or from a defective ground connection. Do not use appliances which have been damaged during transit.
- Page 5: Warnings Do not operate the dishwasher unless all the outer panels have been positioned correctly. Immediately after installation, briefly test the appliance following the instructions indicated below. If the dishwasher fails to operate correctly, disconnect it from the electrical power supply and call the nearest technical service centre. Do not attempt to repair the appliance. Do not use extension cords, adaptors or shunt connections in order to avoid the possibility of overheating or burning, with consequent fire hazard. The manufacturer declines all responsibility for damage to persons, animals or property resulting from failure to observe the above precautions. Contact the technical assistance service if in doubt about the contents of this manual.
- Page 6: Installation instruction To install the dishwasher correctly, the following materials are required: Phillips screwdriver Spirit level Tape measure Compass saw Pencil File 13mm open-ended wrench Plumbing pliers Drill Safety gloves
- Page 7: Installation instruction The kit supplied with the dishwasher comprises adhesive steam guard or steel steam guard, screws for fixing the dishwasher to adjacent walls, and screw caps. The adhesive protection is suitable for kitchens with worktops that do not allow the steel protection to be fixed with screws. Dimension of dishwasher includes height, width, and depth measurements for different types.
- Page 8: Installation instruction During installation, take care not to injure yourself on the sharp edges of the appliance. Remove the polystyrene rack blocks. Position the appliance in the chosen installation position. If the dishwasher is installed next to a heat source, separate it with a heat insulating panel to prevent overheating and malfunctions. To assure stability, only install built-in appliances under continuous worktops, securing them to the adjacent kitchen units or worktop with screws. Building-in a dishwasher underneath a ceramic hob is absolutely forbidden. A dishwasher can be built-in underneath a conventional hob provided there is no break in the kitchen worktop. Make sure the dishwasher has been correctly installed and grounded by a qualified fitter. This safety requirement must be met. In case of doubt, call in a qualified fitter. The manufacturer declines all responsibility for damage to persons or property resulting from the failure to ground the appliance. Before proceeding with installation, disconnect the mains power supply from the work area.
- Page 9: Installation instruction Level the appliance using the adjustable feet. Use an open-ended wrench to rotate the feet until the dishwasher is perfectly level. Some models have one rear foot adjustable with a screw at the bottom front. Use a suitable Phillips screwdriver to turn the screw for leveling. Use a spirit level to check if the appliance is perfectly level. Leveling is vital for assuring correct dishwasher operation. Leave a gap of at least 3 mm (7/64”) between the top of the dishwasher and the worktop.
- Page 10: Installation instruction Install the dishwasher to allow ease of access to the electrical and hydraulic connections. These connections must never be behind the dishwasher. The inlet and drain hoses can be pointed in all directions. Make sure that the hoses are not bent, crushed, or too tight. Tighten the ring nut after pointing the hoses in the required direction. A through hole with a diameter of at least 8 cm is required to pass the hoses and power cord. Make sure there are no rough edges that could damage the power cord or hoses. Do not use extension cords when making the electrical connection. Installing the dishwasher in a narrow space may bend or crush the power cord. Take great care to reduce the possibility of damaging the power cord when installing or removing the appliance.
- Page 11: Installation instruction Connection to the water supply Preventing the risk of clogging or damage: check that the water is clear and free of impurities before connecting to the water supply. The dishwasher must always be connected to the water system with new hoses; old or used hoses must never be reused. Connection to the water tap: connect the inlet hose to a threaded ¾” gas cold water tap, fitting the supplied filter. Firmly secure the hose by tightening the ring nut with your hands and finish by tightening another ¼ turn using plumbing pliers. The dishwasher can be filled with water at a temperature of less than 60°C (140°F). If the appliance is filled with hot water, washing times will be reduced by about 20 minutes, but efficiency will be slightly impaired. Recommended temperature: 49°C (120°F), max. 60°C (140°F). Recommended water pressure: 0.5 - 9 bar (7 -130 PSI). If the pressure is too high, fit a pressure reducer.
- Page 12: Installation instruction Do not cut the inlet hose. If the hose is cut, the dishwasher will not work, water will leak and you may be injured. If the hose is too long, wind it up tidily and place it behind the appliance. The cable harness and electrical components must not come into contact with the hydraulic system and the water inlet and drain hoses. When connecting the dishwasher drain hose to the sink, make sure that the hose is not bent to prevent cracks or breakages that could damage it.
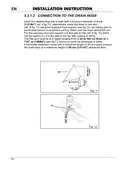
- Page 13: Installation instruction for connecting to the drain hose includes inserting the hose into a drain with a minimum diameter of 4 cm. Alternatively, the hose can be placed on the sink using the supplied hose support. Care should be taken to avoid obstructions or excessive curving of the hose. Ensure the hose cannot fall out by using the hole in the hose support to fix it to the wall or tap. The free end of the hose must lie at a height ranging from 30 to 100 cm and must never be submerged in water. If using horizontal extension hoses with a maximum length of 3m, position the drain hose at a maximum height of 85 cm above the floor.
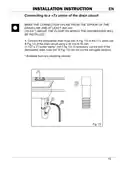
- Page 14: Installation instruction for connecting to a T union of the drain circuit. Make the connection upline from the siphon of the drain line and at least 400 mm (15-3/4) above the floor on which the dishwasher will be installed. Connect the dishwasher drain hose to the T union of the drain circuit using a 38 mm to 50 mm (1-1/2 to 2) screw clamp. If necessary, cut the end of the dishwasher drain hose, but do not cut the corrugated section.
- Page 15: Installation instruction Connecting to a waste disposal unit with an air gap Make the connection upline from the siphon of the drain line and at least 400 mm (15-3/4) above the floor on which the dishwasher will be installed. Remove the cover of the waste disposal unit. Connect the dishwasher drain hose to the air gap using the wide spring clamp; if necessary, cut the end of the dishwasher drain hose (do not cut the corrugated section). If the drain hose has been cut, use a 38 to 50 mm (1-1/2 to 2) screw clamp. To connect the air gap to the waste disposal unit inlet, use a rubber union with spring or screw clamps.
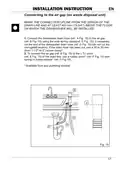
- Page 16: Installation instruction for connecting to the air gap without a waste disposal unit. Make the connection upline from the siphon of the drain line and at least 400 mm above the floor. Connect the dishwasher drain hose to the air gap using a wide spring clamp; if necessary, cut the end of the dishwasher drain hose. If the drain hose has been cut, use a screw clamp sized from 38 to 50 mm. To connect the air gap to the T union of the drain line, use a rubber union with spring or screw clamps. Available components can be sourced from any plumbing stockist.
- Page 17: Installation instruction for connecting to a waste disposal unit without an air gap. Make the connection upline from the siphon of the drain line and at least 400 mm above the floor. Remove the cover of the waste disposal unit. Connect the dishwasher drain hose to the waste disposal unit inlet using the wide spring clamp.
- Page 18: Installation instruction Check that the voltage and the frequency of the mains match the ratings on the nameplate of the appliance. In the event of damage to the supply cord, have it replaced by the manufacturer or an authorized technical service centre. This appliance must be grounded. In case of a malfunction or fault, the ground reduces the risk of electrocution by providing the electrical current with an alternative, less resistant path. Fit the plug into a suitable socket, installed and grounded in compliance with the laws in force in the country of installation. Before making electrical connections, disconnect the mains power supply from the work area. Check that the mains supply in the place of installation complies with the regulations in force in the country of use. Warning: an incorrectly connected ground wire may generate the risk of electrocution. If in doubt as to the correct grounding of the appliance, call in a qualified electrician or the technical assistance service.
- Page 19: Installation instruction Do not change the plug attached to the appliance. Call in a qualified electrician to fit a suitable plug if the plug is not suitable for the socket. The plug at the end of the power cord and the corresponding socket must be of the same type. The plug must be accessible after installation. Never remove the plug by pulling on the wire. If the power cord is damaged, have it replaced by the manufacturer or an authorized service centre. Do not use extension cords, adaptors or shunt connections to avoid the possibility of overheating or burning. In the event of damage to the supply cord, have it replaced by the manufacturer or an authorized technical service centre. Clean the underneath of the worktop lying over the dishwasher door. Apply the steam guard to protect the worktop from steam and condensation.
- Page 20: Installation instruction Put the dishwasher into position, taking care not to twist or crush the power cord or hoses. Two people wearing safety gloves are needed to push the dishwasher into place.
- Page 21: Installation instruction Completion of installation (if necessary) Make sure the dishwasher door, complete with panel, opens comfortably and that the base plate does not prevent it from opening fully. If the base plate prevents the door from opening, mark out the section to remove. Take out the base plate and cut it along the marking using a compass saw.
- Page 22: Installation instruction includes finishing the cut with a file to remove any burrs and imperfections. After that, put back the base plate and check if the dishwasher door opens fully. If the base plate obstructs the door, repeat the necessary operations.
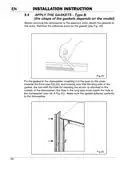
- Page 23: Installation instruction Apply the gaskets - Type A Before securing the dishwasher to the adjacent units, attach the gaskets to the sides. Remove the adhesive band on the gasket. Fix the gasket to the dishwasher, inserting it in the seat on the sides towards the front. Make sure that the long side of the gasket, the one with the hole for inserting the screw, is attached to the outside of the dishwasher. The hole in the long side must match the hole in the dishwasher. Make sure the gasket adheres perfectly to the dishwasher.
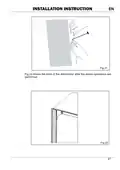
- Page 24: INSTALLATION INSTRUCTION Fig.28 shows the state of the dishwasher after the above operations are performed.
- Page 25: INSTALLATION INSTRUCTION APPLY THE GASKETS - Type B Before securing the dishwasher to the adjacent units, attach the gaskets to the sides. Remove the adhesive band on the gasket. Fix the gasket to the dishwasher, inserting it in the seat on the sides towards the front. Make sure that the long side of the gasket, the one with the hole for inserting the screw, is attached to the outside of the dishwasher. The hole in the long side must match the hole in the dishwasher. Make sure the gasket adheres perfectly to the dishwasher.
- Page 26: INSTALLATION INSTRUCTION Fig.32 shows the state of the dishwasher after the above operations are performed.
- Page 27: Installation instruction includes tightening the supplied screws with a screwdriver to fix the dishwasher to adjacent units. Cover the side holes using the supplied plugs. After installation, test the dishwasher by starting a work cycle. Check for leaks and ensure the appliance does not malfunction.

FISHER and PAYKEL DD24DTX6HI1 Tall Dishwasher

AEG FSK74747P Dishwasher

FISHER PAYKEL DD60D2NB9 Built Under Dishwasher

HAFELE HDW-F605B Free Standing Dishwasher

HOMCOM 800-190V70 Tabletop Dishwasher

FISHER PAYKEL DD60SCTX9 Single Dishwasher

FISHER PAYKEL DD24SCTB9_N Dishwasher

Whirlpool DU1014XTXQ Dishwasher

Westinghouse WSF6608XB Dishwasher

FISHER AND PAYKEL DD60SAX9 Dishwasher