
BOSCH SMS26DW00T Dishwasher


























Dishwasher
SMS26DW00T
[en]
Information for Use


| General | Details |
|---|---|
| Name | BOSCH SMS26DW00T Dishwasher |
| Make | Bosch |
| Language | English |
| Filetype | PDF (Download) |
| File size | 1.63 MB |
 (1 votes, average: 5.00 out of 5)
 Loading...

BOSCH SMV6ZCX49E-39 Dishwasher

BOSCH SMI4HVS33E Dishwasher

BOSCH SRV2HKX39G Dishwasher

BOSCH SGH4HVX32G Dishwasher

BOSCH SGS4HAW40G Dishwasher

BOSCH SMS4ECI26E Dishwasher

BOSCH SMS6EDI02G Free-Standing Dishwasher

BOSCH SMS6EDW02G Free-Standing Dishwasher

BOSCH SMV4HTX27G Dishwasher

BOSCH SMV4HCX48E Dishwasher

BOSCH SMS26DW00T Dishwasher Overview
Summary of Contents
- Page 1: Dishwasher SMS26DW00T Information for use
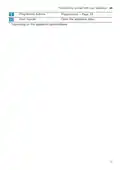
- Page 2: Further information and explanations are available online. Table of contents Safety General information Intended use Restriction on user group Safe installation Safe use Damaged appliance Risk to children Features Before using for the first time Preventing material damage Environmental protection and saving energy Installation and connection Familiarising yourself with your appliance Rinse aid system Detergent Programs Additional functions
- Page 3: Tableware Damage to glass and tableware Arrange tableware Removing tableware Technical specifications Basic operation Switching on the appliance Setting a programme Starting the programme Cleaning and servicing
- Page 4: Safety Observe the following safety instructions. Read this instruction manual carefully. Keep the instruction manual and the product information safe for future reference or for the next owner. Do not connect the appliance if it has been damaged in transit. Only use this appliance for cleaning household tableware. This appliance may be used by children aged 8 or over and by people with reduced abilities, provided they are supervised or instructed on safe use. Do not let children play with the appliance. Cleaning and user maintenance must not be performed by children unless supervised. Keep children under the age of 8 years away from the appliance and power cable. Improper installation may cause injury.
- Page 5: Safety Warning - Risk of electric shock. Incorrect installation is dangerous. Connect and operate the appliance only in accordance with the specifications on the rating plate. Always use the supplied power cable for the new appliance. Connect the appliance to a power supply with alternating current only via a properly installed socket with earthing. Never equip the appliance with an external switching device, e.g. a timer or remote control. When the appliance is installed, the mains plug of the power cord must be freely accessible. It is dangerous to use an extended power cord and non-approved adapters. Do not use extension cables or multiple socket strips. Check that there is a distance of at least 5 cm between the appliance and installation lines.
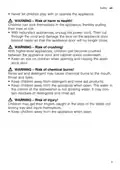
- Page 6: Safety Warning - Risk of injury. Hinges move when opening and closing the appliance door and can cause injury. If built-under or integrable appliances are not in a cavity so that one side is accessible, the hinge area must be covered at the side. Warning - Risk of tipping. Improper installation may cause the appliance to tip up. Only install built-under or integrable appliances under a continuous worktop that is securely connected to adjacent cabinets. Warning - Risk of burns. If the appliance is not installed properly, this may result in burns. With free-standing appliances, ensure that they are installed with the back panel against a wall. Warning - Risk of serious harm to health. Failure to comply with safety instructions and directions for use on packagings of detergent and rinse aid products may cause serious harm to health. Follow the safety instructions and directions for use on the packagings of detergent and rinse aid products. Warning - Risk of explosion. Adding solvents to the interior of the appliance may cause explosions. Never add solvents to the interior of the appliance.
- Page 7: Safety Highly caustic alkaline or highly acidic cleaning agents in conjunction with aluminium parts may cause explosions. Never use highly caustic alkaline or highly acidic cleaning agents with aluminium parts. Leaving the appliance door open may result in injury. Only open the appliance door to load or unload tableware to prevent accidents. Do not sit or stand on the appliance door when open. Arrange knives and utensils with sharp points in the cutlery basket with the points downwards. If you open the appliance door while the programme is running, hot water may splash out. Open the appliance door carefully if the programme is still running. Overfilling the baskets may cause the appliance to tip up. Never expose the appliance to intense heat or humidity.
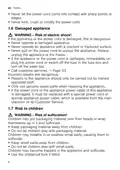
- Page 8: Safety Never let the power cord come into contact with sharp points or edges. Never kink, crush or modify the power cord. If the appliance or the power cord is damaged, this is dangerous. Never operate a damaged appliance. Never operate an appliance with a cracked or fractured surface. Repairs to the appliance should only be carried out by trained specialist staff. Only use genuine spare parts when repairing the appliance. Children may put packaging material over their heads or wrap themselves up in it and suffocate. Keep packaging material away from children. Use the childproof lock if fitted.
- Page 9: Safety Never let children play with or operate the appliance. Children can lock themselves in the appliance, thereby putting their lives at risk. With redundant appliances, unplug the power cord and damage the lock on the appliance door beyond repair. With higher-level appliances, children can become crushed between the appliance door and cabinet doors underneath. Keep an eye on children when opening and closing the appliance door. Rinse aid and detergent may cause chemical burns to the mouth, throat, and eyes. Keep children away from detergent and rinse aid products. Keep children away from the appliance when open; the water may contain residues of detergents and rinse aid. Children may get their fingers caught in the slots of the tablet collecting tray and injure themselves.
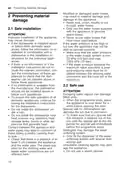
- Page 10: Preventing material damage Modified or damaged water hoses may result in material damage and damage to the appliance. Never kink, crush, modify or cut through water hoses. Only use the water hoses supplied with the appliance or genuine spare hoses. Never re-use water hoses that have been used before. Safe installation Improper installation of the appliance may cause damage. Make sure that the water pressure in the water supply system is min. 50 kPa (0.5 bar) and max. 1000 kPa (10 bar). Do not install the dishwasher under a hob. Do not install the dishwasher near heat sources, e.g. radiators, heat storage tanks, ovens or other appliances that generate heat. Check that there is a distance of at least 5 cm between the appliance and the water pipe.
- Page 11: Environmental protection and saving energy Aqua sensor is an optical measuring device that measures the turbidity of the washing water, allowing for water savings. Use of the AquaSensor depends on the programme, reducing water consumption by 3-6 litres if the soiling level is low. Higher soiling levels result in the washing water being drained and replaced with fresh water. In automatic programmes, temperature and running time are adjusted based on the level of soiling. Packaging materials are environmentally compatible and can be recycled. Sort individual components by type for separate disposal. Proper connection to power and water supply is essential for operation. Following energy-saving instructions leads to less electricity and water usage. The Eco 50 ° programme is energy-efficient and environmentally friendly. Check for damage and completeness of delivery after unpacking.
- Page 12: Installation and connection User manual Drainage connection Connect your appliance to drainage connection so dirty water is discharged via the wash cycle. Consult the installation instructions supplied for the steps required here. Connect the wastewater hose to the outlet connection of the siphon using the enclosed parts. Check that the wastewater hose is not kinked, crushed or twisted. Check that there is no cover in the drainage system preventing the wastewater from being discharged. You can position your built-under or integrable appliance in a fitted kitchen between wooden and plastic walls. If you are replacing the appliance, you must use a new water supply hose. Make the appliance level using the height-adjustable feet. Connect the appliance to the power supply.
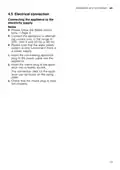
- Page 13: Installation and connection Electrical connection Connecting the appliance to the electricity supply Please follow the safety instructions. Connect the appliance to alternating current only, in the range of 220 - 240 V and 50 Hz or 60 Hz. Please note that the water safety system is only functional if there is a power supply. Insert the non-heating appliance plug of the power cable into the appliance. Insert the mains plug of the appliance into a nearby socket. The connection data for the appliance can be found on the rating plate. Check that the mains plug is inserted properly.
- Page 14: Familiarising yourself with your appliance Add detergent to the detergent dispenser. Add special salt to the dispenser for special salt. The lower spray arm washes the tableware in the bottom basket. If the tableware has not been washed properly, clean the spray arms. During the wash cycle, tablets automatically fall out of the detergent dispenser into the tablet collecting tray where they can fully dissolve. The upper spray arm washes the tableware in the top basket. Filter system Add rinse aid to the dispenser for rinse aid.
- Page 15: Familiarising yourself with your appliance You can use the control panel to configure all functions of your appliance and to obtain information about the operating status. With some buttons you can perform different functions. The display shows information about the remaining running time or the basic settings. You can change the basic settings via the display and the setting buttons. Switching on the appliance Switching off the appliance Starting the programme Terminating the programme Setting timer programming
- Page 16: Familiarising yourself with your appliance Programme buttons Door handle Open the appliance door. Depending on the appliance specifications
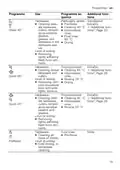
- Page 17: You can find an overview of the programmes that can be selected here. Different programmes are available depending on the appliance configuration. The running time may vary depending on the programme selected. The running time depends on the water temperature, the quantity of tableware, the level of soiling, and the additional function selected. The consumption values can be found in the quick reference guide. The consumption values relate to normal conditions and a water hardness of 16 - 20 °E. Programme sequence and additional functions are detailed for each programme. Intensive programme is for washing pots, pans, non-fragile tableware, and cutlery. Most economical programme is for cleaning mixed tableware and cutlery. Level of soiling affects the choice of programme and its effectiveness.
- Page 18: Programmes Use Programme sequence Additional functions Particularly gentle cleaning for delicate tableware Time-optimised cleaning for mixed tableware Level of soiling for removing lightly adhering fresh food remnants Intermediate rinse Drying options available Cold rinse for all types of dishes
- Page 19: Additional functions Test institutes are provided with information for comparability tests, e.g. according to EN60436. These are the conditions for conducting the tests, however they are not the results or consumption values. The product number (E-Nr.) and the production number (FD) are required here. HygienePlus raises the temperature and maintains it for an extra-long period. Continuous use of this function increases the hygiene status. ExtraDry increases the rinse temperature and extends the drying phase. VarioSpeed shortens the running time by 20% to 50% depending on the washing programme. You can find an overview of the additional functions that can be selected here. Different additional functions are available depending on the appliance configuration. You can find an overview of the possible features of your appliance and how to use them here.
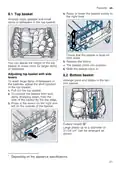
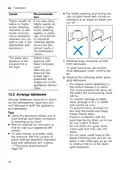
- Page 20: Features Raise or lower the basket evenly to the right level. Arrange cups, glasses, and small items of tableware in the top basket. Check that the basket is level on both sides. You can adjust the height of the top basket to make room for larger items of tableware. Arrange pans and plates in the bottom basket. To wash large items of tableware in the baskets, adjust the shelf position of the top basket. Pull out the top basket. To prevent the basket from suddenly dropping down, hold the side of the basket by the top edge. Press in the levers on the right and left on the outside of the basket. Large plates up to a diameter of 31/34 cm can be arranged as shown.
- Page 21: Features Use the cutlery shelf and space underneath for small cups and glasses or for large items of cutlery. Arrange cutlery in the cutlery basket, always without sorting it and with the sharp points downwards. If you do not need the cutlery shelf, you can fold it up. You can adjust the height of the etagere. Position the etagere vertically and pull it upwards. Position the etagere at a slight angle and move to the right height. Push the etagere down. The etagere clicks into position.
- Page 22: Features Folding down prongs If you do not need the prongs, fold them down. Use the folding prongs to position tableware securely, e.g. plates. You can fold the prongs down to position pans, bowls, and glasses better. To use the prongs again, fold them back up. The prongs audibly click into position. Basket heights Set the baskets at the right height. Appliance height 81.5 cm with cutlery basket. Depending on the appliance specifications.
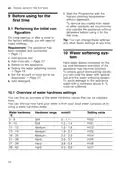
- Page 23: Before using for the first time, it is recommended to operate the appliance without tableware to remove any marks from water or other residues. On initial start-up or after a reset to factory settings, you will need to make settings. The appliance must be installed and connected before performing the initial configuration. To ensure good dishwashing results, treat the water with special salt and the water softening system. Water with a hardness above 9 °E must be softened to avoid damage to the appliance. An overview of the water hardness values that can be selected is provided. You can find out how hard your water is from your local water company or by using a water hardness tester. Setting values for water hardness range from soft to hard, with specific values indicated for each range. Add special salt and rinse aid to the appliance for optimal performance. Set the amount of rinse aid to be dispensed and add detergent as part of the initial setup.
- Page 24: Water softening system Set the water hardness determined on your appliance. The higher the water hardness, the greater the consumption of special salt. Detergent may damage the water softening system. With a water hardness of 0 - 8 °E, you can dispense with special salt and switch off the water softening system. Only fill the dispenser of the water softening system with special dishwasher salt. To make sure that any special salt that escapes is washed out of the tub, add the special salt to the dispenser immediately before the programme starts. Set the water hardness on your appliance. Only use special salt for dishwashers. If the special salt refill indicator lights up, add special salt to the dispenser just before the programme starts. Fill the dispenser right up with special salt.
- Page 25: Water softening system To avoid damage to the appliance, only switch off the water softening system in the following cases: The water hardness is max. 26 °E and you are using combined detergents with salt replacement substances. Regeneration of the water softening system takes place before the end of the main rinse cycle in all programmes. It will increase the run time and consumption values, e.g. water and electricity. Here you can find an overview of the maximum additional running time and consumption values during regeneration of the water softening system. You can find the column applicable to your model in the quick reference guide according to its water consumption in the Eco 50° programme.
- Page 26: Rinse aid system The consumption values specified are laboratory measurements determined in accordance with the currently applicable standard. You can use the rinse aid system and rinse aid to get tableware and glasses rinsed perfectly without marks. If rinse aid spills out, remove it from the tub. Spilled rinse aid can cause excessive frothing during the wash cycle. For optimum drying results, use rinse aid. Only use rinse aid for domestic dishwashers. If there are streaks or water marks on tableware, change the amount of rinse aid.
- Page 27: Detergent Only use detergents that are suitable for dishwashers. Both separate and combined detergents are suitable. For optimum washing and drying results, use separate detergent, adding special salt and rinse aid separately. Modern, powerful detergents mainly use a low-alkaline formulation with enzymes. Enzymes break down starch and remove protein. Oxygen-based bleaching agents are generally used to remove coloured marks, e.g. tea or ketchup. If you find the rinse aid refill indicator irritating, you can switch the rinse aid system off. The function of rinse aid is limited with combined detergents. Tabs are suitable for all cleaning functions and do not need to be measured out. With shorter programmes, tabs sometimes do not dissolve entirely and leave residues of detergent. Powder detergent is recommended for shorter programmes.
- Page 28: Detergent can include rinse aid and salt replacement substances. Combined detergents generally function up to a water hardness of 26 °E. Above this level, special salt and rinse aid are necessary for optimal results. Liquid detergent works faster and is recommended for shorter programs without PreRinse. Hand washing-up liquid can cause increased frothing and damage the appliance. Separate detergents do not contain components other than detergent and allow for dosage adjustment based on soiling levels. Chlorine residue on tableware may present a health risk. Detergents marked as organic or ecological typically contain lower levels of active agents.
- Page 29: Detergent should be added to the dry detergent dispenser. Set the rinse aid and water softening system according to the detergent in use. Combined detergents can only be used up to a certain water hardness without adding special salt. For optimal results, use special salt for water hardness above 17 °E. Only touch detergents in water-soluble pouches with dry hands. Washing programs will run properly with combined detergents, even if refill indicators light up. For tablets, one is sufficient and should be inserted horizontally. Follow the manufacturer's instructions for powder or liquid detergent dosage. 20 ml to 25 ml of detergent is usually sufficient for normal soiling. The function of rinse aid is limited with combined detergents; better results are generally achieved using rinse aid.
- Page 30: Tableware Only put glasses and china in the dishwasher if it is marked as dishwasher-safe by the manufacturer. Avoid damage to glass and tableware. The following tableware is not dishwasher-safe: items of cutlery and tableware made from wood, decorated glassware, antique and hand-crafted tableware, plastic parts not resistant to heat, tableware made from copper or tin, and tableware soiled with ash, wax, lubricating grease, or paint. If you use powder detergent and select a program with pre-rinse, you can also add a little detergent to the interior door of the appliance. Only clean tableware that is suitable for dishwashers. Decorated glassware and parts made of aluminium or silver may fade or discolour with dishwashing. Delicate types of glass may turn cloudy after a few washing cycles. The chemical composition of detergent causes damage. Use a detergent marked by the manufacturer as gentle on tableware.
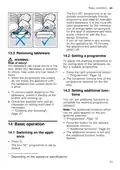
- Page 31: Tableware For better washing and drying results, position items with curves or recesses at an angle so water can run off. If you are using highly caustic alkaline or highly acidic cleaning agents, do not put aluminium parts in the dishwasher interior. Select a programme with lower temperatures if the water temperature of the programme is too high. After the programme has ended, take glassware and cutlery out of the appliance without delay. Remove large remnants of food from tableware. To save resources, do not pre-rinse tableware under running water. Put heavily soiled tableware in the bottom basket, e.g. pans, for better dishwashing results. Arrange tableware so it is stable and cannot tip over to prevent damage. Arrange cutlery with the points and sharp edges facing down to prevent injury. Position containers with the openings facing down so no water can collect in them. Using the appliance allows you to save energy and water compared to washing-up by hand.
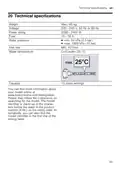
- Page 32: Basic operation The Eco 50° programme is an environmentally friendly programme ideal for normally soiled tableware. It is the most efficient programme for energy and water consumption for this type of tableware. If you do not perform any actions on the appliance for 15 minutes, the appliance will automatically switch off. Hot tableware can cause burns to the skin. When hot, tableware is sensitive to shock, may crack, and can result in injury. When the programme has ended, do not empty the appliance until the tableware has cooled down for a while. To adjust the washing programme to the soiling level of the tableware, select a suitable programme. The remaining running time of the programme appears on the display. You can set additional functions to complete the washing programme selected. The additional functions which can be used depend on the programme selected. The additional function is set and the additional function button flashes. The Eco 50° programme is set by default.
- Page 33: Basic operation Setting timer programming The button lock prevents the appliance from being operated accidentally or incorrectly while running. You can delay the start of the programme by up to 24 hours. Press to activate timer programming. The programme has ended when the display shows 0:00. When you open the appliance door once the appliance has heated up, leave the door slightly ajar for a few minutes. You can only change a programme when running if you cancel it. The appliance switches off automatically 1 minute after the end of the programme to save energy. To end a programme early or to switch from a programme that has already started, you will need to cancel it first.
- Page 34: Basic operation Switching off appliance Please note the information on safe use. Press the button to switch off. To prevent damage from dripping water, turn the water tap off tight. If you press the button during the wash cycle, the programme currently running will be interrupted. When you switch the appliance back on, the programme continues automatically.
- Page 35: Basic settings You can configure the basic settings for your appliance to meet your needs. Overview of basic settings The basic settings depend on the features of your appliance. Set the water softening system to your water hardness. Level H:00 switches the water softening system off. Set the amount of rinse aid to be dispensed. Switch the rinse aid system off with level r:00. The temperature is increased during the final rinse, which improves the drying result. Not suitable for delicate items of tableware. Set cold water or hot water connection. Switch hot water on A:01 or off A:00.
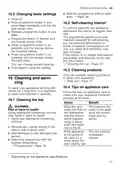
- Page 36: Cleaning and servicing To keep your appliance working efficiently for a long time, it is important to clean and maintain it carefully. Only use suitable cleaning products to clean your appliance. Follow the tips on appliance care to make sure your appliance functions properly at all times. Wipe the door and parts of the appliance regularly using a damp cloth and washing-up liquid. Never use detergents containing chlorine. If the appliance is not going to be used for a while, leave the door slightly ajar. The appliance self-cleans the interior at regular intervals to remove deposits. The programme sequence is automatically adjusted for self-cleaning, and consumption values may increase. If the interior is no longer self-cleaned adequately and deposits occur, refer to Cleaning the tub. Add detergent to the detergent dispenser to prevent unpleasant odours.
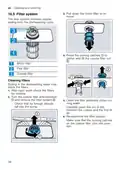
- Page 37: Cleaning and servicing The filter system removes coarse soiling from the dishwashing cycle. Soiling in the dishwashing water may block the filters. After each wash check the filters for residue. Turn the coarse filter anticlockwise and remove the filter system. Clean the filter elements under running water. Check that no foreign objects fall into the sump. Carefully clean the rim of dirt between the coarse and the fine filter. Re-assemble the filter system. Make sure that the locking catches on the coarse filter click into position.
- Page 38: Cleaning and servicing Insert the filter system into the appliance and turn the coarse filter clockwise. Pull up the lower spray arm to remove. Make sure that the arrow markings match up. Check the outlet nozzles on the spray arms for blockages under running water and remove any foreign bodies. Insert the lower spray arm. The spray arm clicks into position. Limescale and soiling in the dishwashing water may block the nozzles and bearings on the spray arms. Clean the spray arms regularly. Unscrew the upper spray arm and pull down to remove. Insert the upper spray arm and screw it firmly in place.
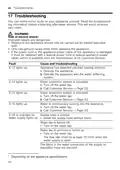
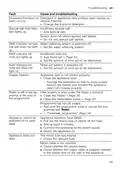
- Page 39: Troubleshooting information can help rectify minor faults on your appliance. Repairs should only be carried out by trained specialist staff. Only use genuine spare parts when repairing the appliance. If the power cord is damaged, it must be replaced with a special power cord from the manufacturer. E:12 indicates a calcified heating element; descale the appliance and use the water softening system. E:14, E:15, and E:16 indicate that the water protection system is activated; turn off the water tap and contact customer service. If water is continuously running into the appliance, turn off the water tap and contact customer service. E:18 indicates a kinked supply hose; install the supply hose without kinks. Ensure the water tap is turned on and has a flow rate of at least 10 l/min. Check for blocked filters in the water connection of the supply or AquaStop hose.
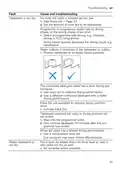
- Page 40: Troubleshooting Fault Cause and troubleshooting E:18 or indicator for water supply lights up. Switch off the appliance and pull out the mains plug. Turn off the water tap and unscrew the water connection. Remove and clean the filter from the supply hose. Re-insert the filter and screw the water connection back on. Check the water connection for leaks and restore the power supply. E:22 lights up. Filters are soiled or blocked. Clean the filters. E:24 lights up. Water is not drained. Check the connection to the siphon and open if necessary. Install wastewater hose without kinks and remove residues.
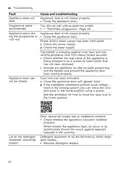
- Page 41: Troubleshooting E:24 lights up. Water is not drained. Secure the cover of the wastewater pump so it clicks into position. E:25 lights up. Wastewater pump is blocked or the cover of the wastewater pump is loose. Clean the wastewater pump. E:27 lights up. Mains voltage is too low. Contact an electrician. Another error code appears on the display. A technical fault is present. Press the reset button. Unplug the appliance or switch off the fuse. Wait at least 2 minutes before reconnecting. Contact Customer Service and give the error code.
- Page 42: Troubleshooting Tableware is not dry. No rinse aid used or dosage set too low. Add rinse aid. Set the amount of rinse aid to be dispensed. Programme or programme option has no drying phase, or the drying phase is too brief. Select a programme with drying, e.g. intensive, strong or ECO programme. Water collects in recesses of the tableware or cutlery. Position tableware at an angle where possible. The combined detergent used has a poor drying performance. Use rinse aid to improve drying performance. Use a different combined detergent with a better drying performance. Extra Dry not activated to improve drying performance. Activate Extra Dry. Tableware removed too early or drying process not yet ended. Wait until the programme ends. Only remove tableware 30 minutes after the programme has ended. Rinse aid used has a limited drying performance. Use a name-brand rinse aid. Plastic tableware is not dry. Not a fault. As plastic does not store heat so well, it also does not dry as well.
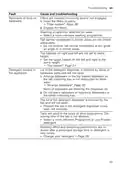
- Page 43: Troubleshooting Cutlery is not dry. Cutlery not arranged properly in the cutlery basket or cutlery drawer. Droplets can form on the cutlery contact points. Arrange cutlery individually where possible. Avoid points of contact. Appliance interior still wet after wash cycle. The condensation drying principle causes water droplets in the tub. Remnants of food on tableware. Tableware is placed too close together or basket is overfilled. Spray arm rotation is blocked.
- Page 44: Troubleshooting Remnants of food on tableware may occur due to incorrectly inserted or disengaged filters. Ensure filters are inserted properly and engaged. A weak washing programme may not effectively clean tableware. Select a more intensive washing programme for better results. Tall narrow receptacles may not be rinsed adequately if positioned incorrectly. Avoid placing tall narrow receptacles at steep angles or in corner areas. The top baskets should be set to the same height for optimal cleaning. Set the upper basket on the left and right to the same height. Detergent residue can occur if the dispenser lid is blocked. Arrange tableware in the top basket to avoid blocking the detergent dispenser lid.
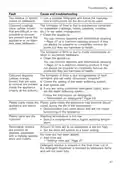
- Page 45: Troubleshooting Water marks on plastic parts are caused by droplet formation on plastic surfaces. Select a more intensive programme. Position tableware at an angle. Use rinse aid. Set the water softening system higher. Detergent substances may be deposited inside the appliance or on the door. Change your detergent. Clean the appliance mechanically. Set the water softening system correctly to avoid white coating in the appliance interior. Increase the amount of detergent used or change detergent if necessary.
- Page 46: Troubleshooting Tea residue or lipstick marks on tableware can be addressed by using a suitable detergent and following the manufacturer's instructions. Coloured coatings on tableware may be due to substances in vegetables or tap water that are difficult to remove. Deposits can be removed with mechanical cleaning or a machine cleaning product, although complete removal may not always be possible. Coloured deposits that are easy to remove may be present inside the appliance, primarily at the bottom. The formation of films can result from food remnants and tap water, indicating a need to check the setting of the water softening system. Adding special salt and activating the water softening system may help if using combined detergents. Plastic parts inside the appliance may become discoloured over time, but this does not impair functionality. If washing temperature is too low, selecting a programme with a higher washing temperature is recommended. Removable streaks on glasses and cutlery may indicate that the amount of rinse aid is set too high or that no rinse aid has been added. Detergent residue in the final rinse may occur if the lid of the detergent dispenser is blocked by tableware items.
- Page 47: Troubleshooting Removable streaks are present on glasses, glassware with a metallic appearance and cutlery. Arrange tableware in the top basket so the tab collecting tray is not obstructed by tableware. Items of tableware are blocking the dispenser lid. Do not place tableware or fragrance dispensers in the tablet collecting tray. Irreversible clouding of glassware can occur if glasses are not dishwasher-proof. Use dishwasher-proof glasses and avoid a lengthy steam phase after the wash cycle ends. Set the softening system to the water hardness and use detergent with a glass protection component. Rust spots on cutlery may indicate that cutlery is not sufficiently rust-resistant. Remove any spilled special salt from the tub and ensure the cap of the special salt dispenser is on tight. Check that the spray arms are not blocked and can rotate freely to avoid detergent residue.
- Page 48: Troubleshooting Excessive formation of foam occurs. Detergent or appliance care product used causes excessive foaming. Change the brand of detergent. Special salt refill indicator lights up. Insufficient special salt. Add special salt. Sensor does not detect special salt tablets. Do not use special salt tablets. Refill indicator for rinse aid lights up. Insufficient rinse aid. Add rinse aid and set the amount of rinse aid to be dispensed. Display flashes. Appliance door is not closed properly. Close the appliance door and arrange the tableware properly. Water is left in the appliance at the end of the programme. Filter system or area under the filters is blocked. Clean the filters and the wastewater pump. Appliance cannot be switched on or operated. Appliance functions have failed. Pull out the mains plug, wait, and reconnect the appliance. Appliance does not start. The mains fuse has tripped. Check the relevant fuse and ensure the mains cable is properly inserted.
- Page 49: Troubleshooting Appliance does not start. Appliance door is not closed properly. Close the appliance door. Programme starts automatically. You did not wait until programme ended. Appliance stops during the programme or cuts out. Power and/or water supply has been interrupted. Check the power supply. Check the water supply. Appliance door cannot be closed. Door lock has been activated. Close the appliance door with greater force. Lid on the detergent dispenser cannot be closed. Detergent dispenser or lid are blocked by sticky detergent residue. Remove detergent residue.
- Page 50: Troubleshooting Filling valves making knocking noises are caused by the domestic installation. No appliance fault is present, and it does not affect the functioning of the appliance. Knocking or rattling noise may occur if the spray arm is striking tableware. Arrange tableware so that the spray arms do not strike tableware. With a small load, the water jets directly strike against the tub. Distribute the tableware evenly to avoid issues. Loading the appliance with more tableware can help mitigate problems. Light items of tableware may move about during the wash cycle. Position light items of tableware securely to prevent movement.
- Page 51: Transportation, storage and disposal Insert the pump cover down and press. Clean wastewater pump. Large remnants of food or foreign bodies can block the wastewater pump. As soon as the rinsing water no longer drains properly, the wastewater pump must be cleaned. Risk of injury! Sharp and pointed objects or fragments of glass may block the wastewater pump and cause injury. Remove any foreign bodies carefully. Install the filter system. Disconnect the appliance from the power supply. Removing the appliance involves disconnecting from the mains power supply and turning off the water tap. Detach the drainage connection and the drinking water connection.
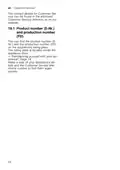
- Page 52: Customer service Protect appliance from frost If there is a risk of frost where the appliance will be standing, empty the appliance completely. Disposing of old appliance Valuable raw materials can be reused by recycling. Risk of harm to health! Children can lock themselves in the appliance, thereby putting their lives at risk. Transporting the appliance To avoid damage to the appliance, empty it before transporting. Always transport the appliance upright to prevent residual water getting into the machine's controls. Function-relevant genuine spare parts can be obtained from Customer Service for a period of at least 10 years. Detailed information on the warranty period and terms of warranty in your country is available from our after-sales service. If you contact Customer Service, you will require the product number (E-Nr.) and the production number (FD) of your appliance.
- Page 53: Customer service contact details can be found in the enclosed directory or on the website. The product number (E-Nr.) and production number (FD) are located on the appliance's rating plate. The rating plate is inside the appliance door. Refer to Familiarising yourself with your appliance for more information. Make a note of your appliance's details and the customer service telephone number for quick reference.
- Page 54: Thank you for buying a Bosch home appliance. Register your new device on MyBosch now and profit directly from expert tips and tricks for your appliance. Enjoy warranty extension options and discounts for accessories and spare parts. Access the digital manual and all appliance data at hand. Get easy access to Bosch home appliances service. Free and easy registration is available, also on mobile phones. Find expert advice for your Bosch home appliances, help with problems, or a repair from Bosch experts. Discover the many ways Bosch can support you. Contact data of all countries are listed in the attached service directory.

FISHER PAYKEL DD24DTX6HI1 Sanitize Dishwasher

IKEA 004.754.18 DISKAD Dishwasher

BOSCH SHX53CM5N 300 Series Dishwasher
FISHER PAYKEL DD24DTI9 N Tall Dishwasher

Amana 6000 Master Clean Dishwasher

FISHER PAYKEL DD60D2NX9 Dishwasher

Robinhood DWG12P6FWH Dishwasher

FISHER PAYKEL DD24DCTW9N Dishwasher

Haier HDW13V1G1 Dishwasher

SHARP QW-NA24S42DI-EE Dishwasher