Home > Frigidaire > FRIGIDAIRE FDPC4221AS Dishwasher
FRIGIDAIRE FDPC4221AS Dishwasher


Dishwasher
use & care
Introduction.......................................................2
Operating Instructions..................................8
Care and Cleaning ........................................ 13
Troubleshooting............................................. 15
Limited Warranty ..........................................18
Important Safety Information ....................3
Features..............................................................5
Controls and Settings....................................6
A17894301B (March 2023)
Frigidaire.ca Canada 1-800-265-8352

| General | Details |
|---|---|
| Name | FRIGIDAIRE FDPC4221AS Dishwasher |
| Make | Frigidaire |
| Language | English |
| Filetype | PDF (Download) |
| File size | 0.96 MB |


FRIGIDAIRE GDPH4525SS Dishwasher

FRIGIDAIRE GDPP4517A Gallery Series Dishwasher

FRIGIDAIRE FDPC4314AS Dishwasher

FRIGIDAIRE GDPH4515AF Gallery Dishwasher

FRIGIDAIRE FFBD2406NB Full Console Dishwasher

FRIGIDAIRE GDPH4525AF Gallery Dishwasher

FRIGIDAIRE FDHP4336AS 24 Tall Tub Dishwasher

FRIGIDAIRE FDHP4336AS Dishwasher

FRIGIDAIRE FDSR4501AP Panel Ready Dishwasher

FRIGIDAIRE FFBD1821MS Dishwasher

FRIGIDAIRE FDPC4221AS Dishwasher Overview
Summary of Contents
- Page 1: Introduction Important safety information Features Controls and settings Operating instructions Care and cleaning Troubleshooting Limited warranty
- Page 2: Welcome to our family. This manual is your resource for the use and care of your product. Please read it before using your appliance. Normal operating sounds: This dishwasher does not sound like most dishwashers - it’s quieter. Your Precision Direct Wash System dishwasher uses energy efficient motors for the wash and drain portions of the cycle you select. If you compare this dishwasher to previous models, you may be surprised at what you don’t hear. Why energy efficient units run long cycles: Several factors are important to washing dishware. The energy use of the dishwasher was reduced by applying more of the factors that don’t use so much energy. The filters will need to be cleaned to maximize wash performance during the life of your dishwasher. Let’s make it official! Be sure to register your product.
- Page 3: IMPORTANT SAFETY INFORMATION When using your dishwasher, follow basic precautions. Disconnect electrical power to dishwasher before servicing. Use your dishwasher only as instructed in this Use and Care Manual. Repairs should be done by a qualified technician. This Manual does not cover every possible condition and situation. Do not tamper with controls. DISHWASHER MUST BE ELECTRICALLY GROUNDED. Use care unloading the dishwasher when the Sanitize option has been selected. Under certain conditions, hydrogen gas may be produced in a hot water system that has not been used for 2 weeks or more. Keep young children and infants away from the dishwasher when it is operating.
- Page 4: Important safety information includes child safety warnings and precautions to reduce the risk of fire, electrical shock, or injury when using the dishwasher. Children should never use packaging materials to play, as they can cause suffocation. Do not store or use flammable liquids near the appliance. Read all instructions before using the dishwasher. The safety alert symbol indicates potential personal injury hazards. Remove all staples from the carton to prevent cuts and damage to finishes. DANGER indicates a hazardous situation that could result in death or serious injury. WARNING indicates a potentially hazardous situation that could result in death or serious injury. CAUTION indicates a potentially hazardous situation that may result in minor or moderate injury. IMPORTANT indicates crucial installation, operation, or maintenance information that is not hazard-related.
- Page 5: Your dishwasher cleans by spraying a mixture of hot water and detergent through the spray arms against soiled surfaces. The dishwasher drains for a few seconds to remove soils dropped while loading, then fills with water covering the filter area. Water is then pumped through the spray arms. Soil particles go through and across the filter and down the drain as the water is pumped out. This series of steps are repeated as needed. Features may vary according to model. Accessories are available for your appliance.
- Page 6: Controls and settings Wash cycle selections Cycle times are approximate and will vary with options selected. Hot water is necessary to activate dishwasher detergent and melt fatty food soils. An automatic sensor will check the incoming water temperature and adjust the cycle accordingly. Your dishwasher uses DishSense technology to understand how much food is on the dishes. Before starting the dishwasher, ensure that the water is connected and turned on. For daily use to completely wash and dry up to a full load of dishes, select normal wash. For heavily soiled dishware, select heavy wash. The heat dry option enhances drying performance but may not completely dry all items. De-selecting the heat dry option reduces energy use and lowers cost.
- Page 7: Controls and settings include child lock controls to prevent accidental changes. Press and hold the HEAD DRY pad for 3 seconds to lock the dishwasher controls. The indicator light illuminates when the controls are locked. To unlock, press the HEAT DRY pad for 2 seconds until the light goes out. The start/cancel button allows you to start the cycle by pressing the START/CANCEL pad and closing the door immediately. You can cancel a cycle anytime by pressing and holding the START/CANCEL pad for 3 seconds. The CLEAN light indicates the end of the cycle and remains on until the door is opened. If the door is opened while running, the START/CANCEL pad must be pressed and the door shut within 10 minutes to continue the cycle.
- Page 8: Operating instructions Select desired heat/air dry option. The indicator light above the pad will glow when selected. Press start/cancel pad to start. Load dishwasher. Add detergent. Add rinse aid, if needed. Run hot water faucet nearest dishwasher until water is hot. Close door to latch. Select desired cycle. The indicator light next to the pad will glow when selected. Cycle chart: Heavy wash recommended for pots, pans, casseroles, and dinnerware having light to heavily soiled loads. Normal wash recommended for lightly to heavily soiled loads.
- Page 9: 10 place settings standard loading pattern 12 place settings standard loading pattern Operating instructions Preparing and loading dishes Scrape away large pieces of food, bones, pits, toothpicks, etc. The continuously filtered wash fluid will remove remaining food particles. Burned-on foods should be loosened before loading. Empty liquids from glasses and cups. Foods such as mustard, mayonnaise, vinegar, lemon juice, and tomato-based products may cause discoloration of stainless steel and plastics if allowed to sit for a long period of time. Load racks so that large items do not prevent the detergent dispenser from opening. Check manufacturer’s recommendations before washing items in question.
- Page 10: Operating instructions Loading the bottom rack Load sharp items pointing down. The lower rack is best for plates, saucers, bowls, and cookware. Large items should be placed along the edge to avoid blocking the spray arm rotation. For best results, place bowls and pans with soiled surfaces facing down. Load the silverware basket while it is in the bottom rack or take it out for loading. Make sure tall items do not block spray arm rotation. Use suggested loading patterns to increase washability of the silverware. Do not mix silver and stainless to avoid damaging the silver finish. Water spray cannot reach nested items.
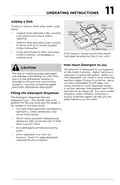
- Page 11: Operating instructions Adding a dish To add or remove items after the wash cycle starts, unlatch the door and wait a few seconds until wash action stops before opening. Add the item and wait a few seconds to allow cold air to slowly expand inside the dishwasher. Close the door firmly to latch and press START/CANCEL immediately to resume the cycle. How much detergent to use The amount of detergent to use depends on the water hardness, which is measured in grains per gallon. Using too little detergent can result in poor cleaning and hard water filming or spotting. Using too much detergent in soft water can cause etching to some glassware. The use of industrial grade detergent can damage the heating coil and other parts of the dishwasher. Filling the detergent dispenser The detergent dispenser has two detergent cups: a smaller one for the pre-wash and a larger one for the main wash. Use only fresh automatic dishwashing detergent, as other detergents may cause oversudsing. Add detergent just before starting the cycle and store it in a cool, dry location.
- Page 12: Operating instructions Detergent usage chart For heavy wash or normal wash, use 2 teaspoons for soft water, 5 teaspoons for medium hard water, 8 teaspoons for hard water, and completely full for very hard water. For very hard water, a water softener is recommended to improve water quality and dishwashing performance. The HEAT DRY option in combination with rinse aid will enhance drying. Rinse aid greatly improves drying, reduces water spots, and lubricates wash arm bearing for proper rotation. Water pressure must be between 20 and 120 psi for optimal performance. Hot water entering the dishwasher should be at least 120°F (49°C) for satisfactory results. To add liquid rinse aid, turn the dispenser cap counterclockwise and pour until the liquid touches the indicated fill level. Before starting a cycle, run hot water to clear cool water from the pipe. If water temperature is below 120°F (49°C), have a qualified person raise the hot water heater thermostat setting.
- Page 13: Care and cleaning To empty the glass trap: Pull the glass trap handle up and out toward you to remove. Empty any debris collected in the glass trap. Allow heating element to cool before cleaning the interior. Once empty, slide the glass trap back into the same location as when removed, then push down to lock back into position. Clean outer door with warm soapy water and a dishcloth or sponge. The inside of the dishwasher and filter are self-cleaning with normal use. A glass trap located in the center of the filter is designed to collect pieces of broken glass, straws, bones, and pits. Clean occasionally with household cleaner containing vinegar or bleach to dissolve any buildup. Use Frigidaire ReadyClean Dishwasher Cleaner Tablets to clean and freshen the interior of the dishwasher.
- Page 14: Care and cleaning Winterizing A dishwasher left in an unheated place should be protected from freezing. Have a qualified person disconnect service. Turn off electrical power to the dishwasher at the supply source. Shut off water supply. Disconnect water line from inlet valve and drain into a pan. Disconnect drain line from pump and drain water into a pan. Reconnect the water, drain, and electrical power supply to restore service. Fill both detergent cups and run dishwasher through a heavy wash cycle. Check connections to make sure they do not leak. See installation instructions for more details on disconnecting and restoring service.
- Page 15: troubleshooting Before you call for service, review this list. It may save you both time and expense. This list includes common experiences that are not the result of defective workmanship or material in your dishwasher. Glassware/Flatware spotted or cloudy Check water hardness. For extremely hard water, it may be necessary to install a water softener. Food soils left on dishes Choose another cycle for longer washing time. Water temperature may be low. Avoid extremely low or high temperatures. Check rack loading section for proper loading-avoid nesting items. Do not overload the dishwasher. Dishes not dry By selecting Heat Dry option this will improve drying. Make sure the rinse aid dispenser is filled. Check the incoming water temperature. Be sure it is at least 120°F (49°C). Dishware stained or discolored Tea and coffee can stain cups. Remove the stains by hand washing in a solution of bleach and warm water. Check for proper loading-avoid nesting items. Iron deposits in water can cause a yellow or brown film.
- Page 16: Troubleshooting Aluminum utensils can leave gray/black marks when they rub against other items. It is normal for the dishwasher to pause when the wash action is switching between the lower and middle spray arms. Certain high acid foods can cause discoloration of stainless steel and plastics if allowed to sit for a long period. Water left in the tub bottom after the cycle is complete is not normal. Mixing stainless steel and silver utensils in the silverware basket can cause pitting of the stainless steel blades. Using too much detergent in soft or softened water causes damage that looks like a film but cannot be removed. Check that the door gasket is pressed into its mounting channel and does not interfere with door closure. Assure the water supply is turned on. Detergent may be old; discard and use fresh detergent. Water vapor escapes from the vent during the drying part of the cycle; this is normal.
- Page 17: Troubleshooting Assure the glass trap is maintained and installed properly assuring no clogs. Hard water can cause lime deposit buildup on the interior of the dishwasher. Dishes and glasses may also get spots and film for a number of reasons. The cycle may have been automatically lengthened to reach key temperatures. Choose lower temperature options to shorten the cycle. Soiled dishes left in the dishwasher too long can create an odor. There will be a “new” smell when first installed; this is normal. Washing large amounts of dishware with tomato-based soil can cause a pink/orange appearance. Pre-rinsing or using the Rinse Only cycle will reduce the chance of staining. If the dishwasher door is opened while the unit is running, the START/CANCEL pad must be pressed immediately to return the unit to the selected cycle.
- Page 18: Your appliance is covered by a one year limited warranty. Electrolux will repair or replace any parts of this appliance that prove to be defective in materials or workmanship. The stainless tub and door liner of your appliance are covered by a lifetime limited warranty. Dishwasher racks and the electronic control module are covered by a two through five year limited warranty. This warranty does not cover products with altered serial numbers or those transferred to another party. Rust on the unit and food loss due to appliance failures are also not covered. Service calls that do not involve defects in materials or workmanship are excluded. Labor costs during the additional warranty periods beyond the first year are not covered. Electrolux shall not be liable for consequential or incidental damages. This warranty only applies in the USA, Puerto Rico, and Canada.
- Page 19: Welcome home. Our home is your home. Visit us if you need help with owner support, accessories, service, or registration. See your registration card for more information.

FISHER PAYKEL DW60UC6X Built-under Dishwasher

GRUNDIG GNFP3440X Dishwasher

BOSCH SPV4EKX25E Dishwasher

beko Din59530ad Epto Dishwasher

FISHER PAYKEL DD24DCTW9 N

SIEMENS SN13ES79CS Dishwasher

SIEMENS SR73HX76ME Dishwasher

IKEA DISKAD Dishwasher

FISHER AND PAYKEL DD60SHI9 Dishwasher

BOSH SBH4HVX00E Dishwasher