
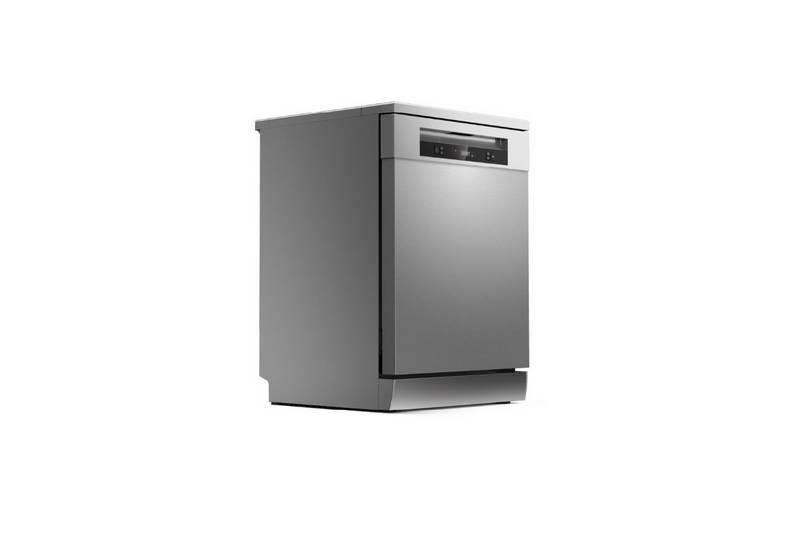
TOSHIBA DWS-22AMY(K) Dishwasher


DISHWASHER
INSTRUCTION MANUAL
Model:
DWS-22AMY(K)
DWS-22AMY(D)
DWS-22AMY(N)
Read these instructions carefully before using your
DISHWASHER, and keep it carefully.


| General | Details |
|---|---|
| Name | TOSHIBA DWS-22AMY(K) Dishwasher |
| Make | Toshiba |
| Language | English |
| Filetype | PDF (Download) |
| File size | 1.93 MB |
 (1 votes, average: 5.00 out of 5)
 Loading...
TOSHIBA DW-15F5SS-AU Dishwasher

TOSHIBA DW-08T1 Place Setting Dishwasher

TOSHIBA DWS-22AMY(K) Dishwasher Overview
Summary of Contents
- Page 1: Dishwasher instruction manual. Model: DWS-22AMY(K), DWS-22AMY(D), DWS-22AMY(N). Read these instructions carefully before using your dishwasher, and keep it carefully.
- Page 2: Disconnect the power plug. Do not connect or disconnect the power plug with wet hands. Do not use damaged power lines, plugs, or loose sockets. Do not damage, cut, or twist the power line. The damaged power line must be replaced by a qualified technician. Do not spray water directly onto the dishwasher's main body. Do not touch the inside of the cabinet or steam jets during operation or for 30 minutes after. Do not use an extension cord. Please ask the agent for inspection or repair to avoid electric shock or leakage. There is a fear of burning.
- Page 3: Fault connection of the grounding wire will cause electric shock. If E3 failure occurs, please unplug the power plug from the outlet, and needs to be repaired by professional electricians or service men.
- Page 4: Quantity of tableware advised: 22 pieces (soup bowl ×2 + rice bowl ×3 + dish ×4 + rice spoon ×1 + chopsticks ×3). Do not strongly push open door and main body, nor put downward pressure to the door. Falling may cause injuries. Do not get close to the exhaust port. Steam or hot air may cause burns. While using or after using the dishwasher, pay attention to hot water drained out. High temperature hot water may come out, there is a risk of burns. Do not hit or tap the dishwasher. Residues clog, causing breakdown. Do not put light and small dishes such as plastic containers. Make the main unit a solid level surface. Normal operation may not be possible.
- Page 5: Treatments Handle the package of the dishwasher with extreme care. All packages are recyclables. The packing material may be dangerous to children. The disposal of package and machine shall be submitted to the recycle center. The cardboard package is made by recycled paper and shall be collected for recycling. If the generated rubbish cannot be treated properly, they will be harmful to the environment and human health. For more details of product recycle, please contact relevant departments of local government or the service center for domestic refuse management. Such warning sign is used to prevent dangers to you and others. Please follow it strictly. After reading, please store it properly for use just in case.
- Page 6: Please carefully read the instruction manual before using the dishwasher. Quick instruction manual. Recognize the dishwasher. Dishwasher features. Control panel. Use the dishwasher. Install dishwasher bowl basket. Cleaning and care. Troubleshooting. Before connecting customer service center.
- Page 7: Quick instruction manual For detailed operation methods, read the manual carefully. Connect power Rated voltage: 220-240V AC Frequency: 50 Hz Power outlet: 220-240V AC 10 A Connect the drainage pipe Before connecting the drainage pipe, remove the rubber stopper on the drainage port at the back of the machine. Put one end of the drainage pipe into the drainage port and tighten it with a screwdriver. Connect the other end of the drainage pipe to a sink or bucket. Connect the inlet pipe Before connecting the inlet pipe, remove the inlet valve cap from the inlet valve at the back of the machine. Rotating the screw cap to the inlet valve screw. Connecting the other side of the inlet pipe to the water tap. Attention: If you choose manual water adding way, please keep the inlet valve cap on the inlet valve.
- Page 8: Add water to the dishwasher tank. Turn on the dishwasher by pressing the button. Open the tank lid and add water to the dishwasher tank. When the tank is full, it will beep. If the water is sufficient, the indicator still lights up, please contact a qualified repairman for help. If the water is insufficient in 3 minutes, the indicator will be flicking and the machine will beep every 1 minute. Check that the water tap is opened in automatically adding water way. If there is enough water in the water tank, please contact a qualified repairman for help. Before putting dishes into the dishwasher, please remove larger residues.
- Page 9: Open the door, put in the dishes and dishwashing powder. Place them from the two sides to the center according to the size. Improper orientation of dishes can also interrupt the cleaning process and lead to unsatisfactory cleaning results. Try to direct the dirty side toward the spray arm. Put the dishwashing powder at the adding place. Close the door, turn on the dishwasher, select the program, and press the button.
- Page 10: Recognize the dishwasher Dishwasher features Handle Control panel Tank lid Top nozzle Lower spray arm Cup holder Filter Accessories
- Page 11: Control panel Power Display shows the highest temperature and length of the program when selected. Display shows the actual water temperature and remaining time when the program starts. Water insufficient indicator lights up when the appropriate washing program is selected. Program options include GLASS, NORMAL, FRUITS, INTENSIVE, RAPID, and ECO. GLASS is for slightly dirty dishes and glasses. NORMAL is for normally soiled loads, such as pots, plates, glasses, and lightly soiled pans. FRUITS program uses cold water for fruits with a weak surface, such as strawberries. INTENSIVE is for dishes with oil stains and heavy dirt. RAPID is for slightly dirty dishes with a relatively short cleaning time.
- Page 12: Use the dishwasher. Install dishwasher bowl basket. Purchase dishes suitable for dishwasher. Use a suitable mild dishwashing powder. Select a washing program that uses a lower temperature for special appliances. Do not take out glass dishes immediately after the program ends to prevent damage. Not suitable for wooden, ivory, porcelain, or pearl shank tools. Cups, glasses, and pots should be placed face down. All utensils should be placed safely and must not be overturned. For small objects, it is easy to fall out from the basket, which should not be placed in the dishwasher.
- Page 13: Long or sharp knives should be placed horizontally in the basket. Do not use the dishwasher overloaded for better cleaning performance. Place the dishes and utensils properly to avoid being moved by the water stream. The dirty surface must face inside to allow the spray water column to clean effectively. No appliance shall protrude from the bottom. Make sure the sharp tip of tableware faces downwards. Align the hole in the bottom of the chopstick basket with the positioning post of the rack. Press down firmly to fix the chopstick basket on the rack.
- Page 14: Chopsticks and spoon should be placed upwards. Height is less than 23 cm. Avoid scratching when placing knives. Knives and other sharp ware must be placed in the basket with the tip down or flat. The basket has an adjustable row for better washing results. The cup holder can hold small objects such as chopsticks. The cup holder can also hold red wine glasses.
- Page 15: Put the dishwashing powder into the addition place. Only dishwashing powder specially designed for dishwashers can be used. Do not use other dishwashing powders to avoid machine damage. The dishwashing powder is corrosive. Keep the dishwashing powder in a place where children cannot reach. Normal washing programs with concentrated dishwashing powder can reduce contamination and dish damage. Certain cleansing tablets cannot completely dissolve and fully function. The use of cleaning tablets requires long-term washing programs to ensure complete removal. Dishwashers use less dishwashing powder than traditional ones. Only one spoon of dishwashing powder is required for normal washing and general dirty dishes.
- Page 16: Program setting provides information on washing programs. The table shows best cleaning procedures and required dishwashing powder based on dirt level. Different washing programs include normal, fruits (hot), and fruits (cold). Each program specifies water temperature, dishwashing powder amount, time, power consumption, and water usage. Attention is drawn to the fact that the program data is for reference only. Test conditions include specific items used for testing. Power consumption at shutdown and standby states is noted. Test voltage for the programs is specified as 220V.
- Page 17: Startup instructions include plugging the device into a 220-240V AC 50Hz socket. Press the ON/OFF button to turn on the dishwasher before selecting a program. The desired program is selected by pressing the corresponding button, which will light up. To start the program, press the Start/Pause button. If the Start/Pause button is pressed during washing, the dishwasher will beep every 60 seconds until restarted. Additional dishes can be added before the program starts or during the washing process. To add dishes during washing, pause the program, wait 5 seconds, open the door, add dishes, close the door, and restart the program. At the end of the washing program, the machine displays End and beeps for 8 seconds. To stop the machine immediately, press the ON/OFF button and wait a few minutes before opening the door. Be cautious of hot dishes when clearing the dishwasher after use.
- Page 18: Open the door carefully. Hot dishes are more likely to be damaged. The dishes shall be cool for about 15 minutes before being taken out from the dishwasher. It is normal that the dishwasher still remains wet inside. It is extremely dangerous to open the door during the washing process as this may cause severe burns by hot water.
- Page 19: Cleaning and care Make sure that filters are properly installed. Remove large food scraps after a washing program ends. The main filter is applicable to intercept food residue and particles. Non broken up residue will flow to the coarse filter. It is suitable for large food residue, for example bone or glass. Residue may block the drainage pipe. Food scraps should be removed to prevent them from remaining on the dishes. The washing water can be recycled. Residue will be broken up and rinsed by water flow from special nozzles. Proper maintenance is essential for optimal performance.
- Page 20: Rotate direction and then lift them up. Lift B and C from A. Separate B and C. Entire assembly shall be cleaned once a week. Filter cleaning. Reload entire assembly into the dishwasher and then position it on its base and press down as indicated in this page. Caution.
- Page 21: Care and maintenance Control panel can be wiped with a slightly wet cloth. After cleaning, make sure it is completely dry. Do not use sharp tools, scratch sponge, or rough detergent anywhere in the machine. Do not use spray detergent to clean the door, as it may damage the door lock and other electrical components. Do not use abrasives or rough paper towels, as it may leave scratches or spots on stainless steel surface.
- Page 22: Installation Warning: Electric shock or death can be caused. Please make sure the machine is properly grounded before use. Preparation before installation: The machine shall be installed close to existing water tap, outlets, and socket. It should be close to drain to facilitate connection of drainage pipe. Where to place: The back of the machine shall be against the wall and for lateral connection, it shall be arranged along adjacent cabinet or wall. The machine is equipped with a drainage pipe, which allows it to be positioned on the left or right side for easy installation. Power connection: Warning: Electric shock. Do not use an extension cord or power adapter on this machine. Power requirements: Please check the label of rated value of power supply system for knowing rated voltage and connect the machine to appropriate power supply. A 10A fuse is required and a time-delay fuse or circuit breaker is recommended. Machine connection: Make sure that supplied voltage and frequency correspond to those on the rating plate. Plug can only be connected to a properly grounded socket. If the socket that the machine must be connected to is not suitable for the plug, replace the socket.
- Page 23: Drainage pipe connection Before connecting the drainage pipe, please remove the rubber stopper on the drainage port at the back of the machine. Connect the other end of the drainage pipe to a sink or bucket. Fix the drainage pipe with a siphon cup.
- Page 24: Troubleshooting Before connecting customer service center, please check the chart below. Possible causes and solutions for common problems include: - Fuse burn-out or circuit trip: Replace fuse or reset circuit breaker, remove any other appliances that share the same circuit with the dishwasher. - The machine is not working: Make sure that the dishwasher is on and properly plugged into the socket, and close the door. - Drainage pipe has a knot or is blocked: Check the drainage pipe. - Filter is blocked: Check the sink drain to ensure good drainage. - Sink drain is blocked: Ask a pipe technician for help rather than attempting to drain it yourself. - Improper dishwashing powder is used: Only use dishwashing powder specially designed for dishwashers to avoid foaming. - Foam remains in liner: Use dishwashing powder with coloring agent and ensure it is free of coloring agent to prevent colors on the liner. - Hard water minerals: Avoid washing dishes that are easily corroded in the dishwasher. - Dishes in the rack prevent spray arm from rotating: Suspend the program and reposition the dishes.
- Page 25: Problem: Dishes are loose. Possible cause: Dishes are not placed correctly. Solutions: Suspend the program and reposition the dishes. Problem: Dishes remain dirty after washing. Possible cause: Filter assembly is dirty or not properly installed. Solutions: Reposition the dishes so that the spray arm can rotate freely. Problem: Glassware is not glossy. Possible cause: Hard water produces more scale. Solutions: Add dishwashing powder. Problem: Black or grey imprints on dishes. Possible cause: Friction between aluminum utensils and dishes. Solutions: Use mild detergent to eliminate these imprints. Problem: Dishwashing powder remains in adding position. Possible cause: Placement of dishes hinders the addition of dishwashing powder. Solutions: Place the dishes correctly. Problem: Dishes are not completely dry. Possible cause: Program is wrong. Solutions: Select a more powerful program. Problem: Dishes are taken out too early. Solutions: Do not take dishes out immediately after the program ends.
- Page 26: Error code will appear to remind you when failure occurs. Possible causes include long water intake time, flow-meters, drain valves, or pump failures. Heating pipe or thermistor may be in an abnormal state, requiring power to be unplugged and repair by a qualified serviceman. Abnormal heating can occur if there is an overflow or an issue with the floater in the water tank, necessitating repair by a qualified serviceman. Water or other material on the button can lead to abnormal function of the operation key. Abnormal communication may also be indicated.
- Page 27: Model: DWS-22AMY(K), DWS-22AMY(D), DWS-22AMY(N) Dimensions: 420 (W) x 435 (H) x 435 (D) mm Rated voltage: 220-240V AC Rated frequency: 50 Hz Rated power: 730-860 W Water consumption: 5 L Power consumption: 0.47 kW h Control mode: Electronic type Washing capacity: 22 pcs (soup bowl×2 + rice bowl×3 + dish×4 + soy sauce ladle ×1 + rice spoon ×1 + chopsticks ×3) Total weight: 16 kg, Net weight: 13 kg

CONCORD PACIFIC SHVM4AYB3N 30 Inch Dishwasher

Whirlpool 3C26 Dishwasher

EdgeStar DWP63BL Dishwasher

BOSCH SMS4HDW52G Dishwasher

Miele PFD 101 ProfiLine Dishwasher

BOSCH SMS4HMW00G Dishwasher

FISHER PAYKEL DD24DT2NX9 Double Dishwasher

BOSCH SMV4HTX31E Dishwasher

FISHER PAYKEL DD24DTX6HI1 Dishwasher

HIGH ONE W701T Dishwasher