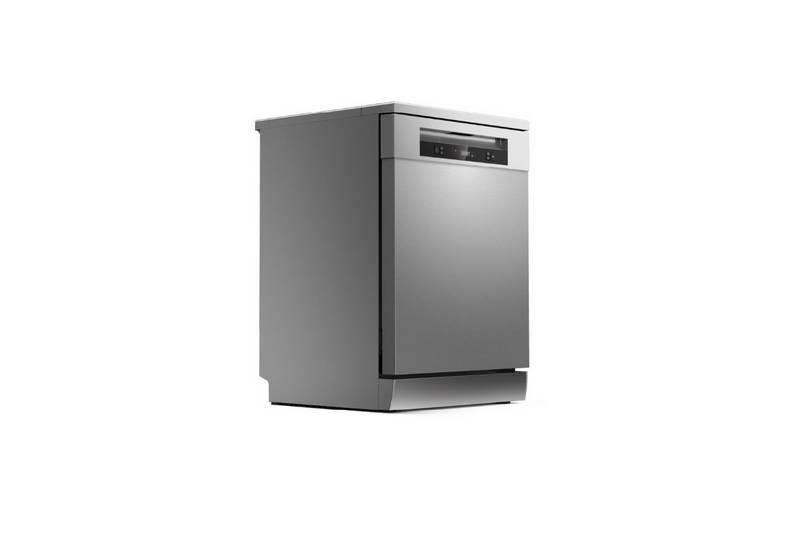
TOSHIBA DW-08T1 Place Setting Dishwasher


DISHWASHER
INSTRUCTION MANUAL
Model:
DW-08T1(S)-MY
Read these instructions carefully before using your
DISHWASHER, and keep it carefully.

| General | Details |
|---|---|
| Name | TOSHIBA DW-08T1 Place Setting Dishwasher |
| Make | Toshiba |
| Language | English |
| Filetype | PDF (Download) |
| File size | 1.22 MB |

TOSHIBA DW-15F5SS-AU Dishwasher

TOSHIBA DWS-22AMY(K) Dishwasher

TOSHIBA DW-08T1 Place Setting Dishwasher Overview
Summary of Contents
- Page 1: Dishwasher instruction manual. Model: DW-08T1(S)-MY. Read these instructions carefully before using your dishwasher, and keep it carefully.
- Page 2: Safety instructions should be carefully read and followed to prevent serious injury or death and property damage. Warning indicates a high possibility of serious injury or death. Caution indicates a high possibility of serious injury or property loss. Serious injury may require hospitalization or lengthy treatment. Prohibited actions are indicated by specific symbols. Mandatory actions are also indicated by symbols. Precautions are recommended and detailed instructions are provided with symbols. The dishwasher should not be operated by individuals with reduced capabilities unless supervised. Children should be kept away from the dishwasher and its packing materials. Dismantling or modifying the dishwasher may lead to fire, electric shock, or injuries.
- Page 3: Before cleaning or maintaining the dishwasher, disconnect the power plug first. Do not connect or disconnect the power plug by wet hand. Do not use damaged power lines, power plug or loose power socket. Do not damage, cut, process power line or bend, pull, twist or bind power line. Do not spray water directly onto the parts of the main body of the dishwasher. Do not put flammable materials into the dishwasher. Wipe off dust or dirt accumulated on the plug of power line. Do not touch the inside of the cabinet, steam jets during operation or 30 minutes after operation. Do not use extension cord. If there is abnormality such as the spray arm is not moving, smoke or strange smell, immediately unplug the power plug and stop using the dishwasher.
- Page 4: Insert the power plug securely to the base and let the cord go downward. If the cord goes upward or if the plug is incompletely inserted, it may cause fire due to electric leakage or heat generation. Do not operate by putting easily combustible items such as towels and cloth inside the cabinet of the dishwasher. Separate from the heat source such as gas stove 15 cm or more. Do not place anything on the main unit. Falling by opening and closing the door may cause injury. Do not place the dishwasher near fire. Make sure the dishwasher can be set at a smooth drainage location. The dishwasher must be grounded. Do not change the plug without permission.
- Page 5: When disconnecting the plug from the socket, do not pull the power line by force. Pull out by grasping the power plug. Do not use soap, washing powder or other hand sanitizer. Only dishwashing powder suitable for automatic dishwasher. Do not wash plastic utensils unless they are marked safe for the dishwasher. Only for indoor use. Do not sit or stand on the dish rack or door of the dishwasher. When the dishwasher is not used for a long time, pull off the power plug from the power socket and close the dishwasher door. The door shall keep closed to prevent stumble. Be careful to put sharp utensils to prevent scratching the door sealing strip. Moisten the soft cloth by mild cleaning solution, then wipe the machine and dry it with a dry cloth. After washing, check if the dishwashing powder is empty and confirm there are no error notifications on the panel before using the dishwasher.
- Page 6: Quantity of tableware advised: 96 pcs. Do not strongly push open door and main body, nor put downward pressure to the door. Be careful not to pinch fingers when opening and closing the door. Do not get close to the exhaust port. While using or after using the dishwasher, pay attention to hot water drained out. High temperature hot water may come out, there is a risk of burns. Do not hit or tap the dishwasher. Set the filters correctly to avoid breakdown. Do not put light and small dishes such as plastic containers. Make the main unit a solid level surface for normal operation.
- Page 7: Treatments Handle the package of the dishwasher with extreme care. All packages are recyclables. Warning: The packing material may be dangerous to children. The disposal of package and machine shall be submitted to the recycle center. When the machine is not in service, please switch off the power and close the machine door. The cardboard package is made by recycled paper and shall be collected for recycling. If the generated rubbish cannot be treated properly, they will be harmful to the environment and human health. For more details of product recycle, please contact relevant departments of local government. Treatment: Please do not treat the product as unclassified municipal refuses. Such warning sign is used to prevent dangers to you and others.
- Page 8: Please carefully read the instruction manual before using the dishwasher. Recognize the dishwasher. Dishwasher features. Control panel. Washing program. Changing the program mid-cycle. Put additional dishes in. End of washing program. Use the dishwasher. Cleaning and care.
- Page 9: Installation Product dimension Power connection Water connection Connection of drain hoses Troubleshooting Before connecting customer service center Error code Specification
- Page 10: Recognize the dishwasher. Before using the dishwasher for the first time, read the following instructions to ensure the best results. Dishwasher features include the spray arm, salt container, dispenser, filter assembly, upper spray arm, upper basket, cutlery rack, and lower basket.
- Page 11: Control panel Power on/off Select the appropriate washing program and the corresponding indicator will light up. Hygiene: Use to remove bacteria from your dishes and glassware. Maintains the water temperature at 70˚C. Normal: For normally soiled loads, such as pots, plates, glasses, and lightly soiled pans. Eco: This is the standard program for general dirty dishes and utensils. Glass: For slight dirty dishes and glasses. Rapid: For normally soiled loads that need a quick wash. Self-clean: An effective cleaning of the dishwasher itself. Delay +/-: Press the “+” button to add delay time or press the “-” button to decrease it, with a maximum of 24 hours delay. Start/Pause: To start or pause the washing process of the dishwasher.
- Page 12: Warning indicator means the dishwasher is low on rinse aid and requires a refill. Warning indicator means the dishwasher is low on salt and requires a refill. Display shows the remaining time, delay time, and error codes.
- Page 13: Program setting Washing program Best cleaning procedures and amount of dishwashing powder required according to the dirty level of the dishes. Highest water temperature. Dishwashing powder (g), time (min), power (kWh), water (L) for various programs. Hygiene program at 70°C requires 160g of powder and takes 150 minutes. Normal program at 65°C requires 185g of powder and takes 95 minutes. Glass program at 55°C requires 24g of powder and takes 15 minutes. Rapid program at 70°C requires 11g of powder and takes 7 minutes. Self-clean program details provided. Program data is for reference only; test conditions specified.
- Page 14: Start up The plug shall be firstly plugged into the socket. Power supply shall be of 220-240V AC 50Hz type, with socket of 10 A 220-240V AC. Make sure that the water supply is turned on to full pressure. Close the door, press ON/OFF button to turn on the dishwasher. Press the button of desired program, the corresponding indicator will light up. Then, press the Start/Pause button to start. Changing the program mid-cycle A wash cycle can only be changed if it has been running for a short time; otherwise, the detergent may have already been released. To reset the dishwasher, follow the instructions below: Press the Start/Pause button to pause the washing. Press the Program button for more than 3 seconds; the dishwasher will enter standby mode. Press the Program button to select the desired program.
- Page 15: Additional dishes can be placed in at any time before dishwasher program start. If you want to reload dishes in the process of washing, please follow instructions below: Press “Start/Pause” button to pause washing program. Wait for 5 seconds to open the door. After the program finishes, the machine shows End after the buzzer beeps for 8 seconds. Press ON/OFF button to turn off the dishwasher. Hot dishes are more likely to be damaged. The dishes shall be cool for about 15 minutes and then taken out from the dishwasher. It is normal that the dishwasher still remains wet inside. It is extremely dangerous to open the door in the process of washing as this may cause severe burn by hot water.
- Page 16: Use the dishwasher The water softener must be set manually, using the water hardness dial. The water softener is designed to remove minerals and salts from the water, which would have a detrimental effect on the operation of the appliance. The softener should be adjusted according to the hardness of the water in your area. The dishwasher is designed to allow for adjustment in the amount of salt consumed based on the hardness of the water used. Please follow the steps below for adjustment in salt consumption. The machine will exit from set mode if there is no operation in five seconds. Setting on the water softener includes various hardness levels. The manufactory setting is H4.
- Page 17: Adding salt to the softener Only use salt specifically designed for dishwasher use. Every other type of salt, especially table salt, will damage the water softener. In case of damages caused by unsuitable salt, the manufacturer does not give any warranty. Only fill with salt before running a cycle to prevent corrosion. Steps for adding dishwasher salt include removing the lower basket and unscrewing the reservoir cap. Fill the salt container to its maximum limit with water. The salt warning light will stop being on after the salt container has been filled. A washing program should be started immediately after filling the salt to avoid damage. The salt container must only be refilled when the salt warning light comes on.
- Page 18: Function of the rinse aid and detergent The rinse aid is released during the final rinse to prevent water from forming droplets on your dishes, which can leave spots and streaks. It also improves drying by allowing water to roll off the dishes. Your dishwasher is designed to use liquid rinse aids. Warning Only use branded rinse aid for dishwasher. Never fill the rinse aid dispenser with any other substances. This would damage the appliance. When to refill the rinse aid You can always estimate the amount from the color of the optical level indicator located next to the cap. You should never let the rinse aid level be less than 1/4 full. Function of detergent The chemical ingredients that compose the detergent are necessary to remove, crush and dispense all dirt out of the dishwasher. Most of the commercial quality detergents are suitable for this purpose. Warning Use only detergent specifically made for dishwashers. Keep your detergent fresh and dry. Dishwasher detergent is corrosive! Keep dishwasher detergent out of the reach of children.
- Page 19: Adding rinse aid to the dispenser involves removing the rinse aid reservoir cap by rotating it counterclockwise. Carefully pour in the rinse aid into its dispenser, avoiding overflow. Close the rinse aid reservoir cap by rotating it clockwise. Adjust the rinse aid reservoir by turning the rinse aid indicator dial to a number between 1 and 6. The higher the number, the more rinse aid the dishwasher uses. If dishes are not drying properly or are spotted, adjust the dial to the next higher number until dishes are spot-free. Reduce the setting if there are sticky whitish stains on dishes or a bluish film on glassware or knife blades. Clean up any spilled rinse aid with an absorbent cloth to avoid excessive foaming during the next wash.
- Page 20: Adding detergent to the dispenser involves several steps. Press the release catch on the detergent dispenser to open the cover. Add detergent into the larger cavity for the main wash cycle. For more heavily soiled wash loads, also add some detergent into the smaller cavity for the pre-wash cycle. Close the cover and press on it until it locks into place.
- Page 21: Install dishwasher bowl basket Purchase dishes suitable for dishwasher. Use a suitable mild dishwashing powder. For special appliances, try to select a washing program that with a lower temperature. Do not take out the glass dishes immediately after the program ends to prevent damage. Use the dishwashing machine rationally. Clear larger food residues. Place the dishes in the dishwasher as follows: cups, glasses, pots and so on are placed face down. All utensils should be placed safely and must not be overturned. Do not use the dishwasher overloaded so that you can get better cleaning performance.
- Page 22: Use the upper rack for small or delicate items such as small plates, cups, saucers, glasses. Place items so that the open end faces down for cleaning and drying. Do not stack items on top of each other. The lower rack is recommended for dinner plates, soup bowls, dishes, pots, pans, lids, and grill trays. Plates should be positioned vertically and facing the center of the rack. Make sure that large items do not interfere with the rotation of the spray arms. Do not prevent the detergent dispenser from opening.
- Page 23: Loading the cutlery rack Cutlery should be placed in the cutlery rack separately from each other in the appropriate positions, and do make sure the utensils do not nest together, this may cause bad performance. Up rack Down rack Item Number Soup spoons Forks Dessert spoons Serving spoons Serving forks Gravy ladles Knives Teaspoons
- Page 24: Cleaning and care Filter cleaning The filtering system in the base of the wash cabinet retains coarse debris from the washing cycle. Check the condition of the filters regularly and clean them if necessary under running water. Do not over tighten the filters. Never use the dishwasher without filters in place. Improper replacement of the filter may reduce the performance level of the appliance and damage dishes and utensils. Lift fine filter up from main filter. Hold the coarse filter and rotate it anticlockwise to unlock the filter. Larger food remnants can be cleaned by rinsing the filter under running water. For a more thorough clean, use a soft cleaning brush. Reassemble the filters in the reverse order of the disassembly.
- Page 25: Spray arms cleaning It is necessary to clean the spray arms regularly for hard water chemicals will clog the spray arm jets and bearings. To clean the spray arms, follow the instructions below: To remove the upper spray arm, hold the nut in the center still and rotate the spray arm counterclockwise to remove it. To remove the lower spray arm, pull out the spray arm upward. Wash the arms in soapy and warm water and use a soft brush to clean the jets. Replace them after rinsing them thoroughly.
- Page 26: Care and maintenance The door and the door seal Clean the door seals regularly with a soft damp cloth to remove food deposits. Food and drink residues may drip onto the sides of the dishwasher door. These surfaces are outside the wash cabinet and are not accessed by water from the spray arms. The control panel Control panel can be wiped with a slightly wet cloth. Do not use sharp tools, scratch sponge, or rough detergent anywhere in the machine. Do not use spray detergent to clean the door, as it may damage the door lock and other electrical components. Do not use abrasives or rough paper towels, as it may leave scratches or spots on stainless steel surface.
- Page 27: Installation Product dimension Height (H) Width (W) Depth (D1) Depth (D2) 590 mm 550 mm 500 mm (with the door closed) 964 mm (with the door opened 90°)
- Page 28: Warning about electric shock during installation and use of the machine. Ensure the machine is properly grounded before use to prevent electric shock or death. Do not use an extension cord or power adapter with this machine. Do not cut off or remove the grounding connection of the power cord. Check the label for rated voltage and connect the machine to the appropriate power supply. A 10A fuse is required, and a time-delay fuse or circuit breaker is recommended. Ensure supplied voltage and frequency match those on the rating plate. The plug must be connected to a properly grounded socket. Replace unsuitable sockets instead of using a power adapter to avoid overheating. This appliance must be earthed to reduce the risk of electric shock in case of malfunction.
- Page 29: If there is no grounding, the power cord with air switch will provide protection. When users touch the shell with electricity, it will cut the power immediately to protect from electric shock. The indicator lights up when the power supply is safe. If an electric shock occurs, the switch will eject. After resolving the issue, press the switch to reset. For safety and proper operation, ensure the appliance is grounded. Connect the cold water supply hose to a threaded connector and fasten it tightly. Let the water run if the pipes are new or unused to ensure clarity. Insert the drain hose into a drain pipe with a minimum diameter of 4 cm. The free end of the hose must not be immersed in water to avoid backflow.
- Page 30: How to drain excess water from hoses Excess water in hoses cannot be drained directly into the sink if it is 1000 mm higher from the floor. Drain excess water from hoses into a bowl or suitable container that is held outside and lower than the sink. Connect the water drain hose correctly to avoid water leaks. Ensure that the water drain hose is not kinked or squashed. If you need a drain hose extension, use a similar drain hose. The extension must be no longer than 4 meters to maintain the cleaning effect of the dishwasher. The waste connection must be at a height less than 100 cm from the bottom of the dish. The water drain hose should be fixed.
- Page 31: Troubleshooting Before connecting customer service center, please check the chart below. Problem: Fuse burn-out or circuit trip. Possible cause: The machine is not working. Solutions: Replace fuse or reset circuit breaker. Make sure that dishwasher is on and properly plugged into the socket. Close the door. Problem: Drainage pipe has a knot or is blocked. Possible cause: Sink drain is blocked. Solutions: Check the drainage pipe. Check the sink drain to ensure good drainage. Problem: Improper dishwashing powder is used. Solutions: In order to avoid foaming, only dishwashing powder specially designed for dishwasher can be used. Problem: Foam remains in liner. Solutions: Use dishwashing powder with coloring agent. Make sure that dishwashing powder used is free of coloring agent. Problem: Rust on dishes. Solutions: Avoid washing dishes that are easily corroded in dishwasher. Problem: Dishes in the rack prevent spray arm from rotating. Solutions: Suspend the program and reposition the dishes that prevent spray arm from rotating.
- Page 32: Problem: Dishes are loose. Possible cause: Dishes are not placed correctly. Solutions: Suspend the program and reposition the dishes. Possible cause: The program is not powerful enough. Solutions: Select a more powerful program. Possible cause: Dishwashing powder is not enough. Solutions: Use more dishwashing powder or replace with new detergent. Problem: Dishes remain dirty after washing. Possible cause: Filter assembly is dirty or not properly installed. Solutions: Reposition the dishes so that the spray arm can rotate freely. Problem: Dishes are not completely dry. Possible cause: Dishes are taken out too early. Solutions: Slightly open the door to let the vapor out and wait until dishes are cool.
- Page 33: Error code When failure occurs, error code will appear to remind you. E1 Possible cause: Long water intake time. Flow-meters, drain valves, or pump failures shall be repaired by qualified serviceman. Heating pipe or thermistor is at abnormal state, which needs to be unplugged from the outlet and repaired by qualified serviceman. E3 E4 The machine may overflow or something is wrong with the floater in the water tank, which needs to be repaired by qualified serviceman. Overflow or water tank problem.
- Page 34: Model: DW-08T1(S)-MY Dimensions: 550 (W) x 590 (H) x 500 (D) mm Rated voltage: 220-240V Rated frequency: 50 Hz Rated power: 1380-1620W Water consumption: 8 L Power consumption: 0.72 kWh Control mode: Electronic type Washing capacity: 96 pcs Total weight: 30.5 kg Net weight: 24.8 kg

LG LD-2130-1-W-S-M-H Dishwasher

BOSCH SMI6ECS10E Dishwasher

SIEMENS SN43HW32US Dishwasher

BOSCH SHPM65W55N Dishwasher

FISHER AND PAYKEL DW60UN2B2 5 Contemporary Built Under Dishwasher

Miele G 5000 SC Active Dishwasher

GAGGENAU DF481100 Dishwasher

SIEMENS SN45ZS55CS Dishwasher

Samsung DW60M5062 Dishwasher

BOSCH SMS6ECC51E Dishwasher