
AEG FSK53617Z Dishwasher






aeg.com/register
NL Gebruiksaanwijzing | Afwasautomaat
3
EN User Manual | Dishwasher
26
FSK53617Z
aeg.com\register


| General | Details |
|---|---|
| Name | AEG FSK53617Z Dishwasher |
| Make | AEG |
| Language | English |
| Filetype | PDF (Download) |
| File size | 1.37 MB |
 (1 votes, average: 5.00 out of 5)
 Loading...

AEG FSK76748P Dishwasher

AEG FSK53617Za Dishwasher

AEG FSK74747P Dishwasher

AEG FSE73507P Dishwasher

AEG GS60AIM Dishwasher

AEG FSB73427Z Dishwasher

AEG FSE74737P Quickselect Dishwasher

AEG FFB73727PM Dishwasher

AEG F8642FI Tall Tub Dishwasher

AEG FFE83800PM Dishwasher

AEG FSK53617Z Dishwasher Overview
Summary of Contents
- Page 1: User manual for the dishwasher. Model: FSK53617Z. Instructions available in multiple languages. Visit aeg.com/register for more information.
- Page 2: How to install your AEG/Electrolux 60 cm sliding door dishwasher.
- Page 3: Welkom bij AEG! Hartelijk dank dat je voor onze apparatuur hebt gekozen. Advies over gebruik, brochures, het oplossen van problemen, service- en reparatie-informatie. Veiligheidsinformatie: Lees zorgvuldig de meegeleverde instructies voor installatie en gebruik van het apparaat. De fabrikant is niet verantwoordelijk voor verwondingen of schade die voortvloeit uit de onjuiste installatie of het onjuiste gebruik. Bewaar de instructies altijd op een veilige, toegankelijke plek voor toekomstig gebruik. Dit apparaat kan worden gebruikt door kinderen van 8 jaar en ouder en door mensen met een beperkt lichamelijk, zintuiglijk of verstandelijk vermogen. Zij moeten onder toezicht staan of instructies hebben gekregen over het veilig gebruiken van het apparaat. Kinderen jonger dan 8 jaar en personen met zware en complexe beperkingen moeten worden beschermd tegen het apparaat.
- Page 4: Beperkingen dienen altijd uit de buurt van het apparaat te worden gehouden, tenzij ze voortdurend onder toezicht staan. Houd toezicht op kinderen om te voorkomen dat zij met het apparaat gaan spelen. Dit apparaat is alleen bedoeld voor het reinigen van huishoudelijke borden en tafelgerei. Dit apparaat is bedoeld voor binnenshuis huishoudelijk gebruik. De specificatie van dit apparaat niet wijzigen. De waterwerkdruk moet liggen tussen 0.05 (0.5) / 1 (10) bar (MPa). De deur van het apparaat mag niet open worden gelaten, om struikelgevaar te voorkomen. Indien het netsnoer beschadigd is, moet het worden vervangen door de fabrikant of een erkende serviceverlener. Messen en andere gebruiksvoorwerpen met scherpe punten moeten met hun punt naar beneden of horizontaal in de mand geplaatst worden.
- Page 5: Gebruik alleen originele reserveonderdelen. Zelfreparatie of niet-professionele reparatie kan gevolgen hebben voor de veiligheid en de garantie. Houd er rekening mee dat de watertoevoerslang een veiligheidsklep heeft en een mantel met een binnenleiding. Zorg ervoor dat er geen zichtbare waterlekken zijn tijdens en na het eerste gebruik van het apparaat. Neem contact op met het bevoegde servicecentrum voor vervanging van de watertoevoerslang als deze beschadigd is. Zonder elektriciteit is het waterbeveiligingssysteem niet actief, wat overstromingsgevaar kan opleveren. Plaats geen ontvlambare producten in, bij of op het apparaat. Volg de veiligheidsinstructies op de verpakking van het vaatwasmiddel op. Drink en speel niet met het water in het apparaat. Neem contact op met de erkende servicedienst voor reparatie van het apparaat.
- Page 6: Haal de stekker uit het stopcontact. Snij het netsnoer van het apparaat af en gooi dit weg. Verwijder de deurgreep om te voorkomen dat kinderen en huisdieren opgesloten raken in het apparaat. PRODUCTBESCHRIJVING De Beam-on-Floor is een lichtstraal die op de vloer onder de deur van het apparaat verschijnt. Als een programma start gaat er een rood lampje aan. Er gaat een groen lampje branden wanneer het programma is afgelopen. Het geluidssignaal klinkt als er zich in het apparaat een storing voordoet. BEDIENINGSPANEEL ECO geeft de milieuvriendelijkste programmakeuze aan voor een normaal bevuilde lading. De ECOMETER geeft aan hoe de programmakeuze het stroom- en waterverbruik beïnvloedt.
- Page 7: Indicatielampje glansspoelmiddel is aan als het glansspoelmiddeldoseerbakje bijgevuld dient te worden. Indicatielampje zout is aan als het zoutreservoir bijgevuld dient te worden. Indicatielampje Machine Care is aan als het apparaat interne reiniging nodig heeft met het Machine Care-programma. Controlelampje droogfase is aan wanneer een programma met de droogfase is geselecteerd. Kies een geschikt programma op basis van de duur. Met het AUTO Sense programma detecteert de vaatwasser de mate van vuil en de hoeveelheid vaat. Pas de programmakeuze aan uw behoefte aan door EXTRAS te activeren. Quick is het kortste programma en is geschikt voor het wassen van een verse vaat met weinig vuil. ExtraPower verbetert de vaatwasresultaten van het geselecteerde programma. ECO is het langste programma en biedt het meest efficiënte water- en energieverbruik.
- Page 8: Programmaoverzicht Programma Lading Serviesgoed, bestek Afwassen bij 45 °C Tussentijdse spoeling Laatste spoeling 45 °C AirDry ExtraPower GlassCare Serviesgoed, potten, pannen Machine Care
- Page 9: Verbruikswaarden De druk en temperatuur van het water, de variaties in stroomtoevoer, de opties, de hoeveelheid vaat en mate van vervuiling kunnen de verbruikswaarden veranderen. De waarden voor andere programma's dan ECO zijn slechts indicatief. Basisinstellingen Je kunt het apparaat configureren door de basisinstellingen naar eigen behoefte te wijzigen. Raadpleeg de informatie in dit hoofdstuk voor meer details. U kunt de basisinstelling in de instellingsmodus wijzigen.
- Page 10: De volgorde van de basisinstellingen die in de tabel worden weergegeven, is dezelfde volgorde van de instellingen op de ECOMETER. Gebruik Vorige of Volgende om de balk van de ECOMETER die bij de gewenste instelling hoort te kiezen. Druk op OK om de instelling te bevestigen. Navigeren in de instellingenmodus kan met gebruik van de keuzebalk MY TIME. De waterontharder verwijdert mineralen van de watertoevoer die een nadelige invloed hebben op de wasresultaten en het apparaat. De waterontharder moet worden aangepast aan de hardheid van het water in jouw omgeving. U kunt de instellingenmodus ingaan voordat een programma start. Stel ongeacht het gebruikte type wasmiddel het juiste waterontharderniveau in om goede wasresultaten te garanderen. Multivaatwastabletten die zout bevatten zijn niet effectief genoeg als waterontharder. Opgeslagen instellingen blijven geldig totdat u ze opnieuw wijzigt.
- Page 11: Waterhardheid Duitse graden (°dH) Franse graden (°fH) Niveau waterontharder Gebruik geen zout op dit niveau. De waterontharder ondergaat een automatisch regeneratieproces. Het glansmiddel zorgt dat het serviesgoed zonder vlekken of strepen droogt. Voor de juiste werking van de waterontharder moet de hars van de ontharder regelmatig worden geregenereerd. De start van de regeneratie heeft geen invloed op de cyclusduur. Watertemperatuur, waterdruk en variaties in de netvoeding kunnen de waarden veranderen.
- Page 12: Let op! Er klinken geluidssignalen als er zich in het apparaat een storing voordoet. Als kinderen toegang hebben tot het apparaat, raden we aan om AirDry uit te schakelen. AirDry verbetert de droogresultaten. Tijdens de droogfase opent de deur van het apparaat automatisch en blijft deze op een kier staan. AirDry wordt bij alle programma's automatisch geactiveerd. Probeer de deur van het apparaat niet binnen twee minuten na automatisch openen te sluiten. Het niveau van de waterontharder aan te passen op basis van de hardheid van de watertoevoer. Gebruik alleen regeneratiezout voor vaatwassers. Gebruik geen keukenzout. Open de waterkraan. Start programma Quick om eventuele resten uit het fabricageproces te verwijderen. Het zout wordt gebruikt om de hars in de waterontharder te herladen en voor goede wasresultaten voor dagelijks gebruik.
- Page 13: Let op! Het compartiment is alleen voor glansmiddel. Niet vullen met vaatwasmiddel. Gebruik alleen glansspoelmiddel dat speciaal is ontworpen voor vaatwassers. Druk op de ontgrendelingsknop om het deksel te openen. Giet het glansmiddel in het doseerbakje tot het vulniveau 'max'. Verwijder gemorst glansspoelmiddel met een absorberend doekje om te voorkomen dat er te veel schuim ontstaat. Sluit het deksel. U kunt de programmakeuzeknop kiezen tussen stand 1 (laagste hoeveelheid) en stand 4 of 6 (hoogste hoeveelheid). Water en zout kunnen uit het zoutreservoir stromen als u het bijvult. Om corrosie te voorkomen, vult u het zoutreservoir en start u onmiddellijk een volledige vaatwascyclus met wasmiddel.
- Page 14: Dagelijks gebruik Open de waterkraan. Hoe een programma te selecteren en starten met gebruik van de keuzebalk MY TIME. Schuif met uw vinger over de keuzebalk MY TIME om een geschikt programma te kiezen. Vul het zoutreservoir bij als het leeg is. Vul het glansspoelmiddelreservoir bij als het leeg is. Voeg het wasmiddel toe. Het lampje van het gekozen programma gaat aan. Sluit de waterkraan als het programma voltooid is. De ECOMETER geeft het niveau van stroom- en waterverbruik aan. Het activeren van opties verhoogt vaak het waterverbruik, het energieverbruik en de programmaduur.
- Page 15: Het apparaat neemt het type lading waar en past aan naar een geschikte wascyclus. Als u de deur opent terwijl een programma loopt, stopt het apparaat. Dit kan het energieverbruik en de programmaduur beïnvloeden. Als de deur tijdens de droogfase langer dan 30 seconden wordt geopend, wordt het lopende programma beëindigd. Deze functie bespaart energie door het apparaat uit te schakelen als het niet in werking is. Nadat het programma is voltooid, verschijnt het volgende op het display: 0:00. De functie Auto Off schakelt het apparaat automatisch uit. Controleer of er vaatwasmiddel in het vaatwasmiddelbakje aanwezig is voordat u een nieuw programma start. Het afwassen in de vaatwasser volgens de instructies in de gebruikershandleiding verbruikt meestal minder water en energie dan het afwassen met de hand. Volg de onderstaande tips om te zorgen voor optimale schoonmaak- en droogresultaten en ook het milieu te helpen beschermen.
- Page 16: Laad de vaatwasser volledig in om water en energie te besparen. Voor de beste reinigingsresultaten plaatst u items in de korven volgens de instructies in de gebruikershandleiding en overbelast u de korven niet. Spoel de vaat niet eerst af; dit verhoogt het water- en energieverbruik. Kies indien nodig een programma met voorwasfase. Verwijder grotere voedselresten van de borden en lege bekers en glazen voordat u ze in het apparaat plaatst. Gebruik altijd de juiste hoeveelheid wasmiddel. Onvoldoende dosering kan leiden tot slechte reinigingsresultaten en hardwaterfilmen of vlekken op de voorwerpen. Het gebruik van te veel wasmiddel met zacht of verzacht water resulteert in wasmiddelresten op de borden. Kies een programma op basis van het type lading en de mate van bevuiling. ECO biedt het meest efficiënte gebruik van water en energieverbruik. Controleer of het wateronthardersniveau correct is; een te hoog niveau kan leiden tot roest op bestek. Gebruik enkel zout, glansmiddel en vaatwasmiddel voor vaatwassers. Overige producten kunnen het apparaat beschadigen. Zorg ervoor dat de filters schoon zijn en correct zijn geïnstalleerd voordat u een programma start.
- Page 17: Er regenereerzout en glansmiddel is toegevoegd (tenzij u gecombineerde afwastabletten gebruikt). Plaats holle voorwerpen (bijv. kopjes, glazen en pannen) met de opening naar beneden. Zorg ervoor dat glazen elkaar niet aanraken. Het programma is geschikt voor het type lading en de mate van bevuiling. Plaats lichte of plastic voorwerpen in het bovenrek. Zorg dat de sproeiarmen vrij kunnen ronddraaien voordat u een programma start. Gebruik het apparaat alleen om voor het reinigen van vaatwasserbestendige artikelen. Laat de borden afkoelen voordat u deze uit het apparaat neemt. Was de volgende materialen niet in de vaatwasser: hout, hoorn, tin, koper, aluminium, delicaat geëmailleerd porselein en onbeschermd koolstofstaal. Als het apparaat reiniging nodig acht, gaat het lampje aan.
- Page 18: Het filtersysteem bestaat uit 3 delen. Reinig de binnenkant van het apparaat met een zachte, vochtige doek. Gebruik geen schuurmiddelen, schuursponsjes, scherpe voorwerpen, sterke chemicaliën, pannensponsjes of oplosmiddelen. Veeg de deur, inclusief de rubberen pakking, eenmaal per week schoon. Gebruik om de prestaties van uw apparaat te onderhouden minstens elke twee maanden een reinigingsproduct dat specifiek is ontwikkeld voor vaatwassers. Controleer de filters en de opvangbak na elk gebruik van de vaatwasser. Vreemde voorwerpen verminderen de reinigingsprestaties en kunnen schade aan de afvoerpomp veroorzaken. Als u de voorwerpen niet kunt verwijderen, neemt u contact op met een erkende servicedienst. Maak het apparaat schoon met een vochtige, zachte doek. Gebruik alleen neutrale schoonmaakmiddelen.
- Page 19: Zet de filters weer in elkaar. Plaats het filter terug in het platte filter. Was de sproeiarm onder stromend water. Gebruik een smal en puntig gereedschap om de vuildeeltjes uit de gaten te verwijderen. Duw de sproeiarm naar beneden om deze weer terug te plaatsen. Verwijder de bovenste sproeiarm niet. LET OP! Een onjuiste plaatsing van de filters kan leiden tot slechte wasresultaten en het apparaat beschadigen. Trek de onderste sproeiarm naar boven om deze te verwijderen. WAARSCHUWING! Onjuiste reparatie van het apparaat kan een gevaar voor de veiligheid van de gebruiker vormen. Zie de onderstaande tabel voor informatie over mogelijke problemen.
- Page 20: Probleem en alarmcode Je kunt het apparaat niet inschakelen. Controleer of de stekker is aangesloten op het stopcontact. Controleer of er geen beschadigde zekering in het zekeringenkastje is. Het programma start niet. Controleer of de deur van het apparaat gesloten is. Als de optie uitgestelde start is ingesteld, annuleer je de instelling of je wacht totdat het aftellen voorbij is. Het apparaat wordt niet met water gevuld. Controleer of de waterkraan geopend is. Controleer of de druk van de watervoorziening niet te laag is. De machine pompt geen water weg. Controleer of de gootsteenafvoer niet verstopt is. Controleer of het binnenfiltersysteem niet verstopt is. De overstromingsbeveiliging is ingeschakeld. Draai de waterkraan dicht. Controleer of het apparaat correct geïnstalleerd is. Storing van de waterniveaudetectiesensor. Controleer of de filters schoon zijn. Schakel het apparaat uit en aan. Technische storing van het apparaat. Schakel het apparaat uit en aan. Het niveau van het water in het apparaat is te hoog. Het apparaat stopt en begint meerdere keren tijdens de werking. Dat is normaal. Het zorgt voor optimale reinigingsresultaten en energiebesparing. Het programma duurt te lang. Als de optie uitgestelde start is ingesteld, annuleert u de uitgestelde instelling of wacht u tot het aftellen voorbij is.
- Page 21: Probleem en alarmcode De weergegeven programmaduur is anders dan de duur in de tabel verbruikswaarden. De druk en temperatuur van het water, de variaties in stroomtoevoer, de opties, de hoeveelheid vaat en de mate van vervuiling kunnen de verbruikswaarden doen veranderen. De resterende duur in het display wordt verlengd en schakelt bijna naar het eind van de programmaduur. Dit is geen defect. Het apparaat werkt correct. Kleine lekkage van de deur van het apparaat. Het apparaat staat niet waterpas. Draai aan de verstelbare pootjes. De deur van het apparaat is moeilijk te sluiten. Delen van het serviesgoed steken uit de korven. De functie AirDry is geactiveerd. U kunt de functie uitschakelen. Ratelende of kloppende geluiden vanuit het apparaat.
- Page 22: De vaatwas- en droogresultaten zijn niet naar tevredenheid. Slechte wasresultaten kunnen worden veroorzaakt door het niet correct laden van de korven. Gebruik een intensiever wasprogramma en activeer de optie ExtraPower voor betere resultaten. Slechte droogresultaten kunnen ontstaan als serviesgoed te lang in het gesloten apparaat staat. Activeer AirDry om de droogprestatie te verbeteren. De kwaliteit van het glansspoelmiddel kan invloed hebben op de resultaten. Witte strepen of een blauwe waas op glazen en borden kunnen duiden op een te hoge dosering van glansspoelmiddel. Vlekken en droge waterdruppels kunnen ontstaan door onvoldoende glansmiddel of een slechte kwaliteit ervan. De binnenkant van het apparaat kan nat zijn door condensatie, wat geen defect is. Gebruik vaatwasmiddelen die specifiek zijn bedoeld voor gebruik in vaatwassers om overmatig schuim te voorkomen.
- Page 23: Probleem Mogelijke oorzaak en oplossing Kalkresten op het serviesgoed, op de kuip en aan de binnenkant van de deur. Het zoutniveau is laag, controleer de bijvulaanduiding. De dop van het zoutreservoir zit los. Het kraanwater heeft een hoge hardheid. Raadpleeg de instelling van de waterontharder. Gebruik zout en stel zelfs bij het gebruik van multitabs de waterontharder in. Start het programma Machine Care met een ontkalker bestemd voor vaatwassers. Reinig het apparaat met de geschikte wasmiddelen als kalkaanslag niet verdwijnt. Dof, ontkleurd of afgeschilferd serviesgoed. Zorg ervoor dat alleen vaatwasserbestendige voorwerpen in het apparaat worden gewassen. Activeer de optie GlassCare om te zorgen voor speciale verzorging voor glaswerk en fijne items. TECHNISCHE GEGEVENS Afmetingen Breedte / hoogte / diepte (mm) 596 / 818 - 898 / 550 Spanning (V) 220 - 240 Watertoevoerdruk min. 5 - max. 60 Koud water of warm water (°C) Capaciteit 13 Link naar de EU-EPREL-databank Het is ook mogelijk om informatie gerelateerd aan de prestaties van het product in de EU-EPREL-databank te vinden.
- Page 24: Milieubescherming Gooi apparaten gemarkeerd met het symbool niet weg met het huishoudelijk afval. Recycleer de materialen met het symbool. Breng het product naar het milieustation bij u in de buurt of neem contact op met de gemeente. Bescherm het milieu en de volksgezondheid en recycleer op een correcte manier het afval van elektrische en elektronische apparaten.
- Page 25: Welcome to AEG! Thank you for choosing our appliance. Before the installation and use of the appliance, carefully read the supplied instructions. The manufacturer is not responsible for any injuries or damage that are the result of incorrect installation or usage. Always keep the instructions in a safe and accessible location for future reference. This appliance can be used by children aged from 8 years and above and persons with reduced physical, sensory or mental capabilities or lack of experience and knowledge if they have been given supervision or instruction concerning the use of the appliance in a safe way and understand the hazards involved. Children of less than 8 years of age and persons with very extensive and complex disabilities shall be kept away from the appliance unless continuously supervised.
- Page 26: Children should be supervised to ensure that they do not play with the appliance. Keep detergents away from children. This appliance is for cleaning household-type dishes and tableware only. This appliance is designed for single household domestic use in an indoor environment. Do not change the specification of this appliance. The operating water pressure must be between 0.05 (0.5) / 1 (10) MPa (bar). The appliance door should not be left in an open position to avoid the tripping hazard. If the supply cord is damaged, it must be replaced by qualified persons to avoid a hazard. Knives and other utensils with sharp points must be loaded in the basket with their points down. Before any maintenance operation, deactivate the appliance and disconnect the mains plug from the socket.
- Page 27: Spare parts are available for at least 10 years after the model has been discontinued. Some spare parts are only available to professional repairers, and not all parts are relevant for all models. Lamps inside the product are designed for extreme conditions and are not suitable for household illumination. Do not put flammable products or items that are wet with flammable products near the appliance. Dishwasher detergents are dangerous; follow safety instructions on the packaging. Do not remove dishes from the appliance until the programme is complete. To repair the appliance, contact the Authorised Service Centre and use original spare parts only. Self-repair or non-professional repair can have safety consequences and might void the guarantee. Disconnect the appliance from the mains supply before disposal. Remove the door catch to prevent children and pets from getting closed in the appliance.
- Page 28: Product description includes various components such as the rinse aid dispenser, detergent dispenser, cutlery basket, lower basket, and upper basket. Beam-on-Floor is a light displayed on the floor below the appliance door, indicating the status of the appliance. A red light indicates when a programme starts and remains on for its duration. A green light signals when the programme is complete, while a flashing red light indicates a malfunction. The control panel features an On/Off button, delay start button, display, MY TIME program selection bar, option buttons, and AUTO Sense program button. The ECOMETER shows how the programme selection affects energy and water consumption. ECO indicates the most environmentally friendly programme selection for normally soiled dishwashing loads.
- Page 29: Rinse aid indicator is on when the rinse aid dispenser needs refilling. Salt indicator is on when the salt container needs refilling. Machine Care indicator is on when the appliance needs internal cleaning. Drying phase indicator is on when a programme with the drying phase is selected. Select a suitable programme based on its duration. The AUTO Sense programme adjusts the temperature and quantity of water based on soil degree and dish amount. Quick is the shortest programme suitable for fresh and light soil. ExtraPower improves dishwashing results by increasing wash temperature and duration. GlassCare prevents damage to delicate items by reducing temperature changes. ECO is the longest programme for efficient use of energy and water.
- Page 30: Programme overview Dishwasher load Degree of soil Programme phases Quick Crockery, cutlery Fresh Dishwashing 45 °C Intermediate rinse Final rinse 45 °C ExtraPower GlassCare AirDry Crockery, cutlery, pots, pans Normal to heavy, dried-on Prewash ECO AUTO Sense Machine Care Cleaning 70 °C
- Page 31: Consumption values for water, energy, and duration are provided for various programmes. The pressure, temperature of water, mains supply variations, options, quantity of dishes, and degree of soil can affect these values. Values for programmes other than ECO are indicative only. Basic settings can be configured according to user needs. Water hardness can be adjusted based on local water conditions. Rinse aid indicator can be activated or deactivated. Acoustic signal for the end of a programme can be turned on or off. AirDry feature can be activated or deactivated. Sound of button presses can be turned on or off. Detailed information for each setting is available in the manual.
- Page 32: The display shows the current setting value. Press OK to enter the setting. The current setting value flashes. You can navigate in setting mode using Previous and Next buttons. The water softener removes minerals from the water supply, which would have a negative effect on the washing results and on the appliance. Water hardness is measured in equivalent scales. The water softener should be adjusted according to the hardness of the water in your area. Regardless of the type of detergent used, set the right water softener level to ensure good washing results. Make sure the appliance is in setting mode. Multi-tabs containing salt are not effective enough to soften hard water.
- Page 33: Water hardness is measured in various units including German degrees (°dH), French degrees (°fH), mmol/l, and mg/l (ppm). The water softener undergoes an automatic regeneration process. If standard detergent or multi-tablets without rinse aid are used, activate the notification to keep the rinse aid refill indicator active. The rinse aid helps to dry the dishes without streaks and stains. You can activate an acoustic signal that sounds when the programme is completed. When the rinse aid chamber is empty, the rinse aid indicator turns on. For the correct water softener operation, the resin of the softener device needs to be regenerated regularly. Regeneration initiation has no impact on the cycle duration unless it occurs in the middle of a programme. Each performed softener rinse may prolong the programme duration by another 5 minutes. All consumption values mentioned are determined in line with the currently applicable standard in laboratory conditions.
- Page 34: AirDry improves the drying results by automatically opening the appliance door during the drying phase. If children have access to the appliance, it is advised to deactivate AirDry due to potential danger. AirDry is automatically activated with all programmes, and the duration of the drying phase varies depending on the selected programme and options. When AirDry opens the door, the display shows the remaining time of the running programme. The buttons on the control panel make a click sound when pressed, which can be deactivated. Do not try to close the appliance door within 2 minutes after automatic opening to avoid damage. Before first use, adjust the level of the water softener according to the hardness of the water supply. Fill the salt container with 1 kg of salt and 1 litre of water for the first time. Start the Quick programme to remove any residuals from the manufacturing process without using detergent or dishes. Use only regeneration salt for dishwashers and avoid kitchen salt to ensure good washing results.
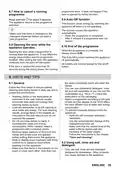
- Page 35: Caution regarding the rinse aid compartment, which is for rinse aid only and should not be filled with detergent. Only use rinse aid designed specifically for dishwashers. Instructions for filling the rinse aid dispenser include pressing the release button to open the lid and pouring the rinse aid until it reaches the fill level 'max'. Remove any spilled rinse aid to prevent excessive foam formation. Water and salt may come out of the salt container when filling it; start a complete dishwashing cycle immediately after filling to prevent corrosion. Close the lid of the salt container and ensure the release button locks into position. The selector for the released quantity can be adjusted between position 1 (lowest) and position 4 or 6 (highest). Daily use instructions include opening the water tap and activating the appliance. Fill the salt container and rinse aid dispenser if they are empty, load the baskets, add detergent, select and start a programme, and close the water tap when complete.
- Page 36: Press the release button to open the lid. Put the detergent, in powder or tablets, in the compartment. If the programme has a prewash phase, put a small quantity of detergent on the inner part of the appliance door. Close the lid and ensure that the release button locks into position. Activating options often increases water consumption, energy consumption, and programme duration. The appliance senses the type of load and adjusts a suitable wash cycle. Do not fill the compartment with more than 30 ml of gel detergent. Select a programme using MY TIME selection bar. Options must be activated every time before you start a programme. If you cancel the delay start, you have to select the programme again.
- Page 37: How to cancel a running programme Auto Off function saves energy by switching the appliance off when it is not operating. Opening the door while a programme is running stops the appliance and may affect energy consumption. When the programme is complete, the display shows 0:00. The Auto Off function switches the appliance off automatically. Follow the hints below to ensure optimal cleaning and drying results. Washing dishes in the dishwasher usually consumes less water and energy than washing by hand. Load the dishwasher to its full capacity to save water and energy. Do not pre-rinse dishes by hand as it increases water and energy consumption. Only use salt, rinse aid, and detergent designed for dishwashers.
- Page 38: In areas with hard and very hard water, it is recommended to use basic dishwasher detergent, rinse aid, and salt separately for optimal cleaning and drying results. The filters should be clean and correctly installed. Ensure the cap of the salt container is tight and that the spray arms are not clogged. There should be enough salt and rinse aid unless using multi-tablets. Detergent tablets may not fully dissolve with short programmes; using tablets with long programmes is recommended. The arrangement of items in the baskets should be correct, and the programme must be suitable for the type of load and degree of soil. Always use the correct quantity of detergent, as insufficient dosage can lead to poor cleaning results. Loading the baskets should utilize the whole space, and only dishwasher-safe items should be washed. Ensure the water softener level is correct to prevent rust on cutlery. Let the tableware cool down before removing it from the appliance to avoid damage.
- Page 39: Care and cleaning Do not use abrasive products, abrasive cleaning pads, sharp tools, strong chemicals, scourer or solvents. Wipe clean the door, including the rubber gasket, once a week. Before any maintenance other than running the programme Machine Care, deactivate the appliance and disconnect the mains plug from the main socket. To maintain the performance of your appliance, use a cleaning product designed specifically for dishwashers at least once every two months. Dirty filters and clogged spray arms negatively affect the washing results. Machine Care is a programme designed to clean the appliance interior with optimal results. Check the filters and the sump after each use of the dishwasher. Foreign objects decrease the cleaning performance and can cause damage to the drain pump. Clean the appliance with a moist soft cloth. The filter system is made of 3 parts.
- Page 40: Reassemble the filters B and C. Put back the filter B in the flat filter A and turn it clockwise until it locks. An incorrect position of the filters can cause bad washing results and damage to the appliance. To remove the lower spray arm, pull it upwards. Wash the filters. Wash the spray arm under running water and use a thin pointed tool to remove particles of soil from the holes. Make sure that there are no residues of food or soil in or around the edge of the sump. Put back in place the flat filter A, ensuring it is correctly positioned under the 2 guides. To install the spray arm back, press it downwards. Do not remove the upper spray arm; if clogged, remove particles of soil with a thin pointed object.
- Page 41: Troubleshooting Refer to the below table for information on possible problems. Improper repair of the appliance may pose a danger to the safety of the user. Any repairs must be performed by qualified personnel. With some problems, the display shows an alarm code. The majority of problems that may occur can be solved without the need to contact an Authorised Service Centre. You cannot activate the appliance. Make sure that the mains plug is connected to the mains socket. The programme does not start. Make sure that the appliance door is closed. The appliance does not fill with water. Make sure that the water tap is open. The appliance does not drain the water. Make sure that the sink spigot is not clogged. The anti-flood device is on. Close the water tap. Malfunction of the water level detection sensor. Make sure that the filters are clean. Malfunction of the wash pump or the drain pump. Switch the appliance off and on.
- Page 42: Problem and alarm code Possible cause and solution Technical malfunction of the appliance. The display shows iC0 or iC3. Switch the appliance off and on. The level of water inside the appliance is too high. The display shows iF1. Make sure that the filters are clean. The appliance stops and starts more times during operation. It is normal. It provides optimal cleaning results and energy savings. The programme lasts too long. Activating options increases the programme duration. The displayed programme duration is different than the duration in the consumption values table. The pressure and the temperature of the water can change the programme duration. Small leak from the appliance door. The appliance is not levelled. Loosen or tighten the adjustable feet. The appliance trips the circuit-breaker. Internal electrical fault of the appliance. Contact an Authorised Service Centre.
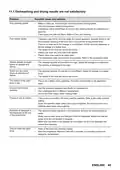
- Page 43: Dishwashing and drying results are not satisfactory Poor washing results may occur due to various factors. Refer to Daily use, Hints and tips, and the basket loading leaflet for guidance. Using a more intensive washing programme can improve results. Activating the ExtraPower option enhances washing performance. Clean spray arm jets and filters as part of regular maintenance. Poor drying results can be caused by leaving tableware inside the closed appliance for too long. Activating AirDry improves drying performance by automatically opening the door. Ensure there is sufficient rinse aid in the dispenser for optimal results. Plastic items may require towel drying after the wash cycle.
- Page 44: Problem Possible cause and solution Limescale deposits on the tableware, on the tub and on the inside of the door. The level of salt is low, check the refill indicator. The cap of the salt container is loose. Your tap water is hard. Refer to the water softener setting. Use salt and set regeneration of the water softener even when multi-functional tablets are used. Start the programme Machine Care with a descaler designed for dishwashers. Dull, discoloured or chipped tableware. Make sure that only dishwasher-safe items are washed in the appliance. Load and unload the basket carefully. Refer to the basket loading leaflet. Activate the option GlassCare to ensure special care for glassware and delicate items. Technical data Dimensions: Width / height / depth (mm) 596 / 818 - 898 / 550. Water supply pressure: Min. / max. MPa (bar) 0.05 (0.5) / 1 (10). Cold water or hot water (°C) min. 5 - max. 60. Capacity: 13 place settings. If the hot water comes from an alternative source of energy, use the hot water supply to decrease energy consumption. Help protect the environment and human health by recycling waste of electrical and electronic materials.
- Page 45: Do not dispose of electronic appliances with the household waste. Return the product to your local recycling facility or contact your municipal office. Appliances marked with the symbol indicate proper disposal methods.
- Page 46: Page 46

gorenje GV673B66 Dishwasher

FISHER AND PAYKEL DD60ST4NX9 Dish Drawer Dishwasher

FISHER and PAYKEL DD24DI9 N Saitize Dishwasher

Electrolux EEC87400W Sliding Door Dishwasher

BOSCH SMS2HMW04E-30 Dishwasher

Mueller DW-1800 Series 18 Inch Dishwasher

epoq EDW45B42W23 45cm Dishwasher

MORA IM6465S Dishwasher

BOSCH SMV4HDX52Y-39 Fully Integrated Dishwasher

BOSCH SHP78CM4N Pocket Handle Dishwasher