
BOSCH SMU2HVW20S Dishwasher




















Dishwasher
SMU2HVW20S
[en]
Information for Use


| General | Details |
|---|---|
| Name | BOSCH SMU2HVW20S Dishwasher |
| Make | Bosch |
| Language | English |
| Filetype | PDF (Download) |
| File size | 1.79 MB |
 (1 votes, average: 5.00 out of 5)
 Loading...

BOSCH SMV6ZCX49E-39 Dishwasher

BOSCH SMI4HVS33E Dishwasher

BOSCH SRV2HKX39G Dishwasher

BOSCH SGS4HAW40G Dishwasher

BOSCH SGH4HVX32G Dishwasher

BOSCH SMS4ECI26E Dishwasher

BOSCH SMS6EDI02G Free-Standing Dishwasher

BOSCH SMS6EDW02G Free-Standing Dishwasher

BOSCH SMV4HTX27G Dishwasher

BOSCH SMV4HCX48E Dishwasher

BOSCH SMU2HVW20S Dishwasher Overview
Summary of Contents
- Page 1: Dishwasher Information for use
- Page 2: Further information and explanations are available online. Table of contents Safety General information Intended use Restriction on user group Safe installation Safe use Damaged appliance Risk to children Before using for the first time Performing the initial configuration Water softening system Overview of water hardness settings Setting the water softening system Special salt Switching off the water softening system Regeneration of the water softening system Preventing material damage Environmental protection and saving energy Disposing of packaging Saving energy Installation and connection Scope of supply Installing and connecting the appliance Drainage connection Drinking water connection Electrical connection Rinse aid system Rinse aid Setting the amount of rinse aid Switching the rinse aid system off Detergent Suitable detergents Unsuitable detergents Information on detergents Adding detergent Familiarising yourself with your appliance Appliance Controls Programs Information for test institutes Tableware Damage to glass and tableware Arrange tableware Removing tableware Additional functions Features Top basket
- Page 3: Basic operation Switching on the appliance Setting a programme Setting additional functions Setting timer programming Starting the programme Activating button lock Deactivate button lock Interrupting programme Terminate programme Customer Service Product number (E-Nr.), production number (FD) and consecutive numbering (Z-Nr.) AQUA-STOP guarantee Technical specifications Information regarding free and open source software Declaration of Conformity Statement of compliance for Great Britain Basic settings Overview of the basic settings Changing basic settings Home Connect Setting up the Home Connect app Setting up Home Connect Remote start Data protection Cleaning and servicing Cleaning the tub Cleaning products Tips on appliance care Machine care Filter system Cleaning spray arms Troubleshooting Clean wastewater pump Transportation, storage and disposal Removing the appliance Protect appliance from frost Transporting the appliance Disposing of old appliance
- Page 4: Safety Observe the following safety instructions. Read this instruction manual carefully. Keep the instruction manual and the product information safe for future reference or for the next owner. Do not connect the appliance if it has been damaged in transit. Only use this appliance for cleaning household tableware. This appliance may be used by children aged 8 or over and by people with reduced physical, sensory or mental abilities, provided they are supervised or instructed on safe use. Do not let children play with the appliance. Cleaning and user maintenance must not be performed by children unless supervised. Keep children under the age of 8 years away from the appliance and power cable. Improper installation may cause injury.
- Page 5: Safety Warning - Risk of electric shock. Incorrect installation is dangerous. Connect and operate the appliance only in accordance with the specifications on the rating plate. Always use the supplied power cable for the new appliance. Connect the appliance to a power supply with alternating current only via a properly installed socket with earthing. Never equip the appliance with an external switching device, e.g. a timer or remote control. When the appliance is installed, the mains plug of the power cord must be freely accessible. Cutting through the supply hose or immersing the Aqua-Stop valve in water is dangerous. Warning - Risk of fire. It is dangerous to use an extended power cord and non-approved adapters.
- Page 6: Safety Contact between the appliance and installation lines may lead to a defect in these lines, e.g. gas pipes and power lines. Check that there is a distance of at least 5 cm between the appliance and installation lines. Hinges move when opening and closing the appliance door and can cause injury. If built-under or integrable appliances are not in a cavity so that one side is accessible, the hinge area must be covered at the side. Improper installation may cause the appliance to tip up. Only install built-under or integrable appliances under a continuous worktop that is securely connected to adjacent cabinets. Failure to comply with safety instructions and directions for use on packagings of detergent and rinse aid products may cause serious harm to health. Follow the safety instructions and directions for use on the packagings of detergent and rinse aid products. Adding solvents to the interior of the appliance may cause explosions. Never add solvents to the interior of the appliance.
- Page 7: Safety Highly caustic alkaline or highly acidic cleaning agents in conjunction with aluminium parts may cause explosions. Never use highly caustic alkaline or highly acidic cleaning agents with aluminium parts. Leaving the appliance door open may result in injury. Only open the appliance door to load or unload tableware to prevent accidents. Do not sit or stand on the appliance door when open. Arrange knives and utensils with sharp points in the cutlery basket with the points downwards. If you open the appliance door while the programme is running, hot water may splash out. Open the appliance door carefully if the programme is still running. An ingress of moisture can cause an electric shock. Only use the appliance in enclosed spaces and avoid exposing it to intense heat or humidity.
- Page 8: Safety Damaged appliance Warning - Risk of electric shock. Never operate a damaged appliance. Never operate an appliance with a cracked or fractured surface. If the appliance or the power cord is damaged, immediately unplug the power cord or switch off the fuse. Improper repairs are dangerous. Repairs to the appliance should only be carried out by trained specialist staff. Risk to children Warning - Risk of suffocation. Keep packaging material away from children.
- Page 9: Safety Warning - Risk of harm to health. Children can lock themselves in the appliance, thereby putting their lives at risk. With redundant appliances, unplug the power cord. Then cut through the cord and damage the lock on the appliance door beyond repair. Warning - Risk of crushing. With higher-level appliances, children can become crushed between the appliance door and cabinet doors underneath. Keep an eye on children when opening and closing the appliance door. Warning - Risk of chemical burns. Rinse aid and detergent may cause chemical burns to the mouth, throat, and eyes. Keep children away from detergent and rinse aid products. Keep children away from the appliance when open. The water in the interior of the dishwasher is not drinking water. Warning - Risk of injury. Children may get their fingers caught in the slots of the tablet collecting tray and injure themselves. Keep children away from the appliance when open.
- Page 10: Preventing material damage Modified or damaged water hoses may result in material damage and damage to the appliance. Never kink, crush, modify or cut through water hoses. Only use the water hoses supplied with the appliance or genuine spare hoses. Never re-use water hoses that have been used before. Safe installation Improper installation of the appliance may cause damage. If the dishwasher is installed above or below other domestic appliances, follow the information on installation in combination with a dishwasher. Make sure that the water pressure in the water supply system is min. 50 kPa (0.5 bar) and max. 1000 kPa (10 bar). Do not install the dishwasher under a hob. Escaping water vapour can damage fitted units.
- Page 11: Environmental protection and saving energy To prevent scratching, do not use sponges with a rough surface or abrasive cleaning agents. To prevent corrosion, do not use sponge cloths on dishwashers with a stainless steel front without thorough rinsing. After unpacking, check for damage and completeness of the delivery. The appliance has been tested at the factory; water marks may appear but will disappear after the first wash cycle. The packaging materials are environmentally compatible and can be recycled. Sort the individual components of the packaging by type and dispose of them separately. If you follow these instructions, your appliance will use less electricity and less water. Use the Eco 50° programme for energy efficiency and environmental friendliness. You can position your built-under or integrable appliance in a fitted kitchen between wooden and plastic walls. If installed as a free-standing appliance, secure it to prevent tipping over.
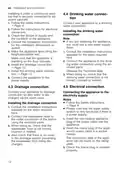
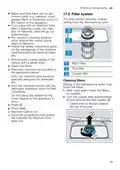
- Page 12: Installation and connection Connect your appliance to a drinking water connection. Follow the instructions for electrical connection. Check the scope of supply and the condition of the appliance. Consult the installation instructions for the installation dimensions required. If you are replacing the appliance, you must use a new water supply hose. Make the appliance level using the height-adjustable feet. Connect the appliance to the drainage connection so dirty water is discharged via the wash cycle. Check that the drinking water connection is not kinked, crushed or twisted. The water safety system is only functional if there is a power supply. Check the mains plug is inserted properly.
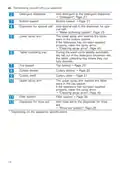
- Page 13: Familiarising yourself with your appliance Add detergent to the detergent dispenser. Add special salt to the dispenser for special salt. The lower spray arm washes the tableware in the bottom basket. If the tableware has not been washed properly, clean the spray arms. During the wash cycle tablets automatically fall out of the detergent dispenser into the tablet collecting tray where they can fully dissolve. The upper spray arm washes the tableware in the top basket. Add rinse aid to the dispenser for rinse aid. Filter system. Cutlery drawer and cutlery shelf.
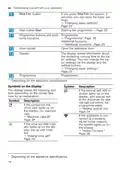
- Page 14: Familiarising yourself with your appliance You can use the control panel to configure all functions of your appliance and to obtain information about the operating status. With some buttons you can perform different functions. Switching on the appliance Switching off the appliance Terminating the programme Special salt refill indicator Rinse aid refill indicator WLAN display Water supply display Timer programming
- Page 15: Familiarising yourself with your appliance If you press for approx. 3 seconds, you can open the basic settings. Starting the programme The display shows information about the remaining running time or the basic settings. You can change the basic settings via the display and the setting buttons. The display shows the following symbols depending on the model. If the special salt refill indicator lights up on the display, add special salt to the dispenser. If the symbol for machine care lights up on the display, run machine care. If the rinse aid refill indicator lights up on the display, top up with rinse aid. If the appliance is connected to a wireless WLAN home network, the symbol lights up on the display.
- Page 16: Familiarising yourself with your appliance If you have activated the button lock, the symbol lights up on the display. If the water inflow or drainage malfunctions, the symbol lights up or flashes on the display.
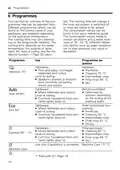
- Page 17: Programmes You can find an overview of the programmes that can be selected here. Different programmes are available depending on the appliance configuration. The running time may vary depending on the programme selected. The consumption values can be found in the quick reference guide. Programme sequence includes various cleaning options for different types of tableware. Intensive programme is for pots and pans, non-fragile tableware, and cutlery. Sensor-controlled programme optimizes cleaning based on the soiling of the washing water. Most economical programme is designed for mixed tableware and cutlery. Time-optimised programme is suitable for cleaning mixed tableware and cutlery quickly. Machine care should only be used if the appliance is unloaded.
- Page 18: Programmes The relatively long running time in the Eco 50 ° programme is due to longer soaking and drying times. This results in optimal consumption values. You can use the Home Connect app to download additional programmes and save them to the button. To reset the programme to the Pre-rinse programme stored at the factory, use the Home Connect app or reset your appliance to the factory settings. Test institutes are provided with information for comparability tests, e.g. according to EN60436. These are the conditions for conducting the tests, however they are not the results or consumption values. You can save a combination of a programme and an additional function to the button. Save the programme via the Home Connect app. The pre-rinse program is saved to this button at the factory. The tableware undergoes intermediate cleaning via cold rinsing. When programmes have been downloaded and on delivery of the appliance, the name of the programme will be displayed in the app.
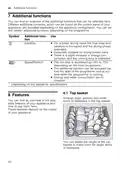
- Page 19: Additional functions You can find an overview of the additional functions that can be selected here. Different additional functions, which can be found on the control panel of your appliance, are available depending on the appliance configuration. ExtraDry For a better drying result the final rinse temperature is increased and the drying phase extended. SpeedPerfect+ The run time is shortened by 15% to 75% depending on the rinse programme. You can find an overview of the possible features of your appliance and how to use them here. These features depend on the model of your appliance. You can adjust the height of the top basket to make room for larger items of tableware.
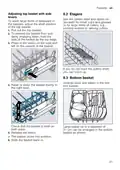
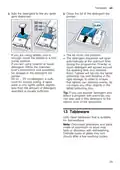
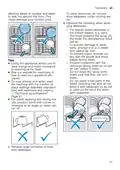
- Page 20: Features Adjusting the top basket with side levers. Use the cutlery shelf and space underneath for small cups and glasses or for large items of cutlery. To wash large items of tableware in the baskets, adjust the shelf position of the top basket. Pull out the top basket. Hold the side of the basket by the top edge to prevent it from suddenly dropping down. Press in the levers on the right and left on the outside of the basket. If you do not need the cutlery shelf, you can fold it up. Arrange pans and plates in the bottom basket. Raise or lower the basket evenly to the right level. Check that the basket is level on both sides.
- Page 21: Features Use the folding prongs to position tableware securely, e.g. plates. The prongs audibly click into position. Arrange cutlery in the cutlery drawer. You can fold the prongs down to position pans, bowls and glasses better. If you do not need the prongs, fold them down. Arrange cutlery with the points and sharp edges downwards.
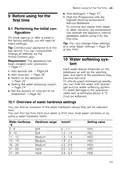
- Page 22: Before using for the first time, start the programme with the highest cleaning temperature without tableware. To remove any marks from water or other residues, operate the appliance without tableware before using it for the first time. On initial start-up or after a reset to factory settings, you will need to make settings. You can change these settings and other basic settings at any time. Connect your appliance to a mobile device to conveniently change all settings via the Home Connect app. Hard water leaves limescale on the tableware and parts of the appliance may become blocked. To ensure good dishwashing results, treat the water with special salt and the water softening system. Water with a hardness above 9 °E must be softened to avoid damage to the appliance. You can find an overview of the water hardness values that can be selected. Find out how hard your water is from your local water company or by using a water hardness tester.
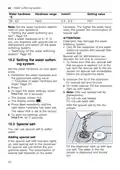
- Page 23: Water softening system Water hardness Set the water hardness determined on your appliance. The higher the water hardness, the greater the consumption of special salt. Detergent may damage the water softening system. With a water hardness of 0 - 8 °E you can dispense with special salt for dishwashers. Only fill the dispenser of the water softening system with special dishwasher salt. To make sure that any special salt that escapes is washed out of the tub, add the special salt to the dispenser immediately before the programme starts. Set the water hardness on your appliance. You can use special salt to soften water. If the special salt refill indicator lights up, add special salt to the dispenser just before the programme starts.
- Page 24: Water softening system Regeneration of the water softening system is performed at regular intervals to ensure fault-free function. Regeneration occurs before the end of the main rinse cycle in all programmes, increasing run time and consumption values. You can switch off the special salt refill indicator if it is irritating when using combined detergents with salt replacement substances. Only switch off the water softening system if the water hardness is a maximum of 26 °E and you are using a combined detergent with salt replacement substances. Combined detergents with salt replacement substances can generally only be used up to a water hardness of 26 °E without adding special salt. An overview of maximum additional running time and consumption values during regeneration of the water softening system is provided. The display shows Hxx when accessing basic settings. The specified consumption values are laboratory measurements determined using the Eco 50° programme. To save the settings, press for 3 seconds after adjusting the display to H00. The water softening system can be switched off, deactivating the salt refill indicator.
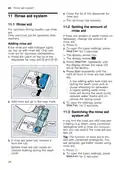
- Page 25: Rinse aid system For optimum drying results, use rinse aid. Only use rinse aid for domestic dishwashers. If there are streaks or water marks on tableware, change the amount of rinse aid. Press the catch on the lid of the dispenser for rinse aid and lift. A low setting adds less rinse aid during the wash cycle and reduces streaking on tableware. A higher setting adds more rinse aid during the wash cycle, reduces water marks, and improves the drying result. If you find the rinse aid refill indicator irritating, you can switch the rinse aid system off. The function of rinse aid is limited with combined detergents. Spilled rinse aid can cause excessive frothing during the wash cycle.
- Page 26: Detergent The display shows Hxx. Powder detergent is recommended for shorter programmes. The dosage can be adjusted to the level of soiling. Liquid detergent works faster and is recommended for shorter programmes without PreRinse. Sometimes liquid detergent may leak out despite the detergent dispenser being closed. Only use detergents that are suitable for dishwashers. For optimum washing and drying results, use separate detergent, adding special salt and rinse aid separately. Modern, powerful detergents mainly use a low-alkaline formulation with enzymes. Separate detergents are products that do not contain components other than detergent. Besides conventional separate detergents, a number of products are available with additional functions.
- Page 27: Detergent Combined detergents generally only function up to a water hardness of 26 °E. With a water hardness above 26 °E, you will need to add special salt and rinse aid. For the best washing and drying results, we recommend using special salt and rinse aid from a water hardness of 17 °E. If you are using combined detergent, the washing programme is adjusted automatically to ensure the best possible washing and drying result. To prevent sticking, only touch detergents in a water-soluble pouch with dry hands. Even if the rinse aid and special salt refill indicators light up, washing programmes will run properly with combined detergents. The function of rinse aid is limited with combined detergents. Use tablets with a special drying performance. Do not use detergent which could cause damage to the appliance or present a risk to health. Follow the instructions on detergents in everyday use.
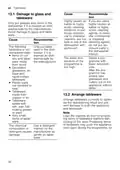
- Page 28: Tableware Damage to glass and tableware Only put glasses and china in the dishwasher if it is marked as dishwasher-safe by the manufacturer. Avoid damage to glass and tableware. Do not put aluminium parts in the dishwasher interior. Select a programme with lower temperatures. After the programme has ended, take glassware and cutlery out of the appliance without delay. Arrange tableware correctly to optimise the dishwashing result and prevent damage to both the appliance and tableware. Load the baskets so that no projecting items of tableware interfere with closing of the door. Use a detergent marked by the manufacturer as gentle on tableware.
- Page 29: Tableware To save resources, do not pre-rinse tableware under running water. Put heavily soiled tableware in the bottom basket, e.g., pans. Arrange tableware so it is stable and cannot tip over to prevent damage. Arrange cutlery with the points and sharp edges facing down to prevent injury. Position containers with the openings facing down to avoid water collection. Do not block the spray arms to ensure they can turn freely. Do not place small parts in the tablet collecting tray or block it with tableware. Using the appliance allows you to save energy and water compared to washing by hand. Load the machine with the specified number of place settings for efficiency. For better washing and drying results, position items with curves or recesses at an angle.
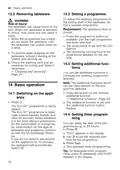
- Page 30: Basic operation Removing tableware To adjust the washing programme to the soiling level of the tableware, select a suitable programme. Requirement: The appliance door is closed. Press the programme button repeatedly until the right programme has been selected. Risk of injury! Hot tableware can cause burns to the skin. When the programme has ended, do not empty the appliance until the tableware has cooled down for a while. To prevent water dripping on the tableware, unload it starting at the bottom and working up. You can set additional functions to complete the washing programme selected. The Eco 50° programme is set by default and is ideal for normally soiled tableware. If you do not perform any actions on the appliance for 10 minutes, the appliance will automatically switch off. You can delay the start of the programme by up to 24 hours.
- Page 31: Basic operation Starting the programme Interrupting programme When you open the appliance door once the appliance has heated up, leave the door slightly ajar for a few minutes to help prevent excess pressure. The programme has ended when the display shows 0h:00m. If you want to add more tableware while the appliance is running, do not use the tablet collecting tray as a handle for the top basket. You can only change a programme when running if you cancel it. To end a programme early or switch from a programme that has already started, you will need to cancel it first. The appliance switches off automatically 1 minute after the end of the programme to save energy. The button lock prevents the appliance from being operated accidentally or incorrectly while running. The button lock is activated and will be automatically deactivated at the end of the programme. If you press during the wash cycle, the programme currently running will be interrupted.
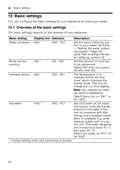
- Page 32: Basic settings You can configure the basic settings for your appliance to meet your needs. Overview of the basic settings The basic settings depend on the features of your appliance. Set the water softening system to your water hardness. Level H00 switches the water softening system off. Set the amount of rinse aid to be dispensed. Switch the rinse aid system off with level r00. The temperature is increased during the final rinse, which improves the drying result. Not suitable for delicate items of tableware. Set cold water or hot water connection. Only set the appliance to hot water if this can be prepared with little energy.
- Page 33: Basic settings Wi-Fi Switch the wireless network connection on or off. Level Cn0 switches the wireless network connection off. This basic setting is not available until you have connected the appliance with the Home Connect app. Activate or deactivate Remote Start. With the setting rc0, the function is permanently deactivated. With the setting rc1, the function can be selected via the button. With the setting rc2, the function is permanently activated. Restore changed settings to the factory settings. Tip: Connect your appliance to a mobile device.
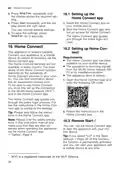
- Page 34: Install the Home Connect app on your mobile device. Start the Home Connect app and set up access for Home Connect. You can change several settings. To save the settings, press for 3 seconds. This appliance is network-capable. Connect your appliance to a mobile device to control its functions via the Home Connect app. The Home Connect services are not available in every country. You must first set up the connection to the WLAN home network and to the Home Connect app. The appliance door must be closed for setup. You can use the Home Connect app to start the appliance with your mobile device.
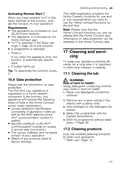
- Page 35: Cleaning and servicing This initial registration prepares the Home Connect functions for use and is only required when you want to use the Home Connect functions for the first time. Activating Remote Start Requirements The appliance is connected to your WLAN home network. Home Connect functions can only be utilized with the Home Connect app. To keep your appliance working efficiently for a long time, it is important to clean and maintain it carefully. Risk of harm to health! Using detergents containing chlorine may result in harm to health. Never use detergents containing chlorine. Remove any coarse soiling in the interior with a damp cloth. Only use suitable cleaning products to clean your appliance.
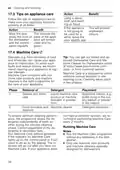
- Page 36: Cleaning and servicing Tips on appliance care include using a damp cloth and washing-up liquid. Leave the door slightly ajar if the appliance is not going to be used for a while. Follow the tips on appliance care to ensure proper appliance function and prevent unpleasant odours. Wipe the door seals, the front of the dishwasher, and the control panel regularly for cleanliness and hygiene. Deposits from food remnants and limescale can cause appliance malfunction. Regular cleaning of the appliance is recommended to avoid faults and reduce odours. Machine Care combined with machine care products is essential for appliance maintenance. Machine Care is a programme that removes various deposits in one washing cycle. Run Machine Care without tableware if the indicator lights up on the control panel. Perform Machine Care every 2 months if your appliance does not have a reminder function.
- Page 37: Cleaning and servicing Make sure that there are no aluminium parts, e.g. extractor hood grease filters or aluminium pans, in the interior of the appliance. If you have not run Machine Care after 3 washing cycles, the indicator for Machine Care will go out automatically. For optimum cleaning performance, ensure the correct placement of cleaners. Follow the safety instructions given on the packagings of the machine care products and machine cleaners. The filter system removes coarse soiling from the dishwashing cycle. Remove any coarse soiling in the interior with a damp cloth. Clean the filters. Only use machine care products specially designed for dishwashers. Soiling in the dishwashing water may block the filters. After each wash check the filters for residue.
- Page 38: Cleaning and servicing Pull down the micro filter to re-insert the filter system into the appliance and turn the coarse filter clockwise. Make sure that the arrow markings match up. Press the locking catches together and lift the coarse filter out. Limescale and soiling in the dishwashing water may block the nozzles and bearings on the spray arms. Clean the spray arms regularly. Unscrew the upper spray arm and pull down to remove. Clean the filter elements under running water. Carefully clean the rim of dirt between the coarse and the fine filter. Re-assemble the filter system. Make sure that the locking catches on the coarse filter click into position.
- Page 39: Cleaning and servicing Pull up the lower spray arm to remove. Check the outlet nozzles on the spray arms for blockages under running water and remove any foreign bodies. Insert the lower spray arm. The spray arm clicks into position. Insert the upper spray arm and screw it firmly in place.
- Page 40: Troubleshooting You can rectify minor faults on your appliance yourself. Read the troubleshooting information before contacting after-sales service. Repairs to the appliance should only be carried out by trained specialist staff. Only use genuine spare parts when repairing the appliance. If the power cord of this appliance is damaged, it must be replaced with a special connection cable. A technical fault is present if the display Check water supply flashes. If the problem occurs again, contact Customer Service and give the error code. Water protection system is activated if E:30-00, E:31-00, or E:32-00 lights up alternately. Turn off the water tap if the water protection system is activated. Install the inlet hose without kinks if the supply hose is kinked. Turn on the water tap if it is turned off.
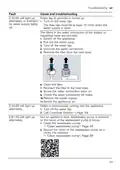
- Page 41: Troubleshooting E:32-00 will light up alternately or indicator for water supply lights up. Water tap is jammed or furred up. The flow rate must be at least 10 l/min when the water supply is open. The filters in the water connection of the supply or AquaStop hose are blocked. Switch off the appliance and pull out the mains plug. Unscrew the water connection and remove the filter from the inlet hose. Clean the filter and re-insert it in the inlet hose. E:34-00 will light up alternately. Water is continuously running into the appliance. E:61-02 will light up alternately. Wastewater pump is blocked or the cover of the wastewater pump is loose.
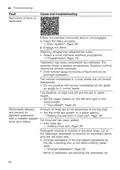
- Page 42: Troubleshooting Fault E:61-03 will light up alternately. Water is not drained. Not an appliance fault. Siphon connection is still closed or the wastewater hose is kinked or blocked. Check the connection to the siphon and open if necessary. Install wastewater hose without kinks. Remove residues. Not an appliance fault. Wastewater pump is blocked or the cover of the wastewater pump is loose. Clean the wastewater pump. Secure the cover of the wastewater pump so it clicks into position. E:92-40 will light up alternately. Filters are soiled or blocked. Clean the filters.
- Page 43: Troubleshooting All LEDs lit up or flashing indicates a fault detected by the electronics. To reset the appliance, press the main switch button for approximately 4 seconds. If the problem recurs, switch off the appliance and unplug it or switch off the fuse. Wait at least 2 minutes before switching the appliance back on. If the issue persists, contact customer service. Remnants of food on tableware may be due to tableware being placed too close together or the basket being overfilled. Arrange tableware with sufficient space to ensure spray jets can reach all surfaces. Avoid points of contact to prevent blocking spray arm rotation. If spray arm nozzles are blocked, clean the spray arms. Soiled filters should be cleaned as well.
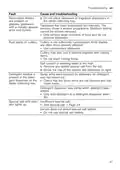
- Page 44: Troubleshooting Fault Cause and troubleshooting Remnants of food on tableware. Filters are inserted incorrectly and/or not engaged. Insert the filters properly. Engage the filters. Washing programme selected too weak. Select a more intensive washing programme. Tableware has been precleaned too intensely. Only remove large remnants of food and do not prerinse tableware. Tall narrow receptacles in corner areas are not rinsed adequately. Do not position tall narrow receptacles at too great an angle or in corner areas. Top baskets on right and left are not set to the same height. Set the upper basket on the left and right to the same height. Removable streaks are present on glasses, glassware with a metallic appearance and cutlery. Amount of rinse aid to be dispensed is set too high. No rinse aid has been added. Add rinse aid. Detergent residue is present in the final rinse.
- Page 45: Troubleshooting Removable streaks are present on glasses and cutlery. Tableware has been precleaned too intensely, causing sensors to choose a weaker program. Only remove large remnants of food and do not prerinse tableware. Rust spots on cutlery may occur if cutlery is not sufficiently rust-resistant. Use rust-resistant tableware and do not wash rusting items together. High salt content in washing water can cause issues; remove any spilled special salt from the tub. Ensure the cap of the special salt dispenser is screwed on tight. Detergent residue may be present if spray arms are blocked or if the detergent dispenser was damp when detergent was added. Check that the spray arms are not blocked and can rotate freely. Add special salt if the special salt refill indicator lights up.
- Page 46: Transportation, storage and disposal Clean wastewater pump. Large remnants of food or foreign bodies can block the wastewater pump. As soon as the rinsing water no longer drains properly, the wastewater pump must be cleaned. Risk of injury! Sharp and pointed objects or fragments of glass may block the wastewater pump and cause injury. Remove any foreign bodies carefully. Disconnect the appliance from the power supply. Turn off the water tap. Detach the drainage connection. Detach the drinking water connection.
- Page 47: Protect appliance from frost. If there is a risk of frost, empty the appliance completely. Valuable raw materials can be reused by recycling. Children can lock themselves in the appliance, putting their lives at risk. Unplug the appliance from the mains before transporting. Always transport the appliance upright to prevent damage. Dispose of the appliance in an environmentally friendly manner. This appliance is labelled in accordance with European Directive 2012/19/EU concerning used electrical and electronic appliances. The guideline determines the framework for the return and recycling of used appliances throughout the EU. Information about current disposal methods are available from your specialist dealer or local authority.
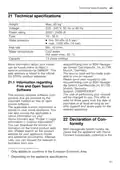
- Page 48: Customer service is available for at least 10 years from the date the appliance was placed on the market within the European Economic Area. Under the manufacturer's warranty, the use of customer service is free of charge. Detailed information on the warranty period and terms is available from after-sales service, retailers, or the website. The Aqua-Stop guarantee offers compensation for water damage caused by a defective Aqua-Stop system for private users. To ensure protection from water damage, the appliance must be connected to the power supply. When contacting customer service, you will need the product number (E-Nr.), production number (FD), and consecutive numbering (Z-Nr.) of your appliance. The liability guarantee is valid for the service life of the appliance. A claim under the guarantee requires correct installation and connection of Aqua-Stop according to instructions. The product number, production number, and consecutive numbering can be found on the appliance's rating plate located inside the appliance door. If fitted with Aqua-Stop, the appliance can be left unattended during operation, but the tap should be turned off if away for an extended period.
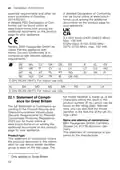
- Page 49: Declaration of Conformity Essential requirements and other relevant provisions of Directive 2014/53/EU. A detailed RED Declaration of Conformity can be found online among the additional documents on the product page for your appliance. Hereby, BSH Hausgeräte GmbH declares that the appliance with Home Connect functionality is in compliance with relevant statutory requirements. 5 GHz WLAN (Wi-Fi): For indoor use only. The full Statement of Compliance according to the Product Security and Telecommunications Infrastructure Regulations 2023 can be found online among the additional documents on the product page for your appliance. Name and address of manufacturer: BSH Hausgeräte GmbH, Carl-Wery-Strasse 34, 81739 München, Germany. This statement of compliance is prepared by the manufacturer. This statement of compliance covers the products described in this information for use whose model identifier group is seen on the title page.
- Page 50: Declaration of Conformity The manufacturer, BSH Hausgeräte GmbH deems that it has complied with provision 5.1-1 of ETSI EN 303 645 v2.1.1 and, where relevant, provision 5.1-2 of ETSI EN 303 645 v2.1.1. Provision 5.2-1 of ETSI EN 303 645 v2.1.1. Provision 5.3-13 of ETSI EN 303 645 v2.1.1. BSH Hausgeräte GmbH will provide security updates that are necessary to maintain the main functions free of charge until at least 28/02/2034.

FISHER and PAYKEL DD60SAX9 Contemporary Dishwasher

FISHER AND PAYKEL DD24SDFTX9 N Dishwasher

gorenje GI52040X Dishwasher

BOSCH SMD6TCX00E Dishwasher

BOSCH SPS2HMW54Q Dishwasher

LG MHK50326534 Panel Ready Dishwasher

FISHER AND PAYKEL DD60ST4NX9 Dish Drawer Dishwasher

ORANIER GSV660 Dishwasher

FISHER and PAYKEL DD60DTX6HI1 Dishwasher

beko DDT39434X Pro Handle Dishwasher