
Home > Fisher & Paykel > FISHER PAYKEL DD24STX6PX1 Sanitize DishDrawer Dishwasher
FISHER PAYKEL DD24STX6PX1 Sanitize DishDrawer Dishwasher


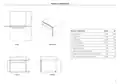


SINGLE DISHDRAWER™ DISHWASHER
CONTEMPORARY
DD24STX6PX1
INSTALLATION GUIDE
US CA
592428B
07.22


| General | Details |
|---|---|
| Name | FISHER PAYKEL DD24STX6PX1 Sanitize DishDrawer Dishwasher |
| Make | Fisher & Paykel |
| Language | English |
| Filetype | PDF (Download) |
| File size | 0.72 MB |
 (1 votes, average: 5.00 out of 5)
 Loading...

FISHER PAYKEL DD24DCHTX9 N Dishwasher

FISHER PAYKEL DD24DCTW9N Dishwasher

FISHER PAYKEL DD24SCTX9 N Dishwasher

FISHER PAYKEL DD24SV2T9N Sanitize Tall Dishwasher

FISHER PAYKEL DD60SCHX9 Dishwasher

FISHER PAYKEL DD24DI9N Sanitize Dishwasher

FISHER PAYKEL DD60DAX9 Dishwasher

FISHER PAYKEL DD60SDFHTX9 Dishwasher

FISHER PAYKEL DW24UT4I2 Dishwasher

FISHER PAYKEL DD24SVT9 Dishwasher

FISHER PAYKEL DD24STX6PX1 Sanitize DishDrawer Dishwasher Overview
Summary of Contents
- Page 1: Single Dishdrawer™ dishwasher installation guide. Model: DD24STX6PX1. Contemporary design. Applicable for US and CA. Document version: 592428B. Release date: 07.22.
- Page 2: Safety and warnings To reduce the risk of fire, injury to persons or damage when using the appliance, follow the important safety instructions listed below. Electric shock hazard Do not repair or replace any part of the appliance unless specifically recommended in this guide. Installation of this DishDrawer™ Dishwasher requires basic mechanical and electrical skills. This appliance must be earthed. Installation must comply with your local building and electricity regulations. The DishDrawer™ Dishwasher must be installed to allow for future removal from the enclosure if service is required. Improper connection of the equipment-earthing conductor can result in a risk of electric shock. Failure to install correctly could invalidate any warranty or liability claims. Take care - panel edges are sharp. Save these instructions.
- Page 3: Tools and components Parts supplied Tools required Keep all packing materials until the unit has been inspected. Inspect the product to ensure there is no shipping damage. Fisher & Paykel is not responsible for shipping damage. This video provides an overview of what is needed to install a DishDrawer™ Dishwasher. Installation should be undertaken by a Fisher & Paykel trained and supported service technician or qualified person. Optional items are indicated. Rubber washer comes fitted to the product.
- Page 4: Product dimensions include overall height, overall width, overall depth, depth of chassis, height of door panel, depth of door panel, ventilation gap below door panel, height from top of drawer panel to top of chassis, and maximum drawer extension from drawer front. Actual product dimensions may vary by 1/16 (2 mm).
- Page 5: Cabinetry dimensions and clearances are essential for proper installation. Connections can be located in an adjacent cabinet on either side of the DishDrawer™ Dishwasher. Minimum clearance to adjacent cupboard door is 1/16 inches. Minimum inside height is 22 3/4 inches. Inside width is 23 5/8 inches. Minimum clearance to corner cupboard is 13 inches. Minimum inside depth includes 11/16 (18mm) door panels on adjacent cabinetry. Refer to ‘Plumbing & electrical considerations’ and ‘Cabinetry preparation’ for more information on service requirements.
- Page 6: Plumbing & electrical considerations Your services can be installed to either the left-hand or right-hand side of the product in an adjacent cabinet. If the drain hoses supplied are not long enough to reach your services, you may purchase a Fisher & Paykel drain hose extension kit. Recommended water temperature: hot (Maximum 140°F/60°C). Ensure water connection complies with local plumbing regulations. Water softener models: max. 1 MPa (145 psi), min. 0.1 MPa (14.5 psi). Non-water softener models: max. 1 MPa (145 psi), min. 0.03 MPa (4.3 psi). 110-120 V AC max. 15 A. Minimum distance from floor to inlet hose connection. Maximum distance from cabinetry centre of electrical outlet. Maximum distance from floor to top of air break.
- Page 7: You have the option to hard-wire your DishDrawer™ Dishwasher. To do this, we recommend removing the supplied power cord and doing the hardwiring installation as close to the cavity as possible. Lift the cover upwards until you are able to pull out towards you to remove. Open the drawer and press both locking tabs back to release. Unscrew the Live, Neutral and Earth wires as illustrated. Ensure the upper Earth wire is not removed. Lift the drawer off the runners and carefully set aside on a protected surface. Take care not to pull the drawer out too far to prevent any strain on the hoses. Fit a suitable cable clamp for the conduit through the metal knock-out. Ensure only copper conductors are used.
- Page 8: Hard-wiring (optional) Fix the Live and Neutral wires to the terminal block and the Earth wire to the chassis. Ensure the hoses are not twisted before refitting the drawer to the runners and clipping into place via both locking tabs. Position the cover fill valve into place before lowering the rest of the cover into position. Lower the cover back into place ensuring the locking clips are aligned, the rear hook is positioned over the slot and the L rib is cleared. Lock clips back into place by pressing down on the cover firmly. Ensure all illustrated areas are engaged. Refit screw to secure cover.
- Page 9: Cabinetry preparation is essential for proper installation. Service access should be planned with holes located on either side of the DishDrawer. Ensure edges are smooth and rounded if the hole is created through wood. Fit an edge protector if the hole is created through metal. Align the supplied moisture protection tape to the cabinetry as illustrated. Ensure the area is free of debris before applying the tape. If using the drawer removal method, ensure marked locations provide adequate support. Construct timber bracing if there are no side partitions to secure the fixings. Two methods for securing cabinetry are available: via brackets or drawer removal. Service hole dimensions must meet specific measurements for proper installation.
- Page 10: Secure all four side brackets to the DishDrawer™ Dishwasher, aligning bracket A with slot A and bracket B with slot B. Secure to cabinetry via the brackets. Pre-drilling a pilot hole may be required depending on the cabinetry material. Ensure the ends of the brackets are not pushed into the chassis. Push the product into the cavity, pulling the hoses through as you push to avoid crushing or twisting them. Take care not to bend the legs. Replace the trim cover and repeat for the remaining brackets. Push the product in the positions illustrated to avoid denting the door. Partially open the drawer and remove the first screw cover from the trim moulding.
- Page 11: Secure to cabinetry via drawer removal (method B). Push the product into the cavity, pulling the hoses through to avoid crushing or twisting them. Secure to cabinetry via all three fixing locations in the tub. Ensure sound insulation is replaced correctly. Push the product in the positions illustrated to avoid denting the door. Before refitting the drawer, ensure the hoses are not twisted and the latches at the rear of the drawer are both facing forward. Open the drawer and press both locking tabs back to release. Lift the drawer off the runners and set aside on a protected surface. Refit the drawer to the runners and clip into place via both locking tabs. Take care not to pull the drawer out too far to prevent any strain on the hoses.
- Page 12: Plumbing & electrical connection Sink trap/waste tee installation Install the drain hose support to the back wall, as close to the underside of the countertop as possible. Refer to ‘Plumbing & electrical considerations’ for minimum install heights. Ensure the drain hose does not extend into water retained in the trap; an air gap is required to prevent waste water from siphoning back into the tub. Ensure hose is routed straight to the joiner, removing excess drain hose if necessary. Unplug or drill out the waste tee before securing joiner to sink trap or waste tee. Ensure the supplied rubber washer is fitted to the coupling before connecting the inlet hose to tap. Using a spanner or pliers, turn a further 180° to secure, avoiding over-tightening. Do not turn water supply on. The DishDrawer™ Dishwasher must be powered on for the flood protection feature to be enabled. Plug product in.
- Page 13: Plumbing and electrical connection Single air gap installation Ensure the supplied rubber washer is fitted to the coupling before connecting the inlet hose to tap. Install your single air gap kit to the benchtop as shown. Tighten using a spanner or pliers, avoiding over-tightening. Refer to ‘Plumbing & electrical considerations’ for minimum install heights. Do not turn water supply on. The DishDrawer™ dishwasher must be powered on for the flood protection feature to be enabled. Secure the drain hose to the supplied hose joiner and fit to the air gap kit. Ensure hose is routed straight to the joiner, removing excess drain hose if necessary. Plug product in. Unplug or drill out the waste tee before securing to sink trap or waste tee.
- Page 14: Installer checklist Check all parts are installed correctly and are secure. Ensure all electrical tests have been conducted in accordance with local regulations. Ensure all clearance gaps have been maintained. Ensure DishDrawer™ Dishwasher is secure and drawer opens and closes freely with no resistance. Turn on the power and water supplies, then open the drawer. You should hear a beep and see a program indicator light up on the control panel. Ensure any packaging or tape securing the racks and spray arm is removed. Check the spray arm is in place, mounted correctly and rotates freely. Ensure knock-to-pause module is fitted securely and operating correctly. Check drainage connections for leaks. Ensure inlet hose has supplied rubber washer fitted, and that it’s tightened.
- Page 15: Troubleshooting No program indicator lights up when the drawer is opened. Ensure power is connected and is switched on. Auto power-on may need to be activated. Ensure the water supply is turned on. Press once to stop the beeping, then again to clear the fault. Ensure nothing is obstructing the drawer from closing. Check hoses, connections and existing plumbing for leaks. If a problem occurs that is not listed, refer to your user guide for additional troubleshooting. Ensure the filter is installed correctly. Open the drawer and check the spray arm.

BOSCH SMI6ZCS49E-39 Dishwasher

Hisense HSCE14FS Dishwasher

Hisense HV643D90UK Dishwasher

Whirlpool WDFS3R4NBSAU 14 Place Setting Dishwasher

STRLING STR-DWSS14 Dishwasher

VALBERG VAL12C47SSC Dishwasher

FORTE F18DWS250SS 18 Inch Dishwasher

FRIGIDAIRE GALLERY GDPP4517AD Dishwasher

BOSCH S255HTX15E-4 Dishwasher

ARDESTO DWMB-V459SMH3 Dishwasher