
Honeywell HDS18SS Dishwasher
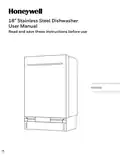









18” Stainless Steel Dishwasher
User Manual
Read and save these instructions before use
HDS18SS


| General | Details |
|---|---|
| Name | Honeywell HDS18SS Dishwasher |
| Make | Honeywell |
| Language | English |
| Filetype | PDF (Download) |
| File size | 0.18 MB |
 (1 votes, average: 5.00 out of 5)
 Loading...

Honeywell HCTDS1W Dishwasher

Honeywell HDS18SS Dishwasher Overview
Summary of Contents
- Page 1: 18” stainless steel dishwasher User manual Read and save these instructions before use
- Page 2: Important safety instructions Proper installation Basic precautions before use Installation introduction Features of your new dishwasher Components Filter system Smart wash system Operating instructions Start/cancel
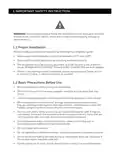
- Page 3: IMPORTANT SAFETY INSTRUCTION WARNING: For your safety, please follow the information in this manual to minimize the risk of fire, explosion, electric shock and to help prevent property damage or personal injury. Proper Installation: Please install your dishwasher properly by following the installation guide. Water supply inlet temperature should be between 120°F and 149°F. Dispose of discarded appliances and packing materials properly. The dishwasher must be properly grounded to avoid electric shock. If there is any damage to the dishwasher, please contact your dealer. Basic Precautions Before Use: Read all instructions before using the dishwasher. The manual does not cover every possible condition and situation that may occur. Use the dishwasher only for its intended function as described in this manual. When loading items, arrange sharp items and knives to reduce the risk of personal injury. Do not wash plastic items unless they are marked dishwasher safe. If the dishwasher drains into a food disposer, ensure the disposer is completely empty before running the dishwasher. Do not tamper with controls or operate the dishwasher unless all enclosure panels are properly placed. Do not touch the heating element during or immediately after use. To reduce the risk of injury, do not allow children to play in or on a dishwasher.
- Page 4: Do not let children hit, sit or stand on the door or racks of the dishwasher. Under certain conditions, hydrogen gas may be produced in a hot water system that has not been used for two weeks or more. Hydrogen gas is explosive. Before using the dishwasher, turn on all hot water faucets and let water flow for several minutes to release any accumulated hydrogen gas. Do not smoke or use an open flame during this time. Do not store or use combustible materials, gasoline, or other flammable vapors and liquids in the vicinity of this or any other appliance. Use only detergents or rinse agents recommended for use in a dishwasher and keep them out of the reach of children. Keep young children and infants away from the dishwasher while it is operating. Do not use the dishwasher if it has a damaged power line or plug, and do not plug it into a damaged outlet. Remove the door to the washing compartment when removing an old dishwasher from service or discarding it.
- Page 5: Features of your new dishwasher include various components such as the lock, cup shelf, upper basket, upper spray arm, cutlery basket, lower basket, heating element, and rinse aid dispenser.
- Page 6: Filter system includes three mesh filters that separate soiled and clean water. The multiple filter system enhances performance while using less water and energy. Smart wash system automatically adjusts the wash cycle based on the load's soil level. A short wash cycle is performed for lightly soiled dishes, while a heavy wash is for heavily soiled dishes. The dishwasher cleans by spraying hot water and detergent through spray arms. Water fills the dishwasher, covering the filter area before being pumped through the system. Soil particles are separated and drained as water is pumped out and replaced with clean water. The number of water fills varies depending on the selected cycle.
- Page 7: Getting started involves several steps. Load the dishwasher and refer to the dish preparation and loading sections. Add detergent and consult the filling the detergent dispenser section. Add rinse aid by checking the filling the rinse aid dispenser section. Select the desired cycle and refer to the cycle chart. Select desired options and note that the indicator light will glow when selected. Run the hot water faucet nearest the dishwasher until the water is hot, then turn it off. To start, press Start/Cancel and then close the door. This model is embedded operation, meaning all buttons can only be operated in the open state. Cycle times are approximate and will vary with the options selected.
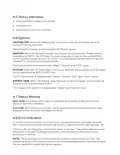
- Page 8: Status indicators include rinse detergent needs to be refilled, program end, and water failure if the faucet is not open. The heating dry function activates the heater during the drying process but is not available with rinse cycles. The sanitize function maintains water temperature at a maximum of 69°C (156.2°F) and is available with heavy, normal, and ECO cycles. The hi temp wash function maintains water temperature at a maximum of 60°C (140°F) and is available with heavy, normal, ECO, and glass cycles. The energy save function reduces energy consumption during the washing process and is available with heavy and normal cycles. The status window displays the number of delay start hours if the delay start option is selected. After the machine operates, the remaining time of the selected cycle is shown in the status window. In critical situations, the control will shut down and indicate an error code. If error codes are displayed, contact the dealer or servicer for assistance. The remaining time may fluctuate as the smart sensor checks the soil level to determine water needs.
- Page 9: User maintenance is essential for improving dishwasher performance and longevity. Cleaning the exterior should be done promptly with a soft, damp cloth, avoiding harsh chemicals. For stainless steel door panels, use a stainless steel cleaner with a soft cloth. The interior should be cleaned periodically to remove dirt and food particles. Running the dishwasher empty with detergent helps maintain cleanliness. If odors persist, use white vinegar in an empty cycle to eliminate them. Do not remove the tub front seal or touch the heating element during or after use. Cleaning the filters is an important maintenance step. Always turn off the dishwasher before performing maintenance tasks. Regular maintenance reduces unnecessary repairs and extends the life of the appliance.
- Page 10: Rotate the filter insert counterclockwise to unfasten and detach the filter insert. Remove the fine filter. Remove any dirt or other remains from the filters, and then rinse them under running water. Reassemble the filters in the reverse order of the disassembly, replace the filter insert, and rotate clockwise to the close arrow. If the filter is not closed properly, its performance will be decreased.
- Page 11: Cleaning the nozzles is important for adequate dishwasher performance. Check whether the nozzle holes are clogged by food particles. If cleaning is needed, remove the nozzle by pulling it upwards. Clean the nozzle, and then push it back into place. Check whether the nozzle is engaged correctly by rotating it by hand.
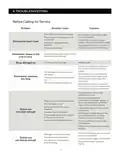
- Page 12: Troubleshooting Before calling for service Door may not be closed properly. Shut the door completely, make sure it is latched. Power supply or power line is not connected. Check and connect the power supply, refer to this manual to reset. Dishwasher won’t start. Delay Start option has been selected. Child Lock activated. It indicates the wash cycle finished, the dishwasher will beep. Rinse Aid light on. Add Rinse Aid. Dishwasher operates too long. When heavy soil is detected, the Auto, Normal, Heavy Wash cycle will automatically increase the cycle time. Water pressure is temporarily low. Use dishwasher when water pressure is normal. Dishes are not clean enough. Improper use of detergent. Dishes are not drying enough. The cycle you chose did not include drying.
- Page 13: Problem Possible Cause Solution Water hardness is too high Install a water softener Improper loading of dishes Load the dishes again as indicated Use fresh Rinse Aid Old or damp powder Rinse Aid is used Add Rinse Aid to the Dispenser Rinse Dispenser empty Use less detergent if you have soft water Using too much detergent The inlet water temperature exceeds 150°F Lower the inlet water temperature Detergent may be too old Use fresh detergent Spray arm is blocked Load the dishes making sure the spray arms aren’t blocked Detergent dispenser will not shut Add detergent and rinse aid as indicated by this manual Dishwasher does not drain properly Drain is clogged Make sure the drain hose is properly connected to the sink Improper detergent is used Make sure to use only the automatic dishwasher detergent Dishwasher leaks Level the dishwasher (see manual) Black or gray marks on dishes Aluminum utensils have rubbed against dishes Make sure the inlet water is no less than 120°F Reddish stain Some tomato based food will cause this Stained tub interior
- Page 14: Problem Noises Possible cause Solution Detergent cup opening/drain pump sound This is normal A hard object has entered the wash module. When the object is ground up, the sound should stop. Check if the water valve is turned on. Water valve is turned off. Dishwasher won’t fill. Door latch may not be properly sealed. Make sure the door is closed. Error codes When some malfunctions come on, the appliance will display error codes to warn you. If overflow occurs, turn off the main water supply before calling service.
- Page 15: Technical information includes capacity, dimensions, power supply, rated power usage, and water feed pressure. The unit has a capacity of 8 place settings. Its dimensions are 17.6” x 21.7” x 32.4” (W x D x H). The power supply is 120 volts, 60Hz. The rated power usage includes a wash motor of 100W and a heater of 700W. The water feed pressure ranges from 5.8 to 145 psi (0.04 to 1MPa).
- Page 16: If you want to return or replace the product, please contact the store where it was purchased. Remember to bring the purchase invoice. If your product needs repair, please contact us via email or phone. The Honeywell trademark is used under license from Honeywell International Inc. Honeywell International Inc. makes no representations or warranties with respect to this product. This product is manufactured by BHRS Group, LLC.

GRUNDIG GSV 42840 Dishwasher

MONOGRAM UDT165SIVII 18 Inch Dishwasher

BOSCH SMI4HCS19E Dishwasher

BOSCH SMS2HTI79E Dishwasher

SIEMENS SR65YX11ME Dishwasher

ARTUSI ADW4001X Dishwasher

FISHER and PAYKEL DD24SHTI9 N Dishwasher

BOSCH SPV6HMX5MR Dishwasher

Whirlpool WDF341PAPB Dishwasher

BOSCH SPH4HKX10E Dishwasher