
AEG FBB32607ZW Dishwasher














EN User Manual
FBB32607ZW
Dishwasher
USER
MANUAL


| General | Details |
|---|---|
| Name | AEG FBB32607ZW Dishwasher |
| Make | AEG |
| Language | English |
| Filetype | PDF (Download) |
| File size | 0.83 MB |
 (1 votes, average: 5.00 out of 5)
 Loading...

AEG FSK76748P Dishwasher

AEG FSK53617Za Dishwasher

AEG FSK74747P Dishwasher

AEG FSE73507P Dishwasher

AEG GS60AIM Dishwasher

AEG FSB73427Z Dishwasher

AEG FSE74737P Quickselect Dishwasher

AEG FFB73727PM Dishwasher

AEG F8642FI Tall Tub Dishwasher

AEG FFE83800PM Dishwasher

AEG FBB32607ZW Dishwasher Overview
Summary of Contents
- Page 1: User manual for FBB32607ZW dishwasher.
- Page 2: SAFETY INFORMATION SAFETY INSTRUCTIONS PRODUCT DESCRIPTION CONTROL PANEL PROGRAMMES OPTIONS SETTINGS BEFORE FIRST USE DAILY USE HINTS AND TIPS Thank you for choosing this AEG product. We have created it to give you impeccable performance for many years, with innovative technologies that help make life simpler. Please spend a few minutes reading to get the very best from it. Always use original spare parts. When contacting our Authorised Service Centre, ensure that you have the following data available: Model, PNC, Serial Number. Warning / Caution-Safety information General information and tips Environmental information
- Page 3: responsible for any injuries or damage that are the result of incorrect installation or usage. Always keep the instructions in a safe and accessible location for future reference. Children and vulnerable people safety This appliance can be used by children aged from 8 years and above and persons with reduced physical, sensory or mental capabilities or lack of experience and knowledge if they have been given supervision or instruction concerning the use of the appliance in a safe way and understand the hazards involved. Children between 3 and 8 years of age and persons with very extensive and complex disabilities shall be kept away from the appliance unless continuously supervised. Children of less than 3 years of age should be kept away from the appliance unless continuously supervised. Children should be supervised to ensure that they do not play with the appliance. Keep detergents away from children. General Safety This appliance is for cleaning household-type dishes and tableware only. This appliance is designed for single household domestic use in an indoor environment. This appliance may be used in offices, hotel guest rooms, bed & breakfast guest rooms, farm guest houses and other similar accommodation where such use does not exceed (average) domestic usage levels. Do not change the specification of this appliance.
- Page 4: Do not use multi-plug adapters and extension cables. Do not put flammable products or items that are wet with flammable products in, near or on the appliance. Dishwasher detergents are dangerous. Follow the safety instructions on the detergent packaging. Make sure not to cause damage to the mains plug and to the mains cable. Do not drink and play with the water in the appliance. Do not remove the dishes from the appliance until the programme is complete. To repair the appliance contact the Authorised Service Centre. Ensure that there are no visible water leaks during and after the first use of the appliance. The following spare parts will be available for 7 years after the model has been discontinued: motor, circulation and drain pump, heaters and heating elements. If the water inlet hose is damaged, immediately close the water tap and disconnect the mains plug from the mains socket.
- Page 5: Disposal instructions emphasize the importance of disconnecting the appliance from the mains supply and cutting off the mains cable. Remove the door catch to prevent children and pets from getting closed in the appliance. The lamps are designed to withstand extreme physical conditions in household appliances. They are not intended for use in other applications or for household room illumination. The product description includes various components such as the upper spray arm, lower spray arm, filters, and more. The graphic provides a general overview of the appliance's parts. For detailed information, refer to other chapters or documents provided with the appliance.
- Page 6: Control panel includes various buttons and indicators for operation. The on/off button powers the device. The program button allows selection of different washing programs. Programme indicators show the current status of the selected program. The display provides information about the ongoing process. The option button enables additional features during operation. The start button initiates the selected program. The delay button sets a delayed start for the program. Salt indicator signals when the salt container needs refilling. Rinse aid indicator indicates when the rinse aid dispenser needs refilling.
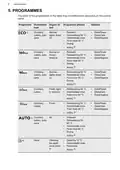
- Page 7: 5. Programmes The order of the programmes in the table may not reflect their sequence on the control panel. Crockery, cutlery, pots, lightly dried-on. Dishwashing 50 °C. Intermediate rinse. Final rinse 55 °C. Drying. Crockery, cutlery, pots, heavy, dried-on. Dishwashing 60 °C. Intermediate rinse. Final rinse 60 °C. Drying.
- Page 8: Programme phases include prewash and options for load and soil. The standard programme offers efficient water and energy consumption for normal soil crockery and cutlery. This programme assesses compliance with the Ecodesign Commission Regulation (EU) 2019/2022. Automatic door opening occurs during the drying phase. The appliance adjusts temperature, water quantity, energy consumption, and programme duration based on soil degree and item quantity. A specific programme cleans the inside of the appliance, removing limescale and grease buildup, and should be run every 2 months without any load. A quick rinse programme prevents odours and should not use detergent. Consumption values include water usage of 9.9 liters and energy consumption of 0.936 kWh for the standard programme. Values may vary based on water pressure, temperature, mains supply variations, options, dish quantity, and soil degree. For performance test information, contact the provided email with the product number code from the rating plate.
- Page 9: Options improve dishwashing temperature and reduce it to 45 °C. Desired options must be activated before starting a programme. It is not possible to activate or deactivate options while a programme is running. The option button toggles between available options and their combinations. ExtraPower improves dishwashing results by increasing wash temperature and duration. Not all options are compatible with each other; incompatible options will be automatically deactivated. ExtraHygiene provides better cleaning results by maintaining a temperature between 65 and 70 °C during the last rinsing phase. Activating options can affect water and energy consumption as well as programme duration. The appliance stores saved settings, eliminating the need for configuration before every cycle. In programme selection mode, it is possible to set a programme and enter user mode.
- Page 10: After activation, the appliance is in programme selection mode by default. The water softener removes minerals from the water supply, which would have a negative effect on the washing results and on the appliance. The higher the content of these minerals, the harder your water is. Water hardness is measured in equivalent scales. The water softener should be adjusted according to the hardness of the water in your area. Set the right level of the water softener to assure good washing results. To enter user mode, press and hold simultaneously Delay and Option until the indicators flash and the display is blank. Regardless of the type of detergent used, set the proper water hardness level to keep the salt refill indicator active. Multi-tabs containing salt are not effective enough to soften hard water. The resin of the softener device needs to be regenerated regularly.
- Page 11: All the consumption values mentioned in this section are determined in line with the currently applicable standard in laboratory conditions with water hardness 2.5mmol/L. The pressure and the temperature of water as well as the variations of the mains supply can change the values. How to set the water softener level. Make sure the appliance is in user mode. The indicator still flashes. The remaining indicators are off. The rinse aid helps to dry the dishes without streaks and stains. When the rinse aid chamber is empty, the rinse aid indicator turns on. For best drying performance, always use rinse aid. Each performed softener rinse may prolong the programme duration by another 5 minutes. Make sure the appliance is in user mode to deactivate the rinse aid empty notification.
- Page 12: When AirDry opens the door, the display shows the remaining time of the running programme. Do not try to close the appliance door within 2 minutes after automatic opening. This can cause damage to the appliance. If the door is closed for at least 3 minutes, the running programme ends. AirDry improves the drying results with less energy consumption. The appliance door opens automatically during the drying phase and remains ajar. If children have access to the appliance, we advise to deactivate AirDry. Make sure the appliance is in user mode to deactivate AirDry. The duration of the drying phase and the door opening time vary depending on the selected programme and options. Make sure that the current level of the water softener agrees with the hardness of the water supply. Start a programme to remove any processing residuals that can still be inside the appliance.
- Page 13: The salt container is essential for the dishwasher's water softener. Use rough salt designed for dishwashers only to avoid corrosion. Fill the salt container with 1 kg of salt after adding 1 litre of water for the first time. The rinse aid dispenser should only be filled with rinse aid, not detergent. Only use rinse aid designed specifically for dishwashers. Fill the rinse aid dispenser until it reaches the MAX marking. Remove any spilled rinse aid to prevent excessive foam formation. After filling the salt container, start a programme immediately to prevent corrosion. Adjust the selector for the released quantity of salt between positions 1 and 4 or 6. Ensure the cap of the salt container is securely closed after filling.
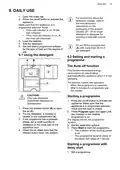
- Page 14: Daily use involves several steps for operating the appliance effectively. Open the water tap before starting the appliance. Press the on/off button to activate the appliance and ensure it is in programme selection mode. Refer to the manufacturer's instructions for detergent dosage, typically 20 - 25 ml of gel detergent for normal soil. Fill the salt container if the salt indicator is on, and fill the rinse aid dispenser if the rinse aid indicator is on. Load the baskets and add the detergent, ensuring not to exceed 30 ml in the compartment. Set and start a programme suitable for the load type and soil degree. The auto off function reduces energy consumption by deactivating the appliance when not in use. Only use detergent specifically designed for dishwashers. Ensure the appliance is in programme selection mode and the door is closed before starting a programme. The display will show the programme duration and options can be set before pressing start to begin the programme.
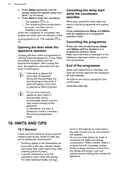
- Page 15: Cancelling the delay start while the countdown operates displays the desired delay time. Press Start to begin the countdown. When you cancel the delay start, you have to set the programme and options again. Opening the door while a programme is running stops the appliance and may affect energy consumption and programme duration. Make sure that there is detergent in the detergent dispenser before starting a new programme. When the programme is complete, the Auto off function switches the appliance off automatically. If the door is opened for more than 30 seconds during the drying phase, the running programme ends. Do not try to close the appliance door within 2 minutes after AirDry automatically opens it as this may cause damage. Follow the hints below to ensure optimal cleaning and drying results in daily use and to protect the environment. Do not pre-rinse dishes by hand as it increases water and energy consumption.
- Page 16: Soak or slightly scour cookware with firmly cooked-on or baked-on food before washing it in the appliance. Make sure that items in the baskets do not touch or cover each other. You can use dishwasher detergent, rinse aid and salt separately or you can use the multi-tablets. Select a programme according to the type of load and the degree of soil. Always use the correct quantity of rinse aid. Insufficient dosage of rinse aid decreases the drying results. Make sure that the water softener level is correct. Before you start to use separately detergent, salt and rinse aid, complete the following steps. Only use salt, rinse aid and detergent designed for dishwasher. Always use the whole space of the baskets. Put hollow items with the opening facing downwards.
- Page 17: Put cutlery and small items in the cutlery basket. The arrangement of the items in the baskets is correct. The programme is suitable to the type of load and the degree of soil. Make sure that the spray arms can move freely before you start a programme. Let the tableware cool down before you remove it from the appliance. First remove items from the lower basket, then from the upper basket. Before maintenance, deactivate the appliance and disconnect the mains plug from the main socket. Check the filters and the sump after each use of the dishwasher. Clean the appliance interior with a soft damp cloth. Use the automatic cleaning programme for optimal cleaning results.
- Page 18: Do not use abrasive products, abrasive cleaning pads or solvents. The filter system is made of 3 parts. Make sure that there are no residues of food or soil in or around the edge of the sump. Put back in place the flat filter (A). Make sure that it is correctly positioned under the 2 guides. Turn the filter (B) counterclockwise and remove it. Reassemble the filters (B) and (C). Put back the filter (B) in the flat filter (A). Turn it clockwise until it locks. Remove the filter (C) out of filter (B). Remove the flat filter (A). An incorrect position of the filters can cause bad washing results and damage to the appliance.
- Page 19: To install the spray arm back, press it downwards. We recommend cleaning the lower spray arm regularly to prevent soil from clogging the holes. Clogged holes can cause unsatisfactory washing results. To remove the lower spray arm, pull it upwards. Do not remove the upper spray arm. If the openings in the spray arm are clogged, remove the remaining particles of soil with a thin pointed object. Wash the spray arm under running water. Improper repair of the appliance may pose a danger to the safety of the user. Any repairs must be performed by qualified personnel. Refer to the below table for information on possible problems.
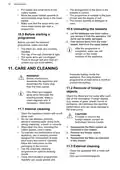
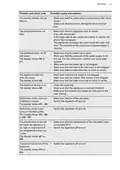
- Page 20: Problem and alarm code Possible cause and solution You cannot activate the appliance. Make sure that the mains plug is connected to the mains socket. Make sure that there is no damaged fuse in the fuse box. The programme does not start. Make sure that the appliance door is closed. Press the start button. If the delay start is set, cancel the setting or wait for the end of the countdown. The appliance does not fill with water. Make sure that the water tap is open. Make sure that the pressure of the water supply is not too low. The appliance does not drain the water. Make sure that the sink spigot is not clogged. The anti-flood device is on. Close the water tap. Make sure that the appliance is correctly installed.
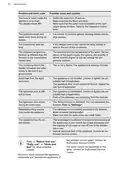
- Page 21: Problem and alarm code Possible cause and solution The level of water inside the appliance is too high. Switch the appliance off and on. Make sure that the filters are clean. Make sure that the outlet hose is installed at the right height above the floor. The appliance stops and starts more times during operation. It is normal. It provides optimal cleaning results and energy savings. The programme lasts too long. If the delayed start is set, cancel the delay setting or wait for the end of the countdown. The displayed programme duration is different than the duration in the consumption values table. The pressure and the temperature of the water, the variations of the mains supply, the options, the quantity of dishes and the degree of soil can change the programme duration. The appliance trips the circuit-beaker. The amperage is insufficient to supply simultaneously all the appliances in use.
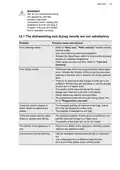
- Page 22: WARNING! We do not recommend using the appliance until the problem has been completely fixed. Unplug the appliance and do not plug it in again until you are certain that it operates correctly. The dishwashing and drying results are not satisfactory. Poor washing results may be due to improper loading or insufficient program intensity. Activate the ExtraPower option to improve washing results. Clean spray arm jets and filter. Poor drying results can occur if tableware is left too long inside the closed appliance. Activate the function AirDry to improve drying performance. Ensure there is sufficient rinse aid and adjust the dosage if necessary. Always use rinse aid, even with multi-tablets. Adjust the rinse aid dosage if there are whitish streaks or bluish layers on glasses and dishes. Unusual foam during washing may indicate the use of incorrect detergent.
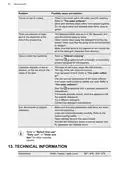
- Page 23: Problem Possible cause and solution Traces of rust on cutlery. There is too much salt in the water used for washing. Silver and stainless steel cutlery were placed together. There are residues of detergent in the dispenser at the end of the programme. The detergent tablet was stuck in the dispenser and was not washed away by water. Odours inside the appliance. Start the programme with a descaler or a cleaning product designed for dishwashers. Limescale deposits on the tableware, on the tub and on the inside of the door. The level of salt is low, check the refill indicator. Dull, discoloured or chipped tableware.
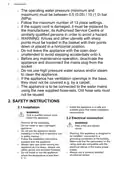
- Page 24: Voltage: 220 - 240 V Frequency: 50 Hz Water supply pressure: 0.5 (0.05) / 10 (1.0) MPa Water supply: max 60 °C Capacity: 13 place settings Refer to the rating plate for other values. Use hot water supply from alternative energy sources to decrease energy consumption. The QR code on the energy label provides a web link to the EU EPREL database. Keep the energy label for reference with the user manual. Recycle materials and packaging to help protect the environment.
- Page 25: Page 25

beko 943711 Dishwasher

hermitlux HMX-DW03 Table Top Dishwasher

whirlpool LDV02284 Dishwasher

GAGGENAU DF481100F 400 Series Dishwasher

Miele G 5000 SC Active Dishwasher

FISHER and PAYKEL DD60DTX6HI CN Dishwasher

respekta GSP60V Dishwasher

FISHER and PAYKEL DD24DCTX9 Sanitize Dishwasher

BOSCH SMV2HVX02E Dishwasher

BOSCH SGV43C53 Custom Panel ADA Compliant Dishwasher