GERMAN DWH-121 Dishwasher


450 Slim Series
Built-In Dishwasher
DWH-121
Online Warranty Registration
Please read thes
before use and k
US E R MA NUAL

| General | Details |
|---|---|
| Name | GERMAN DWH-121 Dishwasher |
| Make | German |
| Language | English |
| Filetype | PDF (Download) |
| File size | 6.49 MB |


GERMAN DWH-121 Dishwasher Overview
Summary of Contents
- Page 1: 450 Slim Series built-in dishwasher DWH-121. Please read these instructions and warranty information carefully before use and keep them handy for future reference. User manual.
- Page 2: Notice before use Important safety instructions Quick operation guide Operation instruction Control panel Product structure Prior using for the first time Loading the dishwasher baskets Starting a washing program Troubleshooting
- Page 3: Notice before use Important safety instructions Please carefully read this manual before using the dishwasher. This appliance is intended to be used in household and similar applications. Keep it as a reference in the later days. This manual contains sections on important safety instructions, operating instructions, installation instructions, and troubleshooting. This appliance can be used by children aged from 8 years and above with supervision. Before calling for service, review the section on troubleshooting. This appliance is for indoor use only, for household use only. Please unplug before cleaning and maintaining the appliance. This appliance must be earthed to reduce the risk of electric shock.
- Page 4: Important safety instructions should be followed when loading items to be washed. Sharp items should be located to avoid damaging the door seal. Knives and utensils with sharp points must be loaded with points down or placed horizontally. Check that the detergent powder is empty after the wash cycle. Do not wash plastic items unless marked dishwasher safe. Use only detergent and rinse additives designed for automatic dishwashers. Children should be supervised to prevent them from playing with the appliance. The door should not be left open to reduce the risk of tripping. If the supply cord is damaged, it must be replaced by a qualified person. This appliance’s packaging materials are recyclable and should be disposed of properly.
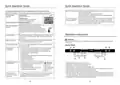
- Page 5: Quick operation guide Switch off the appliance when the working cycle has finished; the buzzer will sound 8 times, then stop. For detailed operating method, read the corresponding content in the instruction manual. Switch on the appliance by opening the door and pressing the On/Off button. Fill the detergent dispenser in Compartment A with each wash cycle. The appliance will power off automatically after 30 minutes without any operation. Unload the appliance starting from the lower basket and wait about 15 minutes before unloading to avoid handling hot dishes. Check the rinse aid level using the mechanical indicator or electric indicator on the control panel. Scrape off any large amounts of leftover food before loading the baskets. Select a programme by pressing the Programme Button until the selected programme lights up. To add forgotten dishes, open the door slightly to stop the dishwasher, then add the dishes and close the door to resume operation.
- Page 6: Operation instruction The water softener must be set manually, using the water hardness dial. The water softener is designed to remove minerals and salts from the water. The softener should be adjusted according to the hardness of the water in your area. The dishwasher is designed to allow for adjustment in the amount of salt consumed. Please follow the steps below for adjustment in salt consumption. Before using your dishwasher for the first time, set the water softener. Add 1.5kg dishwasher salt and then fill the salt container with water. Fill the rinse aid dispenser. The manufactory setting is H4 (EN 50242). Contact your local water board for information on the hardness of your water supply.
- Page 7: Prior using for the first time If your model does not have any water softener, you may skip this section. The hardness of the water varies from place to place. If hard water is used in the dishwasher, deposits will form on the dishes and utensils. The salt container must only be refilled when the salt warning light in the control panel comes on. The appliance is equipped with a special softener that uses a salt container specifically designed to eliminate lime and minerals from the water. Always use the salt intended for use with dishwashers. The rinse aid is released during the final rinse to prevent water from forming droplets on your dishes. Only use salt specifically designed for the use in dishwashers. Rinse aid is automatically added during the last rinse, ensuring thorough rinsing, and spot and streak free drying. You should never let the rinse aid level fall 1/4 full. Immediately after filling the salt into the salt container, a washing program should be started.
- Page 8: Prior using for the first time, new pulverised detergent is typically without phosphate, so it is recommended to fill salt in the salt container even with low water hardness. Using detergents without phosphate in hard water can lead to white spots on dishes; adding more detergent may improve results. Detergents without chlorine may not completely remove strong and colored spots; using a higher temperature program is advisable. Detergents can be categorized into conventional alkaline detergents and low alkaline concentrated detergents with natural enzymes. To use the rinse aid dispenser, turn the cap to the open arrow, fill it carefully, and replace the cap securely. Detergent tablets dissolve at different speeds; longer programs are recommended to ensure complete removal of detergent residues. The detergent dispenser should be refilled before each wash cycle, typically requiring only one tablespoon of detergent for a normal load. The rinse aid dispenser has adjustable settings; starting at setting 4 is recommended, adjusting higher if spots or poor drying occur. Detergents are essential for removing dirt and transporting it out of the dishwasher; most commercial quality detergents are suitable for this purpose. Only use branded detergent specifically made for dishwashers, keeping it fresh and dry, and add it just before starting the wash cycle.
- Page 9: Prior using for the first time Consider buying utensils which are identified as dishwasher-proof. Use a mild detergent that is described as ‘kind to dishes’. Dishwasher detergent is corrosive; keep it out of reach of children. For particular items, select a program with as low a temperature as possible. To prevent damage, do not take glass and cutlery out of the dishwasher immediately after the program has ended. Fill the detergent dispenser with detergent. Please observe the manufacturers dosing and storage recommendations as stated on the detergent packaging. Scrape off any large amounts of leftover food; it is not necessary to rinse the dishes under running water. Place objects in the dishwasher in a way that allows the spray arms to rotate freely during washing.
- Page 10: Loading the dishwasher baskets involves specific guidelines for optimal cleaning results. The height of the upper basket can be adjusted to create more space for large utensils. Very small items should not be washed in the dishwasher as they could easily fall out of the basket. Load hollow items such as cups and glasses with the opening facing downwards to prevent water collection. Dishes and items of cutlery must not lie inside one another or cover each other. Long bladed knives stored upright are a potential hazard; they should be positioned horizontally in the upper basket. Do not overload your dishwasher for good results and reasonable energy consumption. To prevent water dripping from the upper basket into the lower basket, empty the lower basket first. Cutlery should be placed in the cutlery basket with handles down, and sharp utensils should have the sharp point down. Pots and serving bowls must always be placed top down, and deep pots should be slanted to allow water to flow out.
- Page 11: Starting a washing program involves several steps, including loading the dishwasher and selecting the appropriate cycle. It is recommended to load the lower basket first, then the upper one. Pour in the detergent before starting the wash cycle. Ensure the power supply is connected and the water supply is turned on. Press the ON/OFF button to turn on the appliance. Select the desired wash program by pressing the program button. A cycle can only be modified if it has been running for a short time. If a program is selected, the response light will indicate the selection. A forgotten dish can be added before the detergent cup opens. The dishwasher will resume operation after closing the door.
- Page 12: Starting a washing program At the end of the wash cycle, the buzzer of the dishwasher will sound for 8 seconds, then stop. Turn off the appliance using the ON/OFF button, shut off the water supply, and open the door of the dishwasher. The filter prevents larger remnants of food or other objects from getting inside the pump. Wait for a few minutes before unloading the dishwasher to avoid handling the dishes and utensils while they are still hot. The filter system consists of a coarse filter, a flat (main filter), and a micro filter (fine filter). Food and soil particles trapped in the main filter are pulverized by a special jet on the lower spray arm and washed down to drain. Larger items, such as pieces of bones or glass, are trapped in the coarse filter. This fine filter holds soil and food residues in the sump area and prevents it from being redeposited on the dishes during the wash cycle. For best performance and results, the filter must be cleaned regularly. The dishwasher must never be used without the filters.
- Page 13: Maintenance and cleaning are essential for the dishwasher's performance. Inspect the filters for blocking after every use. Remove the filter system by unscrewing the coarse filter and clean it under running water. Regularly clean the spray arms to prevent clogging from hard water chemicals. The entire filter assembly should be cleaned once a week. After every wash, turn off the water supply and leave the door slightly open. Use a lightly dampened cloth to clean the control panel and dry it thoroughly. Avoid using sharp objects or abrasive cleaners on any part of the dishwasher. When cleaning the door, only use a soft warm, damp cloth. To prevent odours, run an empty wash cycle before unplugging the appliance.
- Page 14: Installation instruction The aesthetic wooden panel could be processed according to the dimensions illustrated. The installation of pipes and electrical equipment should be done by professionals. Disconnect electrical power before installing the dishwasher to avoid electrical shock. The installation position of the dishwasher should be near the existing inlet and drain hoses and power cord. Choose a place near the sink to facilitate the installation of inlet and drain hoses. If the dishwasher is installed at the corner of the cabinet, ensure there is space when the door is opened. Install the hook on the aesthetic wooden panel and fix the panel onto the outer door by screws and bolts. Ensure there is less than 5mm between the top of the dishwasher and cabinet. Maintain a minimum space of 50mm for the door of the dishwasher.
- Page 15: Installation instruction Tension adjustment of the door spring The door springs are set at the factory to the proper tension for the outer door. If aesthetic wooden panels are installed, you will have to adjust the door spring tension. Adjust the tension of the door springs by using an Allen key turning in a clockwise motion. Door spring tension is correct when the door remains horizontal in the fully opened position. Connect the inlet hose to the cold water supply. Connect the drain hose. Affix the condensation strip under the work surface of the cabinet. Level the dishwasher. The dishwasher must be secured in place.
- Page 16: Installation instruction Dishwasher must be level for proper dish rack operation and wash performance. Level the dishwasher by adjusting the three levelling legs individually. Improper connection of the equipment-grounding conductor can result in the risk of an electric shock. The appliance must be connected to the water mains using new hose-sets. Water pressure must be between 0.04 MPa and 1 MPa. Do not use an extension cord or an adapter plug with this appliance. Ensure the Aquastop safety supply unit is in a vertical position once installed. Connect the cold water supply hose to a threaded 3/4(inch) connector. This appliance must be earthed to reduce the risk of electric shock. Please close the hydrant after using.
- Page 17: Installation instruction Position the appliance in the desired location. The dishwasher is equipped with water supply and drain hoses that can be positioned either to the right or the left sides. Review the charts on the following pages may save you from calling for service. Make sure the dishwasher is turned on and the door is closed securely. Check that the water supply is connected properly and water is turned on. If the sink is 1000mm higher from the floor, drain excess water from hoses into a bowl or suitable container. The following things should be checked before starting the dishwasher: the dishwasher is level, the inlet valve is open, and the power is switched on. Use only the special dishwasher detergent to avoid suds. Always wipe up rinse-aid spills immediately. To clean the interior, use a damp sponge with dishwasher detergent and wear rubber gloves.
- Page 18: Troubleshooting Improper loading can lead to issues with cleaning and drying. Load the dishwasher as suggested in the directions. Rust stains on cutlery may indicate items are not corrosion resistant. Increase the amount of rinse-aid if there are issues with drying. Always run the quick wash programme after adding dishwasher salt. Do not empty your dishwasher immediately after washing; allow steam to escape. Unsatisfactory drying results may be due to a loose lid on the softener. Rearranging items in the basket can resolve knocking noises from the spray arm. Select a more intensive programme if the dishes are not clean. Error codes will display to warn you of malfunctions and possible causes.
- Page 19: Technical specifications Sheet of household dishwasher according to EU Directive 1059/2010 Model No. DWH-121 Rated Voltage/Frequency: 220-240V / 50Hz Rated Power (Max): 1,930 Energy Efficiency Class: A++ Noise Level: 49dB(A) Product Dimensions: (H)815 (W)448 (D)550 mm Net Weight: 38kg The device meets the European standards and the directives in the current version at delivery.
- Page 20: Loading the baskets according to EN50242 Cutlery basket Upper basket Lower basket Information for comparability tests in accordance with EN 50242 Capacity: 9 place settings Position of the upper basket: lower position Programme: Eco Rinse aid setting: 6 Softener setting: H4
- Page 21: 目錄 使用前注意事項 重要安全注意事項 快速操作指南 操作說明 請仔細閱讀此使用說明書,以幫助您更有效地使用和保養洗碗碟機。 請妥善保存以備日後查閱。 請將此說明書隨機附贈給後續使用者。 本說明書由重要安全注意事項、操作說明、安裝說明、常見故障及處理等部分組成。 如果無法自己解決已出現的故障,請尋求專業技術人員提供幫助。 工廠根據實際情況可能會對產品進行不斷的改進,與本說明書有不符之處請以產品實物為准,恕不另行通知。
- Page 22: 重要安全注意事項 如要清洗標示不清晰的塑膠物品,請查看製造商的清洗建議。 請使用洗碗碟機專用的洗滌劑和助洗劑。 番梘、洗衣粉或洗手液不得用於碗碟機。 應監管兒童,確保他們不玩弄本機。 門不應一直敞開,這會增加翻倒風險。 如果電源線損壞,必須由專業人員更換。 本機僅供家用和類似用途。 本產品可由8歲及以上年齡的兒童使用,但需有人監督。 安裝時,請不要過分彎曲或擠壓電源線。 請勿將本機、電源線及插頭浸入水中或其他液體中。
- Page 23: 快速操作指南 為了更好地使用洗碗碟機,初次使用洗碗碟機時,請仔細閱讀所有操作說明。 打開洗碗碟機門,按電源鍵啟動洗碗碟機。 檢查助洗劑量和再生鹽量。 清除餐具上較大塊的殘留食物,然後裝入餐具籃中。 按程式按鍵直至所選程式指示燈亮起。 打開水龍頭,關上洗碗碟機門,約1秒鐘後,本機開始工作。 正在運行的洗滌程式只有在洗碗碟機僅運行了短時間時才能修改。 稍微打開洗碗碟機門,洗碗碟機停止運行。 洗滌程式結束後,洗碗碟機的蜂鳴器響8次,隨後停止。 關掉水龍頭,卸下餐具籃之前,等待幾分鐘以避免處理熱的餐具。
- Page 24: 操作說明 初次使用前: 產品結構 觀看操作視頻 設置軟水器 軟水器必須通過手動設置,使用水硬度刻度盤設置。 軟水器用於去除水中的礦物質和鹽。 根據您所在地區的水質硬度調整軟化器。 本機可以根據所使用水質的硬度調整鹽用量。 請按照以下步驟調整鹽用量: 水質硬度
- Page 25: 初次使用 注意:取出下層餐具籃後,擰開並取出鹽槽蓋。 將鹽斗下端放入鹽槽,倒入約1.5kg洗碗碟機專用鹽。 鹽槽注滿水。有少量水從鹽槽中流出為正常現象。 填充鹽槽後,按順時針方向擰緊鹽槽蓋。 鹽槽裝滿鹽後,鹽警告燈熄滅。 加完鹽後馬上運行一個洗滌程式,否則溢出的鹽水可能會腐蝕過濾系統。 水的硬度因地而異。如果洗碗碟機使用硬水,則會在餐具和器具上形成沉積物。 本機配備了特殊的軟水器,使用專為消除水中石灰和礦物質而設計的鹽槽。 在最後一遍漂洗階段會投放助洗劑,以防止水滴殘留在餐具上。 只能使用洗碗碟機專用鹽!其他類型的鹽會損壞軟水器。
- Page 26: 初次使用 調整助洗劑艙 何時添加助洗劑艙 助洗劑槽裝滿時,指示燈全黑。隨著助洗劑的減少,指示燈黑點縮小。切勿讓助洗劑液位低於1/4。 助洗劑艙有六個或四個設置。洗碗碟機每次啟動,分配器設置均為“4”。如果碗碟仍不能正常風乾或殘留水漬,可調節至更高一級設置。 必須添加洗滌劑,其化學成分可以去除餐具上的污垢、殘渣。 請僅使用專門用於洗碗碟機的洗滌劑。洗滌劑保持清新乾燥。 洗滌劑有三種:含磷酸鹽含氯、含磷酸鹽不含氯、不含磷酸鹽不含氯。 使用硬水的情況下,如果所用洗滌劑不含磷酸鹽,通常碗碟和玻璃器具會出現斑點。 不含氯的洗滌劑只能稍微將餐具漂洗乾淨,不能將頑固污漬和色斑清除乾淨。
- Page 27: 初次使用 濃縮洗滌劑 根據其化學成分,濃縮洗滌劑可分為兩種基本類型: 將洗滌劑填滿洗滌劑艙。 請遵循洗滌劑包裝上製造商所述的推薦用量和存儲建議。 不同品牌的洗滌塊,溶解速度有所不同。 如果碗碟嚴重髒汙,往預洗洗滌劑艙中多添加洗滌劑。 每次開始洗滌前,務必按照洗滌程式一覽表中的說明重新裝滿洗滌劑艙。 所需洗滌的餐具越髒,需要的洗滌劑越多。 請遵守洗滌劑包裝上製造商給出的建議。 洗碗碟機所使用的洗滌劑具有腐蝕性!
- Page 28: 餐具籃裝載 注意:不要用洗碗碟機清洗非常小的餐具,如果太小可能會從籃中掉出來。 置放中空的物品,如茶杯、玻璃杯、鍋等等。開口朝下置放,避免物品積水。 餐具不得緊貼擺放,或互相遮蓋。 選購可用於洗碗碟機的器具。 使用對餐具無損壞的溫和洗滌劑。 對於特定物品,選擇溫度盡可能低的程式。 較大的器具最難清洗,應將其放置於下層餐具籃。 上層餐具籃專為擺放更精緻更輕的餐具,如玻璃杯、咖啡杯和茶杯。 長刀不應具直立置放,否則危險! 洗滌程式完成後,請勿立即取出玻璃杯和餐具,以防損壞餐具。
- Page 29: 餐具籃裝載 啟動洗滌程式 洗滌程式一覽表 調節上層餐具籃 折疊杯架 注意:需將助洗劑填滿助洗劑艙。 下層餐具籃置放大件器具時留出更多空間。 長物品、餐具、沙律盤和刀具應放在碗架上。 刀叉、筷子等應放到刀叉籃中,手柄放在籃底。 餐具裝載容量:9套。
- Page 30: 啟動洗滌程式 洗滌程式結束後,洗碗碟機的蜂鳴器會鳴叫8秒鐘。 建議先裝載好下層餐具籃,再裝載上層餐具籃。 倒入洗滌劑。 確保水龍頭開到最大。 餐具比較燙,更容易破損。 在程式已結束的情況下,程式指示燈仍亮著但不再閃爍。 小心打開門,燙的餐具經不起敲碰。 當前正在運行的程式只有在僅運行了短時間的情況下才能修改。 洗滌過程中打開洗碗碟機門非常危險,熱水可能會燙傷您!
- Page 31: 清潔與保養 過濾系統防止食物或其他物品的殘留物進入洗滌泵內,堵塞過濾。 每次用完洗碗碟機後,檢查過濾系統有無堵塞。 應每星期清洗一次整個過濾系統。 過濾系統由三重過濾器構成。 清潔過濾器時,使用清潔刷清潔粗過濾器和微過濾器。 清潔時請勿敲擊過濾器,否則會造成其變形,導致洗滌性能下降。 可用輕微蘸濕的布清潔控制面板。 切勿使用尖銳的物品、百潔布和粗糙的清潔用品擦拭本機。 在冬天,請採取防凍措施保護洗碗碟機。 如果洗碗碟機因為結冰而不能正常工作,請聯繫專業服務人員處理。
- Page 32: 清潔與保養 定期清潔噴淋臂以防止硬水中的化學物質堵塞噴嘴和軸承。 安裝洗碗碟機時要由專業人員進行,並斷開電源以避免觸電危險。 清潔噴淋臂時,將其放入溫肥皂水中,使用軟刷清潔噴嘴。 安裝位置應靠近現有的進/出水管和電源線,以方便連接排水軟管。 每次洗滌結束後,關掉水源並稍微打開洗碗碟機門以散開水氣和氣味。 清潔機器表面時,請勿使用溶劑或磨損性清潔用品,僅用布蘸溫肥皂水擦拭。 長時間不使用時,建議清空洗碗碟機並運行一個空載洗滌程式。 移動洗碗碟機時應保持其垂直,避免將其背面朝下移動。 定期用濕海綿清潔密封元件以防止食物殘留導致氣味。
- Page 33: 安裝說明 裝飾門板尺寸和安裝 可按照圖三所示加工木製裝飾門板。 門板彈簧張力調節 出廠時,門板彈簧已調至適合外門。 如果安裝木製裝飾門板,則必須重新調整門板彈簧。 轉動調節螺絲,使調節器拉緊或放鬆鋼絲。 洗碗碟機門完全打開時,保持水平位置,而用手指略微抬起時,門又即可關上。 將掛鈎插入裝飾門板,再裝入洗碗碟機外門上的插槽。 門板位置放好後,用螺絲和螺栓將門板固定在外門上。 將排水軟管連接到直徑至少為40mm的排水管,或將其放入水槽中。 排水軟管出水口高度應低於1000mm。
- Page 34: 安裝說明 洗碗碟機必須保持水平位置,以讓洗滌工作正常運行,達到良好的洗滌效果。 使用隨機支架將裝飾門板安裝到洗碗碟機的外門上。 通過分別調整三個調節腳使洗碗碟機處於水平位置。 將進水管連接到冷水供水處。 連接排水軟管。 將冷凝帶粘附在櫥櫃工作檯面之下。 洗碗碟機必須固定到位。 本機請勿使用延長線或轉接插頭。 查看銘牌資訊以瞭解額定電壓,將洗碗碟機連接至合適的電源。 確保電源電壓和頻率與銘牌上標示的電壓和頻率相符。
- Page 35: 安裝說明 接地說明 本機必須接地,以降低觸電風險。 接地導體連接不正確可能會導致觸電危險。 使用後請關閉水龍頭。 安置洗碗碟機 將洗碗碟機放置在所需位置,並確保其靠在牆上。 本機必須用新軟管連接到水源,不可重複使用舊軟管。 水壓必須在0.04MPa和1MPa之間。 連接排水管,務必正確安裝以防漏水。 安全供水軟管採用雙層設計,保證供水安全。
- Page 36: 常見故障及處理 請查閱本說明書中常見故障及處理的內容,以幫助您自己處理一些常見的故障。 洗碗碟機不運行,保險絲燒斷或斷路器斷開。 確保洗碗碟機已接通電源並且門關好。 水壓過低,檢查是否正確連接至水源並且打開水龍頭。 洗碗碟機門未關好,確保門關好並鎖上。 餐具清洗不乾淨,餐具籃裝載不正確。 使用了錯誤的洗滌劑,僅使用洗碗碟機專用洗滌劑以避免泡沫產生。 選擇的洗滌程式不夠強力,選擇更為強力的洗滌程式。 洗滌劑不夠多,加入更多的洗滌劑或更換現用的洗滌劑。 內膽有污漬,使用了含著色劑的洗滌劑。 玻璃器具上有暗點,軟水中放了太多的洗滌劑。
- Page 37: 技術規格 符合歐盟指令1059/2010的家用洗碗碟機參數表 按照推薦的方向擺放餐具。 額定電壓/頻率 標準洗滌能耗(每輪) 標準洗滌耗水量(每輪) 噪音等級 產品尺寸 安裝尺寸 錯誤代碼
- Page 38: 技術規格 依據En50242標準裝載餐具籃 餐具裝載容量為9套。 本機符合歐洲標準和交付時的最新版指令。 注意:以上資料已根據標準在規定的操作條件下進行測量。 根據餐具的數量和髒汙程度,水的硬度,洗滌劑的用量等因素,結果可能會有很大差異。 本說明書的以上注意事項基於歐盟的標準和規則。
- Page 39: Warranty terms & conditions provide a 1-year full warranty under normal operations. The warranty is effective from the date of purchase. This warranty is not valid until customer registration information is received by the Service Centre within 10 days of purchase. Customers must register via the website or by mailing the Warranty Card to the Customer Service Centre. The warranty will be invalidated if the information provided is found to be inaccurate. Customers who fail to present the original purchase invoice will not be eligible for free warranty service. The warranty does not cover labor costs for installation, check-up, repair, or transportation costs. The warranty is void if the product is used for commercial purposes or modified by unauthorized personnel. German Pool will repair or replace any defective part at its discretion. The warranty will be void if there is any transfer of ownership from the original purchaser.
- Page 40: HONG KONG TOP BRAND TEN YEAR ACHIEVEMENT AWARD All rights reserved. Copying, reproducing or using the contents of this manual is not allowed without prior authorization from German Pool, violators will be prosecuted.

IKEA 104.756.15 Hygienisk Dishwasher

SIEMENS SN25ZI49CE Free Standing Dishwasher

BOSCH SMH4HCX48E Dishwasher

FISHER AND PAYKEL DD24STX6I1 Tall Dishwasher

BOSCH SMP6ZCW80S Dishwasher

SIEMENS SN61HX04AE Dishwasher

AIRMSEN AE-TDQR03 Complete Dishwasher

Bertazzoni DW24T3IXV Dishwasher

FISHER AND PAYKEL DD24SHTI9 N Tall Dish Drawer Dishwasher

SAMSUNG DW60R2014 Wide 12 Place Dishwasher