
ASKO D5636XXL Dishwasher


Dear Customer,
Thank you for choosing this quality product from ASKO.
We hope it will meet your expectations and fulfill your needs for many years to
come. Scandinavian design combines clean lines, everyday functionality, and
high quality. These are key characteristics of all our products and the reason
they are greatly appreciated throughout the world.
To get the most out of your new dishwasher, we recommend that you read the
operating instructions before using it. The operating instructions also include
information on how you can help protect the environment.
Do you need this Use&Care Guide in spanish? Log onto
¿Necesita esta Instrucciones de uso y cuidado en español? Entre en
Operating Instructions
Dishwasher
ASKO D5636XXL


| General | Details |
|---|---|
| Name | ASKO D5636XXL Dishwasher |
| Make | ASKO |
| Language | English |
| Filetype | PDF (Download) |
| File size | 3.19 MB |
 (1 votes, average: 5.00 out of 5)
 Loading...

ASKO DSD5444D Dishwasher

ASKO DFI8557MMXXL Dishwasher

ASKO DBI565IXXLS Logic Series 24 Dishwasher

ASKO DFI766UXXL.AU Dishwasher

ASKO DFI5558MKXXL Dishwasher

ASKO DFI777UXXL Dishwasher

ASKO DFI544D Dishwasher

ASKO DFI7602MMXXL Dishwasher

ASKO DBI343ID.W.AU Dishwasher

ASKO D5233 Dishwasher

ASKO D5636XXL Dishwasher Overview
Summary of Contents
- Page 1: Dear Customer, Thank you for choosing this quality product from ASKO. We hope it will meet your expectations and fulfill your needs for many years to come. Scandinavian design combines clean lines, everyday functionality, and high quality. To get the most out of your new dishwasher, we recommend that you read the operating instructions before using it. The operating instructions also include information on how you can help protect the environment. Operating Instructions Dishwasher ASKO D5636XXL
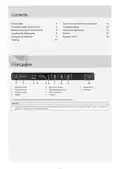
- Page 2: Contents Care and maintenance instructions Troubleshooting Important safety instructions Before washing for the first time Loading the dishwasher Using the dishwasher Settings Technical information Service Program chart The panel is fitted with touch buttons with audible feedback.
- Page 3: Important safety instructions Save these instructions for future reference. Should a child swallow dishwasher detergent or rinse aid, give plenty to drink immediately. Seek medical advice immediately. When using your dishwasher, follow basic precautions. Always close the door and start the dishwasher as soon as you put in the detergent. Read all instructions before using the dishwasher. Use the dishwasher only for its intended function. Always keep small children away from the machine when it is open. Do not wash plastic items unless they are marked “dishwasher safe.” The overflow protection starts pumping out the machine and turns off the water supply if the water level exceeds the normal level. When cleaning the edge around the door, use only a slightly damp cloth.
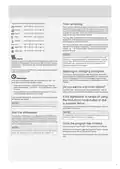
- Page 4: Before washing for the first time The machine can be connected to either a hot or cold water supply. We recommend a cold water supply. The water pressure should be 4.2-140 psi. The section Settings describes how to set rinse aid amount. The rinse aid amount can be set from (Off) to (High dose). Increase the rinse aid dosage if the dishes have water marks. Reduce the rinse aid dosage if the dishes have a sticky white/blue film or are streaked. Contact the local water utility to check the water hardness in your area. Use rinse aid to improve wash and dry times and achieve clear and spotless results. When the rinse aid needs topping up, the symbol lights on the display.
- Page 5: Loading the dishwasher Run programs only with a full load to save energy. Use the Rinse & Hold program if there are unpleasant odors while waiting for a full load. Select a lower temperature for lightly soiled dishes. Use the Short dry option to save energy and improve drying results. Do not rinse dishes under running water; scrape off large food particles instead. Choose a green detergent and read the environmental declaration on the packaging. Connect to cold water if using oil or electricity for heating. Connect to hot water to cut program times and reduce electricity consumption. Some cookware is not dishwasher safe due to material limitations. Position fragile items carefully to avoid damage during operation.
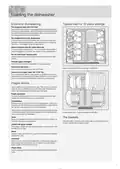
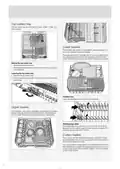
- Page 6: Top cutlery tray accommodates cutlery, ladles, whisks, and other utensils. Place plates, side plates, serving dishes, pots, and cutlery in the lower basket. Place pots and pans in the right rear of the lower basket for the best cleaning results from the two rear spray nozzles. Remove the top cutlery tray to raise or lower it using the locking handles. Lower the foldable tines when washing large pots. Place glasses, cups, bowls, side plates, and saucers in the upper basket with soiled surfaces down. Move adjustable tines to adapt the lower basket for plates with a diameter greater than 9 3/4. Place cutlery with handles facing down, except for knives, and spread them out as much as possible. Ensure that spoons do not stack inside each other in the cutlery basket. The cutlery basket is best placed in the middle at the front of the lower basket for optimal dishwashing performance.
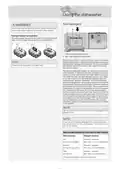
- Page 7: Using the dishwasher Add detergent Knives and other pointed items must be placed with the points down in the cutlery basket or horizontally in other baskets. The cutlery basket has a fold-down section in the middle for small items, or small shafts, such as electric whisk attachments. We recommend that you use only unscented, granular automatic dishwashing detergent. Using the wrong detergent could cause flooding and/or damage your dishwasher. The amount of detergent needed can vary due to differences in water hardness. In hard water areas, both the dishes and the machine can develop a white or gray film after a while. If this happens, run the Normal program with high temperature and two tablespoons of citric acid or commercially available dishwasher cleaner in the detergent compartment. We recommend that you do not add prewash detergent for the program Quick. If you use a dishwashing detergent with a rinse aid additive, you should not fill the rinse aid dispenser. Recommended detergent amounts based on water hardness.
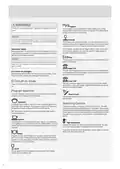
- Page 8: WARNING! Children must be supervised – dishwasher detergent is corrosive. This program is recommended for baby bottles and cutting boards when additional sanitation is required. Use only dishwasher detergent! Liquid hand-washing detergent must not be used as the foam that forms prevents the dishwasher from operating effectively. If the dishes are only lightly soiled, you can select Delicate. This program is intended for glasses and porcelain that have just been used. This program is most effective in terms of combined energy and water consumption. You can use this program if you only have cups and glasses that need washing in the upper basket. Press and hold the On/Left-on mode button until the display lights up. Use to rinse dishes while you wait for the dishwasher to become fully loaded. Selecting Options: A program that is able to deal with most household germs and particularly dirty dishware. This program is recommended for daily, regular, or typical use to completely wash a full load of normally soiled dishes.
- Page 9: You can vary the temperature as shown below: Sanitation: 150 °F (65 °C) / 160 °F (70 °C) Time remaining Once you have selected a program and options, the display indicates how long the program took the last time it was used. The remaining time is updated after the water for the final rinse has been heated. During the first run of each program, the remaining time displayed can be slightly misleading, as the dishwasher is estimating the time. Activate Long dry to increase final rinse temperature and dry time to improve drying results. If you want to change programs after starting the dishwasher, open the door then press and hold Start/Stop for three seconds. When you select Delayed start, the dishwasher will start 1-24 hours after you press the Start/Stop button. Open the door. The dishwasher stops automatically. Add the dishes, close the door, and the dishwasher resumes the program. Press and hold Start/Stop until the display shows open symbol. This indicates that the dishwasher is ready to start. Once the program has finished, End appears on the display.
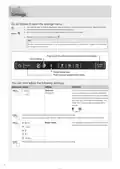
- Page 10: Settings menu instructions include opening the door and turning off the dishwasher. Press and hold the On/Left-on mode button until the display lights up. Within five seconds, press and hold the Program selector and the Long dry button. Release the buttons when the display shows the appropriate symbol. Be careful to press the correct symbols to avoid activating other buttons. You can adjust settings such as child lock and buzzer volume. The child lock option prevents children from starting the dishwasher. To deactivate the button lock temporarily, press the High temperature and Long dry buttons simultaneously. The buzzer indicates when a program is finished or when a fault occurs. Press Start/Stop to save settings and continue through the menu.
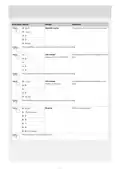
- Page 11: Button press options include off, low, and high settings. Operation volume sound confirms each button press. Press Start/Stop to save the setting value and continue to the next setting. LCD contrast can be adjusted for the display on the front door. Press Start/Stop to save the setting value and continue to the next setting for the front door display. LCD contrast can also be adjusted for the display on the panel. Press Start/Stop to save the setting value and continue to the next setting for the panel display. Rinse aid dosage setting options include off, low dosage, and high dosage. Press Start/Stop to exit the settings menu.
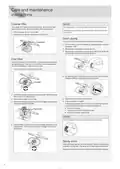
- Page 12: Care and maintenance instructions The coarse filter traps larger food particles, which cannot get past the drain pump. Empty the coarse filter as necessary. The dishwasher must not be used without the filters in place. Dishwashing results may be affected if the coarse filter is incorrectly fitted. The pump can be accessed from inside the dishwasher. Debris that collects on the fine filter is automatically rinsed away during each wash. The fine filter and its pipe section should be cleaned a couple of times a year. If the dishwasher still does not start and a whirring sound is heard, the overflow protection has been triggered. Shut off the water. Spray arms can be removed for cleaning. Reinstall after cleaning.
- Page 13: Door cleaning should be done with a slightly damp cloth. Do not use a spray bottle around the door lock to prevent water from contacting electrical components. The lower spray arm can be released by pulling it straight up. The upper basket must be removed to release the upper spray arm. Limescale deposits may form in the dishwasher if hard water is used. To remove limescale, run the Normal program with high temperature and citric acid or dishwasher cleaner. Keep the touch buttons clean and free from grease. Use a dry or slightly damp cloth to clean the touch buttons. Turn off the dishwasher before cleaning the touch buttons to avoid accidental activation. The top spray arm can be removed by turning the spray arm bearings counterclockwise.
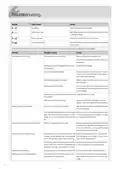
- Page 14: Troubleshooting Type of fault Overfilling Call the Customer Care Center. Water outlet fault See Water remains in the dishwasher above the filters in the table below. Water inlet fault Check that the water supply valve is on. Inlet valve leakage Turn off the water supply valve and call the Customer Care Center. The dishes are not clean. The spray arms do not rotate. Remove the arms and clean them. Detergent is too old. Avoid large packages. Incorrect rinse aid dosage setting. Reduce the amount. Spots or films on the dishes. Rinse aid dosage setting too high. Silver and stainless steel items should not come into contact during dishwashing.
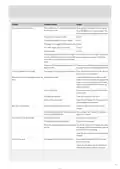
- Page 15: The dishwasher does not start. Press and hold Start/Stop until the display shows the door open symbol. The door is not properly closed. Check. A fuse/circuit breaker has been tripped. Check. The water supply valve is turned off. Check. Water remains in the dishwasher above the filters. Check that the drain hose is free from kinks and sharp bends. The filters are blocked. Clean the coarse and fine filters. Bad odor in dishwasher. Clean with dish brush and low foaming cleaner. The dishes are not dry enough. Activate the Long dry option. Rinse aid needs topping up or dosage is set too low. Top up with rinse aid or increase the rinse aid dosage. Cannot close door. Check that the baskets are correctly positioned horizontally.
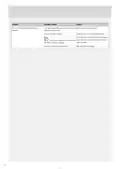
- Page 16: Problem: The touch buttons do not react when pressed. Possible causes: You have pressed the touch buttons too soon after opening the door. Action: Wait a moment then try again. Possible causes: Dirt on the touch buttons. Action: Clean with a dry or slightly damp cloth. Action: Open the door until the display illuminates or close the door and wait 30 seconds. Then open the door. Possible causes: If this symbol appears on the display, the door is not open enough. Possible causes: Child lock (button lock) activated. Action: See the section Settings.
- Page 17: Technical information Height: 34-3/8 - 36-1/2 (873-927 mm) Width: 24 (610 mm) Depth: 22-7/8 (581 mm) Weight: 110 lb (50 kg) Water pressure: 4.2–140 psi Electrical connection: See serial number tag and rating plate. Rated power: See serial number tag and rating plate. Weight can vary due to different specifications.
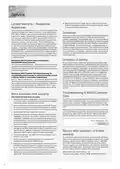
- Page 18: Limited warranty – residential appliances ASKO warrants to the original purchaser that the ASKO product is free of defects in materials and/or workmanship. This limited warranty covers parts and labor, except as set forth in this limited warranty. Service must be provided by an authorized ASKO service company. Proof of original purchase date is required to obtain service under this limited warranty. Your sole and exclusive remedy under this limited warranty shall be product repair as provided herein. This limited warranty is valid only when the ASKO product is used in the country in which it was purchased. Items excluded from warranty include replacement parts or repair labor if the ASKO product is used inconsistently with published instructions. Cosmetic damage is not covered unless reported to ASKO within 5 days from the date of purchase. For information about obtaining parts and labor after expiration of this limited warranty, please contact ASKO Customer Care.
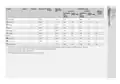
- Page 19: Program options include prewashes, main wash temperatures, number of rinses, and final rinse temperature. Consumption values vary depending on the temperature of the incoming water, room temperature, load size, selected additional options, and more. Connection to cold water is recommended at approximately 50 °F (10 °C). Connection to hot water should be approximately 120 °F (50 °C). The energy label performance figures are based on the specified program. Dishwashing energy consumption is measured in kWh and time in hours and minutes. Different programs have varying rinse temperatures and durations. Sanitation requires specific temperatures for effective cleaning. Heavy and delicate cycles have distinct energy and water consumption values. Rinse & Hold is a quick option with minimal water and energy usage.
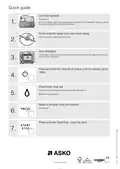
- Page 20: Quick guide Load the baskets Do not rinse dishes under running water before loading them in the dishwasher. Simply scrape off large food particles before loading the dishwasher. Check that the spray arms can rotate freely. Check also that the water supply valve is on. Add detergent. The detergent compartment has a small compartment for prewash and a large compartment for the main wash. Check/Add rinse aid. Fill rinse aid for optimal washing and drying results. Select a program and any options. Press and hold Start/Stop, close the door.

FISHER PAYKEL DOOR DD60ST Door Panel Tall Dishwasher

FISHER and PAYKEL DD60D4NB9 Dish Drawer Dishwasher

BOSCH SMV6ZCX16E Dishwasher
FISHER PAYKEL DD24DTI9 N Tall Dishwasher

FISHER AND PAYKEL DD24DCTW9 Dishwasher

Fisher and Paykel DD24DV2T9_N Dishwasher

Haier HDW9TFE3SS2 Compact Dishwasher

Miele G 5006 SCU Electric Dishwasher

Electrolux EET43200LX Dishwasher

BOSCH SPI4HMS49E Semi Integrated Dishwasher