FORTE F24DWS450PR Dishwasher


Dishwasher Instruction
Manual
FORTÉ
F24DWS450PR
Please keep it handy for
reference at all times.

| General | Details |
|---|---|
| Name | FORTE F24DWS450PR Dishwasher |
| Make | FORTE |
| Language | English |
| Filetype | PDF (Download) |
| File size | 3.94 MB |


Forte F24DWS650PR Dishwasher

FORTE F18DWS450PR Dishwasher

FORTE F18DWS250SS 18 Inch Dishwasher

FORTE F24DWS450PR Dishwasher Overview
Summary of Contents
- Page 1: Dishwasher instruction manual FORTÉ F24DWS450PR Please keep it handy for reference at all times.
- Page 2: Please carefully read this manual before using the dishwasher, it will help you use and maintain the dishwasher properly. Important safety instructions Features of your new dishwasher Specification Filter system Smart wash system Operating instructions Control panel Cycle chart Preparing and loading dishes User maintenance
- Page 3: IMPORTANT SAFETY INSTRUCTION For your safety, please follow the information in this manual to minimize the risk of fire, explosion, electric shock, and to help prevent property damage or personal injury. Proper installation is crucial. Please install your dishwasher properly, following the installation guide. Water supply inlet temperature should be between 120℉ and 149℉. The dishwasher must be properly grounded to avoid the risk of electric shock. Read all instructions before using the dishwasher. Do not let children abuse, sit, or stand on the door or racks of the dishwasher. Under certain conditions, hydrogen gas may be produced in a hot water system that has not been used for two weeks or more. Use the dishwasher only for its intended function as described in this manual. Do not wash plastic items unless they are marked dishwasher safe. Keep young children and infants away from the dishwasher when it is operating.
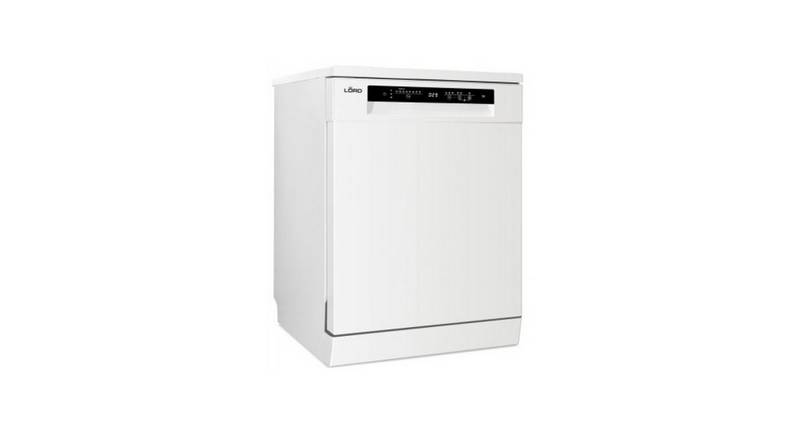
- Page 4: Features of your new dishwasher include a capacity of 10 place settings. The dimensions are 23.62 x 22.83 x 32.48 inches (W x D x H). It operates on 120 volts and 60Hz power supply. The rated power usage includes a wash motor of 100W and a heater of 700W. The water feed pressure ranges from 5.8 to 145 psi (0.04 to 1MPa). Key components include the lower basket, upper basket, upper spray arm, cutlery basket, cup shelf, and heating element.
- Page 5: Features of your new dishwasher include a multiple filter system and a smart wash system. The multiple filter system consists of three mesh filters that separate soiled water and clean water in different chambers. This system enhances performance while using less water and energy. The smart wash system automatically adjusts the wash cycle based on the load, performing a short wash for lightly soiled dishes and a heavy wash for heavily soiled dishes. It ensures efficient cleaning by determining the appropriate cycle for the dishes.
- Page 6: Features of your new dishwasher How your dishwasher cleans Your dishwasher cleans by spraying a mixture of hot water and detergent through the spray arms against soiled surfaces. Load the dishwasher. Add detergent. Add rinse aid. Select desired cycle. The dishwasher fills with water covering the filter area. Run the hot water faucet nearest the dishwasher until the water is hot. To start, press Start/Cancel. Cycle times are approximate and will vary with the options selected.
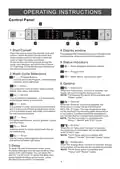
- Page 7: Operating instructions Control panel Start/Cancel button allows you to start or cancel the cycle. Display window shows remaining hours, minutes, delay hours, and error codes. To start the cycle, open the door, select the desired cycle, touch Start/Cancel, and close the door within 4 seconds. To cancel and reset the program, open the door and touch Start/Cancel for 3 seconds. Status indicators inform about rinse detergent refill, program end, and water failure. Wash cycle selections include various programs for different levels of soil. Heating Dry option activates the heater during the drying process. Sanitize function maintains water temperature at 69°C (156.2°F) max. ECO program is the most efficient for normally soiled tableware. Energy Save function reduces energy consumption during washing.
- Page 8: Operating the dishwasher includes understanding the status window and error indications. In critical situations, the control will shut down and indicate an error code. If the Delay Start option is selected, the number of delay start hours will show in the status window. After the machine starts operation, the remaining time of the selected cycle will be displayed. Error codes should be addressed by contacting the dealer or services for troubleshooting assistance. The remaining time may fluctuate as the Smart Sensor checks the soil level for water fills. The cycle chart outlines various programs and their descriptions, including cycle times and water usage. Different programs include Heavy, Normal, Eco, and Rapid, each with specific cycle times and water consumption. Each cycle consists of pre-wash, main wash, rinse, and drying stages. Water usage varies by program, with specific liters and gallons indicated for each cycle.
- Page 9: Preparing and loading dishes involves several important steps. Dish preparation requires scraping away large food pieces and loosening burned-on foods before loading. Empty liquids from glasses and cups to prevent discoloration of stainless steel and plastics. Rinsing off food soils is recommended unless the dishwasher will be operated immediately. The upper basket is designed for cups, glasses, small plates, bowls, and dishwasher-safe plastic items. For best results, place items facing down or toward the center for better drainage. The bottom basket is intended for plates, soup bowls, and cookware, with an adjustable space for items up to 11 inches tall. Ensure that loaded dishes do not obstruct the rotation of the middle spray arm. The fold-down tines in the bottom basket allow for flexible loading of large items. Large items should be positioned along the edge and turned so that the inside faces downward to avoid interference with spray arm rotation.
- Page 10: Preparing and loading dishes Loading the lower basket is designed for dinner dishes, soup bowls, plates, pots, lids, and casserole dishes. Load large items such as pans and pots with their open sides facing downwards. It is recommended to load cups, stemware, and small plates into the upper basket. The upper basket is designed for small plates, mugs, glasses, and plastic items marked “dishwasher safe.” Load plates in two half rows, with the front of each plate facing the back of the plate in front of it. Ensure the loaded dishes do not interfere with the rotation of the nozzle located at the bottom of the upper basket. Check the nozzle's rotation by turning it by hand. Pull the upper basket out sufficiently to load it without striking the counter.
- Page 11: Preparing and loading dishes The silverware basket can be divided into three separate modules that can be used in both upper and lower racks. To add or remove items after the wash cycle starts, open the door slightly and wait a few seconds until wash action stops before completely opening. Close the door firmly to latch within 4 seconds, then the cycle will automatically resume. Caution: To avoid burn injury, slightly open the door and wait until spray arms and wash action stop. Hot water may splash out of the dishwasher. Filling the rinse aid dispenser improves drying and reduces water spots and filming. Without rinse aid, your dishes and dishwasher interior will have excessive moisture. The rinse aid dispenser automatically releases a measured amount of rinse aid during the last rinse. If the rinse aid is low, the Rinse Aid light is illuminated at the beginning and end of the cycle indicating that it is time to refill. Be sure nothing protrudes through the bottom of the basket or rack to block the lower spray arm.
- Page 12: Preparing and loading dishes Filling the rinse aid dispenser Your dishwasher is designed to use a liquid rinse aid. The use of rinse aid greatly improves drying performance after the final rinse. Under normal conditions, the rinse aid will last approximately one month. Filling the detergent dispenser Open the detergent dispenser cap by pushing the detergent dispenser release catch. The flap is always open at the end of a dishwashing cycle. Add the recommended amount of detergent to the main wash detergent compartment. Close the flap and then press it down.
- Page 13: Preparing and loading dishes Your dishwasher has been designed to use liquid rinse aid only. Using a powdered rinse aid will clog the reservoir opening and cause the dishwasher to malfunction. Rinse aid improves the drying performance of the dishwasher. Do not add regular detergent to the rinse aid reservoir. Remove the rinse aid reservoir cap by rotating it counterclockwise. Fill the rinse aid reservoir with rinse aid. Use the viewing port when filling the rinse aid reservoir. Do not fill the reservoir above the full level indicator. Excess rinse aid can overflow during the wash cycle. Add the rinse aid if the LED screen shows “LSb”.
- Page 14: User maintenance is essential for improving dishwasher performance and longevity. Cleaning the exterior should be done promptly with a soft, damp cloth, avoiding harsh chemicals. Do not sprinkle water over the dishwasher or let it contact electrical parts. For stainless steel door panels, use a stainless steel cleaner with a soft cloth. The interior should be cleaned periodically to remove dirt and food particles. Running the dishwasher empty with detergent helps maintain cleanliness. If odors persist, use white vinegar in an empty cycle to eliminate them. Avoid removing the tub front seal during cleaning. Caution is advised to not touch the heating element during or after use. Cleaning the filters involves turning off the dishwasher and detaching the filter insert.
- Page 15: User maintenance involves removing dirt from filters and rinsing them under running water. Reassemble the filters in reverse order of disassembly and ensure the filter insert is closed properly to maintain performance. Cleaning the nozzles is necessary if the dishwasher is not cleaning adequately or if they seem clogged. Take care when removing the nozzles as they may break. Check for clogged nozzle holes and remove the nozzle by pulling it upwards if cleaning is needed. After cleaning, push the nozzle back into place and check if it is engaged correctly by rotating it by hand.
- Page 16: Troubleshooting Possible causes and solutions for common dishwasher issues. Dishwasher won't start: Ensure the door is completely shut and latched. Check the power supply connection. Delay Start option may be selected: Refer to the Delay Start section to reset. Child Lock activated: Deactivate the child lock as per the manual instructions. Dishwasher beeps at the end of the cycle: This indicates the wash cycle has finished. Rinse Aid light on: Add rinse aid to the dispenser. Dishwasher operates too long: Cycle time may vary due to soil detection or selected sanitize option. Dishes are not clean enough: Ensure proper loading and detergent use according to the manual. Dishes not drying enough: Choose a cycle that includes drying. Spots and filming on dishes: Use fresh rinse aid and ensure proper loading. Water hardness is too high: Consider installing a water softener for extremely hard water.
- Page 17: Troubleshooting Possible causes and solutions for common dishwasher problems include: Detergent may be too old; use fresh detergent. Spray arm is blocked; load the dishes, ensuring the spray arms are not blocked. Detergent dispenser will not shut; add detergent and rinse aid as indicated by the manual. Water remains in the dishwasher; select the proper cycle explained in the manual. Drain is clogged; ensure the drain hose is properly connected to the sink. Improper detergent is used; make sure to use only the proper dishwasher detergent. Dishwasher leaks; level the dishwasher. Black or gray marks on dishes may be removed with an approved spot cleaner. Reddish stains can occur from certain foods; using the rinse only cycle right after loading can decrease staining. If noise persists after a complete cycle, call for service.
- Page 18: Error codes indicate malfunctions in the appliance. Check the water supply if issues arise. Check the inlet valve during the water inlet step if the flow meter can't detect water after 4 minutes. Check the flow meter and pressure switch as part of troubleshooting. E1, E3, E4, E6, and E7 are specific error codes related to various issues. If the temperature can't reach the defined value after 90 minutes, check the heater and thermistor. Check the use of detergent and ensure the appliance is level. Investigate for water flooding and leakage that may affect the switch. E9 indicates a button sticking issue, resolved by releasing the button. If communication data is abnormal for more than 30 seconds, the dishwasher will show an Ed warning.
- Page 19: Dishwasher warranty applies only to the FORTÉ appliance sold for normal household use. The warranty is valid for Dishwashers purchased new at retail and not for resale or commercial use. It covers appliances within the United States or Canada and remains valid for the original purchaser and succeeding owners. The warranty lasts for three hundred sixty-five days from the date of original purchase. Cosmetic defects are warranted for thirty days from the date of purchase, excluding slight color variations. FORTÉ's liability is limited to repairing manufacturer-defective Dishwashers using authorized service providers. Repairs by non-authorized service providers are not covered under the warranty. The warranty excludes defects or damage not directly caused by FORTÉ. FORTÉ is not liable for Dishwashers in remote or hazardous locations. Once the warranty expires, FORTÉ is not obligated to provide repairs or replacements.
- Page 20: Use of the dishwasher in anything other than its normal, customary and intended manner is not covered. Willful misconduct, negligence, misuse, and improper operation void the warranty. Adjustment, alteration, or modification of the dishwasher is not permitted. Failure to comply with local electrical, plumbing, and building codes is excluded from the warranty. Ordinary wear and tear and spills are not covered. External environmental factors such as floods and lightning are excluded from liability. Service calls for installation correction or user instruction are not covered. This warranty sets out exclusive remedies and is in lieu of all other warranties. The manufacturer is not liable for consequential or incidental damages. No alterations to the warranty are effective unless authorized in writing by an officer of the company.

FISHER PAYKEL DW24UT2I2 Tall Sanitize Integrated Dishwasher

FISHER PAYKEL DW60FC1X114 Place Dishwasher

FISHER PAYKEL DD60D4HNB9 Dishwasher

IKEA SBE8596Z0E DISKAD PROFFSIG Dishwasher
lord D3 Dishwasher

Whirlpool WIE 2B19 N Dishwasher

SIEMENS SN23EI14AE Dishwasher 60 cm A+++

FISHER and PAYKEL DD24DCHTX9 N Contemporary Tall Dishwasher

IKEA RANSBERG Dishwasher

Whirlpool Dishwasher