
GAGGENAU DF211701 200 Series 24 Dishwasher










| General | Details |
|---|---|
| Name | GAGGENAU DF211701 200 Series 24 Dishwasher |
| Make | Gaggenau |
| Language | English |
| Filetype | PDF (Download) |
| File size | 2.95 MB |
 (1 votes, average: 5.00 out of 5)
 Loading...

Gaggenau DF264101 Dishwasher

GAGGENAU DF271101F Dishwasher

GAGGENAU DF481100 Dishwasher

GAGGENAU 400 Dishwasher

GAGGENAU DF480161F Dishwasher

Gaggenau 9001923384 B Dishwasher

GAGGENAU DF261101 Dishwasher

Gaggenau DF211700 Dishwasher

GAGGENAU DF480701F Dishwasher

GAGGENAU DF481100F 400 Series Dishwasher

GAGGENAU DF211701 200 Series 24 Dishwasher Overview
Summary of Contents
- Page 1: Use and care manual for the Gaggenau DF211701 dishwasher.
- Page 2: IMPORTANT SAFETY INSTRUCTIONS Safety definitions General information Intended use Restrictive use Grounding instructions Safe use Risk to children State of California Proposition 65 Warning Preventing material damage Environmental protection and energy-saving
- Page 3: Technical specifications Information regarding free and open source software Statement of limited product warranty What this warranty covers and who it applies to How long the warranty lasts Extended warranty Repair/replace as your exclusive remedy Out of warranty product Warranty exclusions Obtaining warranty service
- Page 4: IMPORTANT SAFETY INSTRUCTIONS Always use caution when opening the door during or following a wash cycle as hot water or steam may escape. Under certain conditions, hydrogen gas may be produced in a hot water system that has not been used for two weeks or more. To avoid floor damage and possible mold growth, do not allow wet areas to remain around or under the dishwasher. Before using a dishwasher that is connected to a hot water system that has been unused for two weeks or longer, turn on all hot water faucets and let the water flow from each for several minutes. It is highly recommended for the end user to become familiar with the procedure to shut off the incoming water supply and the procedure to shut off the incoming power supply. Only use the appliance in enclosed residential space according to the installation manual. Do not allow children to play in or on the dishwasher. When loading items to be washed, locate sharp items so they are not likely to damage the door seal. Do not wash plastic items unless they are marked dishwasher safe or the equivalent. This product may contain a chemical known to the State of California, which can cause cancer or reproductive harm.
- Page 5: Preventing material damage Harsh chemicals such as bleach-based products can damage your dishwasher. Do not use harsh chemicals such as bleach-based products to clean your dishwasher. Do not use a steam cleaner. To avoid scratching the finish, do not use sponges with a rough surface or abrasive cleaning agents. Do not use stainless steel polish on an anti-fingerprint finish or a black stainless finish. When the program ends, let the appliance cool down a bit before opening the door. Protect against freezing to avoid possible damage to the fill valve. The sensors adjust the cycle sequence and strength in the Auto cycles depending on the level and type of soiling. The AquaSensor measures the turbidity of the washing water, allowing for water savings.
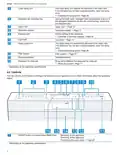
- Page 6: Familiarizing yourself with your appliance Appliance Rating plate with E number and FD number You will need this data to contact customer service. Add detergent to the detergent dispenser. Add special salt to the dispenser for special salt. Depending on the appliance specifications.
- Page 7: Familiarizing yourself with your appliance The lower spray arm washes the dishware in the lower rack. If the dishware has not been washed properly, clean the spray arms. During the wash cycle, detergent tabs automatically drop out of the detergent dispenser into the tab collecting tray, where they can dissolve fully. The upper spray arm washes the dishware in the upper rack. Rinse aid is added to the dispenser for rinse aid. You can use the control panel to configure all functions of your appliance and to obtain information about the operating status. Switching on the appliance. Switching off the appliance. Terminating the wash cycle.
- Page 8: Familiarizing yourself with your appliance Cycle buttons Info button If you press the info button, the display shows information about selected cycles, basic settings and additional functions. If you press the button for approx. 3 seconds, you can open the menu. Rinse aid refill indicator Special salt refill indicator If you have activated the function and are controlling the appliance via the Home Connect® app, the display lights up on the appliance. Electronic delay time You can use these buttons to scroll between the basic settings. Open the appliance door. The display shows information about cycles, basic settings or additional options.
- Page 9: Dishwasher cycles overview The running time may vary depending on the cycle selected. The consumption values relate to normal conditions and a water hardness of 16 - 20 °E. Auto cycle for washing pots and pans, non-fragile dishware, and silverware. Eco cycle is the most economical for removing common household food remnants. Glass care cycle is particularly gentle for sensitive dishes and glasses. Quick wash cycle is time-optimized for cleaning delicate dishware and silverware. The displayed cycle time indicates an average value. Level of soiling affects the choice of cycle. Different influencing factors such as water temperature may result in deviations. Sensor-controlled cycles optimize cleaning based on the soiling of the rinse water.
- Page 10: Energy Guide label was based on the Normal soil sensing cycle. The unit was tested without any rinse aid in the rinse aid dispenser. A single dose of detergent was inserted into the detergent dispenser, with no detergent being used in the prewash. We recommend that dish loads have the rack position set in the highest position for typical use. With the personalization function, you can save a combination of a cycle and an option. The pre-rinse cycle is pre-programmed and is suitable for all types of dishware. You can use the Home Connect app to download additional cycles and options. To save the personalization function, specific steps must be followed on the appliance. To reset the cycle, use the Home Connect app or reset the appliance to factory settings. An overview of the different options available on your dishwasher is provided.
- Page 11: Features There is a slight increase in energy consumption and the run time is extended. Switch on with mixed loads containing dishware with different soiling levels. The spray pressure in the lower rack is increased and the maximum program temperature held longer. The run time is shortened depending on the wash cycle. The option can be activated before the cycle starts or at any time when it is running. Energy and water consumption are increased. You can find an overview of the possible features of your appliance and how to use them here. Arrange cups, glasses, and small tableware items in the top rack. You can adjust the height of the upper rack to make room for larger items. To wash large items in the racks, adjust the shelf height of the upper rack.
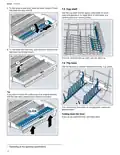
- Page 12: Features Lower rack Arrange pans and plates in the lower rack. Arrange the silverware in the silverware basket, ensuring that the items are not nestled together and with the sharp points down. The sharp points and edges of knives and other sharp utensils can cause serious injury. Load knives and other sharp utensils with edges down. Do not allow children to handle or play near knives and sharp utensils. Silverware drawer Arrange silverware in the silverware drawer. Large plates up to a diameter of 13 inches can be arranged in the lower rack as shown. You can reorganize the silverware drawer to make more space for longer or wider utensils. Fold down the side shelves and front tines to provide more space for longer or wider cutlery items.
- Page 13: Features To fold down a side shelf, push the lever forward and fold down the side shelf. Use the cup shelf and the space underneath for small cups and glasses or for large items of silverware, e.g. cooking spoons or serving cutlery. To fold down the front tines, push the lever forward and fold down the folding tines. If you do not need the cup shelf, you can fold it up. Use the flip tines to position dishware securely, e.g. plates. If you want to return the cutlery tray to its original position, fold the side shelf upward until it clicks into position. You can fold the tines down to arrange pans, bowls and glasses better. If you do not need the tines, fold them down.
- Page 14: Features Push the lever forward and fold down the tines. Arrange max. 2 baking sheets and 2 racks to ensure that the spray jet can reach all parts. Check that the appliance is always operated with the upper rack or the baking sheet spray head. Use the baking sheet spray head instead of the upper rack to clean large trays, racks, and plates. Remove the upper rack to insert the baking sheet spray head. To use the tines again, fold them back up. Set the racks at the right height. Appliance height 34 with silverware basket. Appliance height 34 with silverware drawer.
- Page 15: Before using for the first time, configure the settings. If you select Home Connect® with the setting Initial use, make further settings using the Home Connect® app on your mobile device. Connect your appliance to a mobile device to conveniently change all settings. To remove any marks from water or other residues, operate the appliance without dishware before using it for the first time. Hard water leaves limescale on dishware and parts of the appliance may become blocked. To ensure good dishwashing results, treat the water with special salt and the water softening system. You can find an overview of the water hardness values that can be selected. Set the water hardness determined on your appliance. With a water hardness of 0 - 8 °E, you can dispense with special salt for dishwashers. Determine the water hardness and the appropriate setting value.
- Page 16: Rinse aid system Salt replacement substances can generally only be used up to a water hardness of 26 °E without adding special salt. You can use special dishwasher salt to soften the water. If the salt refill indicator lights up, add special dishwasher salt to the dispenser just before the cycle starts. The amount of special dishwasher salt required depends on the water hardness. The water softening system is switched off and the salt refill indicator is deactivated. Detergent may damage the water softening system. Only fill the dispenser of the water softening system with special dishwasher salt. For optimum drying results, use rinse aid. Only use rinse aid intended for household dishwashers. If the display shows Please add rinse aid, add rinse aid.
- Page 17: Add rinse aid up to the max mark. Only use detergents that are made for dishwashers, either basic or combination detergents. For the best washing and drying results, use a separate detergent, then add special salt and rinse aid separately. Modern, powerful detergents mainly use a low-alkaline formulation with enzymes. If rinse aid spills out, remove it from the tub. Tabs are perfect for all cleaning functions and do not need to be measured out. Powder detergent is recommended for shorter cycles. Liquid detergent works faster and is recommended for shorter cycles without a pre-rinse. If you choose not to use rinse aid, you can turn the rinse aid system off. Do not use a detergent which is not designated for dishwasher use or contains chlorine.
- Page 18: Dishware Close the lid of the detergent dispenser. Information on detergent Follow the instructions on detergents in everyday use. Detergents marked as ecological generally contain lower levels of active agents or none at all. Adjust the rinse aid and the water softening system settings in accordance with the detergent in use. Combination detergents with salt replacement substances can only be used up to a certain water hardness without adding special salt. You will have better results using a separate rinse aid. To prevent sticking, only touch detergents in a water-soluble pouch with dry hands. Use tablets with enhanced drying results. Only wash dishware that is suitable for dishwashers. Only put glasses and china in the dishwasher if they are labeled dishwasher-safe.
- Page 19: For better washing and drying results, position items with curves or recesses at an angle so water can run off. Use a detergent labeled as gentle to dishes. Highly caustic alkaline or highly acidic cleaning solutions are not safe to use in the dishwasher. Remove large remnants of food from dishware before loading. To save resources, do not pre-rinse dishware under running water. Arrange dishware correctly to optimize the dishwashing result and prevent damage. Do not load the dishwasher with paper products, plastic bags, packing materials, or anything other than normal, dishwasher safe dishware. Using the appliance allows you to save energy and water compared to doing dishes by hand. To save energy and water, load the machine with the number of place settings specified. Adjust the water hardness setting on your dishwasher if the water is too soft.
- Page 20: Dishware Removing dishware Dishes can be very hot immediately after the cycle ends. Open the door slightly and allow dishes to cool for a few minutes before unloading. To prevent water dripping onto dishware, unload it starting at the bottom and working up. Check the washing tank and accessories for soiling and clean if necessary. Recommended loading patterns. 12 place settings: Lower rack. Additional loading patterns for 10 place settings: Lower rack, Upper rack.
- Page 21: Basic operation involves setting options to complete the chosen wash program. The available options depend on the selected program. You can delay the start of the wash cycle by up to 24 hours. The end of the program is shown on the display as Finish in or Finish at. The dishwasher has a built-in feature to prevent unintentional operation, especially by children. After starting the appliance, the door must be closed within 4 seconds to avoid pausing the operation. To start the wash cycle, press the designated button. The wash cycle ends when the display shows Finished! If you want to add more dishware while the appliance is running, avoid using the collecting tray as a handle for the upper rack. The appliance automatically switches off 10 minutes after the end of the wash cycle. To switch on the appliance, touch the control with a short touch. The standard cycle is set by default. To interrupt the wash cycle, press On/Off. If no actions are performed for 10 minutes, the appliance will automatically switch off. To adjust the wash cycle to the soiling level of the dishware, select a suitable program. To terminate a wash cycle early, you must cancel it first by opening the appliance door and pressing the designated button.
- Page 22: Basic operation Close the appliance door. The cycle is cancelled and ends after approx. 1 minute. Displaying wash cycle information You can show information about cycles and options on the display. Switching off the appliance To avoid risk of injury, always use caution when opening the door during or following a wash cycle as hot water or steam may escape. Do not fully open the door until water noises have stopped and steam has subsided. Please note the information on preventing material damage. Press On/Off.
- Page 23: You can configure the basic settings for your appliance to meet your needs. The basic settings depend on the features of your appliance. Set the current time. Set the time format. Set the time display for the end of the wash cycle. Select the menu language. Set the water hardness. Set or switch off the amount of rinse aid to be dispensed. Switch Extra Dry on or off for each operation. Switch EcoCheck on or off.
- Page 24: Home Connect® Basic setting Switch the wireless network connection on or off. The basic setting WLAN is not available until you have connected the appliance with the Home Connect® app. Activate or deactivate remote start. The basic setting is not available until you have connected the appliance with the Home Connect® app. Restore changed settings to the factory settings. The settings for initial use must be configured. Connect your appliance to a mobile device to conveniently change all settings using the Home Connect® app. To use Home Connect®, you must first set up the connection to the WLAN home network and to the Home Connect® app. Follow the instructions in the Home Connect® app to implement the settings.
- Page 25: Cleaning and maintenance Setting up Home Connect® Remote diagnostics The Home Connect® app is installed on your mobile device. The appliance receives signals from the WLAN home network (Wi-Fi) at its installation location. Customer Service can access your appliance via Remote Diagnostics if you ask them to do so. You can use this function to update the software of your appliance. Please see the information on data protection. Adapt Home Connect® to your needs. You can use the Home Connect® app to start the appliance with your mobile device. To keep your appliance working efficiently for a long time, it is important to clean and maintain it carefully.
- Page 26: Cleaning and maintenance Turn the coarse filter counterclockwise and take out the filter system. Start the program without dishware. Ensure that foreign objects do not fall into the sump. Only use suitable cleaning agents to clean your appliance. Follow the tips on appliance care to make sure your appliance functions properly at all times. Regularly wipe the door seals, the front of the dishwasher, and the control panel using a damp cloth and dishwashing liquid. If the appliance is not going to be used for a while, leave the door slightly ajar. The filter system removes coarse soiling from the dishwashing cycle. Check the filters for residues after each dishwashing cycle. Clean the filter elements under running water.
- Page 27: Cleaning and maintenance Insert the filter system into the appliance and turn the coarse filter clockwise. Check the outlet nozzles on the spray arms for blockages under running water and remove any foreign objects. Ensure that the arrow markings match up. Insert the lower spray arm. The spray arm clicks into position. Insert the upper spray arm and screw firmly in place. Limescale and soiling in the dishwashing water may block the nozzles and bearings on the spray arms. Clean the spray arms regularly. Unscrew the upper spray arm and pull down to remove. Pull up the lower spray arm to remove.
- Page 28: Troubleshooting You can eliminate minor issues on your appliance yourself. Please read the information on eliminating issues before contacting Customer Service. This may avoid unnecessary repair costs. E:2060 lights up. Appliance has detected that the heating element is calcified. Descale the appliance and operate the appliance with the water softening system. E:3000 lights up. Water protection system is activated. Turn off the water faucet and call customer service. E:3100 lights up. Water protection system is activated. Turn off the water faucet and call customer service. E:3200 or indicator for water supply lights up. Inlet hose is kinked. Install the inlet hose without kinks. Water faucet is turned off. Turn on the faucet. Water faucet is clogged or calcified. The flow rate must be at least 10 l/min when the water supply is open. Filters in the water connection of the supply or AquaStop hose are blocked. Switch off the appliance, pull out the power cord plug, turn off the water faucet, unscrew the water connection, remove the filter from the supply hose, clean the filter, reinsert the filter in the supply hose, screw the water connection back on, check the water connection for leaks, restore the power supply, and switch the appliance on. E:3400 lights up. Water is continuously running into the appliance. Turn off the water faucet and call customer service.
- Page 29: Troubleshooting E:6102 lights up. Not an appliance error. The drain pump cover is loose or a foreign object is blocking the pump. Secure the cover of the drain pump so it clicks into place or clean the drain pump. E:6103 lights up. Water is not draining. Not an appliance error. Garbage disposal is still plugged or the drain hose is kinked. Check that the garbage disposal plug is removed and that the drain hose is not kinked. Not an appliance error. The drain pump cover is loose or a foreign object is blocking the pump. Secure the cover of the drain pump so it clicks into place or clean the drain pump. Not an appliance error. High loop is missing and/or debris flushed back into drain hose and blocked it. Be sure there is a high loop in the drain hose and that no debris has flushed back into the hose. E:9001 lights up. Power voltage is too low. There is no problem with the appliance. Call an electrician. Have the power voltage and electrical installation checked by an electrician.
- Page 30: Troubleshooting E:9240 lights up. Filters are soiled or blocked. Clean the filters. A different error code appears in the display window. There is a technical issue. Follow the steps to reset the appliance. Dishware is not dry. No rinse aid used or dosage set too low. Add rinse aid and set the amount to be dispensed. Cycle or cycle option has no drying phase, or drying phase is too short. Select a wash cycle with drying. Some option buttons decrease the drying result. Position dishware at an angle where possible. The combined detergent used has a poor drying performance. Use rinse aid to improve drying performance or a different detergent. Extra Dry/intensive drying not activated. Activate Extra Dry/intensive drying. Dishware removed too early or drying process not yet ended. Wait until the program ends and remove dishware 30 minutes after the program has ended. Rinse aid used has a limited drying performance. Use a name-brand rinse aid.
- Page 31: Troubleshooting Silverware is not dry. Silverware not arranged properly in the silverware basket or silverware drawer. Droplets can form on the contact points of silverware. Arrange silverware individually where possible. Avoid points of contact. Appliance interior still wet after wash cycle. Not an error. Condensation drying creates water droplets in the tub. This is normal. Moisture in the air condenses on the inside walls of the appliance, runs off, and is pumped out. No action required. Food remnants on dishware. Dishware was placed too close together or rack is overfilled. Arrange dishware with sufficient space in between. The spray jets must reach the surfaces of the dishware. Avoid points of contact. Spray arm rotation of the lower spray arm is blocked. Arrange dishware so it does not obstruct spray arm rotation. Spray arm nozzles are blocked. Clean the spray arms. Filters are dirty. Clean the filters. Filters are inserted incorrectly and/or not engaged. Insert the filters properly. Twist filters into place. Selected wash cycle is too light. Select a more intensive wash program. Dishware has been precleaned too intensively. Only remove large remnants of food and do not pre-rinse dishware. Tall narrow containers in corner areas are not rinsed out adequately. Do not position tall narrow containers at too great an angle or in corner areas.
- Page 32: Troubleshooting Food remnants on dishware. Set the upper rack on the left and right to the same height. Detergent residue in the appliance. Lid of the detergent dispenser is blocked by items of dishware and will not open. Arrange dishware in the upper rack so the tab collecting tray is not obstructed by dishware. Items of dishware are blocking the dispenser lid. Do not place dishware or fragrance dispensers in the tab collecting tray. Water spots on plastic parts. Droplet formation on plastic surfaces is unavoidable due to the laws of physics. Wipeable or water-soluble coatings. There is detergent residue that cannot generally be removed with chemicals. White coating is deposited inside the appliance. Adjust the water softening system correctly. There are stubborn white coatings on the dishware. Change your detergent or scrub the appliance by hand. Too little detergent is being used. Increase the amount of detergent used or change detergent.
- Page 33: Troubleshooting There are stubborn white coatings on the dishware, inside the appliance, or on the door. Adjust the sensitivity of the sensors. Tea residue or lipstick marks on dishware may be due to low dishwashing temperature. Select a program with a higher dishwashing temperature. Too little or unsuitable detergent can cause issues. Use a suitable detergent and follow the manufacturer's instructions for the amount to be used. Dishware that has been precleaned too intensively may not be cleaned properly. Only remove large remnants of food and do not pre-rinse dishware. Colored coatings inside the appliance or on stainless steel dishware can be due to substances in vegetables or tap water. Clean the appliance. Colored deposits inside the appliance may be due to food remnants and tap water. Check the setting of the water softening system. Plastic parts inside the appliance may become discolored over time, but this will not impair functioning. Removable streaks on glasses and silverware may be due to the amount of rinse aid being set too high. Set the rinse aid system to a lower setting. No rinse aid added can lead to issues. Add rinse aid as needed. Detergent residue in the final rinse may occur if the lid of the detergent dispenser is blocked by dishware.
- Page 34: Troubleshooting There are removable streaks on glasses, glassware with a metallic appearance and silverware. Items of dishware are blocking the dispenser lid. Dishware has been precleaned too intensively, leading to stubborn remnants. Irreversible clouding of glassware may occur if glasses are not dishwasher-proof. Detergent residue may be present in the detergent dispenser or the tab collecting tray. Excessive formation of foam can occur from hand soap in the rinse aid dispenser. Connection to home network is not established if WLAN on router is not active. Home Connect may not be implemented correctly due to incorrect settings or technical errors. Special salt refill indicator lights up due to insufficient special salt. The refill indicator for special salt may not light up if the water softening system is switched off.
- Page 35: Troubleshooting Refill indicator for rinse aid lights up. No rinse aid. Add rinse aid and set the amount to be dispensed. Refill indicator for rinse aid does not light up. Rinse aid system is switched off. Set the amount of rinse aid. All LEDs light up or flash. Electronics have detected a fault. Press the main switch button for approx. 4 seconds. Water is left in the appliance at the end of the program. Filter system or area under the filters is blocked. Clean the filters and drain pump. Appliance cannot be switched on or operated. Software update is taking place. Wait until the software update has finished. Appliance does not start. The breaker has tripped. Check the relevant breaker and power cord connections. Appliance door is not closed properly. Close the appliance door to ensure the wash cycle starts automatically. Appliance stops during the cycle. Power and/or water supply has been interrupted. Check the power and water supply.
- Page 36: Troubleshooting Appliance stops during the cycle or cuts out. Check whether the rear panel of the appliance is being pressed in by a power outlet or a hose holder that has not been removed. Appliance door cannot be closed. Close the appliance door with greater force. Lid on the detergent dispenser cannot be closed. Remove detergent residue. Filling valves making knocking noises. Can only be remedied in the home installation. Noise level varies. Make sure the dishware is loaded in the most secure way, resting on the tines and not hitting each other. Spray arm is striking dishes. Arrange dishware so the spray arms do not strike dishware. Clean drain pump. Large food remnants or foreign objects can block the drain pump. Use caution when removing parts for cleaning. There may be some sharp debris, such as glass fragments, blocking the drain pump. Disconnect the appliance from the power supply. Remove the upper and lower rack. Remove any food remnants or foreign objects in the area of the impeller.
- Page 37: Transportation, storage and disposal To avoid damage to the appliance, empty it before transporting. Always transport the dishwasher upright to prevent residual water getting into the machine's controls. Remove dishware from the appliance. Secure loose parts. Switch on the appliance and select the cycle with the highest temperature. To drain the appliance, terminate the cycle after approx. 4 minutes. Environmentally sound disposal allows valuable raw materials to be recycled. Disconnect the appliance from the power supply before removal. Preparing your unit for vacation includes turning off the main valve and water supply. If your dishwasher will be unused for an extended period in freezing temperatures, have it winterized by an authorized service provider.
- Page 38: Customer service information is provided for assistance. The model number (E-Nr.), production number (FD), and consecutive numbering (Z-Nr.) can be found on the appliance's rating plate. The rating plate is located inside the appliance door. Noting your appliance's details and the customer service telephone number will help in future inquiries. BSH offers an AquaStop pledge in addition to the standard warranty. Compensation is available for damage caused by a defect in the AquaStop system under valid warranty claims. Water damage must be due to a defect in materials or workmanship in the AquaStop system for compensation. The appliance with AquaStop must be installed and connected correctly according to instructions for warranty claims. The warranty does not cover defective feed lines or fittings leading to the AquaStop connection at the tap.
- Page 39: Statement of limited product warranty 5 year limited warranty on dish racks: BSH will replace the upper or lower dish rack if the rack proves defective in materials or workmanship. Lifetime warranty against stainless steel rust through: BSH will repair or replace your dishwasher if the inner liner should rust through. BSH will repair or replace the stainless steel door if the door should rust through. Gaggenau is under no obligation to provide concessions once this warranty has expired. During this warranty period, Gaggenau will repair your product without charge if it proves to have been manufactured with a defect. Gaggenau's sole liability is to repair manufacturer-defective product only, using an authorized service provider. Gaggenau will not incur any liability for the product if it is located in a remote area or is reasonably inaccessible. The warranty excludes defects or damage that are not the direct fault of Gaggenau. The warranty does not cover use of the product in anything other than its normal, customary and intended manner. Damage caused by non-authorized service providers is not covered unless approved by Gaggenau before service is performed.
- Page 40: Page 40

Mueller DW-1800 Series 18 Inch Dishwasher

SAMSUNG DW80 R2031 Series Dishwasher

BOSCH SMT6ECX00E/38 Dishwasher

comfee FD1201P-W Dishwasher

AEG FFE83800PM Built-Under Dishwasher

FISHER PAYKEL DD24SCTX9 N Dishwasher

UGP-24CR Classic Retro By Unique Dishwasher

FISHER AND PAYKEL DD24STX6PX1 Simple Contemporary Dishwasher

NEFF S145HTS01G Dishwasher

Maidaid Halcyon AMH51 Amika Drain Pump Dishwasher