
Omega ODWIF6015 Integrated Dishwasher


@omegaappliances_aus
omegaappliances.com.au
Designed to Enhance
ES T. 1981


| General | Details |
|---|---|
| Name | Omega ODWIF6015 Integrated Dishwasher |
| Make | Omega |
| Language | English |
| Filetype | PDF (Download) |
| File size | 5.59 MB |
 (1 votes, average: 5.00 out of 5)
 Loading...

omega ODWIS6015X Dishwasher

Omega ODW300XN Slimline Dishwasher

Omega ODWIF6015 Dishwasher

omega ODWF6015BXCOM Dishwasher

Omega ODWF6014BX Dishwasher

omega OFI101X Dishwasher

Omega ODWF4510X 45cm Compact Dishwasher

Omega ODW702X DishWasher

Omega ODWF6015X Dishwasher

omega ODD614X Drawer Dishwasher

Omega ODWIF6015 Integrated Dishwasher Overview
Summary of Contents
- Page 1: Designed to enhance.
- Page 2: Welcome Safety information Your integrated dishwasher Installation instructions Operating instructions Preparing & loading dishes Rinse aid & detergent Cleaning & maintenance Troubleshooting Purchase details
- Page 3: Welcome Congratulations on purchasing your Integrated Dishwasher. Please refer to the warranty chapter at the rear of this manual for information regarding your product’s parts and labour warranty. Here at Residentia Group, we are customer obsessed and our Support Team are there to ensure you get the most out of your appliance. It is important that you read through the following user manual thoroughly, in order to familiarise yourself with the installation and operation requirements of your appliance. We strongly encourage the use of authentic spare parts to guarantee the best results.
- Page 4: Safety information is crucial when using your dishwasher. This appliance must be earthed to reduce the risk of electric shock. Installation and repair should only be carried out by a qualified technician. The appliance is intended for indoor use only within a domestic environment. Children should be supervised to ensure they do not play with the appliance. Improper connection of the earthing conductor can result in electric shock. Do not modify the plug provided with the appliance. Check that the detergent powder is empty after the wash cycle. Some dishwasher detergents are strongly alkaline and can be dangerous if swallowed. Do not wash plastic items unless they are marked dishwasher safe.
- Page 5: Safety information includes guidelines for unpacking and disposal of the appliance. Use only recommended detergent and rinse agents for automatic dishwashers. Never use soap, laundry detergent, or hand washing detergent in your dishwasher. Keep packaging materials out of reach of children during unpacking. The door should not be left open to avoid tripping hazards. If the supply cord is damaged, it must be replaced by a qualified person. Dispose of packaging and the appliance at a recycling center. Old hose sets should not be reused; use new hose sets for connection. Correct disposal helps prevent negative consequences for the environment and human health. Do not dispose of this product as unsorted municipal waste.
- Page 6: Your dishwasher Key Inner pipe Dispenser Top spray arm Filter assembly Cup rack Upper spray arm Lower spray arm Cutlery drawer Upper basket Lower basket
- Page 7: Your dishwasher (continued) Product specifications Model: ODWIF6015 Standard place settings: 15 Installation: Built-in Dimensions (W × D × H mm): 598 × 550 × 815 Weight (Net): 32.2 kg Energy efficiency rating (MEPS): 4 Stars Water consumption rating (WELS): 5 Stars Energy consumption of standard cleaning cycle: 0.664 kWh Water consumption of standard cleaning cycle: 12 Litre
- Page 8: User manual Installation instructions Prior to installing appliance Warning: electrical shock hazard Disconnect electrical power before installing dishwasher. Cold water connection Connect the cold water supply hose to a threaded 3/4 inch connector. Let the water run to make sure that the water is clear. The installation of the pipes and electrical equipment should be done by professionals. Do not use an extension cord or an adapter plug with this appliance. Safety supply hose consists of double walls to block water flow in case of a break. Ensure the voltage and frequency of the power corresponds to those on the rating plate.
- Page 9: Installation instructions for connection of drain hoses include important guidelines for proper setup. The drain hose should be inserted into a drain pipe with a minimum diameter of 4 cm or directed into a sink, avoiding bends or crimps. The height of the drain pipe must be less than 1000 mm, and the free end of the hose should not be submerged in water to prevent backflow. Ensure the drain hose is correctly fitted to avoid leaks and is not kinked or squashed. If extending the drain hose, use a similar type and keep the extension no longer than 4 meters to maintain cleaning effectiveness. The drain hose must be securely fixed in either position A or position B. For sinks higher than 1000 mm, excess water must be drained into a bowl or container lower than the sink. The waste connection should be less than 100 cm from the bottom of the dishwasher. The water drain hose should be properly fixed to ensure effective drainage.
- Page 10: Installation instructions for the appliance include positioning the appliance against the wall with sides along adjacent cabinets. The dishwasher has water supply and drain hoses that can be positioned on either side for installation. Begin by affixing the condensation strip under the work surface of the cabinet. Connect the inlet hose to the cold water supply and the drain hose. The installation position should be near existing inlet and drain hoses and power cord. Level the dishwasher by adjusting the rear feet and front feet as needed. Install the aesthetic door panel onto the outer door of the dishwasher. Adjust the tension of the door springs using an Allen key to avoid damage. Secure the dishwasher in place using appropriate methods for wood or marble work surfaces. Ensure there is less than 5 mm between the top of the dishwasher and the cabinet for proper alignment.
- Page 11: Installation instructions for the dishwasher include levelling and adjusting the door spring tension. To ensure optimal dish rack operation and performance, the dishwasher must be perfectly level. Use a spirit level on the door and the rack track inside the tub to verify levelness. Adjust the door spring tension by rotating the adjusting screw to tighten or loosen the door steel cable. The correct door spring tension allows the door to remain horizontal when fully opened and close with a slight lift. Levelling can be achieved by manipulating the three levelling legs individually. Exercise caution while levelling to prevent the dishwasher from tipping over. The maximum adjustment height of the levelling feet is 50 mm. Adjustments may be necessary after installing the aesthetic door panel. Refer to provided illustrations for guidance on checking levelness and adjusting the door spring tension.
- Page 12: Installation instructions for the aesthetic door panel are provided. The appliance is fully integrated and does not include an aesthetic door panel. Contact a kitchen cabinetmaker to organize a door panel in your chosen finish. Refer to the aesthetic door panel installation template for panel measurements. Install the hook on the aesthetic wooden panel and put the hook into the slot of the outer door of the dishwasher. Secure the door panel onto the outer door of the dishwasher using the 4 long screws provided. Remove the 4 short screws before applying the 4 long screws. Ensure proper positioning of the door panel during installation. Follow the figures provided for guidance on installation. Use the correct screws as specified in the instructions.
- Page 13: Operation instructions provide essential guidance for using the dishwasher. The control panel includes various buttons for operation. The power button turns the dishwasher on or off. Auto wash adjusts the cycle based on water clarity detected by a sensor. Intensive program is for heavily soiled crockery. Heavy program is suitable for heavily soiled loads like pots and plates. ECO program is designed for normally soiled loads at rated capacity. Glass program is for lightly soiled delicate glassware. 90 min program offers a fast daily wash for lightly soiled dishes. Rapid program provides a quick 30-minute wash without a drying stage.
- Page 14: Operation instructions for the dishwasher include various programs and additional functions. Buttons allow users to wash items in only the upper or lower basket. The half zone function saves energy and water when the dishwasher is at half capacity. The extra clean function is for particularly dirty dishes, increasing wash, rinse, and drying times. The express wash function reduces program time while increasing power for lightly soiled dishes. The extra dry function performs the rinse cycle at a higher temperature for better drying results. The delay start button increases the start time in 1-hour increments up to 24 hours. The auto door opening function automatically opens the dishwasher door at the end of the wash cycle for better drying. The start/cancel button starts the selected washing program or cancels it when pressed for 3 seconds. The beam-on-floor indicator light shows that the washing cycle is in progress and blinks upon completion.
- Page 15: Operation instructions Program functions table The table shows which programs are best for the levels of food residue and how much detergent is needed. It also shows various information about the programs. Detergent (Prewash/Main Wash) Rinse aid used in last rinse cycle Washing cycle steps Default time Energy water usage Additional functions Note: The parameters in this table are only for user's reference. Actual parameters may differ.
- Page 16: Operation instructions for changing the program mid-cycle indicate that a wash cycle can only be changed if it has been running for a short time. If the detergent has already been released, the dishwasher needs to be reset and the detergent dispenser refilled. To reset the dishwasher, open the door slightly to pause the washing, then press the program button for more than 3 seconds to cancel the program. Energy conservation guidelines suggest that pre-rinsing tableware is not recommended as it increases water and energy consumption. Utilizing a household dishwasher according to the provided instructions typically results in lower energy and water consumption compared to hand dishwashing. A forgotten dish can be added before the detergent dispenser opens by pausing the wash cycle and waiting 5 seconds before opening the door. After adding forgotten dishes, close the door and ensure the power supply is connected for the cycle to resume. It is dangerous to open the door mid-cycle due to the risk of hot steam. To start a wash cycle, load the dishes in the lower basket first, then the upper basket, and ensure the water supply is turned on to full pressure. Select a program and press the Start/Cancel button to begin the dishwasher cycle.
- Page 17: Preparing & loading dishes To prevent water dripping from the upper basket into the lower basket, we recommend that you empty the lower basket first, followed by the upper basket. For delicate items, select a program with the lowest possible temperature. WARNING: Items will be hot! To prevent damage, do not take glass and cutlery out of the dishwasher for around 15 minutes after the program has ended. Scrape off any large amounts of leftover food. It is not necessary to rinse the dishes under running water. For best performance of the dishwasher, follow these loading guidelines. Curved items, or ones with recesses, should be loaded aslant so that water can run off. All utensils are stacked securely and cannot tip over. Load hollow items such as cups, glasses, pans etc. with the opening facing downwards so that water cannot collect. Dishes and items of cutlery must not lie inside one another or cover each other. Please do not overload your dishwasher. This is important for good results and for reasonable consumption of energy.
- Page 18: Preparing & loading dishes Adjusting the upper basket height The height of the upper basket can be easily adjusted to accommodate taller dishes. To raise the upper basket, lift it at the center of each side until it locks into place. To lower the upper basket, lift the adjust handles on each side and lower it. Folding the cup shelves back allows for taller items in the upper basket. You can lean tall glasses against the raised cup rack. The pronges on the lower basket hold plates and platters. Lowering the pronges creates more room for large items like pots and pans.
- Page 19: Preparing & loading dishes Loading recommendations The upper basket is designed to hold more delicate and lighter dishware such as glasses, coffee and tea cups and saucers, as well as plates, small bowls and shallow pans. Position the dishes and cookware so that they will not get moved by the spray of water. We suggest that you place large and difficult to clean items into the lower basket: such as pots, pans, lids, serving dishes and bowls. It is preferable to place serving dishes and lids on the side of the racks in order to avoid blocking the rotation of the top spray arm. The maximum diameter advised for plates in front of the detergent dispenser is of 19 cm, this not to hamper the opening of it.
- Page 20: Preparing & loading dishes Loading the cutlery drawer Cutlery should be placed in the cutlery rack separate from each other in the appropriate positions. Avoid nesting of the cutlery to prevent insufficient cleaning performance. You can lift the right side of the cutlery drawer up so both left and right sides are flat. You can move the right side to the left side so both sides are overlapping. You can remove the right basket from the drawer, to allow room for taller items in the upper basket.
- Page 21: Rinse aid is released during the final rinse to prevent water from forming droplets on dishes, which can leave spots and streaks. Your dishwasher is designed to use liquid rinse aids. Only use branded rinse aid for the dishwasher. Never fill the rinse aid dispenser with any other substances, as this would damage the appliance. The regularity of the dispenser needing to be refilled depends on how often dishes are washed and the rinse aid setting used. The Low Rinse Aid indicator will appear in the display when more rinse aid is needed. The chemical ingredients in detergent are necessary to remove dirt from the dishwasher. Use only detergent specifically made for dishwasher use. Keep your detergent fresh and dry. Dishwasher detergent is corrosive; keep it out of the reach of children.
- Page 22: Rinse aid & detergent Adjusting the rinse aid compartment Filling the detergent dispenser To achieve a better drying performance with limited rinse aid, the dishwasher is designed to adjust the consumption by user setup and requirements. Open the cap by sliding the release catch. Close the door and switch on the appliance. Press the Rapid button for more than 5 seconds to enter the set model. The rinse aid indicator will then blink. Press the Rapid button again to select the proper set according to your usage habits. The higher the number, the more rinse aid the dishwasher will use.
- Page 23: Rinse aid and detergent instructions are provided. Add detergent into the larger cavity for the main wash cycle. For better cleaning results, pour a small amount of detergent onto the door for very dirty items. Close the flap by sliding it to the front and pressing it down. Be aware that settings may vary depending on water soiling. Observe the manufacturer’s recommendations on the detergent packaging.
- Page 24: Cleaning & Maintenance Hold the coarse filter and rotate it anticlockwise to unlock the filter. Lift the filter upwards and out of the dishwasher. Clean the door seals regularly with a soft damp cloth to remove food deposits. Any deposits should be wiped off before the door is closed. If cleaning is required, the control panel should be wiped with a soft damp cloth only. Larger food remnants can be cleaned by rinsing the filter under running water. The filtering system in the base of the wash cabinet retains coarse debris from the washing cycle. Check the condition of the filters regularly and clean them if necessary under running water. Reassemble the filters in the reverse order of the disassembly. Do not over tighten the filters. Never use the dishwasher without filters in place.
- Page 25: Cleaning & Maintenance It is necessary to clean the spray arms regularly for hard water chemicals will clog the spray arm jets and bearings. Please take frost protection measures on the dishwasher in winter. After every wash, turn off the water supply to the appliance and leave the door slightly open so that moisture and odors are not trapped inside. Before cleaning or performing maintenance, always remove the plug from the socket. To clean the exterior and rubber parts of the dishwasher, do not use solvents or abrasive cleaning products. It is recommended that you run a wash cycle with the dishwasher empty after prolonged inactivity. Food can remain trapped in the seals which can cause odors. Periodic cleaning with a damp sponge will prevent this from occurring.
- Page 26: Troubleshooting In the event of an emergency you should switch off the appliance using the power button and unplug it. Some minor faults can be fixed by referring to the instructions in the troubleshooting section. If your appliance appears to be operating incorrectly, disconnect it from your electrical supply and contact after sales support. Do not attempt to repair the appliance yourself. If overflow occurs, turn off the main water supply before calling for service. If there is water in the base pan, it should be removed before restarting the dishwasher. If a technician finds that the problem is not due to an appliance fault, you may be liable for the call-out charge. The appliance must be accessible for the engineer to perform any necessary repair. Error Codes include E1 for long inlet time, E3 for not reaching required temperature, and E4 for overflow.
- Page 27: Troubleshooting Dishwasher doesn't start Possible causes include a blown fuse or tripped circuit breaker. Ensure the power supply is turned on and the door is securely closed. Water not pumped from dishwasher Check for a twisted or trapped drain hose and a clogged filter. Ensure the kitchen sink is draining properly. Suds in the tub Use only special dishwasher detergent to avoid suds. If suds occur, let them evaporate and drain the water. Stained tub interior Detergent with colorant may have been used. Ensure the detergent has no colorant. White film on inside surface Hard water minerals may cause this. Clean the interior with a damp sponge and dishwasher detergent. Rust stains on cutlery Ensure that the affected items are corrosion resistant.
- Page 28: Troubleshooting Knocking or rattling noise in the dishwasher may be caused by a spray arm knocking against an item or loose crockery. Interrupt the program and rearrange the items obstructing the spray arm. Knocking noise in the water pipes may be caused by on-site installation or the cross-section of the piping. This has no influence on the dishwasher function. The dishes are not clean due to incorrect loading, insufficient program intensity, inadequate detergent, blocking items, or a dirty filter combination. Refer to the Preparing & Loading Dishes section for guidance. Cloudiness on glassware can result from a combination of soft water and too much detergent. Use less detergent and select a shorter cycle. Black or grey marks on dishes may be due to detergent left in the dispenser or aluminium utensils rubbing against dishes. Use a mild abrasive cleaner to eliminate those marks. Dishes may not be drying due to improper loading, insufficient rinse-aid, or removing dishes too soon. Reload the dishes properly and increase the amount of rinse-aid. Selecting the wrong program can decrease cleaning performance. Choose a program with a long washing time for better results. Low-quality coated cutlery or dishes are not suitable for washing in the dishwasher.
- Page 29: Purchase details should be recorded for future reference. Information can be found on the rating plate and sales invoice. Store name and address should be noted. Telephone number of the store is required. The purchase date should be documented. Product details include model number and serial number. There is a section to attach the receipt.
- Page 30: Warranty information outlines the terms and conditions for product warranties for Residentia Group appliances. It is important to keep this document with proof of purchase for future reference. Definitions include 'acceptable quality' as per the ACL, 'Appliance' referring to any Residentia Group product purchased with this document, and 'Warranty Period' indicating a 36-month warranty for personal use appliances. The warranty applies only to appliances purchased and used in Australia and does not exclude any statutory warranties. During the warranty period, Residentia Group or its authorized service representative will repair or replace defective parts at no extra charge, provided the appliance is accessible. Replaced appliances or parts become the property of Residentia Group, and the warranty does not cover perishable parts like light globes or batteries. Parts and appliances not supplied by Residentia Group are not covered by this warranty.
- Page 31: Warranty Information You will bear the cost of transportation, travel and delivery of the appliance to and from Residentia Group or its ASR. For appliances and services provided by Residentia Group in Australia, the appliances come with a guarantee that cannot be excluded under the Australian Consumer Law. You are entitled to a replacement or refund for a major failure and for compensation for any other reasonably foreseeable loss or damage. Proof of purchase is required before you can make a claim under this warranty. Residentia Group shall, at its discretion, determine whether repair, replacement or refund will apply if an appliance has a valid warranty claim. Missing parts are not covered by warranty. To inquire about claiming under this warranty, follow specific steps including checking operating instructions and having the model and serial number available. This warranty and the relationship between you and Residentia Group are governed by the law applicable where the appliance was purchased. Before calling for service, ensure that the steps in the warranty claim process have been followed. The Australian Consumer Law requires the inclusion of a statement regarding guarantees that cannot be excluded.
- Page 32: Designed to enhance. Omega is proudly owned, designed and engineered in Australia by Residentia Group Pty. Ltd.

KitchenAid W11373417 Dishwasher

BOSCH SMS2ITW41G WiFi Connected Standard Dishwasher

FISHER and PAYKEL DW60FC4X3 Contemporary Dishwasher

FISHER AND PAYKEL DD24SDFTX9 N Dish Drawer Dishwasher

MAYTAG W11680100B Dishwasher

Kenmore W10898468B Ultra WashTMHE Dishwasher
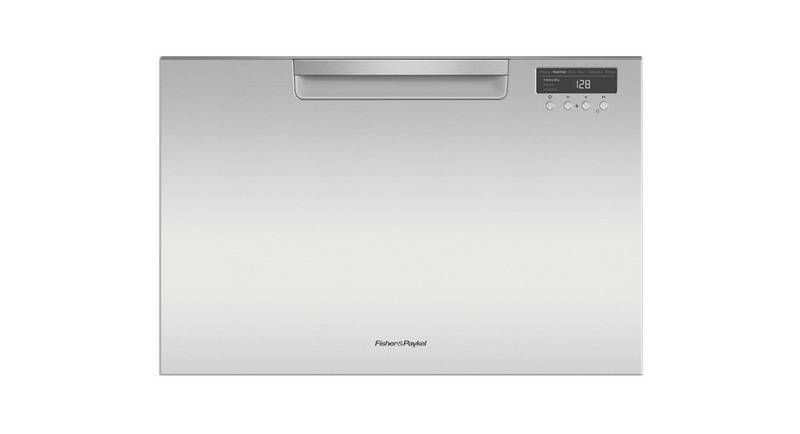
FISHER PAYKEL DD60SCX9 DishDrawer Dishwasher

Miele PFD 103 SCi XXL XXL Dishwasher

FISHER and PAYKEL DW60FC2X3 Contemporary Dishwasher

GE PDT755SYV Profile UltraFresh System Dishwasher