×
- 1. Dishwasher (Installation Manual → Model Numbers)
- 2. Safety Instructions (Important Safety Instructions → Before Using Your Dishwasher → Installation → Product Dimensions)
- 3. Safety Instructions (Important Safety Instructions → What The Icons And Signs In This Installation Guide Mean: → To Reduce The Risk Of Fire, Explosion, Electric Shock, Or Personal Injury When Using The Dishwasher, Follow These Basic Safety Precautions: → These Warning Signs Are Here To Prevent Injury To You And Others.)
- 4. Safety Instructions (Grounding Instructions)
- 5. Make Sure To Use A New Water Supply Line. Old Lines Are Susceptible To Breakage Because They Become Hardened And May Cause Property Damage D…
- 6. Installation (Check The Parts And Tools → Parts Required)
- 7. Power Cable (Hot Water Supply Line → Fitting (3/4') → Note)
- 8. Installation (Tools Required)
- 9. New Installation (Replacement → Select The Best Location For The Dishwasher)
- 10. Installation (Caution)
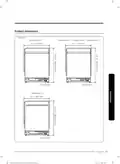
- 11. Product Dimensions (Front View → Junction Box)
- 12. Installation (Cabinet Dimensions)
- 13. Check Water Supply Requirements And Cautions (Adjust The Water Heater To Deliver Water Between 120 F (49 C) 149 F (65 C) → Ensure That The Water Supply Valve Is Turned Off Before Connecting The Hot Water Supply Line To The Dishwasher → Seal The Hot Water Supply Line Connections Using Teflon Tape Or Sealing Compound To Stop Any Water Leakage → The Drain Hose Connected To The Dishwasher Must Be Run Through The Hole In The Side Wall So It Can Be Connected To The Drain Outlet Of The Sink)
- 14. Installation (Check The Electrical Requirements And Cautions)
- 15. Unpacking And Inspecting The Dishwasher (Unpacking → Caution)
- 16. Installation (Mechanical → Plumbing → Electrical → Appearance)
- 17. Mounting The Bespoke Panel (applicable Models Only)
- 18. Installation
- 19. Reinstallation (Caution)
- 20. Installation (Caution)
- 21. Preparing The Dishwasher (Ensure That The Circuit Breaker And Water Supply Valve Are Turned Off Before Proceeding With The Following Steps → Caution)
- 22. Installation
- 23. Caution (Do Not Overtighten The 90 Fitting. (below 280 Lbin (31.6 Nm)) → Doing So May Damage The Water Inlet Valve And Cause A Water Leak.)
- 24. Installation (Placing The Dishwasher And Connecting The Hot Water Supply Line → Caution)
- 25. Caution (Make Sure The Dishwasher Is Positioned To The Center. → Do Not Overtighten The 90 Fitting.)
- 26. Installation (Leveling The Dishwasher → Note)
- 27. Note (Caution)
- 28. Installation (Securing The Dishwasher → To The Countertop → Caution)
- 29. To The Sides (Caution)
- 30. Installation (Securing)
- 31. With Disposal (Disposal With An Air Gap → Without An Air Gap → Check The Size Of The Sinks Drain Hose Connector → To Prevent Backflow)
- 32. Installation (Note → Caution)
- 33. To Prevent Backflow For Models Without The Air Gap, Secure The Drain Hose To The Side Wall Of The Kitchen Cabinet Using Cable Ties Or Other …
- 34. Installation (Wiring Connections → Caution)
- 35. Electrical Shock Hazard (Fire Hazard)
- 36. Installation (Completing The Installation → Caution → Water Leakage Sensor)
- 37. Kick Plate (Caution)
- 38. Specifications (Power Supply → Water Pressure → Dimensions → Minimum Inlet Water Temperature)
- 39. Memo
- 40. Dw500
- 41. Lavavajillas (Manual De Instalación → Dw80cb5450****, Dw80cg5450****, Dw80cg5420**** → Dw80cg5020****, Dw80cg5451****)
- 42. Instrucciones De Seguridad (Instrucciones De Seguridad Importantes → Antes De Usar La Lavavajillas → Instalación → Dimensiones Del Producto)
- 43. Instrucciones De Seguridad (Instrucciones De Seguridad Importantes → Significado De Los Íconos Y Señales De Esta Guía De Instalación → Para Reducir El Riesgo De Incendio, Explosión, Descargas Eléctricas O Lesiones Físicas Cuando Usa Esta Lavavajillas, Siga Estas Instrucciones De Seguridad Básicas → Estas Instrucciones De Instalación Están Dirigidas A Instaladores Calificados.)
- 44. Instrucciones De Seguridad (Advertencia De La Propuesta 65 De California → Instrucciones De Conexión A Tierra → Conserve Estas Instrucciones)
- 45. Antes De Usar La Lavavajillas (Riesgo De Vuelco → Riesgo De Descarga Eléctrica)
- 46. Instalación (Verique Las Piezas Y Las Herramientas → Piezas Necesarias)
- 47. Cable De Alimentación (Conector De Resorte → Alivio De Tensión → Adaptador De 90 → Conducto De Suministro De Agua Caliente)
- 48. Instalación (Herramientas Requeridas)
- 49. Instalación Nueva (Reemplazo → Elección De La Mejor Ubicación Para La Lavavajillas)
- 50. Instalación (Precaución)
- 51. Dimensiones Del Producto (Cajadeconexiones → Cajadeconexiones)
- 52. Instalación (Dimensiones Del Gabinete → Nota)
- 53. Verifique Los Requisitos Para El Suministro De Agua Y Precauciones (Ajuste El Calentador De Agua Para Obtener Una Temperatura De Agua Entre 120 F (49 C) Y 149 F (65 C) → Selle Las Conexiones Del Conducto De Agua Caliente Con Cinta Teflón O Pasta De Sellado → La Manguera De Desagüe Conectada Al Lavavajillas Debe Pasar Por El Orificio De La Pared Lateral)
- 54. Instalación (Verifique Los Requisitos Eléctricos Y Advertencias → Requisitos Eléctricos Para La Lavavajillas)
- 55. Desempacar E Inspeccionar El Lavavajillas (Desempaque → Placa De Protección → Precaución)
- 56. Instalación (Cañerías → Eléctrica → Apariencia → Piezas)
- 57. Montaje Del Panel Bespoke (solo Modelos Aplicables)
- 58. Instalación (Nota)
- 59. Nota (Reinstalación → Precaución)
- 60. Instalación (Precaución)
- 61. Preparación Del Lavavajillas (Asegúrese Que El Disyuntor Y La Válvula Del Suministro De Agua Estén Desactivados Antes De Continuar Con Los Siguientes Pasos. → Precaución)
- 62. Instalación (Conexiones Del Cableado → Fijación De La Lavavajillas)
- 63. Ajuste Del Adaptador De 90 (Precaución)
- 64. Instalación (Colocación Del Lavavajillas Y Conexión Del Conducto Del Suministro De Agua Caliente → Precaución)
- 65. Bu (R → L → E → Te Later → A → A → L → L → M → Anguera De De → S → A → G → U → E → C → O → O → N → D → U → C → T → T → O → D → E → S → U → M → I → N → I → S → T → R → O → D → E → A → G → U → A → C → A → L → I → E → N → T → E → C → A → B → L → L → E → D → E → A → L → L → I → M → E → N → T → A → C → I → Ó → N → V → Ál → Vu → L → A → D → E → E → N → T → R → A → D → A)
- 66. Instalación (Nivelación Del Lavavajillas)
- 67. Nota (Precaución)
- 68. Instalación (Asegurar La Lavavajillas → A La Encimera → Precaución)
- 69. Hacia Los Laterales (Precaución)
- 70. Instalación (Ajuste → Verifique Las Piezas Del Fregadero A Las Cuales Se Conectará La Manguera De Desagüe. → Caso 1. Sin Triturador)
- 71. Con Triturador (Espacio De Aire → Manguera De Desagüe → Abrazadera De Manguera → Triturador Con Un Espacio De Aire)
- 72. Instalación (Nota → Precaución)
- 73. Manguera De Desagüe (Freedadero)
- 74. Instalación (Conexiones Del Cableado → Precaución)
- 75. Riesgo De Descarga Eléctrica (Riesgo De Incendio → Alivio De Tensión → Caja De Conexiones → Verde Con Verde)
- 76. Instalación (Finalización De La Instalación → Precaución → Sensor De Pérdidas De Agua)
- 77. Enchufe La Lavavajillas, Abra El Suministro De Agua E Inicie El Ciclo De Instalación Inteligente.
- 78. Especificaciones (Suministro Eléctrico → Presión De Agua → Dimensiones → Temperatura Mínima Del Agua En La Entrada)
- 79. Notas
- 80.
- 81. Lave-vaisselle (Manuel D'installation → Dw80cb5450****, Dw80cg5450****, Dw80cg5420**** → Dw80cg5020****, Dw80cg5451****)
- 82. Consignes De Sécurité Importantes (Avant D'utiliser Votre Lave-vaisselle → Installation → Dimensions De L'appareil → Caractéristiques Techniques)
- 83. Consignes De Sécurité Importantes (Que Signifient Les Icônes Et Symboles Utilisés Dans Ce Manuel D'installation ? → Risques Ou Manipulations Dangereuses Susceptibles D'entraîner Des Blessures Graves, Voire Mortelles. → Risques Ou Manipulations Dangereuses Pouvant Entraîner Des Blessures Ou Des Dommages Matériels. → Pour Réduire Le Risque D'incendie, D'explosion, D'électrocution Ou De Blessures Lors De L'utilisation Du Lave-vaisselle, Veuillez Vous Conformer Aux Précautions De Sécurité De Base Suivantes :)
- 84. Consignes De Sécurité (Avertissement De La Proposition 65 De La Californie → Instructions De Mise À La Terre → Attention → Conservez Ces Instructions)
- 85. Avant D'utiliser Votre Lave-vaisselle (Risque De Basculement → Risque D'électrocution → Conservez Ces Instructions)
- 86. Installation (Vérication Des Pièces Et Des Outils → Pièces Nécessaires)
- 87. Câble D'alimentation (Raccords Pour Tuyaux → Tuyau D'arrivée D'eau Chaude → Raccord À 90 → Remarque)
- 88. Installation (Outils Nécessaires)
- 89. Nouvelle Installation (Remplacement → Choisir Le Bon Emplacement)
- 90. Installation (Remarque → Attention)
- 91. Dimensions De L'appareil (Boîte De Jonction)
- 92. Installation (Dimensions Du Meuble → Remarque → Ce Lave-vaisselle Est Conçu Pour Être Encastré)
- 93. Vérifiez Les Normes Et Les Conditions À Respecter En Matière D'alimentation En Eau (Température D'alimentation En Eau Chaude → Raccordement Du Lave-vaisselle À L'eau Chaude → Étanchéité Des Raccords Du Tuyau D'eau Chaude → Installation Du Tuyau D'évacuation)
- 94. Installation (Exigences Électriques À Respecter Pour Le Lave-vaisselle → Normes À Respecter En Matière D'électricité)
- 95. Déballage Et Vérification Du Lave-vaisselle (Déballage → Attention)
- 96. Installation (Éléments Mécaniques → Éléments De Plomberie → Éléments Électriques → État Général)
- 97. Montage Du Panneau Sur Mesure (modèles Applicables Uniquement)
- 98. Installation (Remarque)
- 99. Réinstallation (Attention)
- 100. Installation (Attention)
- 101. Préparation Du Lave-vaisselle (Assurez-vous Que Le Disjoncteur Et La Vanne D'arrivée D'eau Sont Bien Coupés Avant D'effectuer Les Étapes Suivantes. → Attention)
- 102. Installation (Câblage → Fixer Le Lave-vaisselle)
- 103. Attention
- 104. Installation (Mise En Place Du Lave-vaisselle Et Raccordement Du Tuyau D'arrivée D'eau Chaude → Attention)
- 105. Joint D'étanchéité Latéral (Boîte De Jonction → Tuyau D'évacuation → Câble D'alimentation → Vanne D'arrivée D'eau)
- 106. Installation (Mise À Niveau Du Lave-vaisselle → Remarque)
- 107. Ajustement Des Pieds De Mise À Niveau (Ajustement De La Hauteur D'un Pied Arrière → Consignes De Sécurité Lors De L'installation)
- 108. Installation (Fixation Du Lave-vaisselle → Au Plan De Travail → Attention)
- 109. Sur Les Côtés (Instructions D'installation → Vérification De L'installation)
- 110. Installation (Fixation → Sans Broyeur → Coupure Antirefoulement)
- 111. Avec Broyeur (Coupure Antirefoulement → Tuyau D'évacuation → Collier De Serrage → Broyeur Avec Coupure)
- 112. Installation (Remarque → Attention)
- 113. Éviter Un Reflux Sur Les Modèles Sans Coupure Antirefoulement, Raccordez Le Tuyau D'évacuation Sur La Paroi Latérale Du Meuble De Cuisine À L…
- 114. Installation (Câblage → Attention)
- 115. Risque D'électrocution (Risque D'incendie → Remarque)
- 116. Installation (Fin De L'installation → Attention → Capteur De Fuite D'eau)
- 117. Branchez Le Lave-vaisselle, Ouvrez L'arrivée D'eau Et Démarrez Le Programme Cycle D'installation Intelligent.
- 118. Caractéristiques Techniques (Alimentation → Pression D'eau → Dimensions → Température Minimale De L'arrivée D'eau)
- 119. Mémo (Dw500)
- 120.
×
Samsung DW80CB5450 Series Dishwasher
Installation
ÉTAPE 10 Fixation du lave-vaisselle
Pour plus de stabilité et de sécurité, ꢀxez le lave-vaisselle au plan de travail ou aux parois latérales du
meuble.
Au plan de travail
Si le plan de travail est en bois ou dans un matériau qui ne risque pas d'être endommagé par le
perçage, suivez les instructions ci-dessous.
1. Placez une grande serviette dans le fond
du lave-vaisselle (recouvrant le ꢀltre) aꢀn
d'empêcher que des copeaux de bois ou une
vis ne tombent dans le puits collecteur.
2. Insérez les supports fournis dans les trous
situés en haut à l'avant du lave-vaisselle,
comme indiqué.
Si les supports sont trop longs, coupez-les à
l'aide d'une pince.
3. Pré-percez les trous par chevauchement des
supports.
Assurez-vous que le trou est plus petit que le
diamètre de la vis.
4. Serrez les vis fournies.
5. Installez les bouchons en plastique fournis,
comme indiqué.
ATTENTION
•
•
Après avoir installé le lave-vaisselle
à l'intérieur du meuble, vériꢀez si la
porte s'ouvre et se ferme librement sans
interférence avec le meuble.
Si les bouchons en plastique ne sont pas
installés, cela peut entraîner une fuite d'eau
puis causer un incendie ou une électrocution.
28 Français
DW500
0
0
C
C
_
_
D
W
W
8
8
0
0
C
C
B
B
5
5
0
0
7
7
0
0
1
1
2
2
A
A
A
A
_
_
D
D
D
D
6
6
8
8
-
-
0
0
0
0
2
2
6
6
0
0
A
A
-
-
0
0
1
1
_
_
C
C
F
F
R
R
.
.
i
i
n
n
d
d
d
d
2
2
8
8
2023
-
-
1
1
2
2
-
-
1
1
5
5
5
:
:
1
1
9
9
:
:
1
1
0
0
| General | Details |
|---|---|
| Name | Samsung DW80CB5450 Series Dishwasher |
| Make | Samsung |
| Language | English |
| Filetype | PDF (Download) |
| File size | 5.84 MB |

SAMSUNG DW80N3030UW Front Dishwasher

SAMSUNG DW90F89 Dishwasher

SAMSUNG DW80BB70 Dishwasher

SAMSUNG DW50T6060U Dishwasher

SAMSUNG DW80BB70 Series Dishwasher

SAMSUNG DW80CB5450 Dishwasher

Samsung DW60M5062 Dishwasher

Samsung DW60 7 Series Dishwasher

SAMSUNG DW9000F Dishwasher

SAMSUNG DW60R2014 Wide 12 Place Dishwasher


seasons SDW2FCMB Front Dishwasher

KitchenAid W11373417 Dishwasher

BOSCH SMV8ZCX07E Total Dishwasher

CMA DISHMACHINES UC65e M3 Undercounter Dishwasher

ETA 238090000C Dishwasher

Gudsunal WQP4-6207 Dishwasher

BOSCH SMS6TCW01G Free Standing Dishwasher

FISHER AND PAYKEL DD60SCTX9 7 Contemporary Tall Dishwasher

FISHER and PAYKEL DD24DTX6I1 Tall Dishwasher

Siemens SX75YX00CE Fully Integrated Dishwasher
Table of Contents
- 1. Dishwasher - Installation Manual →
- 2. Safety Instructions - Important Safety Instructions →
- 3. Safety Instructions - Important Safety Instructions →
- 4. Safety Instructions - Grounding Instructions →
- 5. Make Sure To Use A New Water Supply Line. Old Lines Are Susc... →
- 6. Installation - Check The Parts And Tools →
- 7. Power Cable - Hot Water Supply Line →
- 8. Installation - Tools Required →
- 9. New Installation - Replacement →
- 10. Installation - Caution →
- 11. Product Dimensions - Front View →
- 12. Installation - Cabinet Dimensions →
- 13. Check Water Supply Requirements And Cautions - Adjust The Wa... →
- 14. Installation - Check The Electrical Requirements And Caution... →
- 15. Unpacking And Inspecting The Dishwasher - Unpacking →
- 16. Installation - Mechanical →
- 17. Mounting The Bespoke Panel (applicable Models Only) →
- 18. Installation →
- 19. Reinstallation - Caution →
- 20. Installation - Caution →
- 21. Preparing The Dishwasher - Ensure That The Circuit Breaker A... →
- 22. Installation →
- 23. Caution - Do Not Overtighten The 90 Fitting. (below 280 Lbin... →
- 24. Installation - Placing The Dishwasher And Connecting The Hot... →
- 25. Caution - Make Sure The Dishwasher Is Positioned To The Cent... →
- 26. Installation - Leveling The Dishwasher →
- 27. Note - Caution →
- 28. Installation - Securing The Dishwasher →
- 29. To The Sides - Caution →
- 30. Installation - Securing →
- 31. With Disposal - Disposal With An Air Gap →
- 32. Installation - Note →
- 33. To Prevent Backflow For Models Without The Air Gap, Secure T... →
- 34. Installation - Wiring Connections →
- 35. Electrical Shock Hazard - Fire Hazard →
- 36. Installation - Completing The Installation →
- 37. Kick Plate - Caution →
- 38. Specifications - Power Supply →
- 39. Memo →
- 40. Dw500 →
- 41. Lavavajillas - Manual De Instalación →
- 42. Instrucciones De Seguridad - Instrucciones De Seguridad Impo... →
- 43. Instrucciones De Seguridad - Instrucciones De Seguridad Impo... →
- 44. Instrucciones De Seguridad - Advertencia De La Propuesta 65 ... →
- 45. Antes De Usar La Lavavajillas - Riesgo De Vuelco →
- 46. Instalación - Verique Las Piezas Y Las Herramientas →
- 47. Cable De Alimentación - Conector De Resorte →
- 48. Instalación - Herramientas Requeridas →
- 49. Instalación Nueva - Reemplazo →
- 50. Instalación - Precaución →
- 51. Dimensiones Del Producto - Cajadeconexiones →
- 52. Instalación - Dimensiones Del Gabinete →
- 53. Verifique Los Requisitos Para El Suministro De Agua Y Precau... →
- 54. Instalación - Verifique Los Requisitos Eléctricos Y Adverten... →
- 55. Desempacar E Inspeccionar El Lavavajillas - Desempaque →
- 56. Instalación - Cañerías →
- 57. Montaje Del Panel Bespoke (solo Modelos Aplicables) →
- 58. Instalación - Nota →
- 59. Nota - Reinstalación →
- 60. Instalación - Precaución →
- 61. Preparación Del Lavavajillas - Asegúrese Que El Disyuntor Y ... →
- 62. Instalación - Conexiones Del Cableado →
- 63. Ajuste Del Adaptador De 90 - Precaución →
- 64. Instalación - Colocación Del Lavavajillas Y Conexión Del Con... →
- 65. Bu - R →
- 66. Instalación - Nivelación Del Lavavajillas →
- 67. Nota - Precaución →
- 68. Instalación - Asegurar La Lavavajillas →
- 69. Hacia Los Laterales - Precaución →
- 70. Instalación - Ajuste →
- 71. Con Triturador - Espacio De Aire →
- 72. Instalación - Nota →
- 73. Manguera De Desagüe - Freedadero →
- 74. Instalación - Conexiones Del Cableado →
- 75. Riesgo De Descarga Eléctrica - Riesgo De Incendio →
- 76. Instalación - Finalización De La Instalación →
- 77. Enchufe La Lavavajillas, Abra El Suministro De Agua E Inicie... →
- 78. Especificaciones - Suministro Eléctrico →
- 79. Notas →
- 80. Page 80 →
- 81. Lave-vaisselle - Manuel D'installation →
- 82. Consignes De Sécurité Importantes - Avant D'utiliser Votre L... →
- 83. Consignes De Sécurité Importantes - Que Signifient Les Icône... →
- 84. Consignes De Sécurité - Avertissement De La Proposition 65 D... →
- 85. Avant D'utiliser Votre Lave-vaisselle - Risque De Basculemen... →
- 86. Installation - Vérication Des Pièces Et Des Outils →
- 87. Câble D'alimentation - Raccords Pour Tuyaux →
- 88. Installation - Outils Nécessaires →
- 89. Nouvelle Installation - Remplacement →
- 90. Installation - Remarque →
- 91. Dimensions De L'appareil - Boîte De Jonction →
- 92. Installation - Dimensions Du Meuble →
- 93. Vérifiez Les Normes Et Les Conditions À Respecter En Matière... →
- 94. Installation - Exigences Électriques À Respecter Pour Le Lav... →
- 95. Déballage Et Vérification Du Lave-vaisselle - Déballage →
- 96. Installation - Éléments Mécaniques →
- 97. Montage Du Panneau Sur Mesure (modèles Applicables Uniquemen... →
- 98. Installation - Remarque →
- 99. Réinstallation - Attention →
- 100. Installation - Attention →
- 101. Préparation Du Lave-vaisselle - Assurez-vous Que Le Disjonct... →
- 102. Installation - Câblage →
- 103. Attention →
- 104. Installation - Mise En Place Du Lave-vaisselle Et Raccordeme... →
- 105. Joint D'étanchéité Latéral - Boîte De Jonction →
- 106. Installation - Mise À Niveau Du Lave-vaisselle →
- 107. Ajustement Des Pieds De Mise À Niveau - Ajustement De La Hau... →
- 108. Installation - Fixation Du Lave-vaisselle →
- 109. Sur Les Côtés - Instructions D'installation →
- 110. Installation - Fixation →
- 111. Avec Broyeur - Coupure Antirefoulement →
- 112. Installation - Remarque →
- 113. Éviter Un Reflux Sur Les Modèles Sans Coupure Antirefoulement... →
- 114. Installation - Câblage →
- 115. Risque D'électrocution - Risque D'incendie →
- 116. Installation - Fin De L'installation →
- 117. Branchez Le Lave-vaisselle, Ouvrez L'arrivée D'eau Et Démarr... →
- 118. Caractéristiques Techniques - Alimentation →
- 119. Mémo - Dw500 →
- 120. Page 120 →