
WISBERG WBDW44DB Dishwasher


EN – USER MANUAL
DISHWASHER
WBDW44DW
WBDW44DS
WBDW44DB
28


| General | Details |
|---|---|
| Name | WISBERG WBDW44DB Dishwasher |
| Make | WISBERG |
| Language | English |
| Filetype | PDF (Download) |
| File size | 14.76 MB |
 (1 votes, average: 5.00 out of 5)
 Loading...

WISBERG WBDW40CW Dishwasher
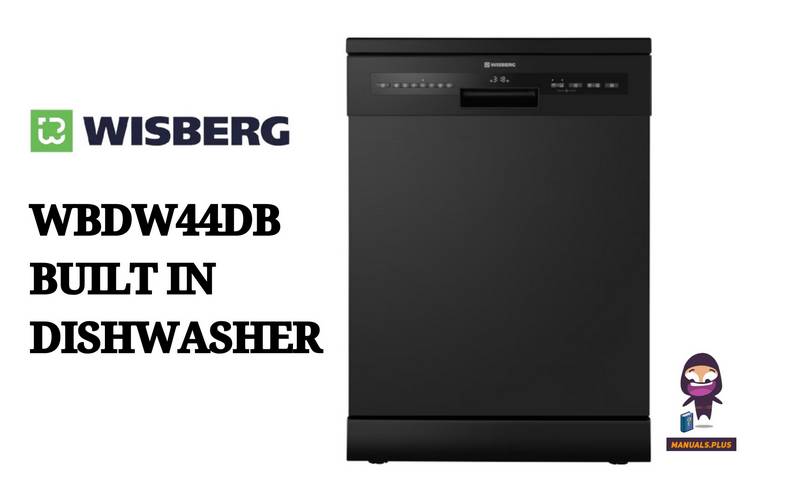
WISBERG WBDW44DB Dishwasher Overview
Summary of Contents
- Page 1: EN – User manual Dishwasher WBDW44DW WBDW44DS WBDW44DB
- Page 2: Foreword Safety Intended use and foreseeable unintended use Safety warnings and regulations Product features Description of the device Installation Requirements on the location of installation Use Cleaning and maintenance
- Page 3: Foreword About this document This user manual contains all information for correct, efficient and safe use of the device. This user manual is intended for the end user and/or buyer of this device. Please make sure that you have completely read and understood the instructions in this manual before you install or use the device. Keep this document for future use as long as you are using and/or are in possession of this device. Wisepick Productions B.V. cannot be held responsible in any way for immaterial damage to you or others, or material damage to the device, your property or the property of others caused by not or not correctly following the instructions in this manual. The warnings and safety regulations in this manual do not cover all possible circumstances and situations. Original instructions This user manual was originally written in Dutch. All other languages are translated documents. In case of translation errors, the Dutch version shall prevail. Used symbols Indicates fire hazard and/or flammable materials. Indicates a hazardous situation which, if not avoided, could result in serious immaterial damage to you or others. Indicates a hazardous situation which, if not avoided, could result in light immaterial damage to you or others. Indicates a situation related to material damage. Indicates useful, additional information.
- Page 4: Safety Please make sure that you have completely read and understood the safety instructions before you install, use or perform maintenance on the device. This device is intended for indoor use only. This appliance is not intended for use as a built-in appliance. This appliance is intended for domestic use and similar applications such as staff kitchens in shops, offices, and other work environments. This device is not meant for use by persons with limited physical, sensory, or mental capacity unless they are under supervision. Any use of the device other than described in the user manual is considered unintended use and may result in property damage. Always be alert and careful. Do not use electrical appliances if you suffer from impaired concentration. Dishwasher detergents contain toxic substances. Always follow the instructions of the dishwasher detergent. Do not drink the water from the appliance. Never let children play with the packaging material.
- Page 5: Fire hazard due to short circuit. Do not use this appliance with an extension lead or power strip. Before use, check that the voltage on the socket matches that on the type plate of the appliance. Make sure you install the appliance so that the power cable is always accessible. Fire hazard due to overheating. Do not install the appliance on or near other heat sources. Never place the appliance on a carpet to prevent the air vents from being blocked. Do not block the air flow to the air inlets or outlets of the device. Electrocution hazard due to short circuit. Always place the device on a dry and moisture-resistant surface. Never use the device if a part is damaged or faulty. Caution! Trip hazard due to loose cables. Risk of burns due to steam. This appliance must not be used by children under 8 years of age.
- Page 6: Never reuse the old supply hose. Always use the new supply hose supplied with the appliance. Do not twist or kink the supply and discharge hoses or roll up the supply and discharge hoses. Do not install the appliance where the temperature can drop below 0°C to prevent frost damage. Make sure that the power cable is not clamped under the adjusting legs. Do not use dishwasher salt if the appliance is set to water softener level H1. Make sure you always set the water softening level to the water hardness in your area. Never use detergent that is unsuitable for dishwashers. Make sure that the rinse aid reservoir is always filled to at least ¼ of its capacity. Do not place any objects in front of the door when the appliance is in operation. Always clean the stainless steel parts immediately with a soft cloth after topping up the dishwasher salt.
- Page 7: Explanation of graphic symbols on the device and packaging The CE marking indicates compliance with European legislation on health, safety, and environmental protection. Instructions for use must be read carefully before using the appliance. The appliance must not be lifted by one person alone. This is a class I appliance with metal parts connected to a protective earthing conductor. The appliance must not be disposed of with ordinary household waste but returned to a collection point. Product features The WBDW44DW/WBDW44DS/WBDW44DB is a freestanding dishwasher suitable for up to 14 place settings. The control panel allows selection between 8 different dishwashing programmes. The appliance automatically opens the door slightly at the end of a programme for efficient drying. Using the appliance typically consumes less energy and water than washing dishes by hand. The appliance comes with a three-year guarantee period after purchase.
- Page 8: The following spare parts are available on the consumer market for up to 10 years after the introduction of the appliance: Door hinges and seals Spray arms Drain filters Dishwasher racks and associated plastic parts such as baskets and lids Please note that some spare parts are only available to professional repairers. Technical data: Article number: WBDW44DW, WBDW44DS, WBDW44DB Dimensions (l x w x h): 85 × 60 × 60 cm, 85 × 117.5 × 60 cm Weight: 48.5 kg Appliance type: Freestanding dishwasher Capacity: 14 place settings Power supply: 220 – 240 V ~ 50 Hz Water supply pressure: 0.04 – 1 MPa Sound level: 44 dB Energy label: D The technical data is indicated on the type plate on the inside of the appliance and on the energy label. The QR code on the energy label provides a web link to the information related to the appliance performance in the EU EPREL database.
- Page 9: 3. INSTALLATION Before installing the appliance, carefully review the safety information in Section 1. 3.1. REQUIREMENTS ON THE LOCATION OF INSTALLATION Before use, check that the voltage on the earthed socket matches that on the type plate of the appliance (220 – 240V ~ 50Hz). Only connect the appliance to an earthed power socket. Make sure you install the appliance in such a way that the power cable is always accessible. Always move the appliance with two people. Use two hands when moving, lifting or turning the appliance. Always wear protective gloves and closed shoes when moving the appliance. Make sure that the power cable is not clamped under the adjusting legs. Never connect the supply hose to a hot water tap. Place the appliance on a flat, stable, heat-resistant and moisture-resistant surface. 3.2. REMOVE AND CHECK THE PACKAGING Never allow children to play with the packaging material. Keep the packaging material out of the reach of children. Remove the packaging material from the device. Check the contents of the pack using the picture in Section 3.3. Main parts. If parts are missing or damaged, please contact Customer Service.
- Page 10: Main parts include the cutlery drawer, top spray arm, top rack, dishwasher detergent reservoir, rinse aid level indicator, rinse aid reservoir, bottom rack, cutlery basket, door, and operating panel. Installation notices highlight the risk of damage to the device. Never connect the supply hose to a hot water tap or reuse the old supply hose. Do not twist or kink the supply and discharge hoses. Required tools for installation include a level and screwdriver. Connecting the supply hose involves placing a bucket under the stop cock and turning it to the open position. Let the water run until clear before connecting the supply hose. Check for leaks after slowly opening the stop cock. Ensure the circle behind the sight glass of the water stop is orange; if red, contact customer service.
- Page 11: Connecting the discharge hose to a siphon requires a minimum diameter of 1½ inches and a maximum height of 100 cm. Remove the dishwasher connection from the siphon and the rubber stopper from the dishwasher connection. Slide a hose clamp around the end of the discharge hose, which is not included, and then slide the discharge hose over the dishwasher connection to the siphon. Tighten the hose clamp with a screwdriver. For connecting the discharge hose to a drain pipe, do not insert the discharge hose deeper than 15 cm to prevent water from flowing back. The loose drain pipe must have a minimum diameter of 4 cm and a maximum height of 100 cm. It is advisable to attach the discharge hose to the wall with a hose bracket to prevent kinks or blockages. To level the appliance, position it at its final location and use a spirit level to check that it is level. Adjust the adjusting legs, which have a maximum height of 5 cm, until the appliance is level. Finally, plug in the power cable.
- Page 12: Preparing the appliance for use involves setting the water hardness and the amount of rinse aid. Make sure to set the water softening level according to the water hardness in your area to avoid damage to the appliance. The factory setting for the water softener is level H3. If the water hardness is set incorrectly, the dishes will not be clean. To set the water hardness, turn on the appliance and access the water hardness setting menu. The rinse aid setting can also be adjusted through the appliance's display. The higher the rinse aid setting, the more rinse aid the appliance will use. Adjust the rinse aid level based on the cleanliness and dryness of the tableware. Consult your local water management company for precise water hardness information. Follow the specific steps to confirm your settings for both water hardness and rinse aid.
- Page 13: Add the dishwasher salt Risk of damage to the device. Always clean the stainless steel parts immediately with a soft cloth after topping up the dishwasher salt. Do not use dishwasher salt if the appliance is set to water softener level H1. Lime can leave a white mark on your crockery or cutlery. The dishwasher salt removes the lime from the rinsing water. The dishwasher salt LED lights up when the dishwasher salt needs to be refilled. Fill the salt reservoir with 1 litre of water for the first use after installation. After that, you only need to top up the salt reservoir with dishwasher salt. Start a short programme to remove the last remnants of dishwasher salt.
- Page 14: Adjusting the top rack allows for fitting higher or lower tableware. To adjust the top basket, slide it slightly out of the appliance. Lift the top basket up to raise it. Press the two handles on the side and push downwards to lower the top basket. After adjustment, slide the top rack back into the appliance. Folding in the shelves in the top rack creates space for tall glasses. To make room for tall glasses, fold in the shelves in the top rack. Place tall glasses against the folded-in shelves in the top rack.
- Page 15: Folding in/out the shelves in the bottom rack allows for accommodating large place settings or plates. For large place settings, fold in the shelves and place the settings in the bottom rack. For plates, fold up the shelves and place them in the slots. Before using the appliance, review the safety information. Always place knives and sharp objects with the sharp tip downwards or horizontally in the rack. Keep the door closed to prevent small children or pets from climbing in. Do not leave the dishwasher door open to avoid trip hazards. Ensure high tableware placement does not block the spray arms. Do not place hot pans in the racks to prevent damage to the plastic protective layer. Remove large food residues before inserting dishes to avoid clogging and leakage.
- Page 16: Non-corrosion-resistant tableware. Tableware made of plastic. Crystal glassware. Non-dishwasher-safe tableware. Place the dishes in the racks. Cutlery drawer and cutlery basket: Suitable for cutlery. Top rack: Suitable for glassware, coffee and tea cups, saucers and small bowls. Bottom rack: Suitable for pots, pans, lids, dishes, bowls and plates. Check that the spray arms can still rotate freely after filling the dishwasher. Never use detergent that is not dishwasher safe.
- Page 17: The rinse aid ensures that the glassware is dried without stains or streaks. The rinse aid LED lights up when the rinse aid needs to be refilled. You can read the current amount of rinse aid from the rinse aid level indicator. Open the rinse aid reservoir. Fill the rinse aid reservoir up to the rim with rinse aid. Close the rinse aid reservoir. The rinse aid LED goes out. Remove the residual rinse aid around the rinse aid reservoir with a soft, dry cloth. Operating panel includes various icons and buttons for different functions. Child lock is available for added safety.
- Page 18: Choosing a programme involves several steps: close the door, press the on/off button, select a programme, check the detergent reservoir, and press the start/pause button to begin. The automatic programme is suitable for cleaning all types of soiled dishes, with temperature and water amount automatically adjusted. The intensive programme is designed for heavily soiled dishes, operating at higher temperatures. The hygiene programme cleans soiled dishes at high temperatures. The ECO programme is the most efficient in terms of energy and water consumption and complies with EU eco design rules. The glass programme is tailored for slightly soiled dishes, particularly glassware. The 60 minutes programme is effective for normally soiled dishes in a short time. The fast programme is suitable for slightly soiled dishes and operates quickly. At the first wash, check for any leakage at the water drainage and ensure the discharge hose is connected correctly. Filling the appliance to maximum capacity can save energy and water.
- Page 19: Choose an additional function. Top/bottom rack selection cleans the dishes in the chosen rack. Delay function postpones the start of a programme. Child lock locks the control panel. Extra drying dries dishes extra intensively. Extra power cleans heavily soiled dishes intensively. Messages on the display indicate water pressure issues. Rinse aid must be refilled. Dishwasher salt must be refilled. Numeric display shows remaining time, set delay time, and error codes.
- Page 20: Programme duration, water and energy consumption details are provided for various settings. Water consumption varies by programme type, with automatic settings using between 10.6 to 15.9 liters. Energy use for different programmes ranges from 0.7 to 1.772 kWh. The duration of programmes can vary significantly, with some lasting from 30 to 205 minutes. Instructions for interrupting the programme include pressing the start/pause button to pause the wash. To change the programme during operation, hold the programme button for 5 seconds to cancel. Caution is advised when opening the door during operation due to the risk of burns from steam. After pausing, wait five seconds before opening the door to place dishes. The door should be closed and the start/pause button pressed to resume the programme. These instructions ensure safe and effective use of the appliance.
- Page 21: Cancelling the active programme involves pressing the start/pause button to pause the wash and holding the programme button for 3 seconds. Before starting a new programme, check that there is enough dishwasher detergent in the reservoir. Do not remove the dishes from the appliance until the programme is complete to avoid the risk of poisoning from detergent residue. Do not leave the dishwasher door open or place objects in front of it during operation to prevent trip hazards. A beep will sound when the programme is finished, and the display will flash 0:00. The door opens automatically to allow the dishes to air dry. Before servicing and cleaning the appliance, review the safety information. Do not pour water over the appliance and always unplug it before cleaning to avoid electrocution hazards. Never use aggressive or abrasive cleaners or sharp objects on the appliance to prevent damage. Clean the outside of the appliance every two months and the inside with a special dishwasher cleaner, following product instructions.
- Page 22: Cleaning the filters should be done once a week. To clean the filters, turn the filter anticlockwise to unlock the filter system. Press the sides of the mesh filter ring to loosen the mesh filter. Remove any foreign objects from the filters and clean them under running water. Use a washing-up brush to remove stubborn dirt. Reassemble the mesh filter, flat filter, and the filter before putting them back into the appliance. Turn the filter clockwise to lock the filter system. It is important to clean the spray arms regularly to prevent leaks. Clean the spray arms once every two months. Loosen the top spray arm clockwise by holding the knurled ring on top.
- Page 23: Pull off the bottom spray arm. Clean the top spray arm and the bottom spray arm under running water. Use a washing-up brush to remove stubborn dirt. Use a narrow and pointed stick to remove the dirt from the holes. Place the top spray arm and the bottom spray arm back into the appliance. WARNING: Electrocution hazard due to short circuit. Do not perform any repairs to the appliance that are not described in this manual. Some problems can be easily solved by yourself using the table below. The appliance will not start. Water is leaking from the appliance.
- Page 24: Problem: The water is not pumped out. Possible cause: The discharge hose is twisted or clamped. Potential solution: Check whether the discharge hose is blocked. Problem: A lot of foam is created during a wash. Possible cause: The wrong dishwasher detergent has been used. Potential solution: Only use dishwasher detergent suitable for dishwashers. Problem: There is a deposit on the inside of the appliance. Possible cause: The hardness of the water can cause limescale build-up. Potential solution: Clean the inside of the appliance with a special dishwasher cleaner. Problem: The dishwasher detergent gives off colour. Possible cause: The cutlery is not corrosion-resistant. Potential solution: Use dishwasher detergent without dyes. Problem: There are rust marks on the cutlery. Possible cause: Only place corrosion-resistant cutlery in the appliance. Problem: The appliance makes an exceptional amount of noise. Potential solution: Open the door and move the tableware which causes the problem. Problem: The dishes are not clean. Possible cause: The dishes are not placed properly or are placed too close together in the racks. Potential solution: Follow the instructions for putting the dishes in the dishwasher. Problem: The selected programme is not powerful enough. Potential solution: Select a more powerful programme. Problem: The filter system is dirty. Potential solution: Clean the filter system. Problem: The water softening level is incorrectly set. Potential solution: Set the water softening level to the water hardness in your region.
- Page 25: There are white marks on the tableware. The dishwasher salt must be topped up. Refill the dishwasher salt. The water softening level is incorrectly set. Too much dishwasher detergent was used. Set the water softening level to the water hardness in your region. The dishes are not dry. The dishes are not properly placed in the racks. Wait a few minutes after the end of the programme before removing the dishes from the appliance. The selected programme does not have a drying phase.
- Page 26: Transport and storage Caution: Danger of entrapment due to tilting the appliance. Always wear protective gloves and closed shoes when moving the appliance. Risk of injury from lifting heavy objects. Always move the appliance with two people. Notice: Risk of damage to the device. Never drop the appliance and avoid bumping. Unplug the power cable from the earthed socket. Clean the appliance following the instructions in chapter 5. Leave the door open for at least 24 hours so that all the moisture can escape from the appliance. Pack the appliance in soft packaging such as bubble wrap or a blanket to prevent damage. Disposing of packaging material should follow national and local regulations regarding environmentally friendly disposal. The appliance must not be disposed of with other household waste within the EU. Proper disposal of the appliance helps prevent potential hazards to the environment and public health.

FISHER PAYKEL DD24STX6PX1 Dishwasher

RANGEMASTER RDWT6012-I1E Integrated Dishwasher

smeg LVS344PM 60 cm Free Standing Dishwasher

Hotpoint H2I HD526 UK Dishwasher

ARDESTO DWMB-V605 Dishwasher

FRIGIDAIRE FDSR4501AP Panel Ready Dishwasher

FISHER AND PAYKEL DD24STX6PX1 Dish Drawer Dishwasher

FISHER PAYKEL DW60UC2X2 Built-Under Dishwasher

Bauknecht 3O35 PF Dishwasher

Whirlpool RUDXYL Dishwasher