
ARTUSI ADW5008X Dishwasher












EN Dishwasher / User Manual
ADW5008X


| General | Details |
|---|---|
| Name | ARTUSI ADW5008X Dishwasher |
| Make | ARTUSI |
| Language | English |
| Filetype | PDF (Download) |
| File size | 2.07 MB |
 (1 votes, average: 5.00 out of 5)
 Loading...

ARTUSI ADW4001X Dishwasher

ARTUSI ADWFI700 Dishwasher

ARTUSI ADW5001X Dishwasher

ARTUSI ADW5008X Dishwasher Overview
Summary of Contents
- Page 1: Dishwasher user manual for model ADW5008X.
- Page 2: Thank you for choosing this product. This user manual contains important information on safety and instructions intended to assist you in the operation and maintenance of your appliance. Please take the time to read this user manual before using your appliance and keep this book for future reference. WARNING: Serious injury or death risk. RISK OF ELECTRIC SHOCK: Dangerous voltage risk. Warning: Risk of fire / flammable materials. Injury or property damage risk. CAUTION: Important for operating the system correctly.
- Page 3: Safety instructions cover general safety warnings, installation warnings, and usage precautions. Installation section includes machine positioning, water connection, water inlet hose, drain hose, electrical connection, and fitting the machine undercounter. Technical specifications provide general appearance and detailed technical specifications. Before using the appliance, it is important to understand detergent usage, filling the detergent, using combined detergents, rinse-aid usage, and filling the rinse-aid and setting. Loading your dishwasher includes recommendations and alternative basket loads. The programme table outlines the different washing programs available. The control panel section explains changing a programme, cancelling a programme, and switching the machine off. Cleaning and maintenance focus on filters, spray arms, and the drain pump. Troubleshooting offers guidance for resolving common issues.
- Page 4: There may be some residue left in the machine after washing. Keep children away from the machine when it is open. Choose a suitable and safe place to install your machine. Only original spare parts should be used with the machine. Unplug the machine before installation. Your machine must only be installed by an authorised service agent. Installation by anyone other than an authorised agent may cause your warranty to be void. Check that the indoor electrical fuse system is connected in line with safety regulations. All electrical connections must match the values on the plate. Ensure the machine does not stand on the electrical supply cable. Never use an extension cord or a multiple socket connection.
- Page 5: Always use the coated plug supplied with your machine. If the supply cord is damaged, it must be replaced by the manufacturer or qualified persons to avoid a hazard. Connect the hose directly to the water inlet tap. The pressure supplied by the tap should be a minimum of 0.03 MPa and a maximum of 1 MPa. This machine is for domestic use only; do not use it for other purposes. Do not stand, sit or place loads on the open door of the dishwasher. Only use detergents and rinse aids produced specifically for dishwashers. Do not drink water from the machine. Due to the danger of explosion, do not place any chemical dissolving agents into the machine’s washing section. Check the heat-resistance of plastic items before washing them in the machine.
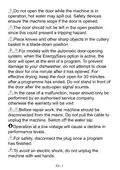
- Page 6: Do not open the door while the machine is in operation, hot water may spill out. Safety devices ensure the machine stops if the door is opened. The door should not be left in the open position since this could present a tripping hazard. Place knives and other sharp objects in the cutlery basket in a blade-down position. For models with the automatic door-opening system, when the EnergySave option is active, the door will open at the end of a program. To prevent damage to your dishwasher, do not attempt to close the door for one minute after it has opened. For effective drying, keep the door open for 30 minutes after a programme has ended. In the case of a malfunction, repair should only be performed by an authorised service company, otherwise the warranty will be void. Before repair work, the machine should be disconnected from the mains. For safety, disconnect the plug once a program has finished.
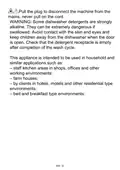
- Page 7: Pull the plug to disconnect the machine from the mains, never pull on the cord. Some dishwasher detergents are strongly alkaline and can be extremely dangerous if swallowed. Avoid contact with the skin and eyes and keep children away from the dishwasher when the door is open. Check that the detergent receptacle is empty after completion of the wash cycle. This appliance is intended to be used in household and similar applications such as staff kitchen areas in shops, offices, and other working environments. It can also be used in farm houses. Clients in hotels, motels, and other residential type environments can use this appliance. It is suitable for bed and breakfast type environments.
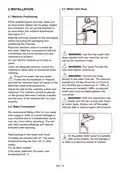
- Page 8: Water inlet hose When positioning the machine, place it in an area where dishes can be easily loaded and unloaded. Do not put the machine in an area where the ambient temperature falls below 0°C. Read all warnings located on the packaging before removing the packaging and positioning the machine. Use the new water inlet hose supplied with your machine, do not use an old machine’s hose. Run water through the new hose before connecting. Connect the hose directly to the water inlet tap. The pressure supplied by the tap should be a minimum of 0.03 MPa and a maximum of 1 MPa. Ensure the water inlet and outlet hoses are not squeezed or trapped. Adjust the feet so the machine is level and balanced. After the connections are made, turn the tap on fully and check for water leaks. We recommend fitting a filter to your water inlet supply in order to prevent damage to your machine due to contamination.
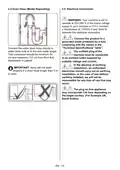
- Page 9: Drain hose (model depending) Electrical connection Your machine is set to operate at 220-240 V. If the mains voltage supply to your machine is 110 V, connect a transformer of 110/220 V and 3000 W between the electrical connection. Connect the product to a grounded outlet protected by a fuse complying with the values in the “Technical Specifications” table. The earthed plug of the machine must be connected to an earthed outlet supplied by suitable voltage and current. Connect the water drain hose directly to the water drain hole or to the sink outlet spigot. This connection should be minimum 50 cm and maximum 110 cm from the floor that the dishwasher is placed. Items will not wash properly if a drain hose longer than 4 m is used. An authorized electrician should carry out an earthing installation. In the case of use without earthing installed, we will not be responsible for any loss of use that may occur. The plug on this appliance may incorporate a 13A fuse depending on the target country.
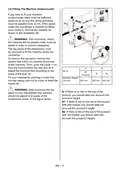
- Page 10: Fitting the machine undercounter requires sufficient space and suitable wiring-plumbing. The countertop must be stable to prevent imbalance. Remove the worktop if the space under the countertop is suitable for fitting the machine. The top panel of the dishwasher must be removed to fit the machine under the countertop. To remove the top panel, unscrew the screws at the rear, push the panel 1 cm from the front towards the rear, and lift it. Adjust the machine feet according to the slope of the floor. Care must be taken not to crush or bend the hoses when pushing the machine under the counter. Consider the product's height when fitting the machine, especially if there is felt on the top. Different height considerations apply depending on whether there is a 2nd or 3rd basket. Ensure the machine is placed in a space that matches the dimensions shown in the figure.
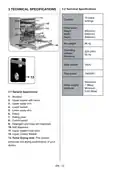
- Page 11: Technical specifications include capacity, dimensions, net weight, operating voltage, and total power. The dimensions are 850 mm in height, 598 mm in width, and 598 mm in depth. The net weight of the unit is 46 kg. Operating voltage is 220-240V with a frequency of 50 Hz. Total current is 10 A and total power is 1900 W. Water supply pressure ranges from a minimum of 0.03 Mpa to a maximum of 1 Mpa. The general appearance includes components such as the worktop, upper basket with racks, and lower basket. Key components also include the upper and lower spray arms, filters, control panel, and dispensers for detergent, rinse-aid, and salt. The upper cutlery basket is part of the design. The Turbo Drying Unit enhances the drying performance of dishes.
- Page 12: Recycling Some machine components and packaging consist of recyclable materials. Plastics are marked with the international abbreviations: (>PE<, >PP<, etc.). The cardboard parts consist of recycled paper. They can be put into waste paper containers for recycling. Material unsuitable for domestic waste must be disposed of at recycling centres. Packaging and the environment Packaging materials protect your machine from damage that may occur during transportation. The packaging materials are environmentally friendly as they are recyclable. The use of recycled material reduces raw material consumption and therefore decreases waste production. Disposal of your old machine The symbol on the product indicates that this product may not be treated as household waste. Instead, it shall be taken to the applicable collection point for the recycling of electrical and electronic equipment.
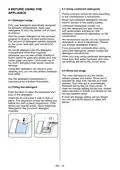
- Page 13: Using combined detergents should follow the manufacturer’s instructions. Never put combined detergents into the interior section or the cutlery basket. Combined detergents contain detergent, rinse-aid, salt replacement substances, and additional components. It is recommended not to use combined detergents in short programmes; powder detergents are preferred. Only use detergents specifically designed for domestic dishwashers. Keep detergents in cool, dry places out of reach of children. The amount of detergent needed depends on the cycle, load size, and soil level of dishes. Rinse aid helps to dry dishes without streaks and stains. If rinse aid dosage setting is too low, whitish stains may remain on dishes. The dispenser should be refilled just before the start of each programme.
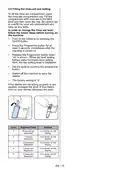
- Page 14: Filling the rinse aid compartment involves opening the cap and filling it to the MAX level before closing it. Care should be taken to avoid overfilling and to wipe up any spills. To change the rinse aid level, turn on the machine and press the Programme button for at least 5 seconds. Release the button when rA is shown. Rinse aid level setting follows the water hardness level setting. The last setting level will be displayed. Set the level by pushing the Programme button and switch off the machine to save the setting. The factory setting is 4. If dishes are not drying properly or are spotted, increase the rinse aid level. If blue stains form on dishes, decrease the level. The rinse aid dose indicators range from r1 to r5, indicating the amount of rinse aid dispensed.
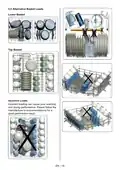
- Page 15: Recommendations for loading your dishwasher include removing coarse residue from dishes before placing them in the machine. Start the machine with a full load for best results. Follow the manufacturer's capacity guidelines to save energy and water. Manual pre-rinsing of tableware is not recommended as it increases water and energy consumption. Place cups, glasses, and small plates in the upper basket, ensuring long glasses are not leaning against each other to avoid damage. Do not overload the drawers or place dishes in the wrong basket. Place long-handle and sharp-pointed knives with their sharp points facing down or horizontally to avoid injuries. Lean long stem glasses against the basket edge and not against other items. Ensure all containers are placed with openings facing downwards to prevent water collection. Use the cutlery grid in the cutlery basket for best results. Place large and very dirty items in the lower rack, ensuring dishes and cutlery are not placed above each other. Take care not to obstruct the rotation of spray arms and ensure dishes do not prevent opening the detergent dispenser.
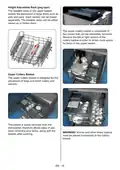
- Page 16: Four folding racks allow easier placement of larger items, such as pots and pans. Each section can be folded separately. The racks can be raised up or folded down. The upper basket includes a mechanism for height adjustment without removing the basket. Hold the basket on both sides to adjust its height. Ensure both sides of the upper basket are in the same position.
- Page 17: Height adjustable rack (peg type) allows for the placement of large items such as pots and pans. Each section of the foldable racks can be raised or folded down separately. The upper cutlery basket is composed of two removable pieces. Removing sections of the cutlery basket provides more space for items in the upper basket. The upper cutlery basket is designed for large and small cutlery and utensils. The basket is easily removable for convenience when unloading. Knives and other sharp objects must be placed horizontally in the cutlery basket.
- Page 18: Alternative basket loads Lower basket Top basket Incorrect loading can cause poor washing and drying performance. Please follow the manufacturer’s recommendations for a good performance result.
- Page 19: Programme table outlines various washing programs and their descriptions. Fastest program is for lightly soiled and recently used dishes, suitable for 4 place settings. Mini 14’ program lasts 14 minutes. Quick 30’ program is suitable for lightly soiled dishes and offers a quick wash. Economic 50°C is a standard program for normally soiled daily dishes with reduced energy and water consumption. Dual Pro Wash 60°C is suitable for both delicate glassware and heavily soiled crockery. Super 50’ program is for lightly soiled daily dishes with a faster wash. Smart programs adjust based on the soil level of dishes, ranging from 30°C to 70°C. Auto programs are available for both lightly and heavily soiled dishes. Programme duration may change based on various factors, including the amount of dishes and selected functions.
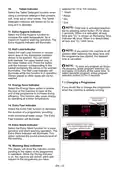
- Page 20: Delay button allows you to delay the start time of the program for 1-24 hours. The delay indicator will be on when the delay button is pressed. To change the delay time, press the Start/Pause button and then the delay button. To activate the new delay time, press the Start/Pause button again. To cancel the delay, switch to 0 hour while the machine is paused. The Remaining Time Indicator shows the programme duration and remaining time during the programme flow. Press the Start/Pause button to start the programme, which turns on the wash lamp. Options can be selected by pressing the Options button repeatedly, indicated by a blinking LED. Child lock is activated by pressing the Select button for about 3 seconds, with indicators for activation and deactivation. When the rinse aid level is low, the rinse aid warning indicator turns on, signaling the need to fill the rinse aid chamber.
- Page 21: Tablet indicator selected for 15 to 100 minutes. Select the tablet detergent function when using a combined detergent that contains salt, rinse aid or other extras. Child lock is activated/deactivated by pressing the select button for about 3 seconds. Select the Extra Hygiene function to increase the wash temperature for maximum hygiene washing operation. Select the Half Load function to choose which area of the dishwasher contains dishes to be washed. To save any program as a favorite program, press program selection and delay buttons at the same time. Select the Energy Save option to enable the door of the machine to open at the end of the program to increase drying efficiency. Select the Extra Fast function to decrease the duration of a program, providing more economical water usage. Select the Extra Silent function for a more sensitive and silent washing operation. The display will show the indicator corresponding to the status of the program in operation.
- Page 22: At the end of washing program, you can leave the door of your machine ajar to hasten the drying. If the door of the machine is opened or power is cut off during washing, the programme will continue when the door is closed or the power is restored. To cancel a programme when it is running, buzzer sounds 5 times at 5 minutes intervals. To change the buzzer sound level, open the door and press Option and Select buttons at the same time for 3 seconds. When sound setting is recognized, the buzzer gives a long sound and the machine will display the last set level. To decrease sound level press Select button. To increase sound level, press Options button. During cancellation, the End light blinks and the machine discharges the water inside it in about 30 seconds. To activate or deactivate save power mode, open the door and press Program and Option buttons at the same time for 3 seconds. When Save Power Mode is activated, interior lights will turn off 2 minutes after the door is opened. In factory setting, Save Power Mode is active.
- Page 23: Natural Ion Tech (Model Depending) This function provides extra hygiene to the machine thanks to Ion Technology. It operates as an independent program. This function is activated by pressing Options button for 3 seconds in ready state. At the end of 3 seconds, “Ion” will be displayed which indicates that Natural Ion Tech function is activated. If there is no intervention by user, 24 hours after activation of Natural Ion Tech function, it is automatically cancelled. If machine is turned off, Natural Ion Tech function is cancelled. Natural Ion Tech function does not work with any program. Crystalight (Model Depending) This technology which have Ion and Light Technology together, provides extra hygiene. It prevents bad odor during a washing program that includes a drying step. Crystalight function is activated or deactivated before starting program by pressing Options button for 6 seconds.
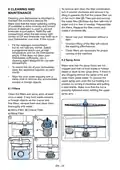
- Page 24: To remove and clean the filter combination, turn it counterclockwise and remove it by lifting it upwards. Rinse the filter with lots of water until it is free of residue. Reassemble the filters and replace the filter insert. Cleaning your dishwasher is important to maintain the machine’s service life. Make sure that the water softening setting is done correctly and the correct amount of detergent is used to prevent limescale accumulation. Never use your dishwasher without a filter. Incorrect fitting of the filter will reduce the washing effectiveness. Clean filters are necessary for proper running of the machine. Make sure that the spray holes are not clogged and that no food waste or foreign object is stuck to the spray arms. To extend the life of your dishwasher, clean the appliance regularly each month. Wipe the door seals regularly with a damp cloth to remove any accumulated residue or foreign objects. Clean the filters and spray arms at least once a week.
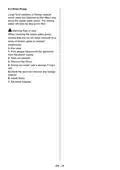
- Page 25: Drain pump may be blocked by large food residues or foreign objects not captured by the filters. Rinsing water will be above the filter if the pump is blocked. Warning: Risk of cuts when cleaning the waste water pump. Ensure you do not injure yourself on pieces of broken glass or pointed implements. First, always disconnect the appliance from the power supply. Take out baskets and remove the filters. Scoop out water and use a sponge if required. Check the area and remove any foreign objects. Install filters and re-insert baskets.
- Page 26: Troubleshooting Possible causes for issues with the dishwasher include being unplugged or switched off. Check indoor fuses if the fuse is blown. Ensure the water inlet tap is turned on and the dishwasher door is closed. If the program does not start, check for a closed water inlet tap or an open dishwasher door. Clogged water inlet hose and machine filters can prevent operation. Water remaining inside the machine may indicate clogged filters or an unfinished program. A machine stopping during washing could be due to a water inlet failure. Shaking and hitting noises during operation may result from the spray arm hitting dishes. Dishes should be placed correctly to ensure proper cleaning and avoid overloading baskets. Use the correct amount of detergent and select the appropriate wash program to avoid food waste on dishes.
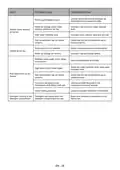
- Page 27: Fault possible causes and troubleshooting tips are provided for common dishwasher issues. Use the correct amount of detergent as instructed in the programme table. Not enough detergent used can lead to poor cleaning results. Increase rinse aid and/or water softener settings if dishes are not drying properly. Whitish stains on dishes may indicate high water hardness levels. Check that the salt compartment cap is closed properly to avoid rust stains. Select a programme with a drying option if dishes do not dry. Use only dishwasher-proof sets to prevent damage to dishes. Adjust the water hardness level using the water hardness table for optimal performance. Consult a qualified electrician immediately for poor mains grounding issues. Ensure the detergent compartment is dry before adding detergent to avoid clogs.
- Page 28: Automatic fault warnings and what to do Water inlet system failure: Make sure the water inlet tap is open and water is flowing. Separate the inlet hose from the tap and clean the filter of the hose. Contact for service if the error continues. Pressure system failure: Close the tap and contact for service. Inability to discharge water: Water discharge hose and filters may be clogged. Cancel the program. If the error continues, contact for service. Heater error: Unplug the machine and close the tap. Contact for service. Faulty electronic card: Contact for service. The installation and repairing procedures should always be carried out by the Authorised Service Agent to avoid possible risks. Improper repairs or use of non-original spare parts may cause considerable damage and put the user at considerable risk. Function-relevant genuine spare parts can be obtained from Customer Service for a period of at least 10 years from the date on which your appliance was placed on the market within the European Economic Area.
- Page 29: Page 29

SIEMENS SN23EW14AE Dishwasher

INVENTUM VVW6035AW Dishwasher

FISHER AND PAYKEL DD24SAX9 N Dishwasher

BOSCH SMV6EMX75Q Dishwasher

BOSCH SHV53CM3N 300 Series Full Dishwasher

FISHER PAYKEL DD24SCTB9N Dishwasher

ASKO DFI777UXXL Dishwasher

BOSCH SMV2HVX02E-01 Dishwasher

BOSCH SMS6TCW00E Dishwasher

Maidaid Halcyon AMH51 Amika Drain Pump Dishwasher