
LG LDT779 Dishwasher





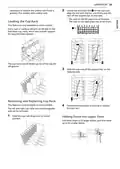


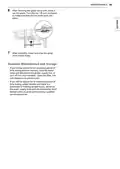


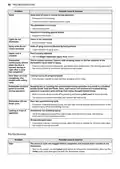


















Scan to see the online manual.
OWNER'S MANUAL
DISHWASHER
Read this owner's manual thoroughly before operating the
appliance and keep it handy for reference at all times.
ENGLISH
LDT779#** LDP679#** LDP567#** LDT566#** LDPN676**
www.lg.com
MFL71917404
Rev.01_072222
Copyright © 2022 LG Electronics Inc. All Rights Reserved.


| General | Details |
|---|---|
| Name | LG LDT779 Dishwasher |
| Make | LG |
| Language | English |
| Filetype | PDF (Download) |
| File size | 9.47 MB |
 (1 votes, average: 5.00 out of 5)
 Loading...

LG LDTH7972SS Black Dishwasher

LG SDWB24S3 STUDIO Smart Dishwasher

LG LDTH7972D Smart Tub Dishwasher

LG LDPH7972D Smart Dishwasher

LG XD3A25UMB 15 Place QuadWash Dishwasher

LG LDT7808BD Dishwasher

LG LDFN4542S Dishwasher

LG DFB424 Dishwasher

LG LDTS5552D PrintProof Black Dishwasher

LG LDPH7972S Smart Dishwasher

LG LDT779 Dishwasher Overview
Summary of Contents
- Page 1: Owner's manual Dishwasher Read this owner's manual thoroughly before operating the appliance and keep it handy for reference at all times.
- Page 2: Important safety instructions should be read before use. Warning and caution statements are included for user safety. The product overview section highlights key features. Installation guidelines cover preparation steps for cabinet openings and connections. Final installation checks ensure proper setup of the dishwasher. Operation instructions detail usage before starting. The control panel section explains its functions. Wash cycles and options are outlined for user convenience. Loading instructions provide guidance for different racks and baskets. Maintenance and troubleshooting tips are provided to assist users.
- Page 3: IMPORTANT SAFETY INSTRUCTIONS READ ALL INSTRUCTIONS BEFORE USE Your safety and the safety of others are very important. This is the safety alert symbol. WARNING: You may be killed or seriously injured if you do not follow instructions. CAUTION: You may be injured or cause damage to the product if you do not follow instructions. All safety messages will tell you what the potential hazard is, how to reduce the chance of injury, and what may happen if the instructions are not followed. To reduce the risk of explosion, fire, death, electric shock, scalding or injury to persons when using this product, follow basic precautions. The appliance must be installed and electrically grounded by qualified service personnel in accordance with local codes. Keep packing materials out of the reach of children. Packaging material can be dangerous for children. Moving or installation of the appliance requires two or more people.
- Page 4: IMPORTANT SAFETY INSTRUCTIONS When installing or moving the appliance, be careful not to pinch, crush, or damage the power supply line. Do not install the appliance in humid spaces. Destroy the carton, plastic bag, and other packing materials after the appliance is unpacked. Never attempt to operate this appliance if it is damaged, malfunctioning, partially disassembled, or has missing or broken parts. Use new hoses when connecting the appliance to the water supply. Do not reuse old hoses. If you detect a strange sound, a chemical or burning smell, or smoke coming from the appliance, unplug it immediately. Do not use an extension cable or adapter with this appliance. This appliance is not intended for use by persons with reduced physical, sensory or mental capabilities unless supervised. Read all instructions before using the appliance and save these instructions. In the event of a gas leak, do not operate this or any other appliance.
- Page 5: IMPORTANT SAFETY INSTRUCTIONS Fix the drain hose securely in place. Use only detergents or wetting agents recommended for use in a dishwasher and keep them out of the reach of children. Do not let children eat detergent or dishwasher rinse agent. Do not wash plastic items unless they are marked dishwasher safe or the equivalent. Do not touch the heating element during or immediately after use. Do not operate your dishwasher unless all enclosure panels are properly in place. Do not open the appliance door while it is operating. Do not plug the dishwasher into a damaged outlet. Do not repair or replace any part of the appliance. All repairs and servicing must be performed by qualified service personnel. For a permanently connected dishwasher, this appliance must be connected to a grounded metal, permanent wiring system.
- Page 6: IMPORTANT SAFETY INSTRUCTIONS Tip over hazard Do not use the dishwasher until completely installed. Do not push down on the open dishwasher door. Failure to follow these instructions may result in serious injury or cuts. CAUTION STATEMENTS To reduce the risk of minor or moderate injury to persons, malfunction, or damage to the product or property when using this product, follow basic precautions. Install the product on a firm and level floor. This dishwasher must be connected to a hot water supply with a temperature range between 120 °F (49 °C) and 149 °F (65 °C). Do not put the drain hose under the dishwasher during installation. Do not place objects on top of the appliance. Turn off the water faucets and unplug the appliance if the appliance is to be left for an extended period of time. Do not store or spill liquid detergents, cleaners, or bleaches on the appliance.
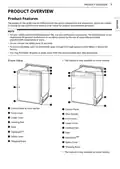
- Page 7: Product overview The images in this guide may be different from the actual components and accessories, which are subject to change by the manufacturer without prior notice for product improvement purposes. For your safety and for extended product life, use only authorized components. The manufacturer is not responsible for product malfunction or accidents caused by the use of separately purchased unauthorized components or parts. Do not remove the safety cover at any time. To ensure reliability, each LG dishwasher goes through thorough quality control before it leaves the factory. You may find water droplets or water spots from this process inside your new dishwasher. This feature is only available on some models.
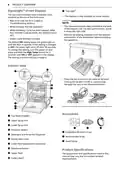
- Page 8: Product overview SignaLight™ (Front Display) The top-control models have 3 indicator LEDs centered at the top of the front cover. Red: Error (See the Error Codes in Troubleshooting section.) The silverware basket ships installed at the back of the bottom rack. For best performance, install it along the right side. White (steady): Normal operation. White (blinking): Cycle has been paused. (After four minutes in pause mode, the machine turns off.) Green: Cycle finished normally. To change the setting, turn the power on and press and hold the High Temp button for 3 seconds until ON or OFF appears in the display. Press the tab to remove the cable tie by hand. The appearance and specifications listed in this manual may vary due to constant product improvements.
- Page 9: Product overview includes various models such as LDT779, LDP679, LDP567, LDT566, and LDPN676. Electrical requirements specify 120 V, 60 Hz AC only, with a 15 A circuit breaker. Water pressure should be maintained between 20 psi and 80 psi (140 kPa - 550 kPa). Dimensions are 23 3/4” X 24 5/8” X 33 5/8” (603 mm X 625 mm X 854 mm). Inlet water temperature should range from 120 ℉ to 149 ℉ (49 ℃ to 65 ℃). Net weight varies from 72 lbs. to 89 lbs. (33 kg to 40 kg).
- Page 10: Installation Before installing Online installation guide This QR code is for reference only, for complete installation instructions, see the owner's manual supplied with each dishwasher. Electrical cable: 16 AWG, with 2 conductors and 1 ground Water supply tube: Minimum 3/8″ O.D. copper tubing or stainless steel braided water supply line Tools needed Warning This guide is strictly confidential and shall not be copied, disclosed, distributed, disseminated, publicized or reproduced, in whole or in part, without the prior written authorization of LG Electronics. Parts not provided
- Page 11: Installation Securing dishwasher in cabinet opening Final installation check Product dimensions For easiest installation, see marked areas for water and electrical clearances in base of dishwasher. Installation overview Please read the following installation instructions first after purchasing this dishwasher or transporting it to another location. Preparing cabinet opening This dishwasher is designed to fit a standard dishwasher opening. An opening may be needed on both sides to route plumbing and electrical connections. Leveling dishwasher
- Page 12: Installation To ensure proper drainage, install the dishwasher no more than 12 ft. (3.65 m) from the sink. Installation damage is not covered by the warranty, and leaks caused by improper installation may result in property damage. The location must have sufficient space for the dishwasher door to open easily and provide at least 0.1” (2 mm) between the dishwasher and the cabinet sides. If installing the dishwasher in a corner, leave a minimum of 2” (50 mm) between the dishwasher and the adjacent wall. Failure to properly locate the hole for the water and drain lines may prevent the dishwasher from installing flush with the cabinets. Select a location as close to the sink as possible for easy connections to water supply line, drain hose and electrical connection. Do not reuse an old hose. Use only a new hose when installing the dishwasher. Use a time-delay fuse or circuit breaker for the electrical connection. The wiring must be grounded properly. If in doubt, have it checked by a qualified electrician. Do not use an extension cable or adapter with this dishwasher.
- Page 13: Installation It is the personal responsibility and obligation of the product owner to have a proper outlet installed by a qualified electrician. Run the electrical cable along the floor 14 – 16 (356 mm – 406 mm) from the water supply line and tape it in place. The electrical outlet must be within 4 ft. (1.22 m) of either side of the dishwasher. The best location for the electrical conduit is on the right side of the back wall. When connecting the dishwasher water supply line to the house water supply, sealing tape or compound should be used on pipe threads to avoid leaks. Connect the dishwasher to a hot water supply with a temperature range between 120 °F (49 °C) and 149 °F (65 °C). Water supply pressure must be between 20 psi and 80 psi (140–550 kPa). There are 2 channels in the bottom of the dishwasher for routing the water and electrical connections. Do not remove safety cover. Removal can result in fire, electric shock or death. Turn off the house water supply and the circuit breaker or dedicated power before connecting the dishwasher.
- Page 14: Installation The rear shipping brace can be removed if additional clearance is needed when installing the dishwasher under a low countertop. Remove all packing materials from the interior of the dishwasher before installing the appliance. For countertops made of wood or other materials that will not be damaged by drilling, use the metal installation brackets provided. If you lay the dishwasher on its back, do so carefully to avoid damaging the drain hose and the tub. For countertops made of granite, marble, or other materials that could be damaged by drilling, use the wood screws to attach the dishwasher to the cabinet. Installation brackets and screws can be found in the silverware basket. Insert the tabbed end of the installation brackets into the slots in the upper frame. Remove the lower cover. If there is insulation padding behind the lower cover, remove it. Bend the tabs on the brackets to secure them to the frame using a pair of needle nose pliers.
- Page 15: Installation instructions for the dishwasher include important notes on handling and positioning. Open the door and grab the body frame and top front opening of the tub to move or lift the dishwasher. Align the dishwasher with the opening, ensuring the water supply line and electrical cable are positioned correctly. Do not pull or lift the dishwasher using the handle, as this can damage the door and hinges. Avoid pushing the door of the dishwasher with knees when sliding it into position to prevent damage to the front cover. Smooth out or pad the edges of the hole drilled for the water supply to avoid damaging the drain hose. Ensure the drain hose is straight before feeding it through the hole for the water supply. As you slide the dishwasher into the opening, slowly pull on the drain hose from inside the cabinet to take up slack. Be careful not to kink, pinch, crush, or stress the drain hose during installation to avoid leaking and water damage. Do not push the top of the dishwasher, as this can damage the interior.
- Page 16: Installation Gradually slide the dishwasher into the opening, ensuring that the water supply line and electrical cable are passing freely. Connecting water supply line and power With the home water supply turned off, connect the water supply line to the inlet valve on the left front of the dishwasher. To avoid malfunctions or leakage, ensure the drain hose is not kinked, pinched, stressed, or crushed. Damage resulting from improper installation is not covered under the warranty. Tape or compound should not be used on the dishwasher inlet valve. As you slide the dishwasher into the opening, periodically stop to take up the slack by pulling the drain hose farther into the cabinet. Tighten the compression nut. The dishwasher should have a dedicated properly grounded branch circuit for the 3 wire setup. If a 3-prong power supply is used, it should be in an accessible location adjacent to the dishwasher. The best location for the electrical conduit is on the right side of the back wall.
- Page 17: Installation instructions include turning off electrical power to the unit at the circuit breaker. Remove the screw from the junction box cover and take off the cover. Insert the electrical cable through the hole in the strain relief and tighten screws to secure the cable. Pull the existing wires through the openings in the junction box and reassemble it in the appliance. Remove the junction box from the appliance. Pair the white, black, and green wires to the matching colored wires from the dishwasher. Twist on the provided wire nuts tightly to connect the corresponding wires. Insert a strain relief through the hole in the junction box and tighten the ring nut to secure it in place.
- Page 18: Installation Wrap electrical tape around each connection. Do not connect drain hoses from other appliances to the dishwasher’s drain hose. If an extension drain hose is required, use a 5/8 or 7/8 inside diameter, 2-3 ft. length hose and a coupler for connecting the two hose ends. The height of the drain hose end must be at least 12 (305 mm) and within 40 (1016 mm) from the base of the dishwasher to avoid water being siphoned from the tub. Verify that the black wire is hot (120 V). If not, or if you are unsure of the power supply, have it checked by a licensed electrician. Do not leave stripped wire exposed. Trim stripped wire to fit completely inside wire nuts. If the end of the drain hose does not fit the drain line, use a heat and detergent resistant adapter. For drain hose installation, use the screw style hose clamp provided with this dishwasher in the silverware basket. If the knockout plug has not been removed, the dishwasher will not be able to drain properly. Follow local codes and ordinances. Do not exceed 12 ft. (3.65 m) distance to drain.
- Page 19: Installation Connecting to disposal or waste Attach the drain hose to the disposal with the hose clamp provided. Remove the knockout plug with a hammer and screwdriver. Connect the end of the drain hose to the air gap with the hose clamp provided. This avoids water being siphoned from the tub. The height of the drain hose end must be at least 12” (305 mm) and within 40” (1016 mm) from the base of the dishwasher. If the knockout plug has not been removed, the dishwasher will not be able to drain properly. Check that the dishwasher is level and adjust the leveling feet if necessary. Failure to level the dishwasher may result in leakage, problems closing the door, or noise. The dishwasher must be carefully leveled and aligned to avoid leaks and operational issues.
- Page 20: Installation Turn the front leveling feet clockwise to raise the front of the tub and counterclockwise to lower it. To check that the tub is level from front to back, remove the lower rack and pour 169 oz. (5 L) of water into the bottom of the tub. The water level should be near the center of both tub lower indentations at the front. When a flat-blade screwdriver is unavailable, use a 1/4 square drive wrench or 3/8 square drive wrench with 1/2 socket to turn the front leveling feet. With the lower rack removed, place a level on the inside wall of the tub to check that the dishwasher is level from side to side. Use a Phillips screwdriver to adjust the rear leveling foot and the rear of the tub using the center screw at the base of the appliance in the front. Make sure that the gap between the tub walls and the door liner is the same on either side. Adjust as needed until the dishwasher is completely leveled. Adjust the front and rear leveling feet until they are all in firm contact with the floor. Failure to level the dishwasher may prevent the door from closing properly and the dishwasher will not turn on.
- Page 21: Installation instructions for securing the dishwasher to the countertop or cabinet frame are provided. Ensure the dishwasher is level and all leveling feet are in firm contact with the floor before attaching it. If the dishwasher is not leveled properly, the door may not close properly or water may leak. Installation brackets and screws can be found in the silverware basket. Turn on the circuit breaker and house water supply before testing the dishwasher. Check if the door opens and closes smoothly. Use the bracket screws provided to secure the brackets at the top of the dishwasher to the underside of the wood countertop. If necessary, level the dishwasher again and ensure all packaging materials have been removed. Power on the dishwasher and run a Turbo cycle to verify proper operation. Check for leaks at the drain hose and water supply connection.
- Page 22: Installation If a water leak is detected, press and hold the Start button for 3 seconds to cancel the wash cycle and automatically drain the water from the dishwasher. Tighten all water connections and run another cycle. Repeat until no leaks are detected. Error Code IE: Water supply line is kinked under the dishwasher. Feed the drain and water supply hoses through the hole under the sink to avoid kinking the hoses. House water supply is not turned on. Only install the lower cover provided with the dishwasher. Remove the protective film from the door, if present. Installation Check Error Codes: Refer to the chart below before calling for service. Error Code OE: Drain hose is kinked or pinched. Waste tee or disposal is clogged.
- Page 23: Operation Before using the appliance, read the safety instructions to reduce the risk of fire, electric shock, or injury. Connect to the hot water supply only, with a minimum temperature of 120 °F for better washing performance. Follow the loading instructions to ensure effective cleaning and remove insoluble items before loading. Select the cycle and options that best fit the load by referring to the Cycle Guide. Load the dishes by pulling each rack out and ensuring only dishwasher-safe items are loaded. Scrape dishes free of excess food and remove solid, burned-on scraps prior to loading. To operate the dishwasher, press the Start button and close the door within four seconds. Add the recommended amount of detergent to the detergent cup and close the lid. Check the rinse aid level; the Rinse Aid icon will flash if low. When the cycle is complete, a chime will sound, and the display will show ENd until the door is opened or Power is pressed.
- Page 24: Operation The dishwasher will chime continuously if you open it during operation or just after the cycle ends. The chiming indicates that the interior temperatures of the unit are hot. Caution: Do not open the door during operation or immediately after the wash cycle. Escaping steam may cause scalding when the door is opened. Note: Empty the lower rack first to avoid water dripping from the upper rack. The dishwasher automatically turns off after four minutes of inactivity.
- Page 25: Operation Control panel features Power on/off button Press this button to turn the washer on or off. After the cycle is complete, the power automatically turns off for purposes of safety and economy. If there is a power surge, power outage, or disruption of any kind, power is automatically turned off for safety. When power is connected again, the dishwasher will turn on automatically and resume the cycle. Display Rinse aid icon illuminates when the rinse aid level is low. The digital display shows the estimated cycle time. During operation, the display shows the remaining estimated operating time.
- Page 26: Operation Cycle time may vary depending on the soil level of your load. Control Lock feature helps prevent settings from being changed during a cycle. Selecting Control Lock locks all buttons except for the Power button. To activate or deactivate Control Lock, press and hold Half Load and Energy Saver simultaneously for three seconds. When the appliance is connected to the internet, the Wi-Fi icon illuminates. Press and hold Delay Start for approximately three seconds to connect to the network. Night Dry indicator lights up when Night Dry is selected. To activate or deactivate button sounds, press and hold Dual Zone and Energy Saver simultaneously for three seconds. The drain pump activates and the cycle cancels when the Cancel Button is pressed. Use the Delicate Wash Cycle to clean delicate items such as fine china and stemware.
- Page 27: Operation Turbo This cycle will clean heavily soiled dishes in an hour using slightly more energy and water. This cycle does not have drying. Select the Extra Dry and Night Dry option or another cycle for better drying. Dual Zone This option automatically sets the spray intensity to soft for the upper spray arm and strong for the lower spray arm. Download Cycle Use a dedicated cycle downloadable via Wi-Fi or NFC. Half Load This option washes intensively by selecting the upper or lower racks. Machine Clean This cycle is for cleaning the inside of the dishwasher. Energy Saver This option saves energy by reducing the wash and rinse temperatures. High Temp Raises the main wash temperature to improve cleaning. Rinse This cycle is a quick rinse for dishes that will not be washed immediately.
- Page 28: Operation Night Dry option helps vent steam from the tub, preventing dishes from getting wet after overnight cycles. The high temperature rinse sanitizes dishes and glassware according to NSF/ANSI Standard 184 for residential dishwashers. Certified residential dishwashers are not intended for use in licensed food establishments. Only sanitizing cycles are designed to meet requirements for soil removal and sanitization efficacy. The Night Dry option is selected by default for all cycles except the Normal cycle. Extra Dry option enhances drying performance by adding extra drying time and raising the heated rinse temperature. Delay Start feature allows delaying the start of a selected cycle from 1 to 12 hours in one-hour increments. When the rinse aid is empty, the Extra Dry option is selected automatically. The cycle guide shows available options for each cycle, including Auto, Heavy, Delicate, Light, and Normal. Actual water consumption will vary depending on soil level and hardness of water.
- Page 29: Operation The actual running time and cycle time displayed may change depending on options chosen, soil level, water temperature, and hardness of water. Energy Saver cannot be used at the same time as Extra Dry or High Temp. Options are not available for Download Cycle. The extra tall tub allows loading of dishes, pans, or other utensils up to 14 high. For effective washing performance, always follow these instructions. Remove large particles of food debris from plates including bones before loading. Items with burnt on food should be soaked prior to loading in the dishwasher. The combination of high water temperature and dishwasher detergents may damage certain items. Do not wash deep pots or dishes upside down. Avoid washing copper or anodized aluminum items in the dishwasher.
- Page 30: Operation Hand painted silver or gold leaf china Wood or bone handled utensils Iron or non-rustproof utensils Plastic items which are not dishwasher safe Sterling silver or gold-plated flatware or delicate metal-rimmed china Fragile items such as crystal glasses Caution: Do not place pots or pans with plastic handles in the appliance as the handles may deteriorate due to the heat and detergent. Silverware loading tips: For best cleaning results, use the top separators in the basket when loading silverware. Load sharp items, such as knives, pointing down. Be careful when loading and unloading sharp items. Load sharp knives with the handles up to reduce the risk of personal injury.
- Page 31: Operation Loading 12 place settings Lower rack loading tips: - Plates should be positioned upright and facing the center of the rack, and pots, pans, and large dishes must be turned upside down. - Load dinner plates, dishes, soup bowls, etc. between the tines. - Load cookie sheets, cake pans, and other large items at the sides or back of the rack. - Make sure that pot handles and other large items do not stop the rotation of the spray arms. - The lower rack should not be used for small items such as cups, wine glasses, or small plates. - Make sure that large items do not interfere with the rotation of the spray arms and do not prevent the detergent dispenser from opening. Loading pots and bowls Folding down the lower tines
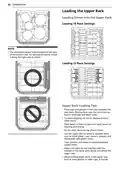
- Page 32: Operation Loading the upper rack Loading dishes into the upper rack Loading 10 place settings The silverware basket ships installed at the back of the bottom rack. For best performance, install it along the right side as shown. Upper rack loading tips: Place cups and glasses in the rows between the rack tines. Placing them over the rack tines can lead to breakage and water spots. To avoid chipping, do not let stemware touch other items. Place items so that the open end faces down for cleaning and drying. Do not stack items on top of each other. Use the upper rack for small or delicate items such as small plates, cups, saucers, glasses, and dishwasher-safe plastic items.
- Page 33: Operation It is necessary to remove the cutlery rack if one is present. Locate the assembly slot on the cup rack, align the slot with the bar, and firmly pop the rack off the support bar on that side. The rack on the left pops free at the back. The rack on the right pops free at the front. Extra cups or cooking utensils can be laid on the fold down cup racks, which also provide support for long-stemmed glasses. The cup racks can be folded up out of the way for tall glasses. Follow the instructions in reverse to replace the cup rack. The left and right cup racks are interchangeable and can be removed. Slide the cup rack down into its closed position. Fold tines down to fit larger dishes; pull tines back up to fit smaller dishes.
- Page 34: Operation Loading dishes & pots Height adjustable upper rack The upper rack adjusts up and down. Raise the upper rack to allow items up to 14 tall in the lower rack. Lower the upper rack to allow dishes up to 12 tall in the upper rack. There are three available positions for adjusting the height of the upper rack. Before adjusting, ensure the rack is empty of all dishes. Raise the upper rack without pushing the buttons on each side. To set the rack to the middle position, it may be easier to lower the rack all the way down.
- Page 35: Operation Raising the rack involves lifting it at the center of each side until it locks into place in the upper position. To replace the rack, place the back rack supports behind the rear hooks and pull the rack forward to snap the supports into the hooks. Removing the snap-in gliding upper rack should only be done for servicing. The cutlery rack is best suited for flatware, with separators to keep items separated and improve cleaning. For best cleaning performance, place flatware in the silverware baskets. Heavily soiled utensils should be placed in the middle rack or spoon basket for optimal performance. To remove the front rack supports, push the front hooks open with a flat-blade screwdriver while pulling the front of the rack up. To remove the back rack supports, hold a side rail with one hand, lift the front of the rack, and push the rack firmly.
- Page 36: Operation Loading 10 place settings Removing the cutlery rack can create more space on the upper rack for larger items. Always remove cutlery before taking out the rack. Be careful when loading and unloading items with sharp edges. Load sharp knives with the blade down to reduce the risk of injury. Do not place bowls in the center of the cutlery rack, as this may prevent the door from closing properly and result in leakage. Adding cleaning products Remove the label on the detergent dispenser before running the dishwasher for the first time. The amount of detergent needed depends on the cycle, load size, and soil level of dishes. Put detergent into the detergent compartment before starting any cycle, except the rinse cycle. Height adjustable tray The tray on the left side can be adjusted to accommodate utensils or cutlery of different sizes. Remove dishes before adjusting the tray. Use only detergent intended for dishwashers, as incorrect detergent may cause excessive suds and reduce wash performance.
- Page 37: Operation To avoid damaging the dispenser, do not pull up on the dispenser to close the dishwasher door. Add dishwashing detergent to the main wash compartment until the level is between the lines marked 15 and 25. Fill to over the 25 line for hard water or heavily soiled loads. Fill to the 15 line for soft water or lightly soiled loads. After completion of the wash program, check whether the detergent was completely washed out. Slide the detergent lid closed until it clicks. Some dishwasher detergent tablets may become stuck in the dispenser due to their excessive size. Using liquid rinse aid improves drying performance by allowing water to drain off of dishes after the final rinse. Do not use detergent tablets for shorter wash cycles. The use of rinse aid is recommended to prevent water spots on dishes and to enhance drying performance.
- Page 38: Operation Adjust the setting higher if you have hard water and notice calcium buildup on your dishes. Setting the rinse aid control too low will contribute to spotting and streaking on dishes and poor drying performance. Setting the control too high can cause foaming, which will cause poor wash performance. Ensure the appliance is off. Press Dual Zone and Power simultaneously to check the current setting. Add a liquid rinse aid to the maximum fill level. Press Delay Start to change the rinse aid dispenser setting. The Rinse Aid e icon flashes when more rinse aid is needed. Close the lid to lock the dispenser. The dispenser has five adjustment levels.
- Page 39: SMART FUNCTIONS The LG ThinQ application allows you to communicate with the appliance using a smartphone. Before using LG ThinQ application, check the current status, cycle, options, running time, and cycle end time for the appliance on a single screen. Check the distance between the appliance and the wireless router to ensure a strong signal. You can download new and specialized cycles that are not included in the standard cycles on the appliance. Only one downloaded cycle can be stored on the appliance at a time. This function shows how many cycles remain before running the Machine Clean cycle. Smart Diagnosis provides useful information for diagnosing and solving issues with the appliance based on the pattern of use. The appliance supports 2.4 GHz Wi-Fi networks only. Turn on the Push Alerts to receive appliance status notifications. If the appliance is having trouble connecting to the Wi-Fi network, it may be too far from the router.
- Page 40: Smart functions The surrounding wireless environment can make the wireless network service run slowly. Reorient or relocate the receiving antenna. If the appliance cannot be connected due to problems with the wireless signal transmission, unplug the appliance and wait about a minute before trying again. Increase the separation between the equipment and the receiver. If the firewall on your wireless router is enabled, disable the firewall or add an exception to it. The wireless network name (SSID) should be a combination of English letters and numbers. This device complies with part 15 of the FCC Rules. This equipment complies with FCC radiation exposure limits set forth for an uncontrolled environment. This equipment has been tested and found to comply with the limits for a Class B digital device. To obtain the source code that is contained in this product, please visit the open source website.
- Page 41: Smart functions This offer is valid to anyone in receipt of this information for a period of three years after our last shipment of this product. Press and hold the Download Cycle button for 3 seconds or longer while holding the smartphone mouthpiece to the logo until the data transfer is complete. Keep the smartphone in place until the data transfer has finished. Time remaining for data transfer is displayed. Smart diagnosis function Use this feature to help you diagnose and solve problems with your appliance. After the data transfer is complete, the diagnosis will be displayed in the application. For reasons not attributable to LGE’s negligence, the service may not operate due to external factors such as Wi-Fi unavailability or app unavailability. For best results, do not move the smartphone while the tones are being transmitted. Using LG ThinQ to diagnose issues If you experience a problem with your Wi-Fi equipped appliance, it can transmit troubleshooting data to a smartphone using the LG ThinQ application. Launch the LG ThinQ application and select the Smart Diagnosis feature in the menu. Follow the instructions provided in the LG ThinQ application. Using audible diagnosis to diagnose issues Follow the instructions below to use the audible diagnosis method.
- Page 42: Maintenance To maintain performance and prevent trouble, it is important to check the outside and inside of the dishwasher, including filters and spray arms, at regular intervals. When cleaning the outside and inside of the dishwasher, do not use benzene or thinner. To prevent injury during care and maintenance or cleaning, wear gloves and/or protective clothing. Do not use scrub pads or abrasive cleaners on the exterior of the dishwasher. Add 3 tbsp. (40 g) of citric acid to the detergent dispenser or follow the manufacturer’s instructions if using a dishwasher cleaning agent. Run the Machine Clean cycle once a month, or more often if needed, to remove detergent buildup and other residue. If cooking oil is spilled on the exterior of the product, wipe it off immediately. Clean the interior of the dishwasher periodically with a soft, damp cloth or sponge to remove food and dirt particles. Check the drain air gap or in-sink disposal if the dishwasher is not draining well. Run an empty cycle, without detergent, with one cup of white vinegar in a dishwasher safe glass or bowl placed on the upper rack to remove white spots and odor from inside the dishwasher.
- Page 43: Maintenance Clean the filters using non-abrasive materials and warm running water. Cleaning the air gap involves turning off the dishwasher, removing the lower rack, and positioning the bottom spray arm. Remove the air gap cover and the plastic cap underneath it. Check the sump opening and remove any foreign materials if needed. Clean out any debris with a toothpick or brush. Clean the filters with a soft brush under running water and reassemble them before reinstalling. Be cautious of sharp edges when handling the stainless steel filter. Remove food residue caught in filters to prevent odor-causing bacteria and drainage problems. For best wash performance, clean the filter after each load. In areas with hard water, clean the filter at least once a month with a soft brush.
- Page 44: Maintenance If any food residue blocks the spray arm holes, remove it with a pin or any sharp tool. Make sure the filter is assembled correctly before starting a cycle. To avoid breaking the rolling spray arm sections, do not pull or manually rotate them. Cleaning the upper spray arm is necessary if the water jet holes are blocked by food particles. When cleaning is necessary, remove the upper spray arm by turning the nut on the bottom of the spray arm. It is recommended that the spray arms be cleaned once every two weeks. If the spray arm holes are blocked by any food residue, dishes may not be cleaned well. Make sure that the water jet holes are not blocked by food particles when cleaning the lower spray arm. Remove food particles by rinsing or shaking the spray arm. After removing the food residue, clean the spray arms under running water.
- Page 45: Maintenance instructions include cleaning the upper spray arm and ensuring it is securely locked in place. After assembly, check that the spray arms rotate freely. For seasonal maintenance, close the water valve and disconnect the power supply if absent during warmer months. Clean the filter, tub, and dispenser to prevent odor. In colder months, winterize the water supply lines and dishwasher if freezing temperatures are expected. Winterization should be performed by qualified service personnel.
- Page 46: Troubleshooting The washer is equipped with an automatic error-monitoring system to detect and diagnose problems at an early stage. Before calling for service, check the following if the washer does not function properly or at all. Rinse aid is strongly recommended to enhance the drying performance of the dishwasher. The cloudy film on dishes is usually caused by minerals in the water reacting with the dishwasher detergent. Adding an extra rinse to the cycle helps to rinse the film away. To remove white film on the tub, use 3 tbsp. of citric acid powder in the main detergent compartment and run a Machine Clean cycle. Drying performance is affected by the amount of heat that remains in the tub after the heated rinse. Using the High Temp setting aids in keeping the inner drum temperature hotter before drying begins. Water tends to bead rather than sheet off plastic and nonstick surfaces, making them more difficult to dry. Allow the dishwasher to completely finish the dry cycle before opening the door to prevent dishes from remaining wet.
- Page 47: Troubleshooting The dishwasher does not rely on a heating element for the drying process; it uses retained heat from the dishes and tub. Rinse aid is required to enhance drying performance; without it, water may remain on dishes. A whistling noise when water is drawn into the dishwasher is normal; high water pressure may increase the noise. Ensure that dishes are dishwasher safe; plastic dishware may require hand drying. To drain standing water, press and hold Start for three seconds until the cycle stops. The dishwasher chimes when the door is opened during or right after a cycle to indicate hot interior temperatures. Control Lock prevents changes to the controls during a cycle; it can be activated by pressing and holding specific buttons. If a drain hose extension is needed, use a 5/8 or 7/8 inside diameter hose with a coupler. An LED blinking and chiming indicates the door must be closed within four seconds of pressing Start for the dishwasher to operate. Pre-rinsing dishes before loading is not necessary, especially with Normal and Auto cycles.
- Page 48: Troubleshooting On the LG home page, click on the Support menu tab to bring up the menu selections. Select Video Tutorials. Select a product category and then pick a topic or search a keyword. Error Messages Water inlet problem. Check for a clogged, kinked or frozen water inlet hose. Check water supply. Drainage Problem. Check for a clogged, kinked or frozen water drain hose. Clean air gap or disposal. Clean filters. Do not use hand dishwashing liquids. Only use detergents which are designed for use in automatic dishwashers.
- Page 49: Troubleshooting Heater circuit failure. Water temperature sensor error. Wash motor error. Vario motor error. The Download Cycle is selected. Test mode is selected. Rinse aid level setting mode is selected. Control Lock is activated. Dishwasher will not operate. Dishwasher operates too long.
- Page 50: Troubleshooting Some level of noise is normal during operation. Noise may be caused by the detergent cover opening or the drain pump at the beginning of the drain cycle. The dishwasher is not level; adjust the leveling feet. Nozzle arm knocking against dishes can be resolved by repositioning the dishes. If lights do not illuminate, check if power is connected. Spray arms may not rotate smoothly if the holes are blocked by food particles; clean the holes. The upper rack may be crooked due to poor adjustment; refer to the Height Adjustable Upper Rack section. The dishwasher chimes continuously when the door is opened during or right after a cycle for safety reasons. If the door does not close completely, ensure the cutlery rack is properly loaded and push the door handle until it clicks. Leaking in front of the appliance may indicate the dishwasher is not leveled properly or that the wrong detergent was used.
- Page 51: Troubleshooting Odor may be caused by food in the bottom of the appliance or in the filter. Clean the filter and the interior according to the maintenance section of the owner’s manual. Unwashed dishes left in the appliance for a long time can also cause odor. Run a cycle with one cup of white vinegar in a dishwasher safe glass or bowl placed on the upper rack. Food soil remains on dishes due to improper cycle selection. Select the correct cycle based on soil level and type of dishware being washed. Cloudiness on glassware can result from a combination of excessive detergent and hard water. Use less detergent and a rinse aid to minimize the problem. Black or gray marks on dishes may occur from aluminum items rubbing against dishes during the cycle. Reposition the dishes to avoid this. Yellow or brown film on inside surfaces of the dishwasher can be removed using a stain removal product. Spots and filming on dishes may be caused by low water temperature. Ensure the water supply is at least 120 °F for best wash performance. Overloading the dishwasher can lead to poor cleaning results. Do not overload the dishwasher. Insufficient water pressure can affect performance. Water pressure should be between 20 and 80 psi. Ensure the rinse aid dispenser is filled to avoid spots on dishes.
- Page 52: Troubleshooting Spots and filming on dishes may be caused by hard water buildup in the tub. To address this, remove all dishes and use citric acid powder or white vinegar in the wash cycle. Dishes not drying could indicate an empty rinse aid dispenser. For Wi-Fi connectivity issues, ensure the password for the network is entered correctly. Mobile data on the smartphone should be turned off before connecting the appliance. Check that the wireless network name (SSID) is set correctly, using only English letters and numbers. Ensure the router frequency is set to 2.4 GHz, as only this frequency is supported. If the appliance is too far from the router, the connection may be weak; consider moving the router closer. During Wi-Fi setup, the app may request a specific password based on the network name. The password may vary depending on the format of the network name, and it is case sensitive.
- Page 53: Limited warranty Terms and conditions Arbitration notice: This limited warranty contains an arbitration provision that requires you and LG Electronics to resolve disputes by binding arbitration instead of in court. Should your LG Dishwasher fail due to a defect in materials or workmanship under normal use, LG will repair or replace the product. This limited warranty is valid only to the original retail purchaser of the product. Warranty period: One year from the date of original retail purchase for labor and parts. Two years from the date of original retail purchase for main control board, racks, stainless steel door liner, and tub. Ten years from the date of original retail purchase for the direct drive motor. Proof of original retail purchase specifying the product model and date of purchase is required to obtain warranty service. Any implied warranty of merchantability or fitness for a particular purpose on the product is limited in duration to the duration of the above limited warranty.
- Page 54: Limited warranty This limited warranty does not cover service trips to deliver, pick up, or install, educate how to operate, correct wiring, or correct unauthorized repairs. Damage or failure of the product to perform during power failures and interrupted or inadequate electrical service is not covered. Damage or failure caused by leaky or broken water pipes, frozen water pipes, restricted drain lines, or inadequate water supply is excluded. Damage resulting from operating the product in a corrosive atmosphere or contrary to the product owner’s manual is not covered. Damage caused by accidents, pests and vermin, lightning, wind, fire, floods, acts of nature, or any other causes beyond the control of LG is excluded. Damage caused by unauthorized modification or alteration, or if the product is used for other than the intended purpose, is not covered. Damage caused by incorrect electrical current, voltage, or plumbing codes is excluded. Costs associated with removal and reinstallation of the product for repairs are not covered. The cost of repair or replacement under excluded circumstances shall be borne by you. All disputes between you and LG arising out of or relating to this limited warranty shall be resolved exclusively through binding arbitration.
- Page 55: Limited warranty Notice of dispute You must notify LG in writing at least 30 days in advance of initiating arbitration. Agreement to binding arbitration and class action waiver You and LG agree to resolve any claims only by binding arbitration on an individual basis. Arbitration rules and procedures The arbitration will be administered by the American Arbitration Association. Governing law The law of the state of your residence shall govern this limited warranty. Fees/costs LG will promptly pay all arbitration filing fees to the AAA unless you seek more than $25,000 in damages.
- Page 56: Limited warranty You may opt out of this dispute resolution procedure. To opt out, you must send notice to LG no later than 30 calendar days from the date of the first consumer purchaser’s purchase of the product. Opting out of this dispute resolution procedure will not affect the coverage of the limited warranty in any way. Poor wash results caused by debris remaining in the filter. Make certain that no dishes or utensils are in the path of the spray arms. Poor drying results caused by lack of rinse aid. Water is not supplied because the water tap is not turned on. Not draining because drain hose is kinked. The knockout plug in the garbage disposal is not removed.
- Page 57: Limited warranty The disposal or air gap is blocked by debris. Clean the disposal or the air gap. Inlet valve and drain hose connection problem caused by improper installation. External leakage. Reinstall the hose. Door movement or closing compromised by incorrect leveling. Adjust the lower front leveling feet to the required height. No power due to loose connection of power supply line or electrical outlet problem. Reconnect the power supply line or repair the electrical outlet. You will be charged for the installation.
- Page 58: Page 58
- Page 59: Page 59
- Page 60: Page 60
- Page 61: Escanee el código QR para ver el manual. Manual del propietario Lavavajillas Lea el manual del propietario detenidamente previo a operar el electrodoméstico y mantengalo al alcance para futuras referencias. Copyright © 2022 LG Electronics Inc. Todos los derechos reservados.
- Page 62: Índice Instrucciones importantes de seguridad Lea todas las instrucciones antes de utilizar Mensajes de advertencia Mensajes de precaución Descripción general del producto Características del producto Instalación Antes de la instalación Funcionamiento Mantenimiento
- Page 63: Instrucciones importantes de seguridad Lea todas las instrucciones antes de utilizar. Su seguridad y la de los demás son muy importantes. Siempre debe leer y respetar todos los mensajes de seguridad. Este es el símbolo de alerta de seguridad. El incumplimiento de las instrucciones podría causarle la muerte o lesiones graves. El incumplimiento de las instrucciones podría causarle lesiones o daños al producto. Todos los mensajes de seguridad le indicarán cuáles son los peligros potenciales. Para disminuir el riesgo de explosiones, incendios, descargas eléctricas, quemaduras, lesiones o muerte, siga las precauciones básicas. El artefacto debe ser instalado y conectado a tierra por personal de servicio calificado. Mantenga los materiales de empaque fuera del alcance de los niños.
- Page 64: instrucciones importantes de seguridad Cuando traslade o instale el aparato, tenga especial cuidado en no apretar, aplastar o dañar la línea de alimentación. No instale el artefacto en lugares húmedos. Destruya el cartón, la bolsa de plástico y los demás materiales de empaque luego de desempacar el artefacto. Nunca intente operar este artefacto si se encuentra dañado, si no funciona correctamente, si no está ensamblado por completo o si tiene piezas faltantes o rotas. Cumpla con todos los procedimientos de seguridad del sector recomendados, incluido el uso de guantes de manga larga y gafas de seguridad. Use mangueras nuevas cuando conecte el aparato al suministro de agua. No dañe la línea de alimentación del artefacto ni coloque objetos pesados sobre él. Repare o reemplace de inmediato todas las líneas de alimentación deshilachados o dañados de otra forma. No use un cable de extensión ni un adaptador con este artefacto. Este artefacto no ha sido diseñado para ser utilizado por personas con capacidades físicas, sensoriales o mentales disminuidas.
- Page 65: Instrucciones importantes de seguridad Minutos antes de usar el artefacto, elimine el gas hidrógeno acumulado. Fije la manguera de desagüe en su sitio de manera segura. Solo use detergentes y agentes de enjuague recomendados para lavavajillas. No permita que los niños ingieran detergente o agentes de enjuague. Cargue los objetos cortantes de tal forma que no dañen el sello de la puerta. No lave artículos de plástico a menos que contengan la indicación de que son seguros para lavar con lavavajillas. No toque el elemento calentador durante el uso o inmediatamente después. No abra la puerta del artefacto durante la operación. No instale ni almacene el lavavajillas en lugares expuestos a la intemperie. Desconecte el artefacto del suministro eléctrico antes de limpiarlo o realizar cualquier tipo de mantenimiento.
- Page 66: Instrucciones importantes de seguridad Instrucciones de conexión a tierra Para conectar el lavavajillas de modo permanente, este artefacto debe estar conectado a un sistema permanente de cableado de metal con descarga a tierra. Conecte el cable a tierra al conector a tierra de color verde en la caja de conexiones eléctricas. Riesgo de vuelco No use el lavavajillas hasta que esté instalado por completo. El incumplimiento de estas instrucciones podría causar heridas o cortes graves. Mensajes de precaución Para reducir el riesgo de lesiones leves o moderadas, siga las precauciones básicas. Instalación Instale el producto sobre un piso firme y nivelado. El lavavajillas debe estar conectado a un suministro de agua caliente con un rango de temperatura entre 120 °F (49 °C) y 149 °F (65 °C). Funcionamiento No coloque ningún objeto encima del artefacto. Cierre las llaves de agua y desconecte el artefacto si este no será usado por un periodo de tiempo prolongado.
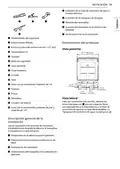
- Page 67: Descripción general del producto Características del producto Las ilustraciones en esta guía pueden diferir de los componentes y accesorios reales, los cuales están sujetos a cambios sin previo aviso por parte del fabricante. Para su seguridad y para prolongar la vida útil del producto, use solo componentes autorizados. El fabricante no se hace responsable del mal funcionamiento del producto o de accidentes provocados por el uso de componentes o piezas no autorizados adquiridos por separado. No retire la cubierta de seguridad en ningún momento. Para garantizar la fiabilidad, cada lavavajillas se somete a un extenso control de calidad antes de salir de fábrica. Puede encontrar gotas de agua o manchas de agua como resultado de este proceso en su nuevo lavavajillas. Esta característica solamente está disponible en algunos modelos.
- Page 68: Descripción general del producto SignaLight™ (pantalla frontal) Los modelos con control superior cuentan con tres indicadores LED centrados en la parte superior de la cubierta frontal. Luz del cuba Esta característica solamente está disponible en algunos modelos. Roja: Error (consulte los Códigos de error en la sección Resolución de problemas). Blanca (fija): Funcionamiento normal. Blanca (parpadea): El ciclo se ha pausado. (Después de cuatro minutos en modo pausa, la máquina se apaga). El cesto para cubiertos se envía instalado en la parte posterior de la bandeja del fondo. Para obtener un mejor desempeño, instálelo a lo largo del lado derecho. Verde: El ciclo finalizó normalmente. Retire todos los materiales de empaque del exterior y el interior del lavavajillas antes de instalar el artefacto. Presione la lengüeta para quitar la atadura del cable con la mano. Cortar la atadura con un cuchillo o tijeras puede dañar el estante o la canasta de cubiertos.
- Page 69: Descripción general del producto Especificaciones del producto La apariencia y las especificaciones detalladas en este manual podrían variar debido a mejoras constantes en el producto. Modelo Requisitos eléctricos: 120 V~ CA, 60 Hz solo, interruptor de corriente de 15 A Presión de agua: 20 psi - 80 psi (140 kPa - 550 kPa) Dimensiones (Ancho X Profundidad X Altura): 23 3/4” X 24 5/8” X 33 5/8” (603 mm X 625 mm X 854 mm) Temperatura de entrada: 120 ℉ - 149 ℉ (49 ℃ - 65 ℃) Peso neto: 72 lbs. - 89 lbs. (33 kg - 40 kg)
- Page 70: Instalación Antes de la instalación Guía de instalación en línea Este código QR es solo para referencia; para obtener instrucciones de instalación completas, consulte el manual del propietario suministrado con cada lavavajillas. Cable eléctrico Tubería de suministro de agua Accesorios para tubería Herramientas necesarias Advertencia La guía puede contener imprecisiones o errores tipográficos.
- Page 71: Instalación Conexión de la línea de suministro de agua y energía eléctrica Conexión de la manguera de desagüe Nivelado del lavavajillas Sujeción del lavavajillas en la abertura del gabinete Verificación final de la instalación Dimensiones del producto Descripción general de la instalación Lea las siguientes instrucciones de instalación inmediatamente después de adquirir el lavavajillas o transportarlo a otra ubicación. Preparación de la abertura para el gabinete
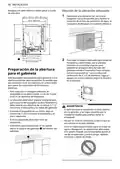
- Page 72: Instalación Elección de la ubicación adecuada Seleccione una ubicación tan cercana al fregadero como sea posible para facilitar la conexión de la línea de suministro de agua, la manguera de desagüe y la conexión eléctrica. Para dejar el espacio adecuado para tareas de fontanería y electricidad, use la plantilla incluida con el material impreso para determinar el espacio libre del lado del gabinete donde el lavavajillas hace contacto con el muro posterior. Este lavavajillas está diseñado para ajustarse a una abertura estándar para lavavajillas. Para asegurar un desagüe adecuado, el lavavajillas no se debe instalar a más de 12 pies (3.65 m) de distancia del fregadero. La ubicación debe tener espacio suficiente para que la puerta del lavavajillas se abra fácilmente y debe dejarse una distancia de, al menos, 0.1” (2 mm) entre el lavavajillas y los lados del gabinete. Advertencia El daño durante la instalación no está cubierto por la garantía, y las fugas causadas por la instalación inadecuada podrían dañar la propiedad. Si instala el lavavajillas en un rincón, deje un mínimo de 2” (50 mm) entre el lavavajillas y el muro adyacente. El muro adyacente debe estar libre de obstáculos.
- Page 73: Instalación La temperatura no debe superar los 149 °F (65 °C). La presión del suministro de agua debe ser de entre 20 psi y 80 psi. Si la presión del suministro de agua es mayor a 80 psi, debe instalarse una válvula reductora de presión. No reutilice una manguera vieja. Emplee solo una manguera nueva cuando instale el lavavajillas. Hay 2 canales en la base del lavavajillas para pasar la conexión de agua y la conexión eléctrica. Utilice un interruptor de corriente o fusible de acción retardada. El artefacto debe operarse con el voltaje correcto, que se indica en este manual. Corte el suministro de agua de la vivienda y apague el interruptor de corriente antes de conectar el lavavajillas. El tomacorriente debe estar a 4 pies (1.22 m) de cualquiera de los lados del lavavajillas. Conecte el lavavajillas a un suministro de agua caliente con un rango de temperatura entre 120 °F (49 °C) y 149 °F (65 °C).
- Page 74: Instalación La abrazadera de envío trasera puede ser removida para más espacio libre al instalar el lavaplatos. Extracción de la cubierta inferior No retire la cubierta de seguridad. Si recuesta el lavaplatos por la parte trasera, hágalo con precaución de no dañar la manguera de drenaje y la cuba. Retire los tornillos que sujetan la cubierta inferior al lavavajillas. Retire la atadura que sujeta la manguera de desagüe. Retire la cubierta inferior. Si hubiera material aislante detrás de la cubierta inferior, retírelo. Reserve las piezas hasta que se complete la instalación.
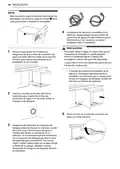
- Page 75: Instalación Retire todos los materiales de empaque del interior del lavavajillas antes de instalarlo. Colocación de los soportes de instalación. Para mostradores de madera u otros materiales que no se dañen al taladrar, utilice los soportes de instalación metálicos suministrados. No tire ni levante el lavavajillas usando la manija; hacerlo podría dañar la puerta y las bisagras. Para mostradores de granito, mármol u otro material que podría dañarse al taladrar, utilice los tornillos para madera para sujetar el lavavajillas al gabinete. No empuje la puerta del lavavajillas con las rodillas cuando lo deslice en su lugar. Hacerlo podría dañar la cubierta frontal. Los soportes de instalación y los tornillos se pueden encontrar en el cesto para cubiertos. Inserte el extremo con lengüeta de los soportes de instalación en las ranuras del bastidor superior. No empuje la parte superior del lavavajillas. Hacerlo podría dañar el interior del artefacto. Doble las lengüetas de los soportes con un par de pinzas de punta para fijarlos al bastidor.
- Page 76: Instalación Abra la puerta y sujete el bastidor del cuerpo del lavavajillas y la abertura superior frontal de la cuba para mover o levantar el lavavajillas. Gradualmente, deslice el lavavajillas en la abertura, asegurándose de que la línea de suministro de agua y el cable eléctrico pasan libremente por los canales. Para evitar fallas o fugas, es importante que la manguera de desagüe no quede plegada, tirante ni aplastada detrás o debajo del lavavajillas. La garantía no cubre los daños derivados de una instalación inadecuada. Suavice o acolche los bordes del orificio taladrado para el paso de la línea de suministro de agua a fin de evitar dañar la manguera de desagüe. Asegúrese de enderezar la manguera de desagüe antes de insertar su extremo a través del orificio para el suministro de agua. Tenga cuidado de no plegar, aplastar o tensar demasiado la manguera de desagüe durante la instalación.
- Page 77: Instalación Conexión de la línea de suministro de agua y energía eléctrica La mejor ubicación para el conducto eléctrico es sobre el lado derecho de la pared posterior. Redirija el cable eléctrico antes de realizar la instalación en caso de que la longitud de la tubería del conducto eléctrico sea mayor a 3” (76 mm). Con el suministro de agua de la vivienda cerrado, conecte la línea de suministro de agua a la válvula de entrada en la parte delantera izquierda del lavavajillas. Desde el interruptor de corriente, apague el suministro de energía eléctrica que va a la unidad. No se debe utilizar cinta ni compuesto en la válvula de entrada del lavavajillas. Utilice un destornillador Phillips para retirar 2 tornillos. Deslice la línea de suministro de agua en el canal tirando suavemente desde el interior del gabinete. El lavavajillas debe tener un circuito con la debida conexión a tierra para conectar la configuración de 3 cables que incluye el cable a tierra. Si se usa una línea de alimentación de 3 clavijas, debe estar en un lugar accesible adyacente al lavavajillas, a no más de 4 pies (1220 mm) del lado del artefacto.
- Page 78: Instalación Inserte el aliviador de tensión a través del orificio de la caja de empalmes. Apriete la tuerca redonda para asegurarlo en su sitio. Envuelva cada conexión con cinta aislante. Inserte el cable eléctrico a través del orificio del aliviador de tensión. Ajuste los 2 tornillos para asegurarlo. Pliegue los cables conectados, introdúzcalos nuevamente dentro de la caja de empalmes y atornille la cubierta de la caja. Advertencia: Verifique que el cable negro esté caliente (120 V). De no ser así o si no está seguro de que haya suministro eléctrico, solicite que lo verifique un electricista calificado. Precaución: No deje expuesto ningún cable pelado. Recorte el cable pelado para que quepa completamente dentro de las tuercas para cable. Conexión de la manguera de desagüe: Si el extremo de la manguera de desagüe no se adapta a la línea de desagüe, use un adaptador resistente al calor y al detergente (no está incluido). Haga coincidir los cables blanco, negro y verde con los cables de los colores correspondientes del lavavajillas. Luego, gire las tuercas para cables suministradas y apriételas firmemente para conectar los cables correspondientes.
- Page 79: Instalación Para la instalación de la manguera de desagüe, use la abrazadera para manguera con tornillo incluida en el cesto para cubiertos de este lavavajillas. Si conecta la manguera de desagüe del lavavajillas al triturador de basura, asegúrese de seguir las instrucciones de instalación adecuadas según el manual del triturador. Cumpla los códigos y las ordenanzas locales. Si no se ha extraído el tapón ciego, el lavavajillas no podrá desagotar correctamente. La distancia al desagüe no debe superar los 12 pies (3.65 m). No conecte mangueras de desagüe de otros artefactos a la manguera de desagüe del lavavajillas. La altura del extremo de la manguera de desagüe debe ser, como mínimo, de 12 (305 mm) y no debe superar las 40 (1016 mm) desde la base del lavavajillas para evitar que el agua haga sifón desde la cuba. Extraiga el tapón ciego del triturador con un martillo y un destornillador.
- Page 80: Instalación Extraiga el tapón ciego con un martillo y un destornillador. Si no se ha extraído el tapón ciego, el lavavajillas no podrá desagotar correctamente. Verifique que el lavavajillas esté nivelado y ajuste las patas de nivelación si es necesario. Sujete la manguera de desagüe a la pieza en T para desechos con la abrazadera para manguera suministrada. Si el lavavajillas no está bien nivelado, pueden producirse fugas, problemas para cerrar la puerta o ruidos. El lavavajillas debe nivelarse y alinearse cuidadosamente para que este se apoye completamente en las 3 patas de nivelación. Conexión al triturador o a la pieza en T para desechos con trampa de aire. Para verificar que la cuba esté nivelada de adelante hacia atrás, retire la bandeja inferior y vierta 169 oz. (5 L) de agua en el fondo de la cuba. El nivel del agua debe quedar cerca del centro de las dos muescas inferiores que presenta la cuba en la parte delantera. Esto impide que el agua haga sifón desde la cuba.
- Page 81: Instalación Coloque un nivel en la pared interior de la cuba para verificar que el lavavajillas esté nivelado de lado a lado. Si no tiene un nivel, puede utilizar una aplicación de nivel de un teléfono inteligente. Los ajustes funcionan de la misma forma para ambas patas de nivelación. Use una llave con accionamiento cuadrado de 1/4 o 3/8 para girar las patas de nivelación delanteras. Ajuste según sea necesario hasta que el lavavajillas esté completamente nivelado. Use un destornillador Phillips para ajustar la pata de nivelación trasera. Ajuste las patas de nivelación hasta que hagan contacto firme con el piso. Si el lavavajillas no está bien nivelado, puede impedir que la puerta cierre correctamente. Haga girar el tornillo central para ajustar la parte posterior de la cuba. Para evitar daños en el tornillo, no utilice un destornillador eléctrico.
- Page 82: Instalación Sujeción del lavavajillas en la abertura del gabinete Hay 2 opciones para sujetar el lavavajillas en su sitio. Si el mostrador es de madera o de un material que puede taladrarse con seguridad, sujete el lavavajillas al mostrador con los soportes proporcionados. Si el mostrador es de granito, mármol o un material que no se puede taladrar, sujete el lavavajillas al bastidor del gabinete con los tornillos para madera provistos. Asegúrese de que el lavavajillas esté nivelado y que todas las patas de nivelación estén en contacto firme con el piso antes de fijar el lavavajillas. Verificación final de la instalación Los soportes de instalación y los tornillos se pueden encontrar en el cesto para cubiertos. Utilice un destornillador magnético. Prueba del lavavajillas Verifique si el lavavajillas está instalado correctamente. Asegúrese de que la puerta se abre y cierra suavemente.
- Page 83: Instalación Asegúrese de que se hayan retirado todos los materiales de empaque. La manguera de desagüe está plegada o presionada. Inserte las mangueras de desagüe y suministro a través del orificio bajo el fregadero. Encienda el lavavajillas y ejecute un ciclo Turbo para verificar que el funcionamiento sea correcto. Verifique si la manguera de desagüe o la conexión de suministro de agua presentan fugas. Retire el tapón ciego del triturador. Si se detecta una fuga de agua, mantenga presionado el botón Start durante 3 segundos para cancelar el ciclo de lavado. Vuelva a colocar la cubierta inferior. Solo instale la cubierta inferior suministrada con el lavavajillas. Abra la llave de agua.
- Page 84: Antes de usar, lea las instrucciones de seguridad para reducir el riesgo de incendios, descargas eléctricas o lesiones. Conecte al suministro de agua caliente solamente, con una temperatura mínima de 120 °F (49 °C) para un mejor lavado. Siga las instrucciones para cargar el lavavajillas para asegurar una limpieza eficaz. Quite los elementos insolubles como huesos, palillos y pedazos de papel al cargar el lavavajillas. Agregue abrillantador si el nivel es bajo para mantener la efectividad del ciclo de secado. Cargue la vajilla según se describe en el manual. Seleccione el ciclo y las opciones que mejor se adapten a la carga, consultando la guía de ciclos. Raspe la vajilla para retirar excesos de alimentos y residuos sólidos antes de cargarla. Coloque los objetos más profundos en un ángulo para ayudar a que corra el agua y contribuir con la velocidad del proceso de secado. Si se abre la puerta durante el ciclo, el lavavajillas se detendrá.
- Page 85: Fin de ciclo. Cuando el ciclo haya finalizado, se emitirá un sonido y la pantalla mostrará ENd hasta que se abra la puerta o hasta que se presione Power. A fin de ahorrar energía, mantenga presionado High Temp durante 3 segundos para configurar que la visualización de ENd se apague pocos minutos después de que finalice el ciclo. Es normal que el lavavajillas suene continuamente si se abre durante el funcionamiento o justo después de terminar el ciclo. El lavavajillas le informa que las temperaturas interiores de la unidad son altas y debe tener cuidado al introducir las manos en el interior. No abra la puerta durante la operación ni inmediatamente después de que se haya completado el ciclo de lavado, ya que el vapor que surge del interior puede provocar quemaduras. Vacíe primero la bandeja inferior y luego la bandeja superior. El lavavajillas se apaga automáticamente luego de cuatro minutos de inactividad en caso de que se lo pause o si no se inicia un ciclo.
- Page 86: Funcionamiento Panel de control Funciones del panel de control Botón de Power (Encendido) Presione este botón para encender o apagar la lavadora. Después de completar el ciclo, la energía se apaga automáticamente por seguridad y economía. Si se produce una sobrecarga eléctrica, un apagón o una interrupción del suministro eléctrico, la energía se apaga de manera automática por cuestiones de seguridad. Cuando se vuelve a conectar la electricidad, el lavavajillas se enciende automáticamente y el ciclo se reanuda. Pantalla Icono del abrillantador: Este icono se ilumina cuando el nivel de abrillantador es bajo. Ícono de Machine Clean (Limpieza de la máquina) y desinfección: El ícono parpadea cada 30 ciclos. La pantalla digital del panel de control muestra el tiempo estimado del ciclo.
- Page 87: Funcionamiento El tiempo estimado en pantalla no incluye los tiempos de retraso para calentar agua. Si se selecciona Delay Start, la pantalla muestra el tiempo de retraso en horas. El tiempo del ciclo podría variar según el nivel de suciedad de su carga. Control Lock ayuda a evitar que se cambien los ajustes durante un ciclo. La selección de Control Lock bloquea todos los botones, excepto el botón Power. Mantenga presionados Half Load y Energy Saver simultáneamente por tres segundos para activar o desactivar Control Lock. Cuando el artefacto está conectado a Internet, el icono de Wi-Fi se ilumina. Este indicador se enciende cuando selecciona Night Dry. La bomba de desagüe se activa y se cancela el ciclo con el botón de Cancel. El ciclo Auto detecta la cantidad de suciedad y se optimiza para lograr la mejor limpieza.
- Page 88: Funcionamiento La etiqueta de consumo de energía se basa en este ciclo sin ninguna opción. Seleccione la opción Night Dry si deja la vajilla en el lavavajillas toda la noche. Mantenga presionado el botón Extra Dry durante tres segundos para activar la opción Night Dry. Este ciclo no tiene secado. Después de finalizado el ciclo, el ventilador trabaja por una hora para ayudar a ventilar el aire caliente y húmedo de la cuba. Este ciclo limpiará rápidamente platos levemente sucios. Mantenga presionado el botón Turbo durante tres segundos para activarlo. Esta opción automáticamente configura una intensidad de aspersión suave en el brazo rociador superior y fuerte en el brazo rociador inferior. Este ciclo es para limpiar el interior del lavavajillas. Esta opción ahorra energía al reducir las temperaturas de lavado y enjuague.
- Page 89: Funcionamiento Si la opción High Temp se agrega a un ciclo, el indicador permanece encendido al final del ciclo si los platos se desinfectaron adecuadamente. La opción Extra Dry es seleccionada automáticamente cuando la asistencia de enjuague está vacante. Si el lavavajillas no pudo desinfectar adecuadamente los platos, el indicador no se encenderá al final del ciclo. Night Dry ayuda a ventilar el vapor de la cuba para evitar que la vajilla quede húmeda. Este enjuague de alta temperatura desinfecta los platos y la cristalería de acuerdo con el estándar 184 de NSF/ANSI. Los lavavajillas residenciales certificados no están diseñados para ser utilizados en establecimientos de alimentos autorizados. Mantenga presionado el botón Extra Dry durante tres segundos para activarlo. La opción de Night Dry se selecciona por defecto con todos los ciclos, excepto para el ciclo Normal. Delay Start retarda el inicio de un ciclo seleccionado entre 1 y 12 horas. Seleccione la opción Extra Dry para un mejor desempeño de secado, agregando tiempo de secado extra al ciclo.
- Page 90: Funcionamiento Opciones disponibles Dual Zone Half Load Energy Saver High Temp Extra Dry Night Dry Delay Start Nota: El consumo real de agua variará según el nivel de suciedad y la dureza del agua.
- Page 91: Machine options include express, rinse, clean, and turbo cycles. Available options are dual zone, half load, energy saver, high temp, extra dry, night dry, and delay start. Actual water consumption varies based on soil level and water hardness. Cycle time may change depending on selected options, soil level, temperature, and water hardness. Energy saver cannot be used simultaneously with extra dry or high temp options. No options are available for the download cycle. Ensure that dishware pieces do not touch each other during loading. The extra tall tub allows for loading dishes, pans, or other utensils up to 14 inches high. Remove large food particles from dishes before loading. Certain items may be damaged by high temperatures and dishwasher detergents and should not be washed in the dishwasher.
- Page 92: Funcionamiento Cobre o aluminio anodizado Carga de 12 posiciones Porcelana pintada a mano con oro o plata Utensilios con mangos de madera o hueso Utensilios de hierro o de material que pueda oxidarse Objetos de plástico que no sean aptos para lavavajillas Cubiertos de plata o chapados en oro o porcelana fina o con bordes de metal Piezas frágiles como, por ejemplo, copas de cristal Precaución: No coloque ollas y sartenes con manijas plásticas en el artefacto.
- Page 93: Funcionamiento La bandeja inferior no se debe usar para objetos pequeños como tazas, vasos de vino o platos pequeños. Estos objetos se deben cargar en la bandeja superior. Asegúrese de que los objetos grandes no interfieran con la rotación de los brazos rociadores y que no impidan que el dispensador de detergente se abra. Pliegue las puntas separadoras hacia abajo para acomodar la vajilla más grande; despliegue las puntas separadoras hacia arriba para acomodar la vajilla más pequeña. Las bandejas deben colocarse en posición vertical y enfrentando al centro de la bandeja, y las ollas, sartenes y la vajilla de gran tamaño deben colocarse invertidas. Cargue bandejas de cena, platos, tazones de sopa, recipientes, etc., entre las puntas separadoras. Cargue placas para hornear, moldes de pasteles y otros objetos grandes en los laterales o la parte posterior de la bandeja. Si carga estos objetos en la parte frontal del lavavajillas, impedirán que el agua por aspersión llegue al dispensador de detergente. Asegúrese de que las manijas de las ollas y otros objetos grandes no detengan la rotación de los brazos rociadores.
- Page 94: Funcionamiento Mejor desempeño, instálelo a lo largo del lado derecho, como se muestra en la figura. Carga de ollas y tazones Carga en la bandeja superior Carga de platos en la bandeja superior Carga de 10 posiciones Nota El cesto para cubiertos se encuentra instalado en la parte posterior del estante del fondo.
- Page 95: Funcionamiento Otras tazas o utensilios de cocina se pueden colocar en las bandejas plegables para tazas, que también se adaptan a las copas. Carga de 12 posiciones Las bandejas para tazas pueden plegarse hacia arriba para dejar espacio para copas o vasos altos. Sugerencias de carga para la bandeja superior: Coloque las tazas y los vasos en las filas entre las puntas separadoras. Para evitar que se astillen, no permita que tengan contacto con otros objetos. Ubique los elementos de manera que los extremos abiertos queden orientados hacia abajo para facilitar su limpieza y secado. Retiro y colocación de la bandeja para tazas Esta característica solamente está disponible en algunos modelos. Se recomienda utilizar la bandeja superior para platos pequeños, tazas, platillos, vasos y objetos de plástico aptos para lavavajillas. Las bandejas para tazas izquierda y derecha son intercambiables y pueden extraerse. Asegúrese de que los objetos no interfieran con la rotación de los brazos rociadores por arriba y por debajo de la bandeja superior.
- Page 96: Funcionamiento Carga de platos y ollas Bandeja superior con altura ajustable La bandeja superior se ajusta hacia arriba y hacia abajo. Suba la bandeja superior para dar lugar a objetos de hasta 14 de altura en la bandeja inferior. Baje la bandeja superior para dar lugar a objetos de hasta 12 de altura en la bandeja superior. El lavavajillas se envía con la bandeja superior subida. Existen tres posiciones disponibles para ajustar la altura de la bandeja superior. Pliegue las puntas separadoras hacia abajo para acomodar la vajilla más grande. Antes de ajustar, asegúrese de que el estante no contenga vajilla de ningún tipo. Levante el estante superior sin presionar los botones ubicados a cada lado.
- Page 97: Funcionamiento Para ubicar el estante en la posición media, puede resultar más fácil llevarlo por completo hasta abajo y luego levantar cada lado de este individualmente hasta que hagan clic en el lugar. Para subir la bandeja, levante la bandeja del centro de cada lado hasta que la bandeja se trabe en la posición superior. Antes de empujar la bandeja superior en el lavavajillas, asegúrese de que la altura de la bandeja sea la misma en ambos lados. Hay un incremento de 2 3/16 pulgadas (56 mm) en la altura disponible cuando el estante superior se coloca en la posición más baja. Luego de ajustar los niveles de las bandejas, verifique que los brazos rociadores no estén impedidos de rotar. El estante superior encajable debe ser removido únicamente para servicio. Cuando la bandeja superior se encuentre en la posición inferior, empuje hacia adentro la bandeja superior primero y la bandeja inferior después. Tire de la bandeja inferior primero y de la bandeja superior después. Para remover los soportes delanteros del estante de los rieles, abra los ganchos delanteros con un destornillador de punta plana mientras levanta el frente del estante. Para bajar la bandeja, sostenga la bandeja del centro de cada lado para soportar su peso.
- Page 98: Funcionamiento Para remover los soportes traseros del estante de los rieles, sostenga un riel lateral con una mano, levante el frente del estante, y empújelo de nuevo firmemente para desencajar el soporte de los ganchos en la parte trasera. Para reemplazar el estante, coloque los soportes del estante trasero detrás de los ganchos laterales y empújelo hacia adelante para cazar los soportes en los ganchos. No coloque recipientes en el centro de la bandeja para cubiertos. Es posible que la puerta no cierre adecuadamente y se produzcan fugas. La bandeja para cubiertos es la más adecuada para la cubertería. Los separadores de las bandejas de cubiertos ayudan a mantener la cubertería separada a fin de evitar daños y mejorar la limpieza. Para un mejor rendimiento de limpieza, coloque la cubertería en los cestos para cubiertos. Los utensilios más sucios o los elementos con comidas quemadas deben ubicarse en el medio de la bandeja o en el cesto para cucharas para lograr un mejor rendimiento. La bandeja del lado izquierdo puede ajustarse en una posición alta o baja para acomodar utensilios o cubiertos de diferentes tamaños. Retire la vajilla antes de ajustar la bandeja. Ajuste la bandeja deslizando la palanca.
- Page 99: Funcionamiento durante el funcionamiento. La espumación excesiva podría reducir el rendimiento de lavado y generar fugas en el lavavajillas. Extracción de la bandeja para cubiertos. La bandeja para cubiertos puede extraerse por completo en caso de necesitar más espacio en la bandeja superior para objetos más grandes. Para evitar dañar el dispensador, no tire de éste para cerrar la puerta del lavaplatos. Retire siempre la cubertería de la bandeja antes de extraer dicha bandeja. Una vez que finalice el programa de lavado, compruebe que el detergente se haya utilizado por completo. Tenga cuidado al cargar y descargar objetos con bordes filosos. Cargue los cuchillos filosos con la hoja hacia abajo para disminuir el riesgo de lesiones personales. Algunas pastillas de detergente pueden quedarse atascadas en el dispensador debido a su tamaño excesivo. Las tabletas pueden colocarse sobre la base de la cuba de lavado, junto al filtro, antes de iniciar el ciclo. El exceso de detergente puede dejar una película en la vajilla y en el lavavajillas, lo que resulta en un mal lavado. Si se utilizan pastillas de detergente sin abrillantador líquido, la vajilla y el interior del lavavajillas tendrán una humedad excesiva. El uso de abrillantador líquido mejora el resultado del secado al permitir que el agua se elimine por completo de la vajilla después del enjuague final. El detergente y el abrillantador para lavavajillas contienen componentes químicos, por lo tanto, deben mantenerse fuera del alcance de los niños.
- Page 100: Cómo agregar abrillantador en el dispensador. El ícono de Rinse Aid aparece en la pantalla cuando se necesita más abrillantador. Se recomienda utilizar abrillantador para evitar que queden marcas de agua en la vajilla y para mejorar el rendimiento del secado. Utilice solamente abrillantador líquido en el lavavajillas. No llene en exceso el dispensador de abrillantador. Llénelo hasta por encima de la línea 25 en caso de agua dura o cargas con suciedad extrema. Limpie el abrillantador que se derrame alrededor del dispensador. Llénelo hasta la línea 15 en caso de agua blanda o cargas con poca suciedad. Abra la tapa del abrillantador levantando la lengüeta. Agregue líquido abrillantador hasta el nivel máximo de llenado.
- Page 101: Funcionamiento del dispensador de abrillantador. El abrillantador se dispensa automáticamente durante el ciclo final de enjuague. La frecuencia de recarga del dispensador depende de la frecuencia de lavado y el ajuste utilizado. El icono de abrillantador parpadea cuando se necesita más asistencia de enjuague. El dispensador tiene cinco niveles de ajuste, programado en fábrica en el nivel 2. Ajuste la configuración a un nivel más elevado si tiene agua dura o formación de calcio. Un ajuste demasiado bajo producirá manchas y un bajo rendimiento de secado. Un ajuste demasiado elevado puede causar espumación y un mal lavado. Para verificar el ajuste actual, presione los botones de Zona Dual y Encendido simultáneamente. Presione Inicio retardado para cambiar el ajuste del dispensador de abrillantador.
- Page 102: Funciones inteligentes La aplicación LG ThinQ le permite comunicarse con el electrodoméstico usando un teléfono inteligente. Si cambia de enrutador inalámbrico, proveedor de Internet o contraseña, borre el artefacto conectado de la aplicación LG ThinQ y proceda a conectarlo de nuevo. Compruebe el estado, el ciclo, las opciones, el tiempo de operación y el tiempo de finalización del ciclo del aparato en una sola pantalla. Puede descargar ciclos nuevos y especiales que no se encuentren incluidos en los ciclos estándar del artefacto. Desactive los Datos Móviles o Datos Celulares en su teléfono inteligente. Esta función brinda información útil para diagnosticar y resolver problemas con el producto conforme a su patrón de uso. Ajuste el nivel de dispensador de abrillantador, el recordatorio de limpieza de la máquina, el señal de nivel y la luz indicadora de limpieza. Active Enviar alertas para recibir notificaciones del estado del electrodoméstico. El electrodoméstico funciona únicamente con redes Wi-Fi de 2.4 GHz. LG ThinQ no es responsable por ningún problema de conexión en red, falla, mal funcionamiento o error causado por la conexión de red.
- Page 103: Funciones inteligentes Si el aparato tiene problemas para conectarse a la red Wi-Fi, es posible que se encuentre demasiado lejos del router. Adquiera un repetidor Wi-Fi para mejorar la intensidad de la señal. Aviso de la FCC Este equipo fue probado y se determinó que cumple con los límites para los dispositivos digitales de Clase B, en conformidad con la parte 15 de las normas de la FCC. Si este equipo causa interferencia dañina a la recepción de radio o televisión, se aconseja al usuario intentar corregir la interferencia realizando alguna de las siguientes acciones. Es posible que la conexión Wi-Fi no se conecte o se interrumpa debido al entorno de la red doméstica. El nombre de la red inalámbrica (SSID) debe ser una combinación de letras y números. Puede que la configuración de red falle si el protocolo de seguridad del enrutador está en WEP. Cambie el protocolo de seguridad por otro y conecte el producto de nuevo. Instalación de la aplicación LG ThinQ Busque la aplicación LG ThinQ en la tienda Google Play o App Store desde su teléfono inteligente. Este equipo cumple con los límites de exposición a la radiación de la FCC establecidos para entornos no controlados. El equipo se debe instalar y operar con una distancia mínima de 20 cm entre la antena y su cuerpo.
- Page 104: Funciones inteligentes Instrucciones de operación específicas para cumplir con las normas de exposición a la RF. Uso del diagnóstico audible para diagnosticar problemas. Siga las instrucciones para utilizar el método de diagnóstico audible. Software de código abierto disponible bajo GPL, LGPL, MPL y otras licencias. Inicie la aplicación LG ThinQ y seleccione la función Smart Diagnosis en el menú. Presione el botón Power para encender el electrodoméstico. Coloque el micrófono de su teléfono inteligente cerca del logo. Mantenga presionado el botón Download Cycle por 3 segundos o más. Utilice esta función como ayuda para diagnosticar y resolver problemas con su electrodoméstico. Para obtener resultados óptimos, no mueva el teléfono inteligente mientras se transmitan los tonos.
- Page 105: Mantenimiento Para mantener el rendimiento y evitar problemas, es importante verificar el exterior y el interior del lavavajillas, incluidos los filtros y los brazos rociadores, a intervalos regulares. Advertencia Cuando limpie el exterior y el interior del lavavajillas, no utilice benceno ni solvente. De lo contrario, podría ocasionar un incendio o una explosión. Para evitar lesiones físicas durante el cuidado y el mantenimiento o limpieza, use guantes y/o prendas protectoras. Limpieza y cuidado Ejecute el ciclo de limpieza de la máquina una vez al mes o después de cada 30 ciclos para eliminar la suciedad residual, el olor, las manchas blancas y otra suciedad dentro del electrodoméstico. La mayor parte de la suciedad se puede retirar con un paño húmedo suave o una esponja. Se puede usar un jabón suave para ayudar a desprender la suciedad difícil. Agregue 3 cucharadas (40 g) de ácido cítrico al dispensador de detergente o siga las instrucciones del fabricante si usa un agente de limpieza para lavavajillas. Precaución En caso de derramar aceite de cocina en el exterior del producto, límpielo de inmediato. Limpie el interior del lavavajillas periódicamente con un trapo o una esponja suaves y humedecidos para eliminar las partículas de alimentos y suciedad.
- Page 106: Mantenimiento Trampa de aire del desagüe o triturador del fregadero obstruidos. Tenga cuidado con los bordes filosos al manipular el filtro de acero inoxidable. Verifique la trampa de aire del desagüe o el triturador del fregadero si el lavavajillas no desagota correctamente. La trampa de aire del desagüe y el triturador son dispositivos de fontanería externos y no forman parte del lavavajillas. Retire los restos de comida que se encuentren atascados en los filtros para evitar la acumulación de bacterias. La garantía del lavavajillas no cubre los costos de servicio directamente relacionados con la limpieza o la reparación de la trampa de aire de desagüe externa y el triturador. Para lograr los mejores resultados de lavado, limpie el filtro después de cada carga. En áreas donde hay agua dura, limpie el filtro utilizando un cepillo suave una vez al mes, como mínimo. Limpie los filtros utilizando materiales no abrasivos y agua corriente tibia. Vuelva a colocar la tapa plástica y la cobertura de la trampa de aire.
- Page 107: Mantenimiento Limpieza del brazo rociador Se recomienda limpiar los brazos rociadores cada dos semanas. Asegúrese de que los orificios propulsores de agua no estén obstruidos con partículas de alimentos. Si algún residuo de comida bloquea los orificios de los brazos rociadores, elimine la suciedad utilizando un alfiler o alguna herramienta punzante. Programa de limpieza del filtro recomendada Cantidad de cargas por semana Si lava la vajilla antes de cargarla Precaución: Para evitar romper las secciones del brazo atomizador rodante, no tire de ellas ni las rote manualmente.
- Page 108: Mantenimiento Limpieza del brazo rociador superior Asegúrese de que los orificios propulsores de agua no estén obstruidos con partículas de alimentos. Cuando sea necesario realizar una limpieza, extraiga el brazo rociador superior girando la tuerca ubicada en la parte inferior del brazo 1/8 de giro en sentido contrario a las agujas del reloj y tire de él hacia abajo. Luego de ensamblar, asegúrese de que los brazos rociadores giren libremente. Mantenimiento estacional y almacenamiento Cierre la válvula de agua, desenchufe la línea de alimentación o apague el interruptor de corriente si va a ausentarse por un extenso período de tiempo durante los meses más calurosos. Limpie el filtro, la cuba y el dosificador para evitar olores. Prepare las líneas de suministro de agua y el mismo lavavajillas para el invierno si existe la posibilidad de que haya temperaturas heladas. Elimine la suciedad utilizando un alfiler o alguna herramienta punzante si algún residuo de comida bloquea los orificios de los brazos rociadores. Cuando haya quitado los residuos de comida, limpie los brazos rociadores bajo el chorro de agua. Vuelva a colocar el brazo rociador superior en su lugar y gire la tuerca 1/8 de giro en sentido de las agujas del reloj para asegurarse de que la tuerca se bloquee nuevamente en su lugar.
- Page 109: solución de problemas La lavadora está equipada con un sistema automático de detección de errores para detectar y diagnosticar problemas en una etapa temprana. Antes de llamar al servicio técnico Es muy recomendable utilizar un abrillantador para mejorar el rendimiento del secado del lavavajillas. La película turbia se origina por los minerales del agua que reaccionan con el detergente del lavavajillas. Los lavavajillas LG utilizan menos agua que los lavavajillas tradicionales. El rendimiento del secado se ve directamente afectado por la cantidad de calor que permanece en la cuba después del enjuague caliente. El abrillantador maximiza la cantidad de agua que se elimina de la vajilla antes de que comience el ciclo de secado. Si lava artículos de plástico, seleccione la opción Extra Dry o Night Dry para mejores resultados de secado. Permita que el lavavajillas finalice por completo el ciclo de secado antes de abrir la puerta. Si la puerta se abre en el medio de un ciclo de secado, el calor necesario se fugara, dejando la vajilla húmeda. El sistema de secado híbrido es un componente clave en el rendimiento del lavavajillas.
- Page 110: Solución de problemas El lavavajillas no utiliza un elemento de calentamiento para el proceso de secado, sino que el calor es retenido por la vajilla y el compartimiento. El aire caliente y húmedo del lavavajillas se introduce en un conducto de condensación ubicado en la puerta por medio de un ventilador. Se requiere abrillantador para mejorar el rendimiento de secado. Es normal escuchar un silbido cuando ingresa el agua al lavavajillas. Asegúrese que la vajilla que coloque en el artefacto sea apta para lavavajillas. Para desagotar el agua estancada, mantenga presionado el botón Start durante tres segundos. El lavavajillas emite un pitido continuo si se abre la puerta durante o justo después de finalizado un ciclo. El Control Lock es una función que evita que se cambien los controles durante el ciclo. Si es necesario utilizar una extensión en la manguera de desagüe, use una manguera de diámetro interior de 5/8 o 7/8. No necesita enjuagar la vajilla antes de cargarla, especialmente si utiliza los ciclos Normal y Auto.
- Page 111: Solución de problemas Videos de soporte para el usuario Si necesita más ayuda, puede encontrar videos y tutoriales en el sitio web LG.com. En la página principal de www.lg.com, haga clic en la pestaña Soporte del menú para mostrar las selecciones del menú. Seleccione Video Tutorials. Mensajes de error Problemas Causas posibles y solución Hay un problema en la entrada de agua. Controle que la manguera del agua no esté obstruida, plegada o congelada. Hay un problema en el desagüe. Controle que la manguera de desagüe de agua no esté obstruida, plegada o congelada. Los filtros están obstruidos. Limpie los filtros. Exceso de espuma causada por el uso de un detergente inadecuado. No utilice detergente para lavar vajillas a mano. Utilice solo detergentes diseñados para su uso en lavavajillas automáticos.
- Page 112: solución de problemas excesiva cantidad de agua. falla en el circuito de calentamiento. problema con el sensor de temperatura del agua. problema con el motor de lavado. problema con el motor vario. se seleccionó download cycle. modo prueba seleccionado. el modo configuración nivel de asistencia de enjuague se encuentra seleccionado. control lock está activado.
- Page 113: Solución de problemas El agua permanece en el compartimiento luego de que el ciclo se completa. La manguera de desagüe está plegada u obstruida. Ajuste la manguera o elimine el bloqueo. Ruido. Algunos ruidos son normales durante el funcionamiento. Abra la cubierta de detergente. El lavavajillas no se encuentra a nivel. Ajuste las patas de nivelación. El brazo de la boquilla golpea contra la vajilla. Reposicione la vajilla. Las luces no se encienden. La electricidad está desconectada. Conecte el suministro de energía. Los orificios de los brazos rociadores están bloqueados con partículas de comida. Limpie los orificios de los brazos rociadores. El lavavajillas emite un pitido constante cuando la puerta está abierta. Se trata de una medida de seguridad. Cierre la puerta hasta que el lavavajillas y la vajilla se enfríen. La puerta no se cierra totalmente. La bandeja para cubiertos no está cargada de manera adecuada. Presione la manija de la puerta para que esta se cierre correctamente. El lavavajillas no finalizó el ciclo. La puerta se abrió durante el ciclo. Si la puerta se abre durante un ciclo, debe presionarse el botón Start antes de que transcurran 4 minutos. Hay pérdidas en la parte frontal del aparato. El lavavajillas no está correctamente nivelado. Verifique que el aparato esté correctamente nivelado de lado a lado y de adelante hacia atrás.
- Page 114: Solución de problemas Desempeño Olor. El ciclo anterior se ha parado antes de su finalización y quedaron residuos de agua en el lavavajillas. Encienda el aparato, ejecute la opción Cancel para eliminar el agua residual y efectúe un ciclo Turbo con detergente, pero con el lavavajillas vacío. Hay alimentos en el fondo del aparato o en el filtro. Limpie el filtro y el interior según la sección Mantenimiento del manual del propietario. Se deja vajilla sin lavar mucho tiempo en el aparato. Ejecute un ciclo con una taza de vinagre blanco en un vaso o recipiente apto para lavavajillas colocado en la bandeja superior. Quedan restos de comida en la vajilla. Selección inadecuada de ciclo. Seleccione el ciclo correcto según el nivel de suciedad y el tipo de vajilla a lavar. La temperatura del agua es demasiado baja. Controle la conexión del suministro de agua o el ajuste de calentamiento del agua. No se utilizó detergente para lavavajillas. Utilice el detergente recomendado. Presión de agua de entrada insuficiente. La presión de agua debe ser de entre 20 y 80 psi. Los orificios propulsores de agua de los brazos rociadores están bloqueados. Limpie los brazos rociadores. Carga inadecuada de vajilla. Asegúrese de que la vajilla no bloquee la rotación de los brazos rociadores ni interfieran con el dispensador de detergente. Los filtros están obstruidos. Limpie los filtros. Opacidad en la vajilla de cristal. Hay una combinación de exceso de detergente y agua dura. Use menos detergente y un abrillantador para minimizar el problema. Marcas negras o grises en la vajilla. Los objetos de aluminio rozan contra la vajilla durante el ciclo. Reposicione la vajilla. Película amarilla o marrón en las superficies internas del lavavajillas. Elimine las manchas utilizando un producto quita manchas. Manchas y película en la vajilla. Baja temperatura del agua. El suministro de agua debe estar a 120 °F para un mejor rendimiento de lavado. Sobrecarga. No sobrecargue el lavavajillas. Carga inadecuada. Consulte la sección Operation. Presión de agua insuficiente. La presión de agua debe ser de entre 20 y 80 psi.
- Page 115: Solución de problemas Problemas Causas posibles y solución Manchas y película en la vajilla. Detergente insuficiente. Agregue la cantidad de detergente recomendada. El dispensador del abrillantador está vacío. Recargue el dispensador del abrillantador. Agua dura acumulada en la cuba. Retire toda la vajilla y use ácido cítrico en polvo. La vajilla no se seca. Controle y recargue el dispensador del abrillantador si está vacío. Problemas al conectar el electrodoméstico y el teléfono inteligente a una red Wi-Fi. Se introdujo una contraseña incorrecta para la red Wi-Fi. Borre su red Wi-Fi doméstica y vuelva a realizar el proceso de conexión. Red Móvil está activada en su teléfono inteligente. Desactive la Red Móvil antes de conectar el electrodoméstico. El nombre de la red inalámbrica (SSID) se ha configurado incorrectamente. Debe ser una combinación de letras y números. La frecuencia del enrutador no es de 2,4 GHz. Configure el enrutador inalámbrico a 2.4 GHz. El electrodoméstico y el enrutador están demasiado alejados. Reubique el enrutador para que esté más cerca del electrodoméstico.
- Page 116: garantía limitada términos y condiciones aviso de arbitraje: esta garantía limitada contiene una cláusula de arbitraje que le demanda a usted y a lg electronics resolver conflictos a través de un arbitraje vinculante. en el arbitraje no están permitidas las acciones colectivas ni los juicios con jurado. en caso de que su lavavajillas lg presente alguna falla por defectos de materiales o de fabricación, será reparado o reemplazado por lg. alcance de la garantía período de garantía: un (1) año a partir de la fecha de compra minorista original. lg también brindará, sin costo alguno, todos los servicios de mano de obra y en sitio para reemplazar la pieza defectuosa. los productos y las piezas de repuesto están cubiertos durante el tiempo restante del período original de garantía o noventa (90) días. salvo lo prohibido por la ley, toda garantía de comercialización o idoneidad implícita está limitada a la duración de la garantía arriba expresada.
- Page 117: Garantía limitada Esta garantía limitada le otorga derechos legales específicos, y es posible que usted cuente con otros derechos, que varían según el estado. Esta garantía limitada no cubre lo siguiente: Viajes del servicio técnico para entregar, buscar o instalar el producto. Daño o fallo del producto al operar durante fallas e interrupciones del suministro eléctrico. Daños o fallos del producto causados por tuberías de agua rotas o con fugas. Daños o fallos del producto causados por operar en una atmósfera corrosiva. Daños o fallos del producto causados por accidentes, pestes y alimañas. Daños o fallos del producto causados por modificaciones o alteraciones no autorizadas. Daños o fallos del producto causados por corriente eléctrica o voltaje incorrectos. Daños o fallos del producto causados por mal uso, abuso, instalación o mantenimiento incorrectos. Productos reacondicionados o cualquier producto vendido con avisos de En el estado actual. Costos asociados con la remoción y reinstalación del producto para reparaciones.
- Page 118: garantía limitada procedimiento para resolver conflictos todos los conflictos entre usted y lg se resolverán exclusivamente a través de un arbitraje vinculante. arbitraje vinculante significa que usted y lg renuncian al derecho de un juicio con jurado. definiciones las referencias a “conflicto” o “reclamación” incluirán cualquier conflicto, reclamo o controversia de cualquier tipo. aviso de disputa en caso de que usted desee iniciar un procedimiento de arbitraje, primero debe notificar a lg por escrito. acuerdo de arbitraje vinculante y renuncia de demanda colectiva cualquier conflicto entre usted y lg no estarán combinados o consolidados con una controversia relacionada con cualquier otro producto. normas y procedimientos de arbitraje el arbitraje será administrado por la Asociación Americana de Arbitraje (aaa).
- Page 119: Garantía limitada Si su reclamo es por $25,000 o menos, usted puede optar que el arbitraje sea realizado únicamente sobre la base de documentos, audiencia telefónica o audiencia en persona. Cualquier audiencia de arbitraje en persona se realizará en un lugar dentro del distrito judicial federal en el cual resida. Usted puede quedarse fuera de este procedimiento de resolución de la disputa. Para excluirse, debe enviar una notificación a LG dentro de 30 días desde la fecha de la primera compra del producto. Excluirse de este procedimiento no afectará la cobertura de la garantía limitada. Resultados deficientes de lavado pueden ser causados por desechos en el filtro. Limpie el filtro con regularidad. Asegúrese de que no haya vajilla ni utensilios que bloqueen los brazos rociadores. Use abrillantador o detergente combinado para evitar resultados deficientes de secado. Verifique y abra la llave de agua si hay un error IE.
- Page 120: Garantía limitada No hay suministro de agua porque la manguera de entrada está plegada. Error IE: No hay desagüe porque la manguera de desagüe está plegada. Error OE: El tapón ciego del triturador no se ha extraído. Error OE: Limpie el triturador o la trampa de aire. Problema en la conexión de la válvula de entrada y la manguera de desagüe causado por una instalación inadecuada. Fuga externa: Reinstale la manguera. Movimiento de la puerta o cierre comprometido debido a nivelación incorrecta. Ajuste las patas de nivelación delanteras inferiores a la altura requerida. No hay energía eléctrica debido a una conexión floja de la línea de alimentación. Deberá pagar la instalación.
- Page 121: Page 121
- Page 122: Page 122
- Page 123: Page 123
- Page 124: Page 124

BOSCH SMS4HDW52G Dishwasher

LAURUS LSVS60-9 Dishwasher

FISHER and PAYKEL DD60D4NX9 Dishwasher
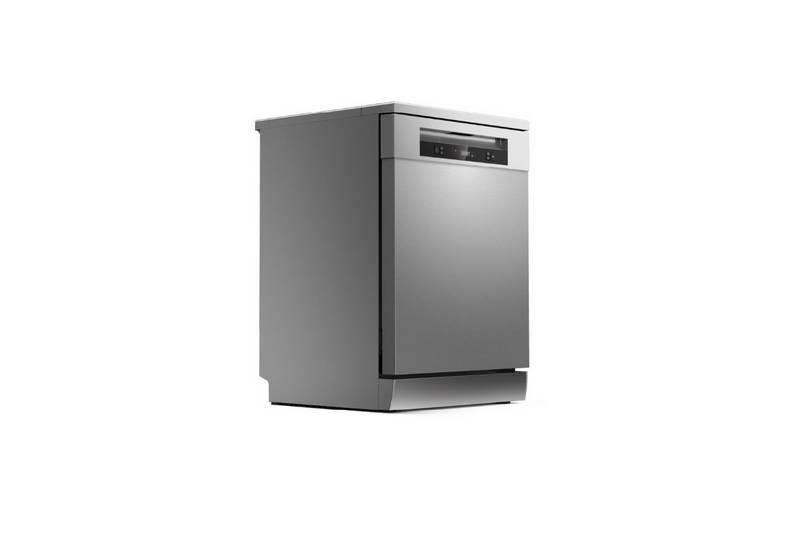
TOSHIBA DW-15F5SS-AU Dishwasher

FISHER PAYKEL DD24STI9N Sanitize Dishwasher

Whirlpool DU810SWP Dishwasher

Midea MDWPF1233F W WG,MDWPF1233F W WG Dishwasher

Electrolux EET43200LX Dishwasher

BOSCH SBI4ECS21E Dishwasher

BOSCH SMV25DX01T-15 Dishwasher