
caple DI631 Dishwasher


D i s h wa s h e r
I n s t r u c t i o n M a n u a l
DI631


| General | Details |
|---|---|
| Name | caple DI631 Dishwasher |
| Make | caple |
| Language | English |
| Filetype | PDF (Download) |
| File size | 2.41 MB |
 (1 votes, average: 5.00 out of 5)
 Loading...

caple DI654 Dishwasher
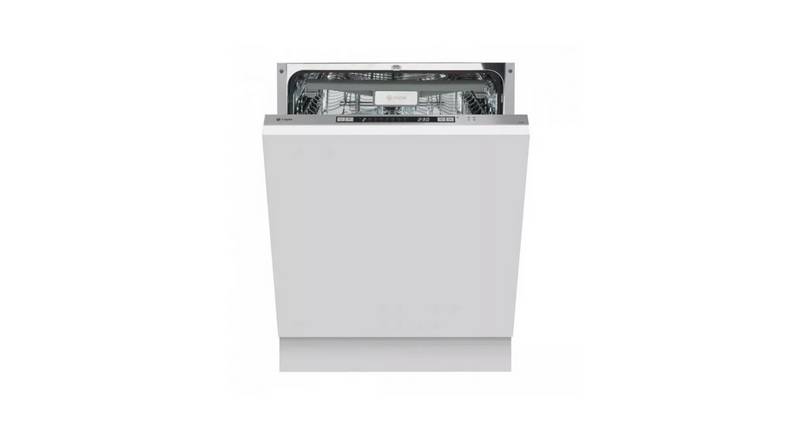
caple DI641 Dishwasher

caple DI631 Dishwasher Overview
Summary of Contents
- Page 1: Dishwasher instruction manual DI631
- Page 2: Safety instructions This product is not designed for commercial use; it is a household appliance only. This appliance can be used by children aged from 8 years and above and persons with reduced physical, sensory or mental capabilities if they have been given supervision or instruction. Children shall not play with the appliance. Cleaning and user maintenance shall not be made by children without supervision. This appliance is not intended for use by persons with reduced physical, sensory or mental capabilities unless supervised. This appliance is for indoor household use only. To protect against the risk of electrical shock, do not immerse the unit, cord or plug in water or other liquid. Please unplug before cleaning or performing maintenance on the appliance. Please keep this instruction manual for future reference.
- Page 3: Use a slightly moistened soft cloth with mild soap, and then use a dry cloth to wipe it again. Do not place any heavy objects on or stand on the door when it is open. This appliance must be earthed. When loading items to be washed, locate sharp items so that they are not likely to damage the door seal. The plug must be plugged into an appropriate outlet that is installed and earthed in accordance with all local codes and regulations. Do not wash plastic items unless they are marked dishwasher safe or the equivalent. Use only detergent and rinse additives designed for an automatic dishwasher. Children should be supervised to ensure that they do not play with the appliance. Do not operate your dishwasher unless all enclosure panels are properly in place. Open the door very carefully when the dishwasher is operating, there is a risk of water squirting out.
- Page 4: If the supply cord is damaged, it must be replaced by Caple, its service agent or a similarly qualified person in order to avoid a hazard. Packaging material could be dangerous for children. For disposing of package and the appliance please go to a recycling centre. During installation, the power supply must not be excessively or dangerously bent or flattened. The dishwasher must not be installed under a hob. The appliance is to be connected to the water mains using new hose sets and that old hose-sets should not be reused. By ensuring this product is disposed of correctly, you will help prevent potential negative consequences for the environment and human health. The maximum permissible inlet water pressure is 1MPa. The minimum permissible inlet water pressure is 0.04MPa. Do not dispose this product as unsorted municipal waste.
- Page 5: Quick operation guide For detailed operating method read the corresponding content on the instruction manual. Switch on the appliance by opening the door and pressing the On/Off button. Waste electrical products should not be disposed of with household waste. Please recycle where facilities exist. Check the rinse aid level and regeneration salt level using the electric indicators on the control panel. Scrape off any large amount of leftover food and load the baskets according to the dishwasher loading instructions. Press the Programme button until the required programme lights up. Close the door to start the dishwasher. Open the door carefully as hot steam may escape. Your new appliance is covered by warranty; keep the warranty card safe. Wait a few minutes before unloading the dishwasher to avoid handling hot dishes.
- Page 6: Control panel features include display indicators for error codes and delay time. The delay button allows for setting a delay in operation. The rinse aid indicator shows when the dispenser needs refilling. The programme button is used to select a wash programme. The on/off button controls the power supply. Before using the dishwasher for the first time, set the water softener. Add 1.5 kg of dishwasher salt and fill the salt container with water. Fill the rinse aid dispenser and add detergent.
- Page 7: Water softener must be set manually using the water hardness dial. The water softener is designed to remove minerals and salts from the water, which would have a detrimental effect on the operation of the appliance. The higher the content of these minerals and salts, the harder your water is. The softener should be adjusted according to the hardness of the water in your area. If hard water is used in the dishwasher, deposits will form on the dishes and utensils. The appliance is equipped with a special softener that uses a salt container specifically designed to eliminate lime and minerals from the water. The dishwasher allows for adjustment in the amount of salt consumed based on the hardness of the water used. Always use salt intended for use with dishwashers. Only fill with salt just before starting one of the complete washing programmes to prevent corrosion. The manufactory setting is H3.
- Page 8: After the lower basket has been removed, unscrew and remove the cap from the salt container. The Rinse Aid warning light in the control panel will illuminate when the dispenser needs re-filling. You should never let the Rinse Aid level fall 1/4 full. Place the end of the funnel into the hole and insert about 1.5kg of dishwasher salt. The salt warning light will turn off after the salt container has been filled with salt. Immediately after filling the salt into the salt container, a washing programme should be started. The Rinse Aid is released during the final rinse to prevent water from forming droplets on your dishes. The volume of the Rinse Aid container is about 110ml. Only use branded Rinse Aid for dishwasher. Clean up any Rinse Aid spilled during filling with an absorbent cloth to avoid excessive foaming during the next wash.
- Page 9: Adjusting rinse aid dispenser The rinse aid dispenser has six settings. Always start with the dispenser set on “4”. If spots and poor drying are a problem, increase the amount of rinse aid dispensed. Based on their chemical composition, detergents can be split into two basic types: conventional alkaline detergents and low alkaline concentrated detergents with natural enzymes. Detergent tablets of different brands dissolve at different speeds. Use long programmes when using detergent tablets to ensure complete removal of detergent residuals. Increase the dose if there are drops of water or lime spots on the dishes after washing. Reduce it if there are sticky whitish stains on your dishes or a bluish film on glassware. The dispenser must be refilled before the start of each wash cycle. Generally, only one tablespoon of detergent is needed for a normal wash load. Detergents with chemical ingredients are necessary to remove dirt, crush dirt, and transport it out of the dishwasher. Use only detergent specifically made for use in dishwashers. Keep your detergent fresh and dry. There are three sorts of detergents: with phosphate and with chlorine, with phosphate and without chlorine, and without phosphate and without chlorine. If detergents without phosphate are used in hard water, often white spots appear on dishes and glasses. In this case, please add more detergent to reach better results. Always add the detergent just before starting each wash cycle.
- Page 10: WARNING: Dishwasher detergent is corrosive. Take care to keep it out of reach of children. Consider buying utensils which are identified as dishwasher-proof. Use a mild detergent that is described as ‘kind to dishes’. Fill the detergent dispenser with detergent. To prevent damage, do not take glass and cutlery out of the dishwasher immediately after the programme has ended. Cutlery with wood, horn china or mother-of-pearl handles are not suitable. If the dishes are heavily soiled, place an additional detergent dose in the pre-wash detergent chamber. Some types of glasses can become dull after a large number of washes. Please observe the manufacturer’s recommendations on the detergent packaging.
- Page 11: Before or after loading the dishwasher basket To prevent water dripping from the upper basket into the lower basket, empty the lower basket first and then the upper basket. Scrape off any large amounts of leftover food. It is not necessary to rinse the dishes under running water. The upper basket is designed to hold more delicate and lighter dishware such as glasses, coffee and tea cups, and saucers. Items such as cups, glasses, pots/pans, etc. are faced downwards. Pots, serving bowls, etc., must always be placed top down. Very small items should not be washed in the dishwasher as they could easily fall out of the basket. Load hollow items such as cups, glasses, pans etc. with the opening facing downwards. Dishes and items of cutlery must not lie inside one another, or cover each other. Long bladed knives stored in an upright position are a potential hazard. Please do not overload your dishwasher for good results and reasonable consumption of energy.
- Page 12: Loading the baskets. Adjusting the upper basket can create more space for large utensils. The height of the upper basket can be adjusted by placing the wheels on different heights of the rails. Long items should be placed on the shelf to avoid obstructing the spray arms. For better stacking of pots and pans, the cup shelves can be folded down. The spikes of the lower basket can also be folded down for better stacking. Please keep this instruction manual for future reference.
- Page 13: Cutlery should be grouped in zones for easier unloading. Spoon heads should contact the serrated retainers for proper water runoff. The wash cycle table includes various programs like intensive, normal, eco, and rapid. The intensive program is for heavily soiled crockery and normally soiled pots and pans. The normal program is suitable for normally soiled tableware and is the most efficient in energy and water consumption. The eco program is designed for energy-saving while cleaning normally soiled loads. The rapid program is for lightly soiled loads that need a quick wash. Silverware should be placed with handles down and not nest together. Do not let any item extend through the bottom of the basket to prevent damage. Long utensils should be placed horizontally at the front of the upper basket. Always load sharp utensils with the sharp point down for safety.
- Page 14: This programme is the test cycle. A forgotten dish can be added any time before the detergent cap opens. Open the door a little. Capacity: 12 settings. The dishwasher will start running again. When the working cycle has finished, the buzzer of the dishwasher will sound for 8 seconds. Wait for a few minutes before unloading the dishwasher to avoid handling the dishes while they are still hot. Hot dishes are sensitive to knocks. A cycle that is underway can only be modified if it has only been running for a short time. It is normal that the dishwasher is wet inside.
- Page 15: Cleaning and maintenance The filter prevents larger remnants of food or other objects from getting inside the pump. The filter system consists of a coarse filter, a flat (main filter), and a microfilter (fine filter). Food and soil particles trapped in the main filter are pulverized by a special jet on the lower spray arm and washed down to drain. Larger items, such as pieces of bones or glass, that could block the drain are trapped in the coarse filter. This fine filter holds soil and food residues in the sump area and prevents it from being deposited on the dishes during the wash cycle. For best performance and results, the filter must be cleaned regularly. Inspect the filters for blocking after every time the dishwasher has been used. The entire filter assembly should be cleaned once a week. The dishwasher must never be used without the filters. Improper replacement of the filter may reduce the performance level of the appliance and damage dishes and utensils.
- Page 16: Caring for the dishwasher involves cleaning the control panel with a lightly dampened cloth and drying it thoroughly. If ice build-up prevents the dishwasher from working, contact a qualified plumber or serviceman. For the exterior, use a good appliance polish wax and avoid sharp objects, scouring pads, or harsh cleaners. Regularly clean the spray arms to prevent clogging from hard water chemicals. Use a soft warm, damp cloth to clean the edge around the door and avoid using spray cleaners. After every wash, turn off the water supply and leave the door slightly open to prevent moisture and odors. Always remove the plug from the socket before cleaning or performing maintenance. Take frost protection measures during winter to prevent freezing. When not in use for a long time, run a wash cycle with the dishwasher empty, then unplug and leave the door slightly open. Periodic cleaning of seals with a damp sponge will help prevent odors from forming.
- Page 17: Please carefully read the installation instruction. Preparations should be made before moving the dishwasher to the installation place. We strongly recommend the installation of the pipes and electrical connections should be made by a qualified engineer or similarly qualified professional. Choose a place near the sink to facilitate the installation of inlet and drain hoses. Electrical shock hazard. Disconnect electrical power before installing dishwasher. If dishwasher is installed at the corner of the cabinet, there should be some space when the door is opened. The installation position of the dishwasher should be near the existing inlet and drain hoses and power cord. Please check the accompanying installation accessories for fixing the aesthetic door panel to the cabinet. Minimum space is required when the door is opened. Please keep this instruction manual for future reference.
- Page 18: Aesthetic door panel dimensions and installation. The aesthetic door panel could be processed according to the figure. Install the hook on the aesthetic door panel and put the hook into the slot of the outer door of the dishwasher. After positioning of the panel, fix the panel onto the outer door by screws and bolts. The aesthetic door panel should be processed in accordance with the illustrated dimensions. The furniture door weight should be 3.5-5kg. Remove the four short screws. Insert the four long screws. Please keep this instruction manual for future reference.
- Page 19: Tension adjustment of the door spring The door springs are set at the factory to the proper tension for the outer door. When the aesthetic door panel is installed, you will have to adjust the door spring tension. Adjust the tension of the door springs by using an Allen key turning in a clockwise motion. Door spring tension is correct when the door remains horizontal in the fully opened position. Connect the inlet hose to the cold water supply. Insert the drain hose into a drain pipe with a minimum diameter of 40mm. The dishwasher must be secured in place. Put the installation hook into the slot of the side plane and secure it to the work surface with wood screws. Please keep this instruction manual for future reference.
- Page 20: The dishwasher must be level for proper dish rack operation and wash performance. For personal safety, place a spirit level on the door and rack track inside the dishwasher to check that it is level. Do not use an extension cord or an adapter plug with this appliance. Level the dishwasher by adjusting the three leveling legs individually. Ensure the voltage and frequency of the power corresponds to those on the rating label. This appliance must be earthed to reduce the risk of electric shock. The plug must be plugged into an appropriate outlet that is installed and earthed in accordance with local standards. Connect the cold water supply hose to a threaded 3/4 inch connector and make sure it is fastened tightly. If the water pipes are new or have not been used for an extended period, let the water run to ensure it is clear and free of impurities. After installation, please make sure to keep this manual for future reference.
- Page 21: Position the appliance in the desired location. The back should rest against the wall behind it, and the sides, along the adjacent cabinets or walls. The dishwasher is equipped with water supply and drain hoses that can be positioned either to the right or the left sides to facilitate proper installation. If the sink waste is more than 1000mm from the floor, the excess water in the hoses cannot be drained directly into the sink. Make sure the dishwasher is turned on and the door is closed securely. Connect the water drain hose. The drain hose must be correctly fitted to avoid water leaks. If you need a drain hose extension, make sure to use a similar drain hose. Insert the drain hose into a drain pipe with a minimum diameter of 40mm, or let it run into the sink, making sure to avoid bending or crimping it. Always wipe up Rinse Aid spills immediately. Make sure that the detergent is the one without colourant. Always run the quick wash programme without any crockery in the dishwasher and without selecting the Turbo function after adding dishwasher salt.
- Page 22: Type problem Possible causes What to do Improper loading A spray arm is knocking against an item in a basket Load the dishwasher as suggested in the directions. Knocking noise in the wash cabinet Interrupt the programme, and rearrange the items which are obstructing the spray arm. Dishes are removed too soon Rattling noise in the wash cabinet Interrupt the programme, and rearrange the items of crockery. The dishes are not drying In short programme the washing temperature is lower. Error codes When some malfunctions occur, the appliance will display error codes to warn you. Items are blocking the path of spray arms Rearrange the items so that the spray can rotate freely. Cloudiness on glassware Combination of soft water and too much detergent. Warning: If overflow occurs, turn off the main water supply before calling a service. Detergent left in dispenser cups Dishes block detergent cups. Please keep this instruction manual for future reference.
- Page 23: Technical fiche of household dishwasher according to EU Directive 1059/2010. Manufacturer: Caple. Type / Description: DI631. Energy efficiency class: A++. Annual energy consumption: 258 kWh. Power consumption of off-mode: 0.91 kWh. Annual water consumption: 3080 litres. Drying efficiency class: A. Programme duration of the standard cleaning cycle: 185 min. Noise level: 49 dB(A) re 1 pW.
- Page 24: Energy consumption is 188 kWh per year, based on 280 standard cleaning cycles using cold water fill and the consumption of low power modes. Actual energy consumption will depend on how the appliance is used. Water consumption is 2240 litres per year, based on 280 standard cleaning cycles. Actual water consumption will depend on how the appliance is used. This programme is suitable for cleaning normally soiled tableware and is the most efficient programme in terms of combined energy and water consumption for that type of tableware. The device meets the European standards and directives in the current version at delivery. The above values have been measured in accordance with standards under specified operating conditions. Results may vary according to quantity and pollution of the dishes, water hardness, amount of detergent, etc. The manual is based on the European Union’s standards and rules. Please keep this instruction manual for future reference.
- Page 25: Page 25

Whirlpool DU1041XTXQ3 Dishwasher

BOSCH SHP65CM2WH Dishwasher
IKEA AA-2412057-2-1 RÅGLANDA Integrated Dishwasher

BOSCH SGS4HVI31E Dishwasher

Whirlpool Dishwasher

FISHER AND PAYKEL DD24DTX6PX1 Tall Dishwasher

BOSCH 800 Series Dishwasher

FISHER AND PAYKEL DD24STI9N Dishwasher

AEG FEE63600ZM Dishwasher

FRIGIDAIRE FFBD2406NB Full Console Dishwasher