edesa EHDB-6930-I Dishwasher


Caring For The Dishwasher
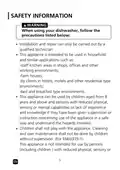
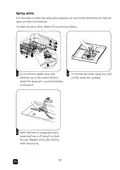
Frost precaution
Please take frost protection measures on the dishwasher in winter. Every time after
washing cycles, please operate as follows:
1. Cut off the electrical power to the dishwasher at the supply source.
2. Turn off the water supply and disconnect the water inlet pipe from the water valve.
3. Drain the water from the inlet pipe and water valve. (Use a pan to gather the water)
4. Reconnect the water inlet pipe to the water valve.
5. Remove the filter at the bottom of the tub and use a sponge to soak up water in
the sump.
After every wash
After every wash, turn off the water supply to the appliance and leave the door slightly
open so that moisture and odors are not trapped inside.
Remove the plug
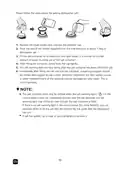
Before cleaning or performing maintenance, always remove the plug from the socket.
No solvents or abrasive cleaning
To clean the exterior and rubber parts of the dishwasher, do not use solvents or
abrasive cleaning products. Only use a cloth with warm soapy water.
To remove spots or stains from the surface of the interior, use a cloth dampened with
water an a little vinegar, or a cleaning product made specifically for dishwashers.
When not in use for a longtime
It is recommend that you run a wash cycle with the dishwasher empty and then remove
the plug from the socket, turn off the water supply and leave the door of the
appliance slightly open. This will help the door seals to last longer and prevent odors
from forming within the appliance.
Moving the appliance
If the appliance must be moved, try to keep it in the vertical position. If absolutely
necessary, it can be positioned on its back.
Seals
One of the factors that cause odours to form in the dishwasher is food that remains
trapped in the seals. Periodic cleaning with a damp sponge will prevent this from
occurring.
16
EN
| General | Details |
|---|---|
| Name | edesa EHDB-6930-I Dishwasher |
| Make | edesa |
| Language | English |
| Filetype | PDF (Download) |
| File size | 13.56 MB |


edesa 3706588 Dishwasher


Whirlpool 400011659130 Dishwasher

BOSCH SMH8ZCX01E Dishwasher

FISHER AND PAYKEL ADDD24DTNX Tall 24 Dishwasher

BOSCH SMS4HMI06E Dishwasher

FISHER PAYKEL DD24ST4NX9 Drawer TM Dishwasher

FISHER PAYKEL DD24DAX9 N Dishwasher

TOSHIBA DW-08T1 Place Setting Dishwasher

BOSCH SMS4EKW06G Dishwasher

Electrolux EEG62310L Dishwasher

BOSCH SMV4EB804E Fully Integrated Dishwasher