
HOOVER HI 4E7L0S-80 Semi Integrated Dishwasher







Thank you for choosing this product.
We are proud to offer the ideal product for
you and the best complete range of home
appliances for your daily routine.
Contents
1. GENERAL SAFETY RULES
2. WATER CONNECTION
3. LOADING THE SALT
Carefully read this manual for correct and
safe appliance use and for helpful tips on
efficient maintenance.
4. ADJUSTING THE UPPER BASKET
(ONLY ON SOME MODELS)
5. LOADING DISHES
Only use the dish washer
after
carefully reading these instructions. We
recommend you always keep this manual
to hand and in good condition for any
future owner.
6. INFORMATION FOR TEST
LABORATORIES
7. LOADING THE DETERGENT
8. TYPES OF DETERGENT
9. LOADING THE RINSE AID
10.CLEANING THE FILTERS
11.PRACTICAL HINTS
Please check that the appliance is
delivered with this instruction manual, the
warranty certificate, the service centre
address and the energy efficiency label.
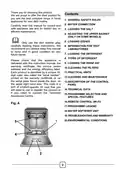
Each product is identified by a unique 16-
digit code, also called the “serial number”,
printed on the warranty certificate or on
the serial plate found inside the door, on
the upper right hand side. This code is a
sort of product-specific ID card that you
will need to use to register the product or
if you need to contact the Technical
Assistance Centre.
12.CLEANING AND MAINTENANCE
13.DESCRIPTION OF THE CONTROL
PANEL
14.TECHNICAL DATA
15.PROGRAMME SELECTION AND
SPECIAL FEATURES
16.REMOTE CONTROL (Wi-Fi)
17.PROGRAMME LEGEND
Fig. A
18.WATER SOFTENER UNIT
19.TROUBLESHOOTING AND WARRANTY
20.ENVIRONMENTAL CONDITIONS
2

| General | Details |
|---|---|
| Name | HOOVER HI 4E7L0S-80 Semi Integrated Dishwasher |
| Make | Hoover |
| Language | English |
| Filetype | PDF (Download) |
| File size | 0.8 MB |
 (1 votes, average: 5.00 out of 5)
 Loading...

HOOVER HI 3E9E0S Dishwasher

HOOVER HV-D13SS 13 Place Dishwasher

Hoover 32901787 Dishwasher

HOOVER HI 4E7L0S-80 Semi Integrated Dishwasher Overview
Summary of Contents
- Page 1: Thank you for choosing this product. We are proud to offer the ideal product for you and the best complete range of home appliances for your daily routine. Carefully read this manual for correct and safe appliance use and for helpful tips on efficient maintenance. Only use the dishwasher after carefully reading these instructions. We recommend you always keep this manual to hand and in good condition for any future owner. Please check that the appliance is delivered with this instruction manual, the warranty certificate, the service centre address and the energy efficiency label. Each product is identified by a unique 16-digit code, also called the “serial number.” This code is a sort of product-specific ID card that you will need to use to register the product or if you need to contact the Technical Assistance Centre. Cleaning and maintenance are important for the appliance's longevity. The manual includes sections on general safety rules, water connection, and loading instructions.
- Page 2: General safety rules This appliance is intended to be used in household and similar applications. It is not intended for use by persons with reduced physical, sensory, or mental capabilities without supervision or instruction. A different use from household environments or typical housekeeping functions is excluded. Using the appliance inconsistently with its intended use may reduce its life and void the warranty. Children should be supervised to ensure they do not play with the appliance. Children aged 3 and under should be kept away unless continuously supervised. If the supply cord is damaged, it must be replaced by a special cord or assembly from the manufacturer. Only use the hose-sets supplied with the appliance for the water supply connection.
- Page 3: Water pressure must be between 0.08 MPa and 1 MPa. The manufacturer declines all responsibility for any damage to people or property due to non-earthing of the machine. Make sure carpets or rugs do not obstruct the base or any of the ventilation openings. Ensure that the dishwasher does not crush power cables. After installation, the appliance must be positioned so that the plug is accessible. In general, it is not advisable to use adaptors, multiple plugs, and/or extension cables. Do not leave the door open in a horizontal position to avoid potential dangers. The appliance must not be supplied through an external switching device, such as a timer. Before cleaning or maintaining the dishwasher, unplug the appliance and turn off the water supply. Make sure that the electrical system is earthed and complies with all applicable laws.
- Page 4: Do not leave the appliance exposed to the elements. When moving the machine, do not lift it by the bottom of the door. Leaning or sitting on the open door of the dishwasher could cause it to tip over. We recommend two people lift the machine. The dishwasher is designed for normal kitchen utensils. Objects contaminated by petrol, paint, corrosive chemicals, acids, or alkalis must not be washed in the dishwasher. Knives and other utensils with sharp points must be loaded with their points down. If a water softening device is installed in the home, there is no need to add salt to the dishwasher's water softener. Repair work should only be carried out by an approved service agent. Do not install or use the dishwasher if it is damaged.
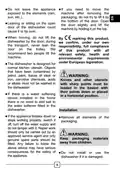
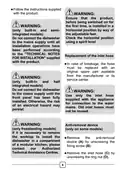
- Page 5: Follow the instructions supplied with the product. Ensure that the product is installed in a horizontal position by way of the adjustable feet before being switched on for the first time. Check the horizontal position using a spirit level for built-in and semi-integrated models. Do not connect the dishwasher to the mains supply until all installation operations have been performed according to the technical notes for installation. In case of breakage, the inlet hose must be replaced with an original spare part available from the manufacturer or its service center. Do not connect the dishwasher to the mains supply until the front panel has been fully installed for built-in and half integrated models. Use only the inlet hose supplied with the appliance for connection to the water mains. Old inlet hoses must not be reused. If it is necessary to remove the worktop to install the dishwasher in a compartment of a modular kitchen, remove the anti-removal device by unscrewing the fixing screw. Remove the inlet hose by unscrewing the ring nut.
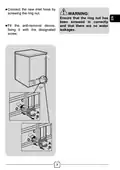
- Page 6: Connect the new inlet hose by screwing the ring nut. Ensure that the ring nut has been screwed in correctly and that there are no water leakages. Fit the anti-removal device, fixing it with the designated screw.
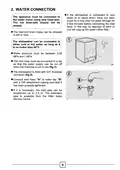
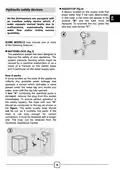
- Page 7: Water connection If the dishwasher is connected to new pipes or to pipes which have not been in use for a long time, run water through for a few minutes before connecting the inlet hose. The appliance must be connected to the water mains using new hose-sets. The inlet and drain hoses can be directed to left or right. The dishwasher can be connected to either cold or hot water, as long as it is no hotter than 60°C. Water pressure must be between 0.08 MPa and 1 MPa. The inlet hose must be connected to a tap so that the water supply can be cut off when the machine is not in use. The dishwasher is fitted with a 3/4 threaded connector. Connect inlet hose A to water tap B with a 3/4 attachment making sure that it has been properly tightened. If it is necessary, the inlet pipe can be lengthened up to 2.5 m.
- Page 8: AQUASTOP is a hydraulic safety device located on the supply tube that stops water flow if the tube deteriorates. A red mark will appear in the window B indicating the need for tube replacement. To unscrew the nut, press the one-way lock device C. All dishwashers are equipped with an overflow safety device that blocks water flow and/or drains excess quantities if water exceeds normal levels due to malfunctions. Some models may include the WATERBLOCK system designed to improve appliance safety by preventing flooding caused by machine malfunctions or fractures in rubber pipes, particularly the water supply pipe. A sump located on the base of the appliance collects possible water leakage and activates a sensor that blocks water flow, even with the tap fully opened. If box A containing electrical parts is damaged, remove the plug from the socket immediately. To ensure perfect operation of the safety system, the hose with box A should be correctly connected to the tap. The water supply hose should not be cut, as it contains live parts. If the hose is not long enough for correct connection, it must be replaced with a longer one. The hose can be obtained from the Technical Assistance Centre.
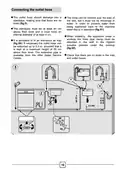
- Page 9: Connecting the outlet hose The outlet hose should discharge into a standpipe, making sure that there are no kinks. The hose can be hooked over the side of the sink, but it must not be immersed in water to prevent water from being siphoned back to the machine. The standpipe must be at least 40 cm above floor level and have an internal diameter of at least 4 cm. When installing the appliance under a worktop, the hose pipe clamp must be attached to the wall in the highest possible position under the worktop. It is advisable to fit an anti-odour air trap. If necessary, the outlet hose can be extended up to 2.5 m, provided that it is kept at a maximum height of 85 cm above floor level. The extension pipe is available from the After Sales Service Centre. Check that there are no kinks in the inlet and outlet hoses.
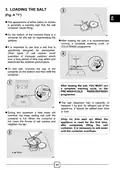
- Page 10: Loading the salt is essential for the dishwasher's performance. The appearance of white stains on dishes is a warning sign that the salt container needs filling. There is a container for the salt located at the bottom of the machine for regenerating the softener. After loading the salt, it is recommended to run a complete washing cycle or a cold rinse program. Only use salt specifically designed for dishwashers, as other types may contain insoluble particles that can affect the softener's performance. To add salt, unscrew the cap of the container at the bottom and refill it. After loading the salt, you must run a complete washing cycle or the pre-wash/cold rinse program. The salt dispenser has a capacity of between 1 kg and should be refilled periodically for efficient use. During the filling process, a little water may overflow; continue adding salt until the container is full. For the first startup, after filling the salt container, add water until it overflows.
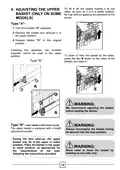
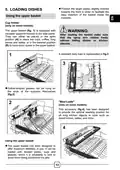
- Page 11: To lift the basket, hold it by the sides and let it go once raised. Adjusting the upper basket is only applicable on some models. For Type A, turn front blocks outwards, remove the basket, and remount it in the upper position. After adjusting, the movable supports cannot be used in the upper position. To lower the basket, hold it by the sides and press the levers on the sides. It is recommended to adjust the basket before loading dishes. Type B models have a height adjustment system for the upper basket. Always accompany the basket during its descent into the stop position. During the first start-up, the upper basket may be in either position. Never raise or lower the basket by working on one side only.
- Page 12: Position the larger plates slightly inclined towards the front to facilitate the easy insertion of the basket inside the machine. The upper basket is equipped with movable supports hooked to the side panel. The supports can be placed in the open position to place tea cups, coffee, long knives, and ladles, or in the lowered position to have more space in the upper basket. After loading the basket, make sure that the spray arm rotates freely without hitting dishes or kitchen utensils. Goblet-shaped glasses can be hung on the ends of the supports. The Maxi-Ladle accessory has been designed to provide the optimal washing position for long kitchen objects or tools. The upper basket has been designed to offer maximum flexibility of use. It can be loaded with dessert plates, cups, and glasses, which it is advisable to lock to avoid them being overturned by the jets.
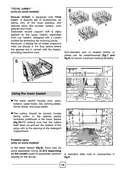
- Page 13: Total Care+ is a specific set of accessories for taking care of delicate items like crystals and wine glasses. Dedicated double support is applied on the upper basket, designed with a rubber surface for protection. A double set of rubber protection mats are placed in the floor space for maximum care of glasses. Non-standard size dishes can be raised or lowered for maximum loading flexibility. The lower basket houses pots, pans, and various types of plates. Cutlery should be placed handle facing down in the special plastic container in the lower basket. Ensure cutlery does not prevent the rotation of the spray arm or the opening of the detergent compartment. Foldable racks may be present in the lower basket for optimum stability of dishes. Adjustable combs are useful for stability, depending on the model. A standard daily load is represented in the provided figure.
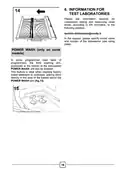
- Page 14: An example of the positioning of the cutlery rack is shown in figure 9. Knives and other utensils with sharp points must be loaded in the basket with their points facing down or placed in a horizontal position. The rational and correct arrangement of the dishes is an essential condition for a good washing result. Use the third basket to load the cutlery, as shown in the image (fig.12). Load the knives with the cutting side facing downwards. The cutlery basket is intended to contain cutlery of all kinds, excluding those of such length as to interfere with the upper sprinkler. The cutlery must be placed in the appropriate spaces of the upper grids to allow for optimal water passage. If necessary, the side shelves of the third basket can be slid or removed (fig.13-14) in order to create additional space in the upper basket for bulky items such as crystals. You can adjust the height of the cutlery basket handle by pulling or pushing the handle (fig.11).
- Page 15: Information for test laboratories is available upon request for comparison testing and measuring noise levels according to EN normative. Requests should specify the model name and number of the dishwasher as indicated on the rating plate. The Power Wash feature is available on some models and is enabled in certain programmes. The third washing arm, located at the bottom of the dishwasher, is part of the Power Wash feature. This feature is particularly effective for cleaning heavily soiled tableware or cookware. Items should be placed directly in the area of the basket above the Power Wash arm for optimal cleaning.
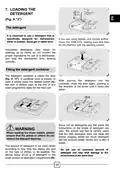
- Page 16: Loading the detergent is essential for proper dishwasher operation. Use a detergent specifically designed for dishwashers in powder, liquid, gel, or tablet form. One tablet should suffice if using tablets. Ensure tablets do not interfere with the opening system. Unsuitable detergents can prevent the dishwasher from working correctly. The detergent container is located inside the door. Press the release button to open the container door. Close the door after pouring in the detergent until it clicks into place. Use 20-30 g of detergent based on the dirtiness of the dishes. Avoid excessive detergent to limit environmental damage.
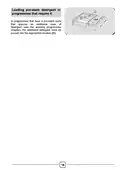
- Page 17: Loading pre-wash detergent in programmes that require it. In programmes that have a pre-wash cycle that requires an additional dose of detergent, the additional detergent must be poured into the appropriate location.
- Page 18: Read carefully and follow the manufacturer’s instructions given on the packaging. The effectiveness of detergents containing built-in water softener/salt depends on the hardness of your water supply. Check that the hardness of your water supply is within the effective range given on the detergent packaging. Detergent tablets of different manufacturers dissolve at different speeds. During short programmes, some detergent tablets may not be fully effective. To get satisfactory washing results, the tablets must be placed in the wash section of the detergent container. Concentrated detergents have a smaller impact on the environment and protect the dishes and the dishwasher. Using combined detergents may cause limescale deposits on dishes or in the dishwasher. If washing and/or drying problems occur, it is recommended to return to traditional separate products. The rinse aid container must be empty when using combined detergents.
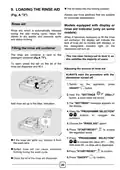
- Page 19: The lid clicks into the locking position. Always use rinse additives that are suitable for automatic dishwashers. Rinse aid helps the dishes to dry quickly and prevents spots and stains forming. When it becomes necessary to fill the rinse aid container, the display will indicate the lack of rinse aid. The rinse aid container is next to the detergent container. This has been factory-set to level 4, as this satisfies the majority of users. Always start the procedure with the dishwasher turned off. If the rinse aid spills out, remove it from the wash tank. Spilled rinse aid can cause excessive frothing during the wash cycle. Close the lid of the rinse aid dispenser.
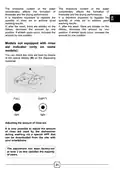
- Page 20: The limestone content of the water considerably affects the formation of limescale and the drying performance. It is therefore important to regulate the quantity of rinse aid to achieve good washing results. If, after the wash, there are streaks on the dishes, decrease the amount by one position. If whitish spots occur, increase the amount by one position. Models not equipped with rinse aid indicator can check the rinse aid level by means of the optical display on the dispensing container. It is only possible to adjust the amount of rinse aid used by the dishwasher during washing via a special app that can be downloaded from the site with your smartphone. The adjustment has been factory-set at level 2 as this satisfies the majority of users.
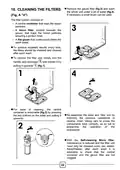
- Page 21: Remove the gauze filter and wash the whole unit under a jet of water. If necessary, a small brush can be used. The filter system consists of a central container that traps larger particles, a micro filter that traps the tiniest particles, and a flat gauze that continuously filters the wash water. To achieve excellent results every time, the filters should be checked and cleaned after each wash. To remove the filter unit, simply turn the handle anti-clockwise and extract it by pulling it upwards. For ease of cleaning, the central container is removable by pressing the two buttons on the sides and pulling it upwards. Re-assemble the plate and filter unit by following the previous operations in reverse order. With the self-cleaning micro filter, maintenance is reduced and the filter unit need only be checked every two weeks. After each wash, it is advisable to check that the central container and the gauze filter are not clogged.
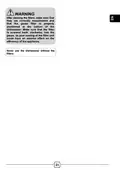
- Page 22: Warning: After cleaning the filters, ensure they are correctly reassembled. The gauze filter must be properly positioned at the bottom of the dishwasher. Make sure that the filter is screwed back, clockwise, into the gauze. Poor seating of the filter unit could adversely affect the efficiency of the appliance. Never use the dishwasher without the filters.
- Page 23: Achieve the best use of energy, water, detergent, and time by using the recommended maximum load size. Before placing the dishes in the dishwasher, remove any remaining food to avoid blocking the filters, water outlet, and washing arm nozzles. If you want the dishwasher to give a complete wash, place the dishes in the dishwasher at the end of each meal and turn on the cold rinse cycle if necessary. There is no need to rinse the dishes before loading them into the dishwasher, as this leads to increased water consumption and is not recommended. If saucepans and oven dishes are encrusted with burnt food, it is advisable to leave them to soak before washing. The most efficient programmes in terms of combined use of water and energy are usually the longer-lasting ones with lower temperature. Washing in a dishwasher uses less energy and water compared to hand washing if the dishwasher is used following the manufacturer’s instructions and advice. It should be remembered that not all dishes are suitable for washing in a dishwasher. To wash silver properly, rinse it immediately after use and keep it separate from other metals. Certain decorations may fade, so it is a good idea to wash just one item first to ensure others will not fade.
- Page 24: It is a good idea not to put silver cutlery with non-stainless steel handles into the dishwasher as there could be a chemical reaction between them. In order to avoid any dripping from the top rack, remove the lower rack first. If the dishes are to be left in the machine for some time, leave the door ajar to let some air circulate and to improve the drying performance. When buying new crockery or cutlery always make sure that they are suitable for washing in a dishwasher.
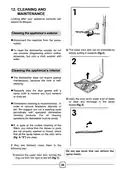
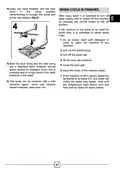
- Page 25: Cleaning and maintenance Looking after your appliance correctly can extend its lifespan. Disconnect the machine from the power supply. To clean the dishwasher outside, do not use solvents or abrasives, but only a cloth soaked with water. The dishwasher does not require special maintenance, because the tank is self-cleaning. Regularly wipe the door gasket with a damp cloth to remove any food remains or rinse aid. Dishwasher cleaning is recommended to remove limestone deposits or dirt. We suggest you run a washing cycle periodically with specialist dishwasher cleaning products. If dishes or pans are not properly washed or rinsed, check that all the spray heads on the rotor arms are clear. Do not use tools that can deform the spray heads. Remove the upper rotor arm by turning the ring nut from the right to the left.
- Page 26: When you have finished, refit the rotor arms in the same position. After every wash, it is essential to turn off the water supply and switch off the machine. If the machine is not going to be used for some time, it is advisable to do an empty wash with detergent. Pull out the electric plug and turn off the water tap. Fill the rinse aid container and leave the door ajar. Both the door lining and the tank lining are in stainless steel. Spots caused by oxidation may occur due to a high level of iron salts in the water. Keep the inside of the machine clean. If the machine is left in places where the temperature is below 0°C, any water left inside the pipes may freeze. The spots can be removed with a mild abrasive agent; never use chlorine-based materials.
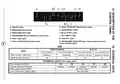
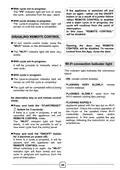
- Page 27: G delay Start/settings option button Start/reset button Delay start lights On/off button Enrolment Wi-Fi button Salt empty light Programme selection/child lock button Half load light Technical data (see rating plate)
- Page 28: Programme selection and special features are important aspects of the appliance. The intermittent working of the washing pump is a normal feature of impulse washing. To turn the appliance on and off, press the ON/OFF button. Opening the door during a programme is not recommended, especially during the main wash and final rinse phases. If the door is opened while a programme is running, the machine stops automatically. To select a different programme, press the PROGRAMME SELECTION button. If you open the door during the drying cycle, an intermittent buzzer signals that the drying cycle has not finished. To change or cancel a programme in progress, hold the RESET button for at least 3 seconds. A special memory stores the selected programme in case of a power supply interruption. Before starting a new programme, check that there is detergent in the dispenser. Some programmes use an impulse or intermittent washing system to reduce consumption and improve performance.
- Page 29: Programme end will be indicated by 3 signals lasting 3 seconds interspersed with a pause of 20 seconds. After one minute, the dishwasher will switch off and the word END will appear for one minute. Once selected, the end of programme option remains active for subsequent washing cycles and can only be de-activated by pressing the button for 5 seconds. In models with the AUTO DOOR option, the door will open automatically during the drying phase. The HALF LOAD button is specifically developed for small, lightly-soiled loads that fit approximately half of the dishwasher’s capacity. Selecting the HALF LOAD option can save time, energy, and water. The NO SALT indicator light will light up when it is necessary to refill the salt container. The TABLETS button optimises the use of combined detergents. Pressing the TABLETS button modifies the selected washing programme for better performance from combined detergents. If the reset button is pressed without filling the salt container, it will interfere with the functioning of the salt indicator light. To guarantee the correct functioning of the salt indicator light, the salt container must always be fully refilled.
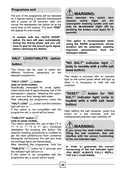
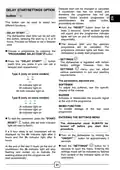
- Page 30: Delayed start can be changed or cancelled if the countdown has not ended. The dishwasher start time can be set with the delay start button, delaying the start by 3, 6, or 9 hours. The delayed start and the selected programme will be cancelled, and the programme indicator lights will flash. From the settings menu, you can adjust various parameters to suit your washing requirements. To adjust the softener, see the specific chapter of the manual. The buzzer activates or deactivates the acoustic signal at the end of the programme. The memo function enables storage of the last used programme. To start the countdown, press the START/RESET button. The dishwasher must always be turned off before starting the settings procedure. Entering the settings mode will be indicated by flashes from several of the indicator lights on the dashboard.
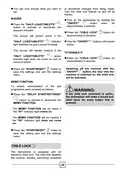
- Page 31: Turn the child lock feature on and off as follows. You can now choose what you want to set. Turn on the dishwasher by holding the ON/OFF button down for approximately 3 seconds. Press the HALF LOAD/TABLETS button to activate or deactivate the acoustic indicator. Press the CHILD LOCK button for approximately 5 seconds. The buzzer will remain active if the HALF LOAD/TABLETS indicator light switches on and a sound is heard. Press the START/RESET button to save the settings and exit the settings menu. To enable memorisation of the last programme used, proceed as follows. If the child lock command is active, the dishwasher will make a sound and blink twice for every button that is pressed. The MEMO FUNCTION will be active if the 6h indicator light comes on.
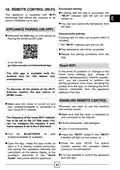
- Page 32: Successful pairing allows remote control of the appliance via an app. If pairing is successful, the Wi-Fi indicator light will turn on and remain on. You can control the dishwasher from the app once paired. If pairing fails, the Wi-Fi indicator light will turn off, and the dishwasher will not be connected. You may need to repeat the pairing procedure if it does not succeed within 5 minutes. In case of changes to home router settings, you must perform the pairing procedure again. The hOn app is available for both Android and iOS devices. Ensure the router is on and connected to the internet for remote control use. The home Wi-Fi network must be set to the 2.4 GHz band for configuration. Follow the instructions in the app to create a user profile and pair the appliance.
- Page 33: With cycle not in progress, the P5 indicator light will turn on when the cycle starts. If the appliance is switched off and then on again, the cycle will continue from the point of interruption when remote control is enabled. With cycle already in progress, the cycle-in-progress indicator light will remain on until the cycle is completed. To exit remote control mode, press the Wi-Fi button on the dishwasher again. The Wi-Fi indicator light will blink very slowly. With cycle not in progress, it will be possible to manually select a new cycle. With cycle in progress, ON indicates remote control is enabled. The cycle will be completed without being controlled via the app. Press and hold the START/RESET button for 3 seconds to exit remote control mode. Press and hold the ON/OFF button for 3 seconds to pause the cycle and exit remote control mode.
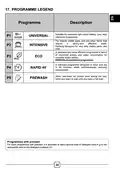
- Page 34: Programme legend Description Suitable for everyday light soiled dishes, your daily reference programme. Universal For heavily soiled pans and any other items that require a strong and effective wash. Intensive Perfectly designed for very dirty plates, pans, and pots. A standard and more efficient programme in terms of combined energy and water consumption for normally-soiled dishes. Eco EN60436-standardized programme. A half-load programme designed to wash and dry in 49 minutes, whilst simultaneously reducing consumption. Rapid 49’ Short, pre-wash for dishes used during the day, when you want to wait until you have a full load. For wash programmes with prewash, it is advisable to add a second dose of detergent in the appropriate seat on the detergent container.
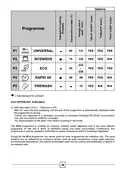
- Page 35: Options for different programmes include 60, 75, 131, and 135. The ECO programme is suitable for cleaning normally soiled tableware and is the most efficient in terms of energy and water consumption. The actual duration of the wash cycle varies according to the model. Values for other programmes are indicative only and may be influenced by factors such as water temperature and the amount of detergent used. The programme duration is automatically displayed while running with hot water. Add detergent for prewash where applicable. N/A indicates options not available. Values are measured according to European Standard EN 50242. The cycle duration may vary based on conditions of usage. The ECO programme is used by regulatory authorities to assess compliance with EU ecodesign legislation.
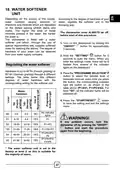
- Page 36: Water softener unit Water contains varying amounts of limestone and minerals, leading to whitish stains on dishes. The degree of hardness of water can be obtained from the water supply company. The dishwasher must be off before starting the procedure. The water softener unit uses special regenerating salt to supply softened water. Hardness can be regulated through 6 different settings. Press the SETTING button for 5 seconds to open the menu. Press the PROGRAMME SELECTION button to select the desired level of limescale removal. Press the START/RESET button to save the setting and exit the settings menu. The water softener unit is set in the factory at level 3, suitable for most users.
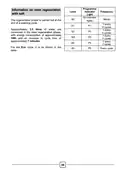
- Page 37: Information on resin regeneration with salt The regeneration phase is carried out at the end of a washing cycle. Approximately 3.5 litres of water are consumed in the resin regeneration phase, with energy consumption of approximately 1Wh and an increase in cycle time of approximately 7 minutes. For the Eco cycle, it is as shown in the table.
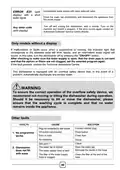
- Page 38: Troubleshooting and warranty If you believe the dishwasher is not working correctly, consult the quick guide provided below with some practical tips on how to fix the most common problems. If the malfunction continues or recurs, contact the Technical Assistance Centre. Models with a display: errors are reported by a number preceded by the letter E (e.g. Error 2 = E2) and a short audio signal. Models without a display: an error is shown by a sequence of flashes of every LED. The dishwasher does not fill with water NO WATER with a short audio signal. Make sure the water supply is open. Close the water supply, unscrew the drain pipe from the back of the dishwasher and check that the sand filter is not clogged. The dishwasher does not drain water ERROR E3 (with display) with a short audio signal. Make sure the drain pipe isn’t bent, trapped or blocked, and the filter is not clogged. Water leak ERROR E4 (with display) with a short audio signal. Make sure the drain pipe isn’t bent, trapped or blocked, and the filter is not clogged. The water heating element is not working correctly or the filter plate is clogged ERROR E8 (with display) with a short audio signal. Clean the filter plate.
- Page 39: Uncontrolled water supply with open solenoid valve. Error E21 with display and audio signal. Close the water tap immediately and disconnect the appliance from the power supply. Turn off and unplug the dishwasher, wait a minute, then restart the program. If the error occurs again, contact an Authorised Customer Service Centre. If malfunctions occur during a program, the corresponding indicator light will blink rapidly. Turn the dishwasher off by pressing the ON/OFF button. Check the water supply, drain pipe, siphon, and filters before setting the program again. The dishwasher is equipped with an overflow safety device that discharges excess water. Do not move or tilt the dishwasher during operation to ensure the correct operation of the overflow safety device.
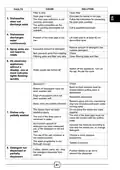
- Page 40: Cause Solution Faults Filter is dirty Clean filter Drain pipe is bent The drain pipe extension is not correctly connected Eliminate the bends in the pipe Follow the instructions for connecting the drain pipe carefully Dishwasher does not discharge water The outlet connection on the wall is pointing downwards not upwards Call a qualified technician Dishwasher discharges water Position of the drain pipe is too low Lift drain pipe to at least 40 cm above floor level Spray arms are not heard to rotate Filtering plate and filter very dirty Clean filtering plate and filter Dishes only partially washed An incorrect amount of detergent has been measured out, or the detergent is old and hard Increase the measure according to how dirty the dishes are, or change detergent
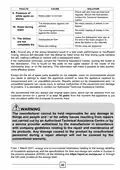
- Page 41: Faults and solutions for dishwasher issues are outlined. Check salt and rinse aid levels if faults persist. Presence of white spots on dishes may indicate hard mains water or improper loading. Noise during wash could be due to dishes knocking against revolving arms. Inadequate air flow or missing rinse aid can prevent dishes from drying completely. Remove dirt deposits by hand if wash performance is poor. Contact Technical Assistance Centre for persistent malfunctions, providing the dishwasher model. Repairs should only be conducted by authorized personnel to avoid injury or further damage. Original spare parts are recommended and available for at least 10 years. The manufacturer is not responsible for damages from unauthorized repairs.
- Page 42: Assistance and warranty The product is guaranteed under the law, and under the terms and conditions stated on the warranty certificate included with the product. The certificate should be stored and shown to an authorized Technical Assistance Centre in case of need, together with the proof of purchase. You can also check the warranty conditions on our website. For assistance, please fill in the online form or contact us at the number indicated on the support page of our website. The manufacturer declines all responsibility for any printing errors in this booklet. The manufacturer reserves the right to make any changes deemed useful to its products without changing their essential characteristics.
- Page 43: Environmental conditions are important for appliance disposal. WEEE should not be treated as household waste. WEEE must be handed over to relevant collection points. Home collection for large WEEE may be available in some countries. WEEE contains polluting substances and reusable components. Specific treatments are necessary to remove pollutants and recycle materials. Old appliances can often be returned to retailers when purchasing new ones. The return of old appliances is typically free of charge on a one-to-one basis. Individuals can help prevent WEEE from becoming an environmental issue. Following basic disposal rules is essential for responsible WEEE management.
- Page 44: Page 44

maidaid halcyon C612 Undercounter Tray Dishwasher

Hisense HFI663BXXL Dishwasher

Hisense HS643D60WUK Dishwasher

FISHER and PAYKEL DD60SCTW9 Contemporary Tall Dishwasher

BOSCH SBI4ECS21E Dishwasher

ASKO DFI5558MKXXL Dishwasher

FISHER PAYKEL DW24UNT4X2 Dishwasher

VALBERG 14S40 B WAD929C Dishwasher

rhima RU-50 Under Bench Dishwasher

Miele HG07-W Fully Dishwasher