
×
- 1. Technologie Für Den Haushalt (Technology For Domestic Use → Bedienungsanleitung → Instruction Manual → Geschirrspüler)
- 2. Sicherheitshinweise (Installation → Gerät Und Bedienfeld → Vor Der Ersten Benutzung → Beladen Der Geschirrkörbe)
- 3. Starten Eines Spülprogramms (Reinigung Und Pflege → Problembehandlung → Technische Daten → Garantiebedingungen)
- 4. Sicherheitshinweise (Bewahren Sie Diese Bedienungsanleitung So Auf → Prüfen Sie Auf Jeden Fall Auch Das Technische Umfeld Des Geräts → Das Gerät Ist Ausschließlich Zur Privaten Nutzung Bestimmt → Erlauben Sie Niemandem, Der Mit Der Bedienungsanleitung Nicht Vertraut Ist, Das Gerät Zu Benutzen)
- 5. Benutzer-wartung (Gefahr → Erstickungsgefahr)
- 6. Gefahr Eines Tödlichen Stromschlags! (Vorsicht! → Verbrennungsgefahr! → Halten Sie Kinder Fern Von Spülmaschinen-spülmitteln Und Spülzusätzen. → Benutzen Sie Das Gerät Niemals Ohne Eingesetzte Filter.)
- 7. Hinweis (Platzieren Sie Scharfe Messer Mit Dem Griff Nach Oben Oder Waagerecht → Benutzen Sie Immer Einen Wasserenthärter → Benutzen Sie Immer Einen Klarspüler → Benutzen Sie Ausschließlich Spülmaschinen-spülmittel Und Zusätze)
- 8. Installation (Entpacken Und Wahl Des Standorts)
- 9. Vorbereitung Der Installation (Wählen Sie Einen Platz Neben Dem Abfluss)
- 10. Mindestfreiraum (Abmessungen Und Einbau Der Frontblende)
- 11. Trennen (Entfernen)
- 12. Einstellung Der Türfedervorspannung (Ordnungsgemäße Funktion Der Körbe Und Spülfunktion)
- 13. Installationsschritte (Kaltwasseranschluss → Anschluss Des Siphons → Stromanschluss)
- 14. Wasseranschluss
- 15. Abnehmen Des Wasserzufuhrschlauchs (Kaltwasseranschluss → Anschluss Des Wasserablaufschlauchs)
- 16. Wasserablaufschlauch (Verlängerungsschlauch → Stromanschluss → Elektrische Anforderungen → Erdungsanweisungen)
- 17. Anbringen Der Oberen Distanzleiste
- 18. Gerät Und Bedienfeld (Oberer Geschirrkorb → Unterer Geschirrkorb → Behälter Für Reinigungsmittel, Tabs Und Klarspüler → Halbe Beladung: Möglichkeit Nur Den Oberen Oder Nur Den Unteren Bereich Zu Benutzen.)
- 19. Kindersicherungsanzeige (Programmtaste → Start/pause → Programmanzeigen → Vor Der Ersten Benutzung)
- 20. Mechanische Anzeige C. (Elektrische Anzeige Auf Dem Bedienfeld → Klarspülerstatus Prüfen → Wasserenthärterstatus Prüfen → Programm Auswählen)
- 21. Überprüfen Sie Vor Dem Starten Des Geräts, Ob Das Gerät Gerade Und Fest Steht.
- 22. Wasserhärte (Wasserenthärter Befüllen)
- 23. Stecken (Befestigen → Wasserenthärteranzeige → Klarspüler-behälter Befüllen)
- 24. Drehen (Füllen → Setzen → Einstellen Des Klarspülspenders → Drehschalter)
- 25. Verringern Sie Die Menge An Klarspüler (Spülmaschinen-spülmittel → Spülmaschinen-tabs → Der Spülmittelbehälter)
- 26. Füllen Des Behälters (Benutzen Sie Nur Für Spülmaschinen Geeignete Spülmittel → Halten Sie Ihr Spülmaschinen-spülmittel Stets Trocken → Stärker Verschmutztes Geschirr Erfordert Eine Höhere Menge An Spülmittel)
- 27. Kammer Für Den Hauptspülgang (Kammer Für Den Vorspülgang → Beladen Der Geschirrkörbe → Vor/nach Dem Beladen)
- 28. Entladen (Oberer Geschirrkorb → Einstellung Des Oberen Korbs)
- 29. Unterer Geschirrkorb (Besteckkorb)
- 30. Die Folgenden Gegenstände Sind Nicht Zum Spülen In Einem Geschirrspüler Geeignet. (Die Folgenden Gegenstände Sind Lediglich Eingeschränkt Zum Spülen In Einem Geschirrspüler Geeignet: → Hinweise Zum Beladen → Schäden An Glaswaren/geschirr)
- 31. Mögliche Ursachen (Empfohlene Abhilfen → Die Art Des Glases/geschirrs → Die Chemische Zusammensetzung Des Spülmaschinen-spülmittels → Die Wassertemperatur Und Dauer Des Spülprogramms)
- 32. Für Normal Verschmutztes Geschirr (Hauptspülen → Trocknen → Eco → Starten Eines Spülprogramms)
- 33. Drücken Sie Die Programm-taste Zur Auswahl Eines Spülprogramms. Die Abfolge Lautet: Intensivnormalecoglas90 Min. Schnell. (Wechsel Eines Laufenden Spülprogramms → Nachträgliches Eingeben Von Geschirr → Ende Eines Spülprogramms)
- 34. Warten (Reinigung Und Pflege → Filtersystem)
- 35. Überprüfen Sie Die Filter Nach Jedem Spülprogramm Auf Verunreinigungen. (Entfernen Sie Größere Rückstände Nach Jedem Spülprogramm. → Bedienfeld Und Gerät → Reinigen Sie Das Bedienfeld Mit Einem Leicht Angefeuchteten Tuch Und Trocknen Sie Sorgfältig Nach. → Setzen Sie Die Filter Immer Ordnungsgemäß Wieder Ein.)
- 36. Sprüharm (Tür → Außerbetriebnahme)
- 37. Problembehandlung (Mögliche Ursache → Maßnahmen → Lärm → Schaumbildung)
- 38. Geschirr Ist Nicht Sauber (Flecken Und Beläge Auf Gläsern Und Bestecken → Eintrübungen Auf Glaswaren → Gelber Oder Brauner Belag Im Inneren Des Geräts → Weißer Belag Im Inneren Des Geräts)
- 39. Spülmaschinen-spülmittel (Spülmittel-behälterdeckel Schließt Nicht → Wasser Bleibt Am Boden Des Geräts Zurück → Das Gerät Ist Undicht → Fehler Kodes)
- 40. Längere Fülldauer (Überfüllung → Technische Daten → Geräteart → Energieeffiziensklasse)
- 41. Entsorgung (Garantiebedingungen → Basierend Auf 100 Standartprogrammen Mit Kaltwasser Und Niedrig-verbrauch-betriebsarten. Der Tatsächliche Energieverbrauch Hängt Von Der Art Der Benutzung Des Geräts Ab.)
- 42. Garantie Für Einwandfreies Material Und Fehlerfreie Fertigung (Gewährleistungsrechte → Der Garantieanspruch → Die Garantie Erstreckt Sich Nicht Auf → Die Gültigkeit Der Garantie Endet Bei)
- 43. Safety Instructions (Installation → Appliance/control Panel → Before The First Use → Use Of The Programmes)
- 44. Spray Arms (Control Panel And Appliance → Trouble Shooting → Technical Data → Guarantee Conditions)
- 45. Danger (Warning → Notice → Caution → Intended Use)
- 46. Never Try To Repair The Appliance Yourself. If The Appliance Does Not Operate Properly, Please Contact The Aftersales Service. Original Spar…
- 47. Do Not Operate The Appliance Without The Filters Installed. (Never Operate The Appliance Unattended. → Caution! → Notice)
- 48. Installation (Unpacking And Positioning → Preparation Of The Installation)
- 49. Minimum Of Free Space (to Open The Door).
- 50. Appliance (Dimensions And Installation Of The Front Panel → Minimum Of Free Space → Separate The Velcro-type Fasteners)
- 51. Remove (Setting Of The Door Springs Tension)
- 52. Installation Steps (Adjusting Screw To Tension Or Relax The Steel Cable → Proper Function And Leveling)
- 53. Connect The Water Drain Hose (Power Connection → Level The Appliance → Securing The Appliance)
- 54. Water Connection (Cold Water Connection)
- 55. Connection Of The Drain Hose (How To Drain Remaining Water → Extension Hose → Electric Connection → Requirements)
- 56. Connection (Grounding Instructions → Fixing Of The Top Spacer)
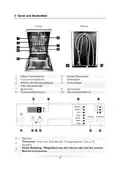
- 57. Appliance/control Panel (Upper Dish Rack → Lower Dish Rack → Container For Detergent, Tabs And Rinse Aid → Spray Arms)
- 58. Half-load (Child Lock → Program → Start / Pause → Programme Indicators)
- 59. Before The First Use (Summary Of The Basic Functions → Switching On Of The Appliance → Filling Of The Detergent Container → Loading Of The Dish Racks)
- 60. Selecting Of A Programme (Starting Of A Programme → End Of A Programme → Before You Start Operating The Appliance → Before You Operate The Appliance For The First Time)
- 61. Filling Of The Water Softener Container (Setting Of The Water Softener Consumption → Water Hardness Range)
- 62. Remove The Lower Dish-rack And The Lid Of The Water Softener Container. (Filling Of The Rinse Aid Container)
- 63. The Rinse Aid Container Is In The Door Beside The Detergent Container. Open The Lid And Fill The Container Until The Level Indicator (c) Has…
- 64. Setting Of The Rinse Aid Dispenser (Dishwasher Detergent → Dishwasher Detergents Are Divided Into 2 Groups → There Are 3 Kinds Of Dishwasher Detergents → Dishwasher Tabs)
- 65. The Detergent Container (Filling Of The Container)
- 66. Use Of The Dish Racks (Before/after Use → Upper Dish Rack)
- 67. Position Of The Upper Rack (Lower Dish Rack → Cutlery Basket)
- 68. The Following Objects Are Not Suitable To Be Washed In A Dishwasher. (The Following Objects Are Partially Suitable To Be Washed In A Dishwasher. → Instructions For Loading The Dish Racks)
- 69. Damage To Glasses And Dishes (Use Of The Programmes → Possible Causes → Recommended Solution → Programme Information)
- 70. Use Rinse Aid When Running One Of These Programmes. (Starting Of A Programme → How To Change A Running Programme)
- 71. Subsequent Addition Of Dishes (End Of A Programme → Cleaning And Maintenance)
- 72. Filter System
- 73. When Operating From Step 1 To 2, You Remove The Filter System, When Operating From Step 2 To 1, You Install The Filter System.
- 74. Decommissioning (Trouble Shooting)
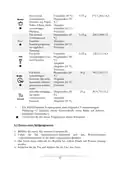
- 75. Foam In The Appliance (Unsuitable Detergent → Dishes Are Not Clean → Spots And Film On Glasses And Cutlery → Cloudiness On Glassware)
- 76. Setting Is Not Off (Steam → Black Or Grey Marks On The Dishes → Water Remains On The Bottom Of The Appliance → Appliance Leaks)
- 77. Technical Data (Waste Management)
- 78. While Unpacking, The Packaging Materials (polythene Bags, Polystyrene Pieces, Etc.) Should Be Kept Away From Children. Choking Hazard!
- 79. Guarantee Conditions (The Guarantee Claim Does Not Cover → The Validity Of The Guarantee Will Be Terminated If)
- 80. Technologie Für Den Haushalt (Service Information → Aftersales Service Information → Änderungen Vorbehalten)
×
PKM GSP12A++7TI2 Dishwasher

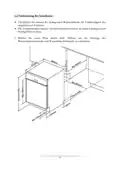
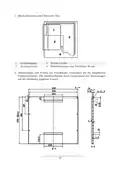

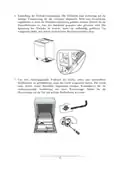


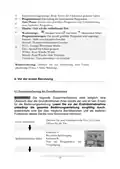
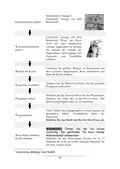
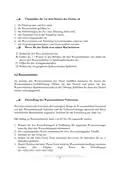

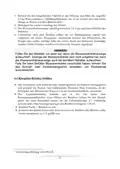
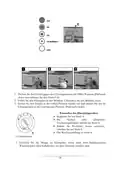
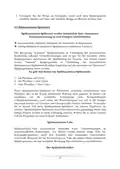



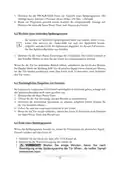
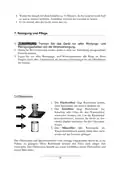





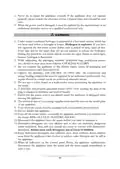


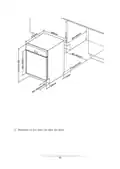

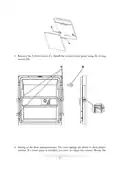


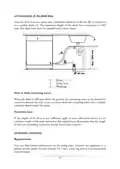
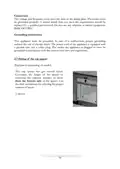
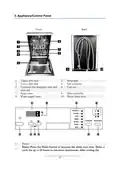





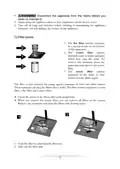





4. Connect the water drain hose (see chapter CONNECTION OF THE DRAIN HOSE).
5. Connect the power cord. (see chapter POWER CONNECTION).
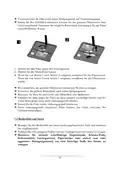
6. Fix the condensation strip (F) under the work top (fig. 3). The condensation strip
should fit flush to the edge of the worktop.
7. Place the appliance into position (Abb. 4)
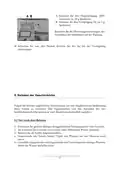
8. Level the appliance. The back feet can be adjusted from the front by rotating the
screw in the centre of the housing; use an Allen key (fig. 5/A). Use a flat
screwdriver to adjust the front feet (fig 5/B).
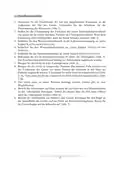
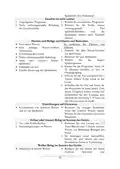
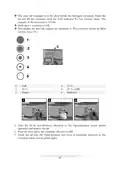
9. The appliance must be secured in place. There are two ways to do this:
a. Wooden worktop: Fix it on the worktop using the wood screws. Please check,
that the door does not touch the worktop when being opened (fig. 6).
b. Worktops made of marble or granite: Install the bracket on the side of the
appliance. Fix the appliance on the kitchen furniture. Cover the screw using the
rubber cap (fig. 7)
53

| General | Details |
|---|---|
| Name | PKM GSP12A++7TI2 Dishwasher |
| Make | PKM |
| Language | English |
| Filetype | PDF (Download) |
| File size | 0.94 MB |
 (1 votes, average: 5.00 out of 5)
 Loading...

PKM GSP9-6TI Dishwasher


smeg STL362DQ Dishwasher

FISHER AND PAYKEL DD60DI9 Dishwasher

BOSCH SPS2IKW01G Dishwasher

FISHER AND PAYKEL DW60FC4X2 Sanitise Dishwasher

BOSCH SMU2HVW20S Dishwasher

FISHER PAYKEL DD24DT4NX9 Dishwasher

SHARP QW-NA25GU44BS-DE Undercounter Dishwasher

smeg DI324AQ Full Size Dishwasher

BOSCH SN23HI65MM Dishwasher
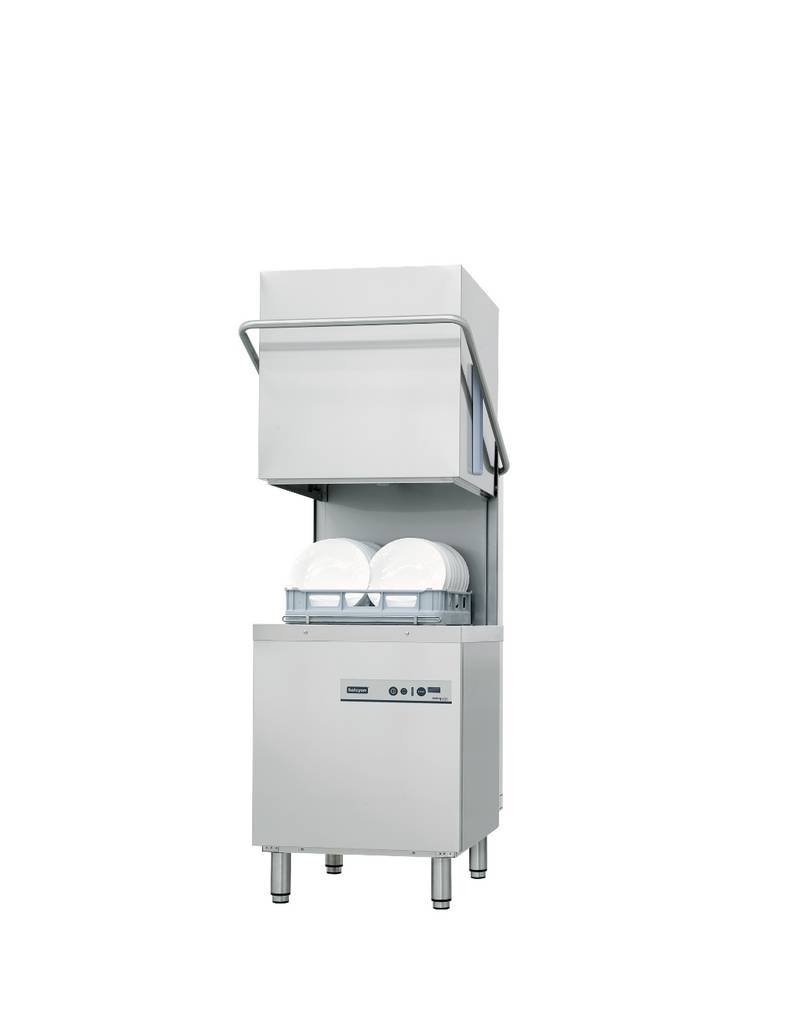
maidaid halcyon AMH91 Pass Through Gravity Drain Dishwasher
Table of Contents
- 1. Technologie Für Den Haushalt - Technology For Domestic Use →
- 2. Sicherheitshinweise - Installation →
- 3. Starten Eines Spülprogramms - Reinigung Und Pflege →
- 4. Sicherheitshinweise - Bewahren Sie Diese Bedienungsanleitung... →
- 5. Benutzer-wartung - Gefahr →
- 6. Gefahr Eines Tödlichen Stromschlags! - Vorsicht! →
- 7. Hinweis - Platzieren Sie Scharfe Messer Mit Dem Griff Nach O... →
- 8. Installation - Entpacken Und Wahl Des Standorts →
- 9. Vorbereitung Der Installation - Wählen Sie Einen Platz Neben... →
- 10. Mindestfreiraum - Abmessungen Und Einbau Der Frontblende →
- 11. Trennen - Entfernen →
- 12. Einstellung Der Türfedervorspannung - Ordnungsgemäße Funktio... →
- 13. Installationsschritt... - Kaltwasseranschluss →
- 14. Wasseranschluss →
- 15. Abnehmen Des Wasserzufuhrschlauch... - Kaltwasseranschluss →
- 16. Wasserablaufschlauch - Verlängerungsschlauc... →
- 17. Anbringen Der Oberen Distanzleiste →
- 18. Gerät Und Bedienfeld - Oberer Geschirrkorb →
- 19. Kindersicherungsanze... - Programmtaste →
- 20. Mechanische Anzeige C. - Elektrische Anzeige Auf Dem Bedienf... →
- 21. Überprüfen Sie Vor Dem Starten Des Geräts, Ob Das Gerät Gera... →
- 22. Wasserhärte - Wasserenthärter Befüllen →
- 23. Stecken - Befestigen →
- 24. Drehen - Füllen →
- 25. Verringern Sie Die Menge An Klarspüler - Spülmaschinen-spülm... →
- 26. Füllen Des Behälters - Benutzen Sie Nur Für Spülmaschinen Ge... →
- 27. Kammer Für Den Hauptspülgang - Kammer Für Den Vorspülgang →
- 28. Entladen - Oberer Geschirrkorb →
- 29. Unterer Geschirrkorb - Besteckkorb →
- 30. Die Folgenden Gegenstände Sind Nicht Zum Spülen In Einem Ges... →
- 31. Mögliche Ursachen - Empfohlene Abhilfen →
- 32. Für Normal Verschmutztes Geschirr - Hauptspülen →
- 33. Drücken Sie Die Programm-taste Zur Auswahl Eines Spülprogram... →
- 34. Warten - Reinigung Und Pflege →
- 35. Überprüfen Sie Die Filter Nach Jedem Spülprogramm Auf Verunr... →
- 36. Sprüharm - Tür →
- 37. Problembehandlung - Mögliche Ursache →
- 38. Geschirr Ist Nicht Sauber - Flecken Und Beläge Auf Gläsern U... →
- 39. Spülmaschinen-spülmittel - Spülmittel-behälterdeckel Schließ... →
- 40. Längere Fülldauer - Überfüllung →
- 41. Entsorgung - Garantiebedingungen →
- 42. Garantie Für Einwandfreies Material Und Fehlerfreie Fertigun... →
- 43. Safety Instructions - Installation →
- 44. Spray Arms - Control Panel And Appliance →
- 45. Danger - Warning →
- 46. Never Try To Repair The Appliance Yourself. If The Appliance... →
- 47. Do Not Operate The Appliance Without The Filters Installed. ... →
- 48. Installation - Unpacking And Positioning →
- 49. Minimum Of Free Space (to Open The Door). →
- 50. Appliance - Dimensions And Installation Of The Front Panel →
- 51. Remove - Setting Of The Door Springs Tension →
- 52. Installation Steps - Adjusting Screw To Tension Or Relax The... →
- 53. Connect The Water Drain Hose - Power Connection →
- 54. Water Connection - Cold Water Connection →
- 55. Connection Of The Drain Hose - How To Drain Remaining Water →
- 56. Connection - Grounding Instructions →
- 57. Appliance/control Panel - Upper Dish Rack →
- 58. Half-load - Child Lock →
- 59. Before The First Use - Summary Of The Basic Functions →
- 60. Selecting Of A Programme - Starting Of A Programme →
- 61. Filling Of The Water Softener Container - Setting Of The Wat... →
- 62. Remove The Lower Dish-rack And The Lid Of The Water Softener... →
- 63. The Rinse Aid Container Is In The Door Beside The Detergent ... →
- 64. Setting Of The Rinse Aid Dispenser - Dishwasher Detergent →
- 65. The Detergent Container - Filling Of The Container →
- 66. Use Of The Dish Racks - Before/after Use →
- 67. Position Of The Upper Rack - Lower Dish Rack →
- 68. The Following Objects Are Not Suitable To Be Washed In A Dis... →
- 69. Damage To Glasses And Dishes - Use Of The Programmes →
- 70. Use Rinse Aid When Running One Of These Programmes. - Starti... →
- 71. Subsequent Addition Of Dishes - End Of A Programme →
- 72. Filter System →
- 73. When Operating From Step 1 To 2, You Remove The Filter Syste... →
- 74. Decommissioning - Trouble Shooting →
- 75. Foam In The Appliance - Unsuitable Detergent →
- 76. Setting Is Not Off - Steam →
- 77. Technical Data - Waste Management →
- 78. While Unpacking, The Packaging Materials (polythene Bags, Po... →
- 79. Guarantee Conditions - The Guarantee Claim Does Not Cover →
- 80. Technologie Für Den Haushalt - Service Information →