×
- 1. Dishwasher Installation Manual (Dw80bb70* Series, Dw80b70* Series, Dw80b60* Series)
- 2. Safety Instructions (Important Safety Instructions → Before Using Your Dishwasher → Installation → Product Dimensions)
- 3. Safety Instructions (Important Safety Instructions → What The Icons And Signs In This Installation Guide Mean: → To Reduce The Risk Of Fire, Explosion, Electric Shock, Or Personal Injury When Using The Dishwasher, Follow These Basic Safety Precautions: → Save These Instructions)
- 4. Safety Instructions (Grounding Instructions)
- 5. Make Sure To Use A New Water Supply Line. Old Lines Are Susceptible To Breakage Because They Become Hardened And May Cause Property Damage D…
- 6. Installation (Check The Parts And Tools)
- 7. Power Cable (Hot Water Supply Line → Fitting (3/4') → Note)
- 8. Installation (Tools Required)
- 9. New Installation (Replacement → Select The Best Location For The Dishwasher)
- 10. Installation (Caution)
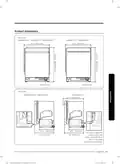
- 11. Product Dimensions (Front View → Side View → Junction Box → You Must Arrange The Water Supply Line, Power Cable And Drain Hose In The Space Behind The Dishwasher.)
- 12. Installation (Cabinet Dimensions)
- 13. Check Water Supply Requirements And Cautions (Adjust The Water Heater To Deliver Water Between 120 F (49 C) 149 F (65 C) → Ensure That The Water Supply Valve Is Turned Off Before Connecting The Hot Water Supply Line To The Dishwasher → Seal The Hot Water Supply Line Connections Using Teflon Tape Or Sealing Compound → The Drain Hose Connected To The Dishwasher Must Be Run Through The Hole In The Side Wall So It Can Be Connected To The Drain Outlet Of The Sink)
- 14. Installation (Check The Electrical Requirements And Cautions)
- 15. Unpacking And Inspecting The Dishwasher (Unpacking → Caution)
- 16. Installation (Mechanical → Plumbing → Electrical → Appearance)
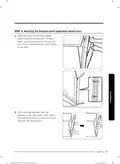
- 17. Mounting The Bespoke Panel (applicable Models Only)
- 18. Installation
- 19. Reinstallation (Caution)
- 20. Installation (Caution)
- 21. Preparing The Dishwasher (Ensure That The Circuit Breaker And Water Supply Valve Are Turned Off Before Proceeding With The Following Steps. → Caution)
- 22. Installation
- 23. Do Not Overtighten The 90 Fitting. (below 280 Lbin (31.6 Nm)) Doing So May Damage The Water Inlet Valve And Cause A Water Leak.
- 24. Installation (Placing The Dishwasher And Connecting The Hot Water Supply Line → Caution)
- 25. Caution (Do Not Overtighten The 90 Fitting. → Make Sure The Dishwasher Is Positioned To The Center.)
- 26. Installation (Leveling The Dishwasher → Note)
- 27. Note (Caution)
- 28. Installation (Securing The Dishwasher → To The Countertop → Caution)
- 29. To The Sides (If The Countertop Is Made Of Granite, Marble, Or Any Other Material That Can Be Damaged By Drilling, Follow This. → Caution)
- 30. Installation (Securing)
- 31. With Disposal (Disposal With An Air Gap → Without An Air Gap → Check The Size Of The Sinks Drain Hose Connector → To Prevent Backflow)
- 32. Installation (Note → Caution)
- 33. To Prevent Backflow For Models Without The Air Gap, Secure The Drain Hose To The Side Wall Of The Kitchen Cabinet Using Cable Ties Or Other …
- 34. Installation (Wiring Connections → Caution)
- 35. Electrical Shock Hazard (Fire Hazard)
- 36. Installation (Completing The Installation → Caution → Water Leakage Sensor)
- 37. Kick Plate (Caution)
- 38. Specifications (Power Supply → Water Pressure → Dimensions → Minimum Inlet Water Temperature)
- 39. Memo
- 40.
- 41. Lavavajillas (Manual De Instalación → Serie Dw80bb70*, Serie Dw80b70*, Serie Dw80b60*)
- 42. Instrucciones De Seguridad (Instrucciones De Seguridad Importantes → Antes De Usar La Lavavajillas → Instalación → Dimensiones Del Producto)
- 43. Instrucciones De Seguridad (Instrucciones De Seguridad Importantes → Significado De Los Íconos Y Señales De Esta Guía De Instalación → Precaución → Nota)
- 44. Instrucciones De Seguridad (Advertencia De La Propuesta 65 De California → Instrucciones De Conexión A Tierra → Conserve Estas Instrucciones)
- 45. Antes De Usar La Lavavajillas (Riesgo De Vuelco → Riesgo De Descarga Eléctrica)
- 46. Instalación (Verique Las Piezas Y Las Herramientas → Piezas Necesarias)
- 47. Cable De Alimentación (Conector De Resorte → Alivio De Tensión → Adaptador De 90 → Conducto De Suministro De Agua Caliente)
- 48. Instalación (Herramientas Requeridas)
- 49. Instalación Nueva (Reemplazo → Elección De La Mejor Ubicación Para La Lavavajillas)
- 50. Instalación (Precaución)
- 51. Dimensiones Del Producto (Vista Frontal → Vista Lateral → Acomode El Conducto, El Cable De Alimentación Y La Manguera De Desagüe En El Espacio Detrás De La Lavavajillas.)
- 52. Instalación (Dimensiones Del Gabinete)
- 53. Verifique Los Requisitos Para El Suministro De Agua Y Precauciones (Ajuste El Calentador De Agua Para Obtener Una Temperatura De Agua Entre 120 F (49 C) Y 149 F (65 C) → Selle Las Conexiones Del Conducto De Agua Caliente → La Manguera De Desagüe Conectada Al Lavavajillas Debe Pasar Por El Orificio De La Pared Lateral)
- 54. Instalación (Verifique Los Requisitos Eléctricos Y Advertencias → Los Requisitos Eléctricos Para La Lavavajillas Son Los Siguientes:)
- 55. Desempacar E Inspeccionar El Lavavajillas (Desempaque → Placa De Protección → Precaución)
- 56. Instalación (Cañerías → Eléctrica → Apariencia → Piezas)
- 57. Montaje Del Panel Bespoke (solo Modelos Aplicables)
- 58. Instalación (Nota)
- 59. Nota (Reinstalación → Precaución)
- 60. Instalación (Precaución)
- 61. Preparación Del Lavavajillas (Precaución)
- 62. Instalación (Conexiones Del Cableado → Fijación De La Lavavajillas)
- 63. Adaptaador De 90 (Precaución)
- 64. Instalación (Colocación Del Lavavajillas Y Conexión Del Conducto Del Suministro De Agua Caliente → Precaución)
- 65. Burlete Lateral (Manguera De Desagüe → Válvula De Entrada → Conduto De Suministro De Agua Caliente → Precaución)
- 66. Instalación (Nivelación Del Lavavajillas → Nota)
- 67. Nota (Precaución)
- 68. Instalación (Asegurar La Lavavajillas → A La Encimera → Precaución)
- 69. Hacia Los Laterales (Precaución)
- 70. Instalación (Ajuste → Verifique Las Piezas Del Fregadero A Las Cuales Se Conectará La Manguera De Desagüe. → Caso 1. Sin Triturador)
- 71. Con Triturador (Manguera De Desagüe → Abrazadera De Manguera → Sin Un Espacio De Aire → Verifique El Tamaño Del Conector De La Manguera De Desagüe Del Fregadero)
- 72. Instalación (Nota → Precaución)
- 73. Para Evitar El Flujo De Retorno En Los Modelos Sin Espacio De Aire, Asegure La Manguera De Desagüe En La Pared Lateral Del Gabinete De La Co…
- 74. Instalación (Conexiones Del Cableado → Precaución)
- 75. Riesgo De Descarga Eléctrica (Riesgo De Incendio → Alivio De Tensión → Caja De Conexiones → Nota)
- 76. Instalación (Finalización De La Instalación → Precaución → Sensor De Pérdidas De Agua)
- 77. Placa De Protección (Precaución)
- 78. Especificaciones (Suministro Eléctrico → Presión De Agua → Dimensiones → Temperatura Mínima Del Agua En La Entrada)
- 79. Dw700
- 80.
×
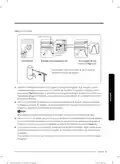
SAMSUNG DW80BB70 Series Dishwasher
NOTE
•
•
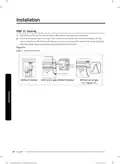
If the leveling legs are rotated to the
left (clockwise), they are loosened and
the front of the dishwasher is raised. If
they are rotated to the right (counter
clockwise), they are tightened and the
front of the dishwasher is lowered.
You can adjust the leveling legs by a
max of 16/32" However, leveling up to
the max height is not recommended.
NOTE
To adjust the height of a rear leg, turn the
T20 Torx (at the front of the base) to the
left to raise the back of the dishwasher
using the proper tool (T20 Torx).
CAUTION
•
Before you move the dishwasher for installation, make sure to adjust the height of the
legs so the legs are as short as possible. This prevents the legs from breaking. Level the
dishwasher by adjusting the height of the legs after you have the dishwasher in place.
If the product is installed unleveled or with the leg missing, the door may not close
completely, causing a leak of steam or water.
•
•
When adjusting the height of the dishwasher, make sure the top gasket is inserted
seamlessly underneath the top of the kitchen cabinet. Otherwise, it may increase noise
when the dishwasher is operating.
English 27
DW700
0
0
B
B
_
_
D
W
W
8
8
0
0
B
B
7
7
0
0
7
7
0
0
_
_
A
A
A
A
_
_
D
D
D
D
6
6
8
8
-
-
0
0
0
0
2
2
4
4
2
2
A
A
-
-
0
0
3
3
_
_
E
E
N
N
.
.
i
i
n
n
d
d
d
d
2
2
7
7
2023
-
-
1
1
2
2
-
-
1
1
5
5
4
:
:
0
0
5
5
:
:
2
2
8
8
| General | Details |
|---|---|
| Name | SAMSUNG DW80BB70 Series Dishwasher |
| Make | Samsung |
| Language | English |
| Filetype | PDF (Download) |
| File size | 3.96 MB |

SAMSUNG DW80N3030UW Front Dishwasher

SAMSUNG DW90F89 Dishwasher

SAMSUNG DW80BB70 Dishwasher

SAMSUNG DW50T6060U Dishwasher

SAMSUNG DW80CB5450 Dishwasher

Samsung DW60M5062 Dishwasher

Samsung DW60 7 Series Dishwasher

SAMSUNG DW9000F Dishwasher

SAMSUNG DW60R2014 Wide 12 Place Dishwasher
SAMSUNG DW60H9950FW-SA Dishwasher


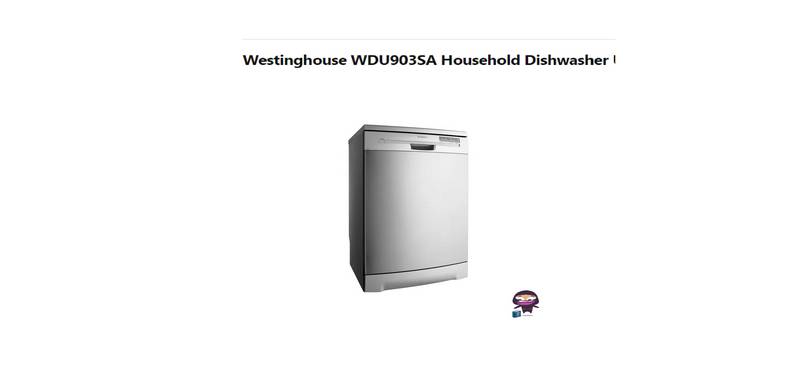
Westinghouse WDU903SA Household Dishwasher
MEIKO UPster U 400 M2 Glass and Dishwasher

Whirlpool WFC 3C26 X UK Dishwasher

element ENB5322HECW Dishwasher

AEG FSB42607Z Build In Dishwasher

Whirlpool WDFS3R4NWESG Sense Dishwasher

FISHER AND PAYKEL DW60FC4X2 Sanitise Dishwasher

FISHER AND PAYKEL DW60FC1X2 Dishwasher

BOSCH DF480100 Dishwasher

Haier HDW15V3S1 Satina Dishwasher
Table of Contents
- 1. Dishwasher Installation Manual - Dw80bb70* Series, Dw80b70* ... →
- 2. Safety Instructions - Important Safety Instructions →
- 3. Safety Instructions - Important Safety Instructions →
- 4. Safety Instructions - Grounding Instructions →
- 5. Make Sure To Use A New Water Supply Line. Old Lines Are Susc... →
- 6. Installation - Check The Parts And Tools →
- 7. Power Cable - Hot Water Supply Line →
- 8. Installation - Tools Required →
- 9. New Installation - Replacement →
- 10. Installation - Caution →
- 11. Product Dimensions - Front View →
- 12. Installation - Cabinet Dimensions →
- 13. Check Water Supply Requirements And Cautions - Adjust The Wa... →
- 14. Installation - Check The Electrical Requirements And Caution... →
- 15. Unpacking And Inspecting The Dishwasher - Unpacking →
- 16. Installation - Mechanical →
- 17. Mounting The Bespoke Panel (applicable Models Only) →
- 18. Installation →
- 19. Reinstallation - Caution →
- 20. Installation - Caution →
- 21. Preparing The Dishwasher - Ensure That The Circuit Breaker A... →
- 22. Installation →
- 23. Do Not Overtighten The 90 Fitting. (below 280 Lbin (31.6 Nm)... →
- 24. Installation - Placing The Dishwasher And Connecting The Hot... →
- 25. Caution - Do Not Overtighten The 90 Fitting. →
- 26. Installation - Leveling The Dishwasher →
- 27. Note - Caution →
- 28. Installation - Securing The Dishwasher →
- 29. To The Sides - If The Countertop Is Made Of Granite, Marble,... →
- 30. Installation - Securing →
- 31. With Disposal - Disposal With An Air Gap →
- 32. Installation - Note →
- 33. To Prevent Backflow For Models Without The Air Gap, Secure T... →
- 34. Installation - Wiring Connections →
- 35. Electrical Shock Hazard - Fire Hazard →
- 36. Installation - Completing The Installation →
- 37. Kick Plate - Caution →
- 38. Specifications - Power Supply →
- 39. Memo →
- 40. Page 40 →
- 41. Lavavajillas - Manual De Instalación →
- 42. Instrucciones De Seguridad - Instrucciones De Seguridad Impo... →
- 43. Instrucciones De Seguridad - Instrucciones De Seguridad Impo... →
- 44. Instrucciones De Seguridad - Advertencia De La Propuesta 65 ... →
- 45. Antes De Usar La Lavavajillas - Riesgo De Vuelco →
- 46. Instalación - Verique Las Piezas Y Las Herramientas →
- 47. Cable De Alimentación - Conector De Resorte →
- 48. Instalación - Herramientas Requeridas →
- 49. Instalación Nueva - Reemplazo →
- 50. Instalación - Precaución →
- 51. Dimensiones Del Producto - Vista Frontal →
- 52. Instalación - Dimensiones Del Gabinete →
- 53. Verifique Los Requisitos Para El Suministro De Agua Y Precau... →
- 54. Instalación - Verifique Los Requisitos Eléctricos Y Adverten... →
- 55. Desempacar E Inspeccionar El Lavavajillas - Desempaque →
- 56. Instalación - Cañerías →
- 57. Montaje Del Panel Bespoke (solo Modelos Aplicables) →
- 58. Instalación - Nota →
- 59. Nota - Reinstalación →
- 60. Instalación - Precaución →
- 61. Preparación Del Lavavajillas - Precaución →
- 62. Instalación - Conexiones Del Cableado →
- 63. Adaptaador De 90 - Precaución →
- 64. Instalación - Colocación Del Lavavajillas Y Conexión Del Con... →
- 65. Burlete Lateral - Manguera De Desagüe →
- 66. Instalación - Nivelación Del Lavavajillas →
- 67. Nota - Precaución →
- 68. Instalación - Asegurar La Lavavajillas →
- 69. Hacia Los Laterales - Precaución →
- 70. Instalación - Ajuste →
- 71. Con Triturador - Manguera De Desagüe →
- 72. Instalación - Nota →
- 73. Para Evitar El Flujo De Retorno En Los Modelos Sin Espacio D... →
- 74. Instalación - Conexiones Del Cableado →
- 75. Riesgo De Descarga Eléctrica - Riesgo De Incendio →
- 76. Instalación - Finalización De La Instalación →
- 77. Placa De Protección - Precaución →
- 78. Especificaciones - Suministro Eléctrico →
- 79. Dw700 →
- 80. Page 80 →