×
- 1. Warranty Condition (Instructions For Use)
- 2.
- 3. Product Overview (Using Your Dishwasher → Installation Instruction → Maintenance And Cleaning → Troubleshooting Tips)
- 4. Preview Of The Appliance (Using The Appliance → Product Overview → Using Your Dishwasher → Important)
- 5. Using The Appliance (Basket Loading Tips → Adjusting The Upper Basket)
- 6. Using The Appliance (Folding Back The Cup Shelves → Using The Cutlery Rack → Folding Back The Rack Shelves)
- 7. Using The Appliance (Installation Instruction → Electrical Requirements → Electrical Connection → About The Safety Supply Hose)
- 8. Using The Appliance (Drain Pipe → How To Connect The Safety Supply Hose → How To Drain Excess Water From Hoses → Connection Of Drain Hoses)
- 9. Using The Appliance (Extension Hose → Positioning The Appliance → Built-in Installation (for The Integrated Model) → Electrical, Drain And Water Supply Line Connection)
- 10. Using The Appliance (Step 3. Dishwasher Installation Steps → Step 4. Levelling The Dishwasher)
- 11. Using The Appliance (Loading The Baskets → Cutlery Rack → Upper Basket → Lower Basket)
- 12. Using The Appliance (Quick User Guide → Install The Dishwasher → Load The Baskets → Select A Suitable Program And Start The Dishwasher)
- 13. Using The Appliance (Using Your Dishwasher → Control Panel → Hygiene → Program)
- 14. Using The Appliance (Adjusting Salt Consumption → Extra Drying → Strong Wash → Auto Open)
- 15. Using The Appliance (Recommendations For Loading The Dishwasher → Water Softener → Preparing And Loading Dishes → For Washing The Following Cutlery/dishes)
- 16. Using The Appliance (Removing The Dishes → Function Of The Detergent And Rinse Aid → Loading The Upper Basket → Loading The Lower Basket)
- 17. Using The Appliance (Filling The Detergent Dispenser)
- 18. Using The Appliance (Filling The Rinse Aid Reservoir → Adjusting The Rinse Aid Setting)
- 19. Using The Appliance (Program Selection → Program Table → Saving Energy → Starting A Program)
- 20. Using The Appliance (Changing The Program Mid-cycle → Auto Open → Forget To Add A Dish)
- 21. Using The Appliance (Useful Information → Usage Counter → Maintenance And Cleaning → The Control Panel)
- 22. Useful Information (Internal Care → Filtering System → Coarse Filter → Fine Filter)
- 23. Reassemble The Filters (Spray Arms)
- 24. Caring For The Dishwasher (After Every Wash → Remove The Plug → Frost Precaution → When Not In Use For A Long Time)
- 25. Useful Information (Troubleshooting Tips → Moving The Appliance → Before Calling For Service)
- 26. Useful Information (Problem → Possible Causes → What To Do → Foam In The Tub)
- 27. Availability Of Spare Parts (Problem → Possible Causes → What To Do → Dishes Are Removed Too Soon)
- 28. Useful Information (Error Codes → Possible Causes → Codes → Meaning)
- 29. Présentation Du Produit (Utilisation De Votre Lave-vaisselle → Instructions D'installation → Entretien Et Nettoyage → Conseils De Dépannage)
- 30. Aperçu De Lappareil (Utilisation De Lappareil → Présentation Du Produit → Utilisation De Votre Lave-vaisselle → Important)
- 31. Utilisation De Lappareil (Avertissement → Conseils Pour Le Chargement Des Paniers → Réglage Du Panier Supérieur)
- 32. Utilisation De Lappareil (Repliage Des Tiges → Repliage Des Étagères À Tasses → Utilisation Du Compartiment À Couverts)
- 33. Utilisation De Lappareil (Instructions D'installation → Informations Sur Les Branchements Électriques → Exigences En Matière D'électricité → Raccordement Électrique)
- 34. Utilisation De Lappareil (À Propos Du Tuyau D'alimentation De Sécurité → Comment Raccorder Le Tuyau D'alimentation De Sécurité → Comment Débrancher Le Tuyau D'alimentation De Sécurité ? → Raccordement Des Tuyaux De Vidange)
- 35. Utilisation De Lappareil (Installation Dans Une Cuisine Intégrée (pour Le Modèle Encastrable) → Choix Du Meilleur Emplacement Pour Le Lave-vaisselle → Raccordement Des Tuyaux De Vidange, De L'alimentation Électrique Et En Eau → Positionnement De L'appareil)
- 36. Utilisation De Lappareil (Étape 3. Étapes D'installation Du Lave-vaisselle → Étape 2. Dimensions Et Installation De La Façade → Modèle Entièrement Encastré)
- 37. Utilisation De Lappareil (Chargement Des Paniers → Mise À Niveau Du Lave-vaisselle → Charger Le Lave-vaisselle À Sa Pleine Capacité → Vérifiez Le Niveau)
- 38. Utilisation De Lappareil (Guide D'utilisation Rapide → Installation Du Lave-vaisselle → Chargez Les Paniers → Informations Pour Les Tests De Comparabilité)
- 39. Utilisation De Lappareil (Panneau De Commande → Programme → Départ Différé → Fonctions)
- 40. Utilisation De Lappareil (Écran → Séchage Supplémentaire → Hygiène → Fonctions D'avertissement)
- 41. Utilisation De Lappareil (Adoucisseur D'eau → Dureté De L'eau → Réglage De La Consommation De Sel)
- 42. Utilisation De Lappareil (Recommandations Pour Le Chargement Du Lave-vaisselle → Adoucisseur D'eau → Préparation Et Chargement De La Vaisselle → Couverts/vaisselle Passant Au Lave-vaisselle)
- 43. Utilisation De Lappareil (Chargement Du Compartiment À Couverts → Déchargement De La Vaisselle → Fonctions Du Détergent Et Du Produit De Rinçage → Chargement Du Panier Supérieur)
- 44. Utilisation De Lappareil (Remplissage Du Compartiment À Produit De Rinçage → Remplissage Du Compartiment À Détergent)
- 45. Utilisation De Lappareil (Remplissage Du Compartiment À Produit De Rinçage → Réglage Des Paramètres De Produit De Rinçage)
- 46. Utilisation De Lappareil (Choix Du Programme → Tableau Des Programmes → Démarrage D'un Programme → Économies D'énergie)
- 47. Utilisation De Lappareil (Changement De Programme En Cours De Cycle → Ouverture Automatique → Ajout De Vaisselle Oubliée)
- 48. Utilisation De Lappareil (Informations Pratiques → Compteur D'utilisation → Entretien Et Nettoyage → Panneau De Commande)
- 49. Informations Pratiques (Entretien De L'intérieur De L'appareil → Système De Filtration → Préfiltre → Filtre Principal)
- 50. Informations Pratiques (Bras De Lavage)
- 51. Informations Pratiques (Après Chaque Lavage → Débranchement De La Prise → Entretien Du Lave-vaisselle → Précautions Contre Le Gel)
- 52. Informations Pratiques (Conseils De Dépannage → Avant D'appeler Un Technicien → Déplacement De Lappareil → Le Lave-vaisselle Ne Démarre Pas)
- 53. Informations Pratiques (Problème → Causes Possibles → Solutions → Taches De Rouille Sur Les Couverts)
- 54. Informations Pratiques (Problème → Causes Possibles → Solutions → Chargement Incorrect)
- 55. Informations Pratiques (Disponibilité Des Pièces Détachées → Codes D'erreur → Codes)
- 56. Overzicht Van Het Product (Uw Vaatwasser Gebruiken → Installatie-instructies → Onderhoud En Reiniging → Tips Om Problemen Op Te Lossen)
- 57. Overzicht Van Het Toestel (Gebruik Van Het Toestel → Overzicht Van Het Product → Uw Vaatwasser Gebruiken → Belangrijk)
- 58. Gebruik Van Het Toestel (Gebruikstips Voor De Mand → Afstellen Van De Bovenste Mand)
- 59. Gebruik Van Het Toestel (Inklappen Van De Houders → Inklappen Van Het Kopjesrekje → Het Bestekrek Gebruiken)
- 60. Gebruik Van Het Toestel (Installatie-instructies → Over De Elektrische Aansluiting → Elektrische Vereisten → Elektrische Aansluiting)
- 61. Gebruik Van Het Toestel (Over De Veiligheidstoevoerslang → Watertoevoer En -afvoer → Aansluiting Koud Water → Aansluiting Van De Afvoerslangen)
- 62. Gebruik Van Het Toestel (Plaatsing Van Het Toestel → Watertoevoer → Afvoerleiding → Ingebouwde Installatie (voor Het Inbouwmodel))
- 63. Gebruik Van Het Toestel (Vaatwasser → Stap 3. Stappen Om De Vaatwasser Te Installeren → Volledig Ingebouwd Model → Afmetingen En Installatie Van Het Sierpaneel)
- 64. Gebruik Van Het Toestel (De Manden Vullen → Stap 4. De Vaatwasser Waterpas Zetten)
- 65. Gebruik Van Het Toestel (De Vaatwasser Installeren → Vul De Manden → Informatie Over Compatibiliteitstesten In Overeenstemming Met En60436 → Vermogen: 16 Couverts)
- 66. Gebruik Van Het Toestel (Uw Vaatwasser Gebruiken → Bedieningspaneel → Uitgestelde Start -/+ → Functie)
- 67. Gebruik Van Het Toestel (Hygiëne → Stevig Afwassen → Universeel → Zelfreiniging)
- 68. Gebruik Van Het Toestel (Waterverzachter → Zoutverbruik → Het Zoutverbruik Aanpassen)
- 69. Gebruik Van Het Toestel (De Vaat Voorbereiden En Inladen → Om Bestek/vaat Te Wassen → De Borden Verwijderen → Aanbevelingen Voor Het Inladen Van De Vaatwasser)
- 70. Gebruik Van Het Toestel (De Bestekmand Inladen → Functie Van Het Spoelmiddel → Wanneer Moet De Spoelmiddeldispenser Worden Bijgevuld → Functie Van Vaatwasmiddel En Spoelmiddel)
- 71. Gebruik Van Het Toestel (Het Afwasmiddelbakje Vullen → Het Spoelmiddelbakje Vullen)
- 72. Gebruik Van Het Toestel (De Instelling Van Het Spoelmiddel Aanpassen)
- 73. Gebruik Van Het Toestel (Programmakeuze → Programmatabel → Energie Besparen → Een Programma Starten)
- 74. Gebruik Van Het Toestel (Automatisch Openen → Een Bord Vergeten → Activdoor)
- 75. Gebruik Van Het Toestel (Praktische Informatie → Teller Afwasbeurten → Onderhoud En Reiniging → Het Bedieningspaneel)
- 76. Praktische Informatie (De Binnenkant Schoonmaken → Filtersysteem → Grove Filter → Fijne Filter)
- 77. Praktische Informatie (Sproeiarmen)
- 78. Praktische Informatie (Onderhoud Van De Vaatwasser → Na Elke Wasbeurt → De Stekker Verwijderen → Voorzorgsmaatregelen Voor Vorst)
- 79. Praktische Informatie (Probleemoplossing → Voor U De Hersteldienst Belt → De Vaatwasser Start Niet → Het Water Wordt Niet Uit De Vaatwasser Gepompt)
- 80. Praktische Informatie (Probleem → Mogelijke Oorzaken → Wat U Moet Doen → De Vaat Is Niet Schoon)
- 81. Praktische Informatie (Beschikbaarheid Van Reserveonderdelen → Probleem → Mogelijke Oorzaken → Wat U Moet Doen)
- 82. Descripción General Del Producto (Uso Del Lavavajillas → Instrucciones De Instalación → Mantenimiento Y Limpieza → Resolución De Problemas)
- 83. Descripción Del Aparato (Utilización Del Aparato → Descripción General Del Producto → Cómo Utilizar El Aparato → Importante)
- 84. Utilización Del Aparato (Consejos Para Cargar Las Cestas → Ajustar La Cesta Superior)
- 85. Utilización Del Aparato (Plegar La Rejilla Para Tazas → Uso De La Cesta Para Los Cubiertos)
- 86. Utilización Del Aparato (Instrucciones De Instalación → Conexión De Energía → Requisitos Eléctricos → Conexión Eléctrica)
- 87. Utilización Del Aparato (El Tubo De Suministro De Seguridad → Cómo Conectar El Tubo De Seguridad → Cómo Desconectar El Tubo De Suministro De Seguridad → Conexión De Los Tubos De Evacuación)
- 88. Utilización Del Aparato (Instalación Empotrada (para El Modelo Integrado) → Cómo Evacuar El Exceso De Agua De Los Tubos → Colocación Del Aparato)
- 89. Utilización Del Aparato (Paso 3. Pasos Para La Instalación Del Lavavajillas → Paso 2. Dimensiones E Instalación Del Panel Estético → Modelo Totalmente Integrado)
- 90. Utilización Del Aparato (Cargar Las Cestas → Paso 4. Nivelación Del Lavavajillas → Comprobar Nivel De La Parte Frontal A La Parte Posterior → Cesta Inferior:)
- 91. Utilización Del Aparato (Guía De Uso Rápido → Instrucciones De Instalación → Cargue Las Cestas → Información Para Las Pruebas De Comparabilidad)
- 92. Utilización Del Aparato (Cómo Utilizar El Aparato → Panel De Control → Programa → Función)
- 93. Utilización Del Aparato (Pantalla → Secado Extra → Higiene → Lavado A Fondo)
- 94. Utilización Del Aparato (Dureza Del Agua → Descalcificador De Agua → Ajustar El Consumo De Sal)
- 95. Utilización Del Aparato (Preparación Y Carga De La Vajilla → Retirar La Vajilla → Recomendaciones Para Cargar El Lavavajillas)
- 96. Utilización Del Aparato (Cargar La Cesta Superior → Cargar La Cesta Inferior → Función Del Abrillantador → Carga De La Cesta Para Los Cubiertos)
- 97. Utilización Del Aparato (Rellenar El Dispensador De Detergente → Llenar El Depósito De Abrillantador)
- 98. Utilización Del Aparato (Ajuste Del Depósito De Abrillantador)
- 99. Utilización Del Aparato (Selección Del Programa → Tabla De Programas → Descripción Del Ciclo → Ahorro De Energía)
- 100. Utilización Del Aparato (Cambio De Un Programa A Mitad De Ciclo → Apertura Automática → Olvidó Añadir Algún Plato? → Activdoor)
- 101. Utilización Del Aparato (Información Práctica → Contador De Utilización → Mantenimiento Y Limpieza → El Panel De Control)
- 102. Información Práctica (Limpieza De La Parte Interior → Sistema De Filtrado → Filtro De Partículas Gruesas → Filtro Principal)
- 103. Información Práctica (Brazos Aspersores → Advertencia)
- 104. Información Práctica (Cuidado Del Lavavajillas → Precaución Contra La Escarcha → Después De Cada Lavado)
- 105. Información Práctica (Retirar El Enchufe → No Utilice Disolventes Ni Detergentes Abrasivos → Cuando No Vaya A Utilizar El Aparato Durante Un Largo Periodo De Tiempo → Mover El Aparato)
- 106. Información Práctica (Resolución De Problemas → Antes De Llamar Al Servicio Técnico → Posibles Causas → Qué Hay Que Hacer?)
- 107. Información Práctica (Problema → Posibles Causas → Qué Hay Que Hacer? → Los Platos No Están Limpios)
- 108. Información Práctica (Disponibilidad De Las Piezas De Recambio → Códigos De Error → Códigos)
×
VALBERG FBI16S43A 16 Dishwasher
Using the appliance
Using the appliance
B
B
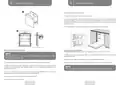
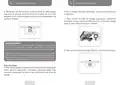
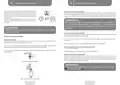
Removing the dishes
Function of the detergent and rinse aid
To prevent water dripping from the upper basket into the lower basket, we recommend that
you empty the lower basket first, followed by the upper basket.
Function of detergent
• The chemical ingredients of dishwasher detergents are necessary to remove, crush and
dispense all dirt out of the dishwasher.
WARNING
• Most of the commercial quality detergents are suitable for this purpose.
Items will be hot! To prevent damage, do not take glass
and cutlery out of the dishwasher for around 15 minutes
after the program has ended.
WARNING
• Use only detergent specifically made for dishwashers
use. Keep your detergent fresh and dry.
Loading the upper basket
The upper basket is designed to hold more delicate and lighter dishware such as glasses,
coffee and tea cups and saucers, as well as plates, small bowls and shallow pans (as long
as they are not too dirty). Position the dishes and cookware so that they will not get moved
by the spray of water.
• Do not fill detergent into the dispenser until you are ready
to start the dishwasher
Dishwasher detergent is corrosive! Keep dishwasher
detergent out of the reach of children.
Loading the lower basket
Function of rinse aid
• We suggest that you place large and difficult to clean items into the lower basket: such as
pots, pans, lids, serving dishes and bowls, as shown in the figure below. It is preferable to
place serving dishes and lids on the side of the racks in order to avoid blocking the rotation
of the upper spray arm.
The rinse aid is released during the final rinse to prevent water from forming droplets on
your dishes, which can leave spots and streaks. It also improves drying by allowing water to
run off the dishes. Your dishwasher is designed to use liquid rinse aids.
WARNING
Never fill the rinse aid dispenser with any other substances
(e.g. Dishwasher cleaning agent, liquid detergent). This
would damage the appliance.
When to refill the rinse aid dispenser
Almost every program uses rinse aid in the final rinse. Depending on the frequency of use
and the rinse aid setting the dispenser needs to be refilled.
Loading the cutlery rack
Cutlery should be placed in the cutlery rack separate from each other in the appropriate
positions. Avoid nesting of the cutlery to prevent insufficient cleaning performance.
• The Rinse Aid indicator (
) will be lit when a refill is required.
WARNING
• Do not overfill the rinse aid dispenser.
For optimal cleaning and drying results, please refer to the
standard loading options in the last section
28
EN
29
EN
| General | Details |
|---|---|
| Name | VALBERG FBI16S43A 16 Dishwasher |
| Make | VALBERG |
| Language | English |
| Filetype | PDF (Download) |
| File size | 31.47 MB |

VALBERG SAD929C Dishwasher

VALBERG 14S44 C XAD929C,14S44 C DXAD929C Dishwasher

VALBERG VAL12C47SSC Dishwasher

VALBERG 14S40 B WAD929C Dishwasher

VALBERG XAD929C Dishwasher


BOSCH SMV4HTX27G-55 Dishwasher

BOSH SX73HX42VE Dishwasher

Magic Chef MCSCD6W3 Countertop Dishwasher

CMA DISHMACHINES CMA L-1Xe Commercial Dishwasher

BOSCH SBH4ECX10E/01 Dishwasher

BOSCH SHE4AEM2N Dishwasher

FISHER PAYKEL DW60UC6X Built-under Dishwasher

FISHER PAYKEL DD24SAX9N Dishwasher

Lockeliving 9001505619 Dishwasher

INVENTUM VVW4530AW Dishwasher
Table of Contents
- 1. Warranty Condition - Instructions For Use →
- 2. Page 2 →
- 3. Product Overview - Using Your Dishwasher →
- 4. Preview Of The Appliance - Using The Appliance →
- 5. Using The Appliance - Basket Loading Tips →
- 6. Using The Appliance - Folding Back The Cup Shelves →
- 7. Using The Appliance - Installation Instruction →
- 8. Using The Appliance - Drain Pipe →
- 9. Using The Appliance - Extension Hose →
- 10. Using The Appliance - Step 3. Dishwasher Installation Steps →
- 11. Using The Appliance - Loading The Baskets →
- 12. Using The Appliance - Quick User Guide →
- 13. Using The Appliance - Using Your Dishwasher →
- 14. Using The Appliance - Adjusting Salt Consumption →
- 15. Using The Appliance - Recommendations For Loading The Dishwa... →
- 16. Using The Appliance - Removing The Dishes →
- 17. Using The Appliance - Filling The Detergent Dispenser →
- 18. Using The Appliance - Filling The Rinse Aid Reservoir →
- 19. Using The Appliance - Program Selection →
- 20. Using The Appliance - Changing The Program Mid-cycle →
- 21. Using The Appliance - Useful Information →
- 22. Useful Information - Internal Care →
- 23. Reassemble The Filters - Spray Arms →
- 24. Caring For The Dishwasher - After Every Wash →
- 25. Useful Information - Troubleshooting Tips →
- 26. Useful Information - Problem →
- 27. Availability Of Spare Parts - Problem →
- 28. Useful Information - Error Codes →
- 29. Présentation Du Produit - Utilisation De Votre Lave-vaissell... →
- 30. Aperçu De Lappareil - Utilisation De Lappareil →
- 31. Utilisation De Lappareil - Avertissement →
- 32. Utilisation De Lappareil - Repliage Des Tiges →
- 33. Utilisation De Lappareil - Instructions D'installation →
- 34. Utilisation De Lappareil - À Propos Du Tuyau D'alimentation ... →
- 35. Utilisation De Lappareil - Installation Dans Une Cuisine Int... →
- 36. Utilisation De Lappareil - Étape 3. Étapes D'installation Du... →
- 37. Utilisation De Lappareil - Chargement Des Paniers →
- 38. Utilisation De Lappareil - Guide D'utilisation Rapide →
- 39. Utilisation De Lappareil - Panneau De Commande →
- 40. Utilisation De Lappareil - Écran →
- 41. Utilisation De Lappareil - Adoucisseur D'eau →
- 42. Utilisation De Lappareil - Recommandations Pour Le Chargemen... →
- 43. Utilisation De Lappareil - Chargement Du Compartiment À Couv... →
- 44. Utilisation De Lappareil - Remplissage Du Compartiment À Pro... →
- 45. Utilisation De Lappareil - Remplissage Du Compartiment À Pro... →
- 46. Utilisation De Lappareil - Choix Du Programme →
- 47. Utilisation De Lappareil - Changement De Programme En Cours ... →
- 48. Utilisation De Lappareil - Informations Pratiques →
- 49. Informations Pratiques - Entretien De L'intérieur De L'appar... →
- 50. Informations Pratiques - Bras De Lavage →
- 51. Informations Pratiques - Après Chaque Lavage →
- 52. Informations Pratiques - Conseils De Dépannage →
- 53. Informations Pratiques - Problème →
- 54. Informations Pratiques - Problème →
- 55. Informations Pratiques - Disponibilité Des Pièces Détachées →
- 56. Overzicht Van Het Product - Uw Vaatwasser Gebruiken →
- 57. Overzicht Van Het Toestel - Gebruik Van Het Toestel →
- 58. Gebruik Van Het Toestel - Gebruikstips Voor De Mand →
- 59. Gebruik Van Het Toestel - Inklappen Van De Houders →
- 60. Gebruik Van Het Toestel - Installatie-instruct... →
- 61. Gebruik Van Het Toestel - Over De Veiligheidstoevoersl... →
- 62. Gebruik Van Het Toestel - Plaatsing Van Het Toestel →
- 63. Gebruik Van Het Toestel - Vaatwasser →
- 64. Gebruik Van Het Toestel - De Manden Vullen →
- 65. Gebruik Van Het Toestel - De Vaatwasser Installeren →
- 66. Gebruik Van Het Toestel - Uw Vaatwasser Gebruiken →
- 67. Gebruik Van Het Toestel - Hygiëne →
- 68. Gebruik Van Het Toestel - Waterverzachter →
- 69. Gebruik Van Het Toestel - De Vaat Voorbereiden En Inladen →
- 70. Gebruik Van Het Toestel - De Bestekmand Inladen →
- 71. Gebruik Van Het Toestel - Het Afwasmiddelbakje Vullen →
- 72. Gebruik Van Het Toestel - De Instelling Van Het Spoelmiddel ... →
- 73. Gebruik Van Het Toestel - Programmakeuze →
- 74. Gebruik Van Het Toestel - Automatisch Openen →
- 75. Gebruik Van Het Toestel - Praktische Informatie →
- 76. Praktische Informatie - De Binnenkant Schoonmaken →
- 77. Praktische Informatie - Sproeiarmen →
- 78. Praktische Informatie - Onderhoud Van De Vaatwasser →
- 79. Praktische Informatie - Probleemoplossing →
- 80. Praktische Informatie - Probleem →
- 81. Praktische Informatie - Beschikbaarheid Van Reserveonderdele... →
- 82. Descripción General Del Producto - Uso Del Lavavajillas →
- 83. Descripción Del Aparato - Utilización Del Aparato →
- 84. Utilización Del Aparato - Consejos Para Cargar Las Cestas →
- 85. Utilización Del Aparato - Plegar La Rejilla Para Tazas →
- 86. Utilización Del Aparato - Instrucciones De Instalación →
- 87. Utilización Del Aparato - El Tubo De Suministro De Seguridad →
- 88. Utilización Del Aparato - Instalación Empotrada (para El Mod... →
- 89. Utilización Del Aparato - Paso 3. Pasos Para La Instalación ... →
- 90. Utilización Del Aparato - Cargar Las Cestas →
- 91. Utilización Del Aparato - Guía De Uso Rápido →
- 92. Utilización Del Aparato - Cómo Utilizar El Aparato →
- 93. Utilización Del Aparato - Pantalla →
- 94. Utilización Del Aparato - Dureza Del Agua →
- 95. Utilización Del Aparato - Preparación Y Carga De La Vajilla →
- 96. Utilización Del Aparato - Cargar La Cesta Superior →
- 97. Utilización Del Aparato - Rellenar El Dispensador De Deterge... →
- 98. Utilización Del Aparato - Ajuste Del Depósito De Abrillantad... →
- 99. Utilización Del Aparato - Selección Del Programa →
- 100. Utilización Del Aparato - Cambio De Un Programa A Mitad De C... →
- 101. Utilización Del Aparato - Información Práctica →
- 102. Información Práctica - Limpieza De La Parte Interior →
- 103. Información Práctica - Brazos Aspersores →
- 104. Información Práctica - Cuidado Del Lavavajillas →
- 105. Información Práctica - Retirar El Enchufe →
- 106. Información Práctica - Resolución De Problemas →
- 107. Información Práctica - Problema →
- 108. Información Práctica - Disponibilidad De Las Piezas De Recam... →