
SHARP SDW6506JS 24 Front Control Dishwasher






Dishwasher: SDW6506JS
INSTALLATION MANUAL
WARNING
BEFORE YOU BEGIN READ THESE
INSTRUCTIONS COMPLETELY AND
CAREFULLY.
SUFFOCATION HAZARD
Before disposing of the old dishwasher, remove the door or lid from
the appliance. Failure to follow this instruction can result in death
or brain damage if a child gets trapped inside the old appliance.
IMPORTANT – Observe all governing codes and ordinances.
1 Note to Installer – Be sure to leave these instructions for the
consumer’s and local inspector’s use.
ELECTRICAL SHOCK HAZARD
2 Note to Consumer – Keep these instructions with your Owner’s
Manual for future reference.
To reduce the risk of electric shock, fire or injury to per-
sons, the installer must ensure the installed dishwasher
is completely enclosed and reduce the likelihood of
damage to the power cord.
3 Skill Level – Installation of this dishwasher requires basic
mechanical and electrical skills. Proper installation is the
responsibility of the installer. Product failure due to improper
installation is not covered under the SHARP Consumer Limited
Warranty.
STATE OF CALIFORNIA PROPOSITION 65
WARNINGS:
To view State of California Proposition 65 warnings
WARNING
4 Completion Time – 1 to 3 Hours. New installations require more
time than replacement installations.
related to cancer and reproductive harm, see:
www.P65warnings.ca.gov
IMPORTANT: Installation must allow for removal of the dishwasher
in case of future service requirements.
READ CAREFULLY.
SAVE THESE INSTRUCTIONS.
If you received a damaged dishwasher, immediately contact your
dealer or builder.
If you have an installation problem, contact your dealer or installer.
You are responsible for providing adequate electrical, exhausting
and other connecting facilities.
FOR YOUR SAFETY: Read and observe all cautions and warnings
in this instruction manual. Always wear proper safety gear during
installation process, including gloves and safety glasses or goggles.
AUG 29, 2023
1


| General | Details |
|---|---|
| Name | SHARP SDW6506JS 24 Front Control Dishwasher |
| Make | Sharp |
| Language | English |
| Filetype | PDF (Download) |
| File size | 1.37 MB |
 (1 votes, average: 5.00 out of 5)
 Loading...

SHARP SDW6506JS 24 Front Dishwasher

SHARP SDW6888JS Smart Dishwasher

SHARP QW-NA1BF47EI-EU Series Dishwasher

SHARP QW-NA24S42DI-EE Dishwasher

SHARP SDW6767HS Dishwasher

SHARP SDW6767HS Slide In Smart Dishwasher

SHARP SDW6767HS Smart Dishwasher

SHARP QW-NA26F39DI-EN Dishwasher

SHARP QW-NS1CF49EI-ES Dishwasher

SHARP SDW6757ES Dishwasher

SHARP SDW6506JS 24 Front Control Dishwasher Overview
Summary of Contents
- Page 1: Dishwasher: SDW6506JS Installation manual Before you begin, read these instructions completely and carefully. Suffocation hazard: Before disposing of the old dishwasher, remove the door or lid from the appliance. Important: Observe all governing codes and ordinances. Note to installer: Be sure to leave these instructions for the consumer’s and local inspector’s use. Electrical shock hazard: The installer must ensure the installed dishwasher is completely enclosed. Skill level: Installation of this dishwasher requires basic mechanical and electrical skills. Completion time: 1 to 3 hours. New installations require more time than replacement installations. Installation must allow for removal of the dishwasher in case of future service requirements. For your safety: Read and observe all cautions and warnings in this instruction manual.
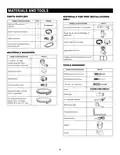
- Page 2: Materials and tools are essential for installation. Parts supplied include various components necessary for setup. Materials for new installations are listed for reference. Flat-head wood screws are included in the parts list. Air gap for drain hose may be required. Screw type hose clamps are necessary for secure connections. Waste tee for house plumbing is applicable if needed. Tools required include screwdrivers and a level. Electrical cable or power cord may be necessary. Safety equipment such as gloves and safety glasses is recommended.
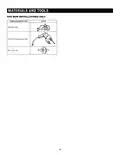
- Page 3: Materials and tools for new installations. Name and descriptions of parts. Tubing cutter. Drill and appropriate bits. Hole saw set.
- Page 4: Location requirements include important installation guidelines. Do not run drain lines, water lines, or electrical wiring where they can interfere with or contact dishwasher motors or legs. Do not install the dishwasher over carpeted flooring. The dishwasher must be fully enclosed on the top, sides, and back. Do not allow any part of the enclosure to rest on or be supported by the dishwasher. The installation location must provide clearance between motors and flooring. Motors must not touch the floor. The installation opening must have a level floor. Use shims to level the dishwasher if the floor is not level. The dishwasher must be installed so that the drain hose is no more than 10 ft in length for proper drainage.
- Page 5: Installation preparation Cabinet dimensions must be at least 24 deep. Water supply requirements include a pressure between 20-120 psi. The cabinet opening height must be between 34 and 35. A copper tubing water line must extend at least 24 from the rear wall. A hand shut-off valve is strongly recommended in an accessible location. Drain requirements must follow local codes and ordinances. The drain hose must not exceed 10 feet in length. An air gap or minimum 32 high drain loop is required to prevent backflow. Clearances of 2 minimum between the dishwasher and adjacent structures are necessary. An air gap must be used if the drain hose connection is lower than 18 above the floor.
- Page 6: Installation preparation requires the use of only copper wire. Wiring must be 2-wire with ground for high drain with waste tee or disposer. A UL Listed/CSA Approved metallic strain relief should be used. Ensure the electrical connection and wire size conform to the National Electrical Code and local codes. The dishwasher must be connected to a grounded metal wiring system or an equipment grounding conductor. Use a power cord that complies with the National Electrical Code and local codes. Installation and service must be performed by a qualified installer or service agency. The wiring may enter the opening from either side, rear, or floor within the shaded area. The dishwasher must be supplied with 120 volt, 60 Hz power and connected to a dedicated, properly grounded branch circuit. Maximum of two field wiring supply conductors plus one grounding conductor are permitted in the terminal box.
- Page 7: Installation instructions provide essential steps for setting up the dishwasher. If you received a damaged dishwasher, immediately contact customer service. Check the door balance by opening it slowly while someone holds the dishwasher. Adjust the spring tension if the door drops too freely or closes on its own. Keep plastic bags and packing materials away from children to avoid suffocation hazards. Adjust both springs to the same tension for proper door balance. Remove the door or lid from old appliances before disposal to prevent children from getting trapped. Read the user manual for operating instructions after unpacking. Remove the kick plate by unscrewing the screws and lifting it off. Properly dispose of or recycle all packing material after installation.
- Page 8: Installation instructions outline the steps for setting up the dishwasher. Adjust leveling legs to ensure proper installation height. Verify existing utility connections, including water and electrical connections. Measure the height of the opening from the underside of the countertop to the floor. Check that the water line reaches the front-left side of the opening. Ensure the direct wire cable extends a minimum of 6 inches beyond the front-right side of the opening. Final leveling leg adjustments will be made after installation into the opening. Connect to the power supply using either direct wire cable or power cord. Disconnect electrical power at the fuse box or circuit breaker before installation to avoid electrical shock. Drill a hole into the right side of the cabinet for wiring, ensuring edges are smoothed or covered.
- Page 9: Installation instructions outline the necessary steps for setting up the dishwasher. Route the cable from the power supply through the designated hole, extending it to 6 inches in front of the unit and securing it to the floor. Drill a 1/2 inch hole in the cabinet side, rear, or floor for the water line connection. Attach copper tubing to the manual shutoff valve and feed it through the hole into the opening. The power cord and connections must comply with the National Electrical Code and local codes. A mating 3 prong, ground-type wall receptacle is required next to the dishwasher opening. Smooth the edges of the hole for the power cord before attaching it to the dishwasher. Turn the water shutoff valve to the ON position and flush water into a shallow pan to remove particles. Warnings include not removing the ground prong from the power cord plug and not using an extension cord. Failure to follow these warnings can result in serious hazards such as death or electrical shock.
- Page 10: Installation instructions for connecting the drain line to the dishwasher are provided. The drain hose will be connected to the house drain system after the dishwasher installation. Method 1 involves using an air gap with a waste tee or disposer. Drill a 1/2 hole in the cabinet wall or floor near the sink for the drain hose. Attach the drain hose to the back of the dishwasher and secure it with a hose clamp. Method 2 requires a high drain loop with a waste tee or disposer. Ensure that the drain plug is removed when connecting the drain line to the disposer. Avoid cutting the corrugated portion of the hose. The total drain hose length must not exceed 10 feet for proper operation. Secure the drain hose connections with clamps to prevent drainage issues.
- Page 11: Installation instructions for connecting to power supply. Use UL listed wire nuts to connect household wiring to dishwasher wiring. Insert wire ends into twist-on connector without pre-twisting bare wire. Electrically ground the dishwasher and connect ground wire to the green ground connector. Gently tug on wires to ensure they are secured. Do not use an extension cord. Contact a qualified electrician to ensure electrical connection compliance. Confirm the power is turned off at the source before starting. Install a UL listed/CSA approved strain relief and tighten screws to secure the power cord. Route the direct wire cable properly to avoid pinching.
- Page 12: Installation instructions provide guidance for connecting the water supply and power cord. Handle and reposition the copper tubing gently to avoid bending and kinking. Connect the water supply line to the 90° elbow without overtightening. Route the water supply line in the channel on the left side of the base to minimize noise from vibration. Ensure the dishwasher is not resting on or pinching the supply line. Use UL listed wire nuts to connect the power cord to the dishwasher wiring. Tighten the compression nut until snug, but do not overtighten. Check for leaks by placing a paper towel under the elbow and turning on the water supply. Secure the power cord by tightening the strain relief screws. Replace the junction box cover, ensuring not to pinch the wires.
- Page 13: Installation instructions outline the steps for properly installing a dishwasher. The dishwasher must be level for proper dish rack operation and wash performance. Level the dishwasher so its front panel is aligned with the adjacent cabinet doors. Do not use the dishwasher until completely installed. Do not push down on the open door, as it can result in serious injury or cuts. Check that the drain hose is not kinked and there is no interference with the water line and wiring. Slowly move the dishwasher into the opening, pulling the hoses and cord through as you proceed. Check that the leveling legs are firmly against the floor and adjust as needed. Ensure the dishwasher is plumb and level from side to side and from back to front. Push the dishwasher completely into the opening so that the front corners of the door are flush with the cabinet doors.
- Page 14: Installation instructions outline the steps for securing the dishwasher to adjacent cabinets to prevent tipping when the door is opened. A pre-test checklist is provided to avoid service call charges not covered by warranty. It is important to ensure that power is off before starting the installation process. The owner’s manual should be located and read for operating instructions. Check the door's opening and closing functionality, making adjustments if necessary. Use two or more people to move and install the dishwasher to avoid injury. Verify that wiring is secure and not pinched or in contact with other components. Check the alignment of the door with the tub and level the dishwasher if needed. Water supply and drain lines should be verified to ensure they are not kinked or in contact with other components. Incoming water temperature must be between 120°F and 150°F for optimal wash performance.
- Page 15: Installation instructions outline the steps for setting up the dishwasher. Turn on the power supply or plug the power cord into the outlet. Replace the kick plate by aligning it with the screw holes in the bracket and allowing it to touch the floor. Turn on the dishwasher and refer to the operation manual for instructions. Fasten the kick plate to the dishwasher using the provided screws. Select the rinse only cycle and press start/cancel to ensure water enters the dishwasher. Check for leaks under the dishwasher and around the door, adjusting the position if necessary. Inspect drain lines for leaks during the draining process and correct any plumbing issues. Ensure most of the water has drained from the dishwasher and check for any blockages. Leave the complete literature package and installation instructions with the consumer.
- Page 16: Page 16

KitchenAid W11775083 Dishwasher

Classeq C500-30D Undercounter Dishwasher

FISHER PAYKEL DD24SCTW9 N Single DishDrawer Dishwasher

GRUNDIG GSV 42840 Dishwasher

BOSCH SHX78B75UC 24 Bar Handle Dishwasher

FISHER PAYKEL DD60D2HNB9 Built-under Dishwasher

BOSCH SMS6ITI01I Dishwasher

KitchenAid W11349453A Dishwasher

FISHER PAYKEL DW60FC1X114 Place Dishwasher

Westinghouse WSF6604WA Dishwasher